

Why is the background image not showing in Outlook?
If you added a background image to your email, you may have had feedbacks from Outlook users saying they had a blank background.
Outlook enforces a size limit of 1728 pixels on the height of images.
Make sure your image height is under 1728 pixels so it will show correctly on all email providers.
How can I change the image size?
You can do it directly on your computer:
- In Windows, open your JPEG using Paint, click “Select All,” and adjust the height and width by percentage or pixel length. Then select “Save As” and choose “JPEG.”
- On Macs, open your JPEG in Preview, click “Tools” and “Adjust Size.” Adjust the height and width by percent or pixel length, click “OK,” and click “Save.”
Or you can use an image resizing website.
Make sure proportions are kept during the resizing to avoid any layout surprise.
If you can, work directly with the image provider so they can design the image with this requirement.
Why do elements disappear when in preview?
If you notice that certain content is not appearing in when previewing your mailing, there are 2 possible reasons.
One possible reason is because you may have copied your content or any part of your design from another rich text editor such as Microsoft Word. If so, there are certain hidden formatting elements that were also copied over and cannot render and are unsupported in the preview.
How to copy text from Microsoft Word without the hidden formatting:
- Open your MS Word file
- Click the File menu > Click Save As.
- In the Save As Type menu, select Plain Text (*.txt)
- Once saved, find the new .txt file that you just saved and double click to open the file. This will likely open in a Notepad app.
- Now you can copy the text from here into the Design tab of your mailing.
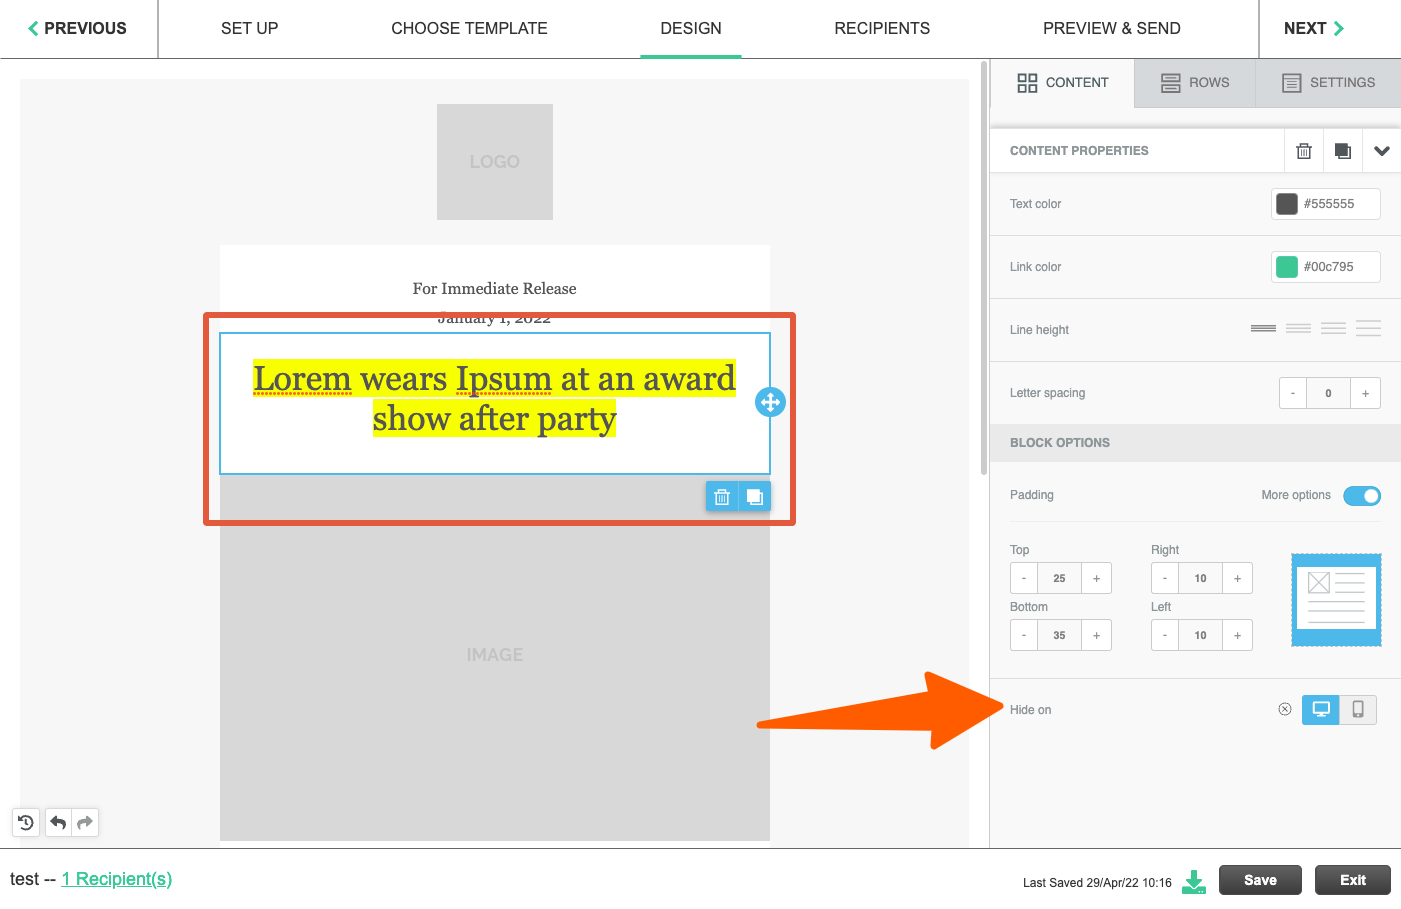
The other possible reason is that you may have selected the option to hide the element while on desktop or mobile.
To check this:
- Go to the Design tab > click on the block that is hidden.
- Look in the right panel and scroll to the bottom.
- There is a setting called "Hide on", if either of the 2 buttons is blue, that means the whole block will be hidden when viewed on that device (desktop or mobile) . Simply click the X icon to remove this setting.
What do the Failed email messages mean?
Failed Email Explanations
Below outlines the most common failed email errors and what you can do to correct...
Below outlines the most common failed email errors and what you can do to correct them.
| Error message | Explanation |
|---|---|
|
Your message was rejected due to its content |
This email content contains words or images that the recipient’s mailbox rejects. |
|
The email address is invalid |
The recipient’s email address no longer exists. |
|
The email address is unsubscribed |
The recipient has opted our of receiving emails from your site, the person must access the unsubscribe link again to re-subscribe. |
|
The domain of the email address is invalid |
The email address domain (ex. @domain.com) is not a valid domain. |
|
The email address is not in a valid format |
Please check that the format of the email address is correct (spelled correctly, no symbols, etc.). |
|
The email address was rejected |
Something is wrong with the actual email address. It may not exist or may not be active. |
|
The recipient’s mailbox is full or over quota |
The recipient’s mailbox is full. Contact the recipient and tell them to clear some space in their mailbox |
|
Recipient email account is inactive/disabled |
Something is wrong with the actual email address. It may not exist or may not be active. |
|
Your email address was rejected |
The recipient’s anti-virus may be blocking the delivery of your email. |
|
Protocol error, invalid command or timeout |
There is a problem with the recipient’s server. Please contact the recipient. |
|
Unable to connect to recipient’s mail server |
There is a problem with the recipient’s server. Please contact the recipient. |
|
Your message was rejected because the receiving server is not accepting mail for the destination domain |
There is a problem with the recipient’s server. Please contact the recipient. |
| Requested mail action aborted, Mailbox not found | The recipient mailbox is no longer available (the mailbox was deleted due to the inactivity state of the account) - or the mailbox is full and can no longer receive additional emails. |
| No such user here in response | The recipient's email address doesn’t exist (maybe it was incorrect introduced in the system) |
| Your message was rejected due to content | The email was rejected by the recipient server which probably has a filter that parses the incoming messages, and didn’t liked the content of these email, probably it was considered spam. |
|
Out of office / Auto-reply |
Out of office replies are included in the “Failed” tab to call attention to this individual, in case you would like to forward the invite elsewhere. The invite was delivered to the recipient’s inbox. |
|
This email address is on a suppression list |
The recipient flagged a Launchmetrics email as abuse. They must request to be removed from this suppression list. |
| 550 Rejected by header based Anti-Spoofing policy |
The email FROM domain is the same as the email TO domain and the customer's IT has set up a spam filter.
|
| [Permanent failure] Name service error for xxxx.xxx Type=A: Host not found. | The domain name to which you sent the message does not exist. Usually, this means you misspelled the domain name, but it may indicate a problem with the domain's record that prevents the domain from being found. |
| [Permanent failure] 550 RCPT TO:<xxxx@xxx.xx> User unknown In response to the RCPT TO command.. | The recipient’s email address does not exist. Most likely you used a wrong or misspelled email address (check the address for typos) or the person you sent the mail to doesn’t exist anymore at the company you’re trying to send the mail to. |
| Failed delivery to the Primary Email xxxx@xxx.xx on XX/xx/XXXX xx:xx. Reason: [Permanent failure] 5.0.0. | The email message could not be delivered because of an unknown issue. The recipient server did not disclose the reason it rejected the message. |
Why is there a delay between the time that I clicked send, or my scheduled time, and the time that the recipient gets the email?
It’s expected and common industry practice. There’s a queue governing the process of dispatching emails so depending on its volume, or volume of emails going out at that moment in the Launchmetrics server, the latency can vary.
Additionally, the number of recipients can affect how long it takes for each recipient to get the email. The first recipient will receive the email a few seconds after the server has processed the batch, and the last recipient could receive it after a few minutes.
Is there a way to undo or stop an email from being sent to the recipient list after I've clicked send?
Short answer is No.
There is a delete button offered in Events Mailing, however this will only remove local history of sent emails, while the emails themselves have already been sent, opened, read and even some of the links received clicks.
Also by deleting a batch that is already sent, we stop collecting READ / OPEN / CLICK event updates from those recipients and the READ EMAIL ONLINE link will no longer work, and in some cases, template attachments (sent as links) will become unavailable.
What is the max file size that I can upload in the file manager?
12mb
What do I do if my attachments exceed the maximum allowed?
Attaching large files to a Mailing
If you’d like to allow your recipients to download a file or files greater than t...
If you’d like to allow your recipients to download a file or files greater than the allotted attachment limit, you can include a link to download a file directly in the body of your email.
Drag & Drop Mode
Using a Button
- Add a button element by dragging from the Content panel
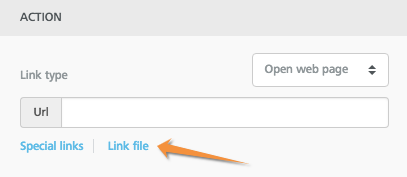
Click the button to activate the content properties panel on the right. Look for the “Actions” section. Click “Link File”
This will load your file manager. From here, upload your file.
- Note there is a 12mb per file limit to upload here
Then click the “Insert” button to link it back to your button
Now, when your recipients click the button, they will be redirected to the file.
Using a text link
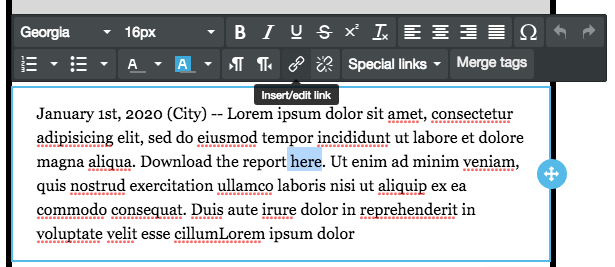
Highlight the text that you would like to link to your file and click the “insert link” icon in the toolbar.
In the “Link Type” dropdown click “File Manager”. This will launch the file manager interface.
Upload your file and click “Insert”
- Note there is a 12mb per file limit to upload here
Click OK in the “Insert Link” window
Now, when your recipients click the button, they will be redirected to the file.
Alternatively, if you can host the file on another site or server. Just paste the link directly in the URL field and you don’t have to upload it to the file manager.
Manual Mode
Highlight the text that you would like to link to the file
Click the link icon in the toolbar to launch the Link editor
Click Browse and select the file on your computer
Click OK
Alternatively, if you already have the file hosted on another server or site, then you can just paste the URL into the URL field in the Link editor.
How do I add a barcode/qr code to my event invitation?
Firstly, Barcodes need to be enabled on an event level. On the Create/edit event modal, click “Enable Invitee Barcode Usage”
Drag & Drop Mode
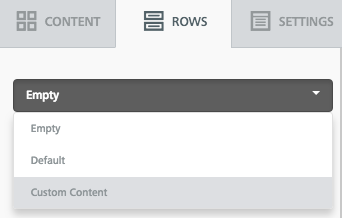
- In the right panel at the top, click the ROWS tab
- Just below the tabs, click the dropdown that says “Empty” and choose “Custom Content”
- Drag one of the 3 barcode sizes over to your layout
Manual Mode
- Click the “Add Special Elements” button in the toolbar
- Click the + icon next to any of the 3 barcode sizes

How do I add an unsubscribe link?
Adding an Unsubscribe Link to a Mailing
All Contacts & Events templates include the unsubscribe link (even the blank ...
All Contacts & Events templates include the unsubscribe link (even the blank one). But if you’ve removed the unsubscribe link or are importing a design using source code, you can do this easily add the Launchmetrics unsubscribe link by following the instructions below:
Drag & Drop Mode
- Simply select some text that you’d like to hyperlink to the unsubscribe page, the word processing toolbar should appear above or below the text area.
- Click the “Special Links” button and click “Unsubscribe Link”.
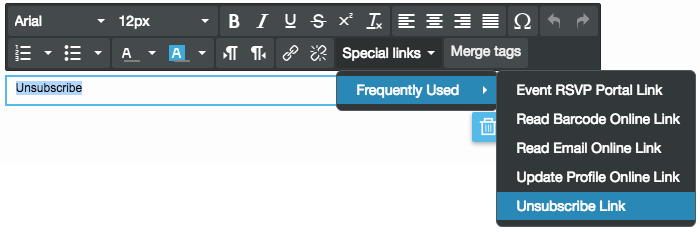
- If you click this button without having text highlighted, it will insert some text for you and hyperlink to the unsubscribe page.
- Now your recipients can click this link to unsubscribe
Manual Mode
- Click the “Add Special Elements” button in the toolbar

- Click the + icon next to “Unsubscribe Link”
This will insert some hyperlinked text into your layout. You may change the text as you please.
Can I use custom fonts in my email?
We now support custom web fonts in mailings. See Web Font Manager article for more.
Who else can see my files in the file manager?
The bucket is separated by Department + Product. So for instance, department New York Events has one bucket and department New York Contacts has another, and department Paris Contacts has another bucket.
How long does the system track email statistics?
We track all email statistics (like opens and clicks) for 3 months.
How can I customize my preview text?
You can create a hidden element at the very top of your email which would be used for the preview text:
Drag & Drop Mode
In the Design step, drag over an HTML element from the right panel’s Content tab. Make sure it’s at the very top of the email design. 
Click to edit the HTML block. 
Delete the default code and paste in this code:
<div style="display:none; max-height:0px; overflow:hidden:">
Your custom preview text
</div>
<div style="display: none; max-height: 0px; overflow: hidden;">
‌ ‌ ‌ ‌ ‌ ‌ ‌ ‌ ‌ ‌ ‌ ‌ ‌ ‌ ‌ ‌ ‌ ‌ ‌ ‌ ‌ ‌ ‌ ‌ ‌ ‌ ‌ ‌ ‌ ‌ ‌ ‌ ‌ ‌ ‌ ‌ ‌ ‌ ‌ ‌ ‌ ‌ ‌ ‌ ‌ ‌ ‌ ‌ ‌ ‌ ‌ ‌
</div>
Replace the where it says “Your custom preview text” with your desired preview text. 
Note: If you still see unwanted text in your preview, add more of the below code (this renders as spaces) to push it out.
‌ ‌ ‌ ‌ ‌ ‌ ‌ ‌ ‌ ‌ ‌ ‌ ‌ ‌ ‌ ‌ ‌ ‌ ‌ ‌ ‌ ‌ ‌ ‌ ‌ ‌ ‌ ‌ ‌ ‌ ‌ ‌ ‌ ‌ ‌ ‌ ‌ ‌ ‌ ‌ ‌ ‌ ‌ ‌ ‌ ‌ ‌ ‌ ‌ ‌ ‌ ‌ Manual Mode
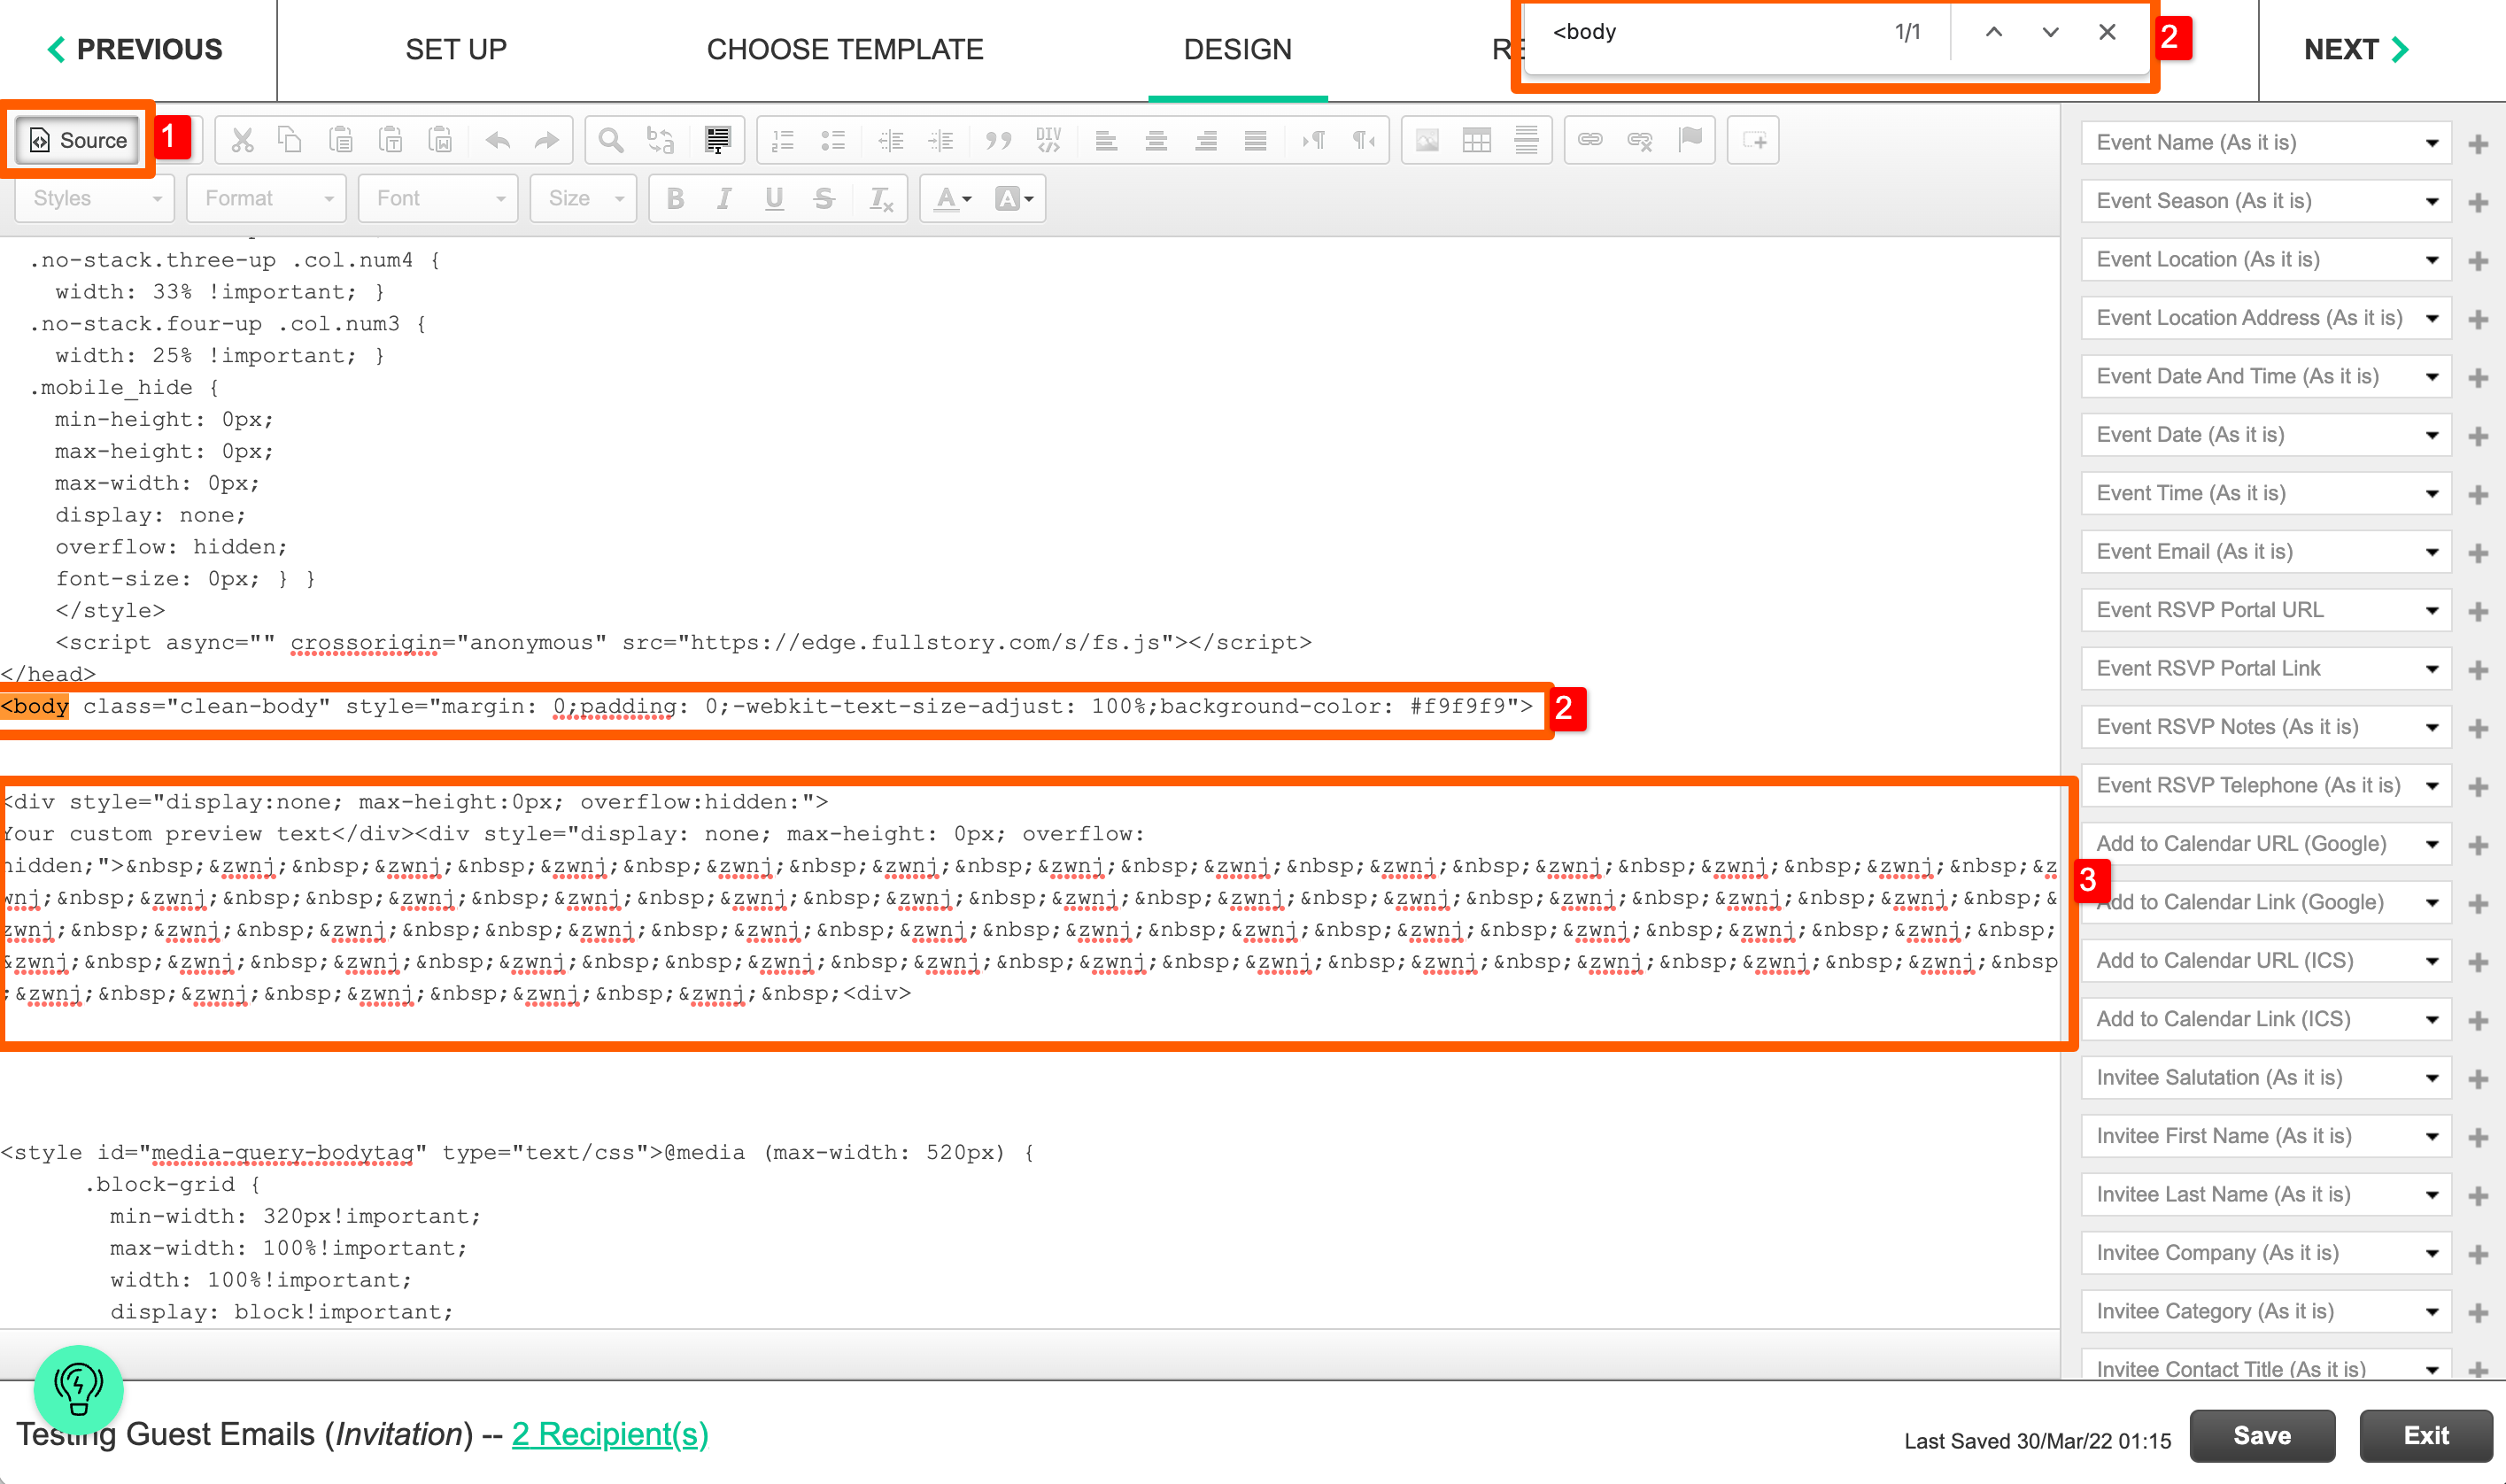
- In the Design step, click the Source button to reveal the code
- Look for the beginning of the body tab. To do this do a page search for <body
- After this row, add the code below:
<div style="display:none; max-height:0px; overflow:hidden:">
Your custom preview text
</div>
<div style="display: none; max-height: 0px; overflow: hidden;">
‌ ‌ ‌ ‌ ‌ ‌ ‌ ‌ ‌ ‌ ‌ ‌ ‌ ‌ ‌ ‌ ‌ ‌ ‌ ‌ ‌ ‌ ‌ ‌ ‌ ‌ ‌ ‌ ‌ ‌ ‌ ‌ ‌ ‌ ‌ ‌ ‌ ‌ ‌ ‌ ‌ ‌ ‌ ‌ ‌ ‌ ‌ ‌ ‌ ‌ ‌ ‌
</div>Replace the where it says “Your custom preview text” with your desired preview text.
How do I include an “Add to Cal” link in my email?
Drag & Drop Mode
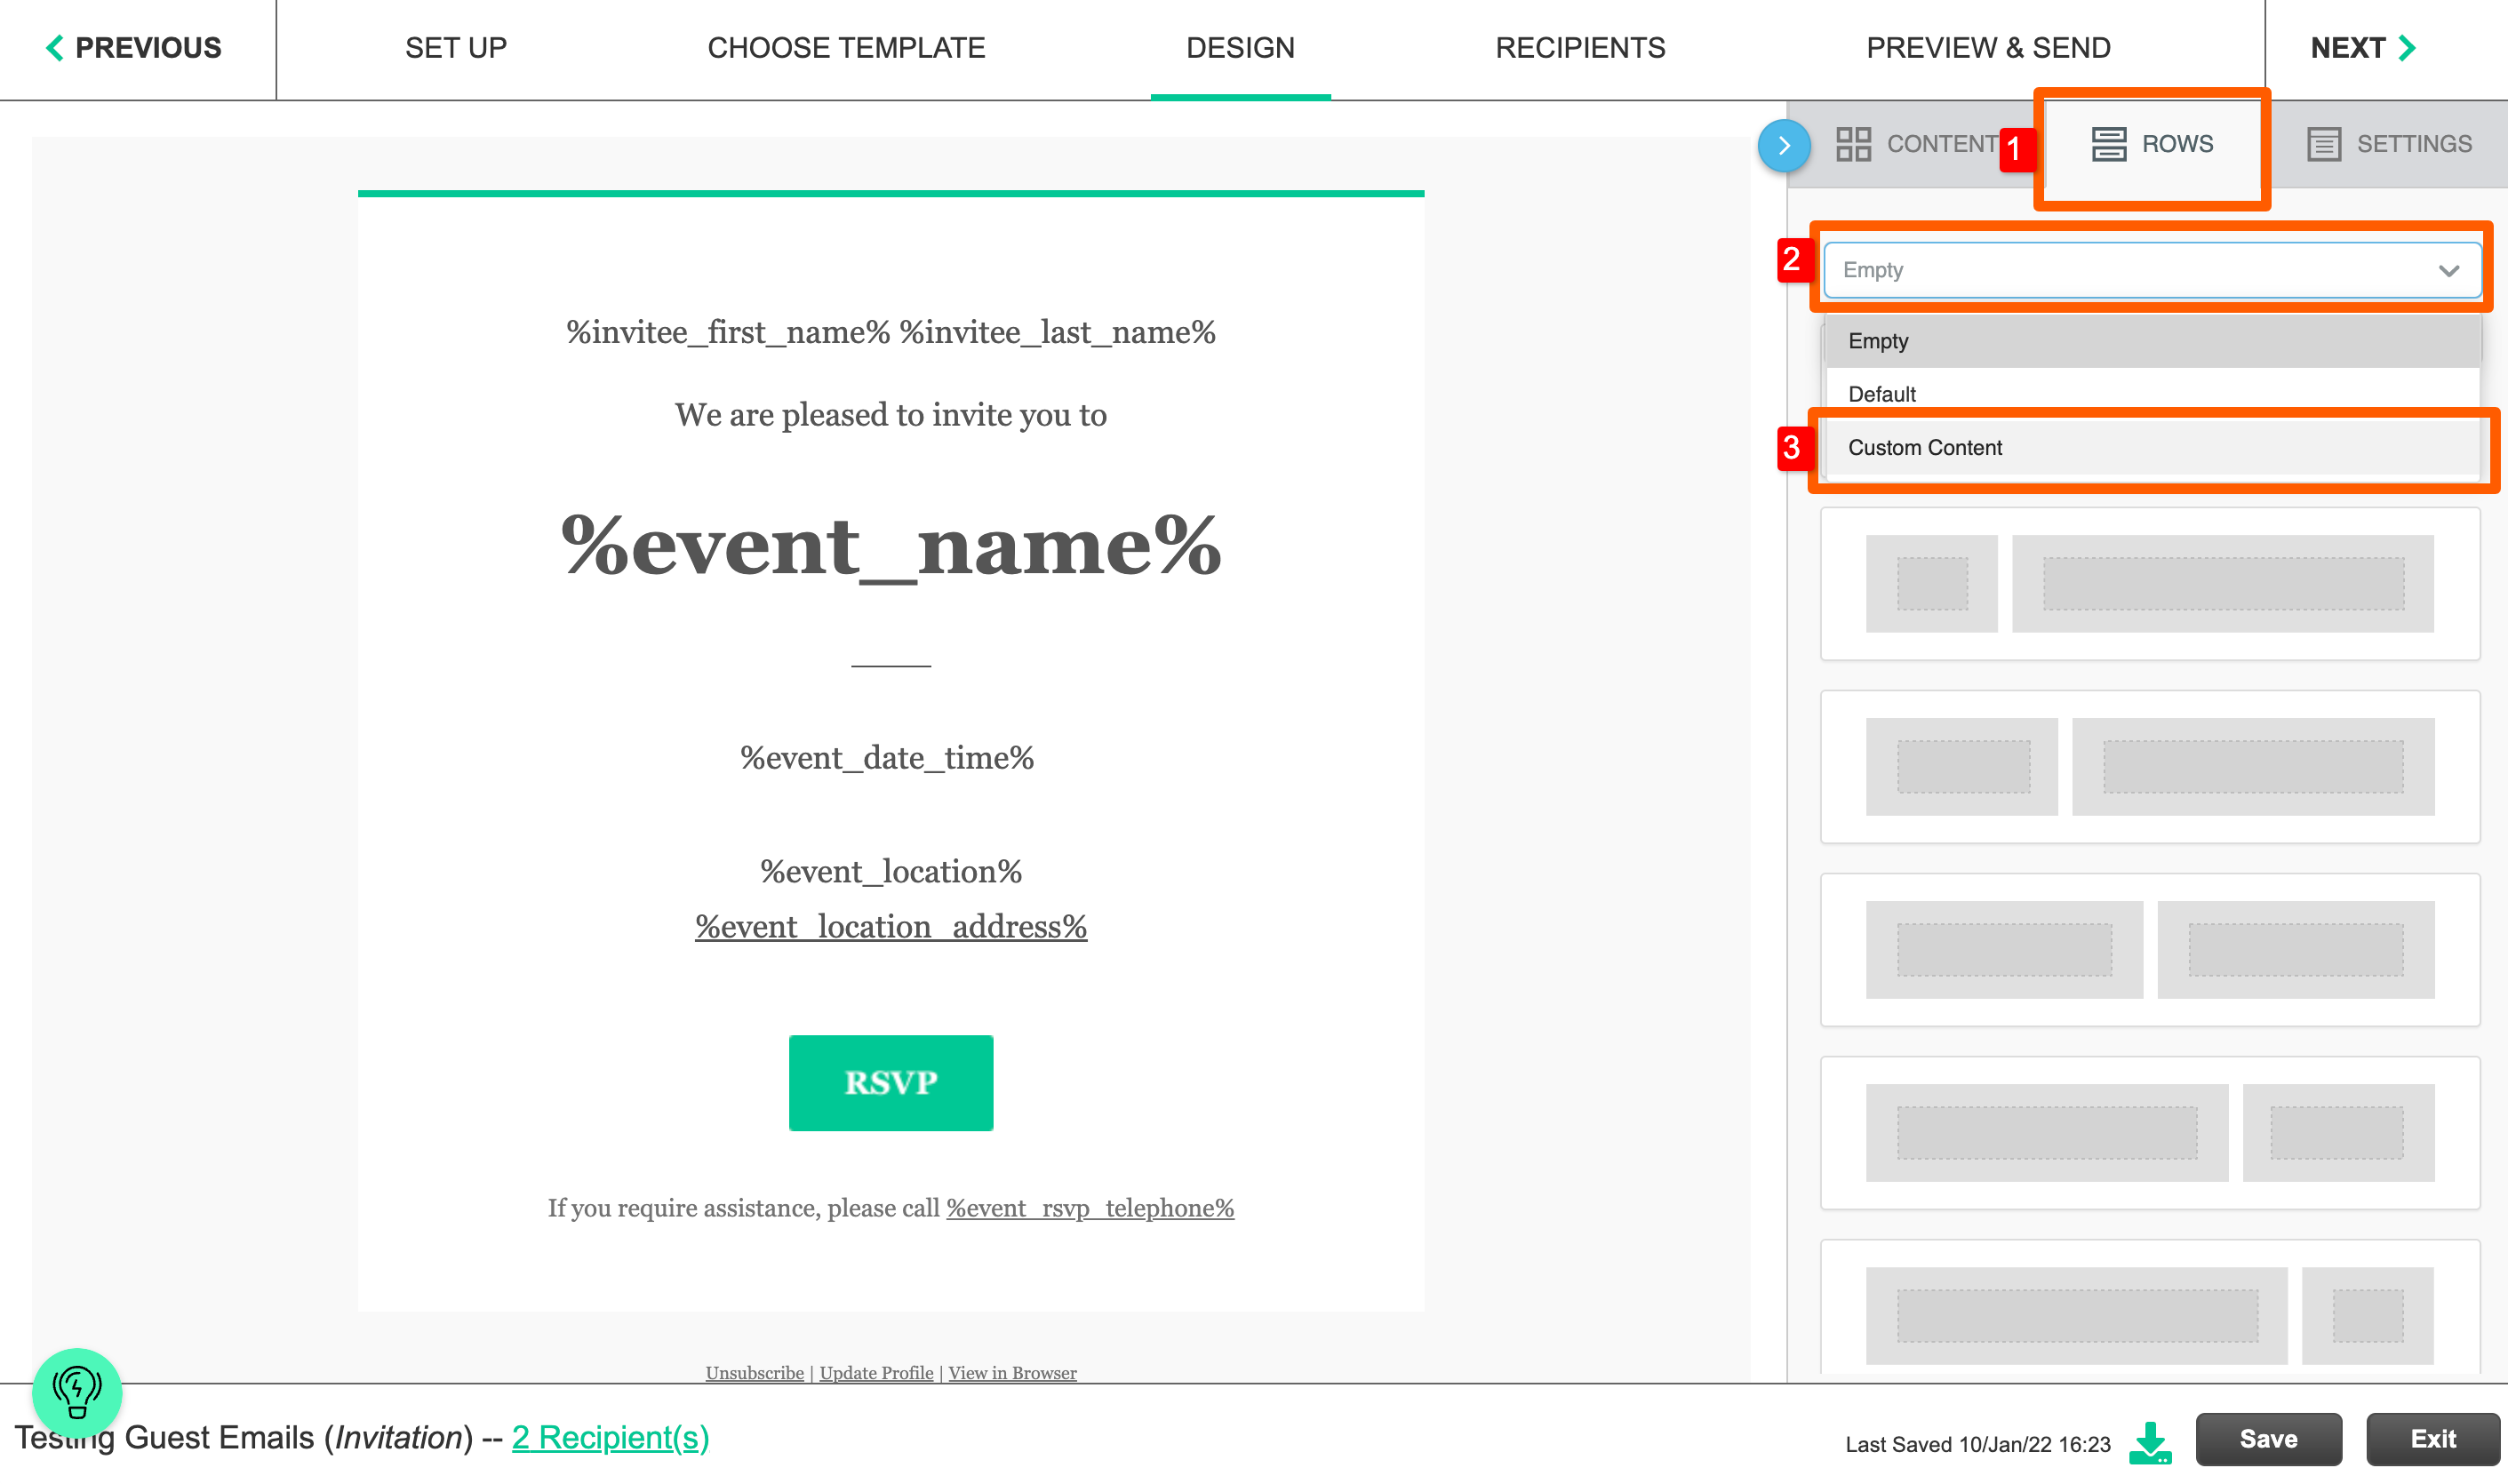
- In the Design Step, Click the "Rows" tab on the right panel
- Open the first dropdown
- Click Custom Content
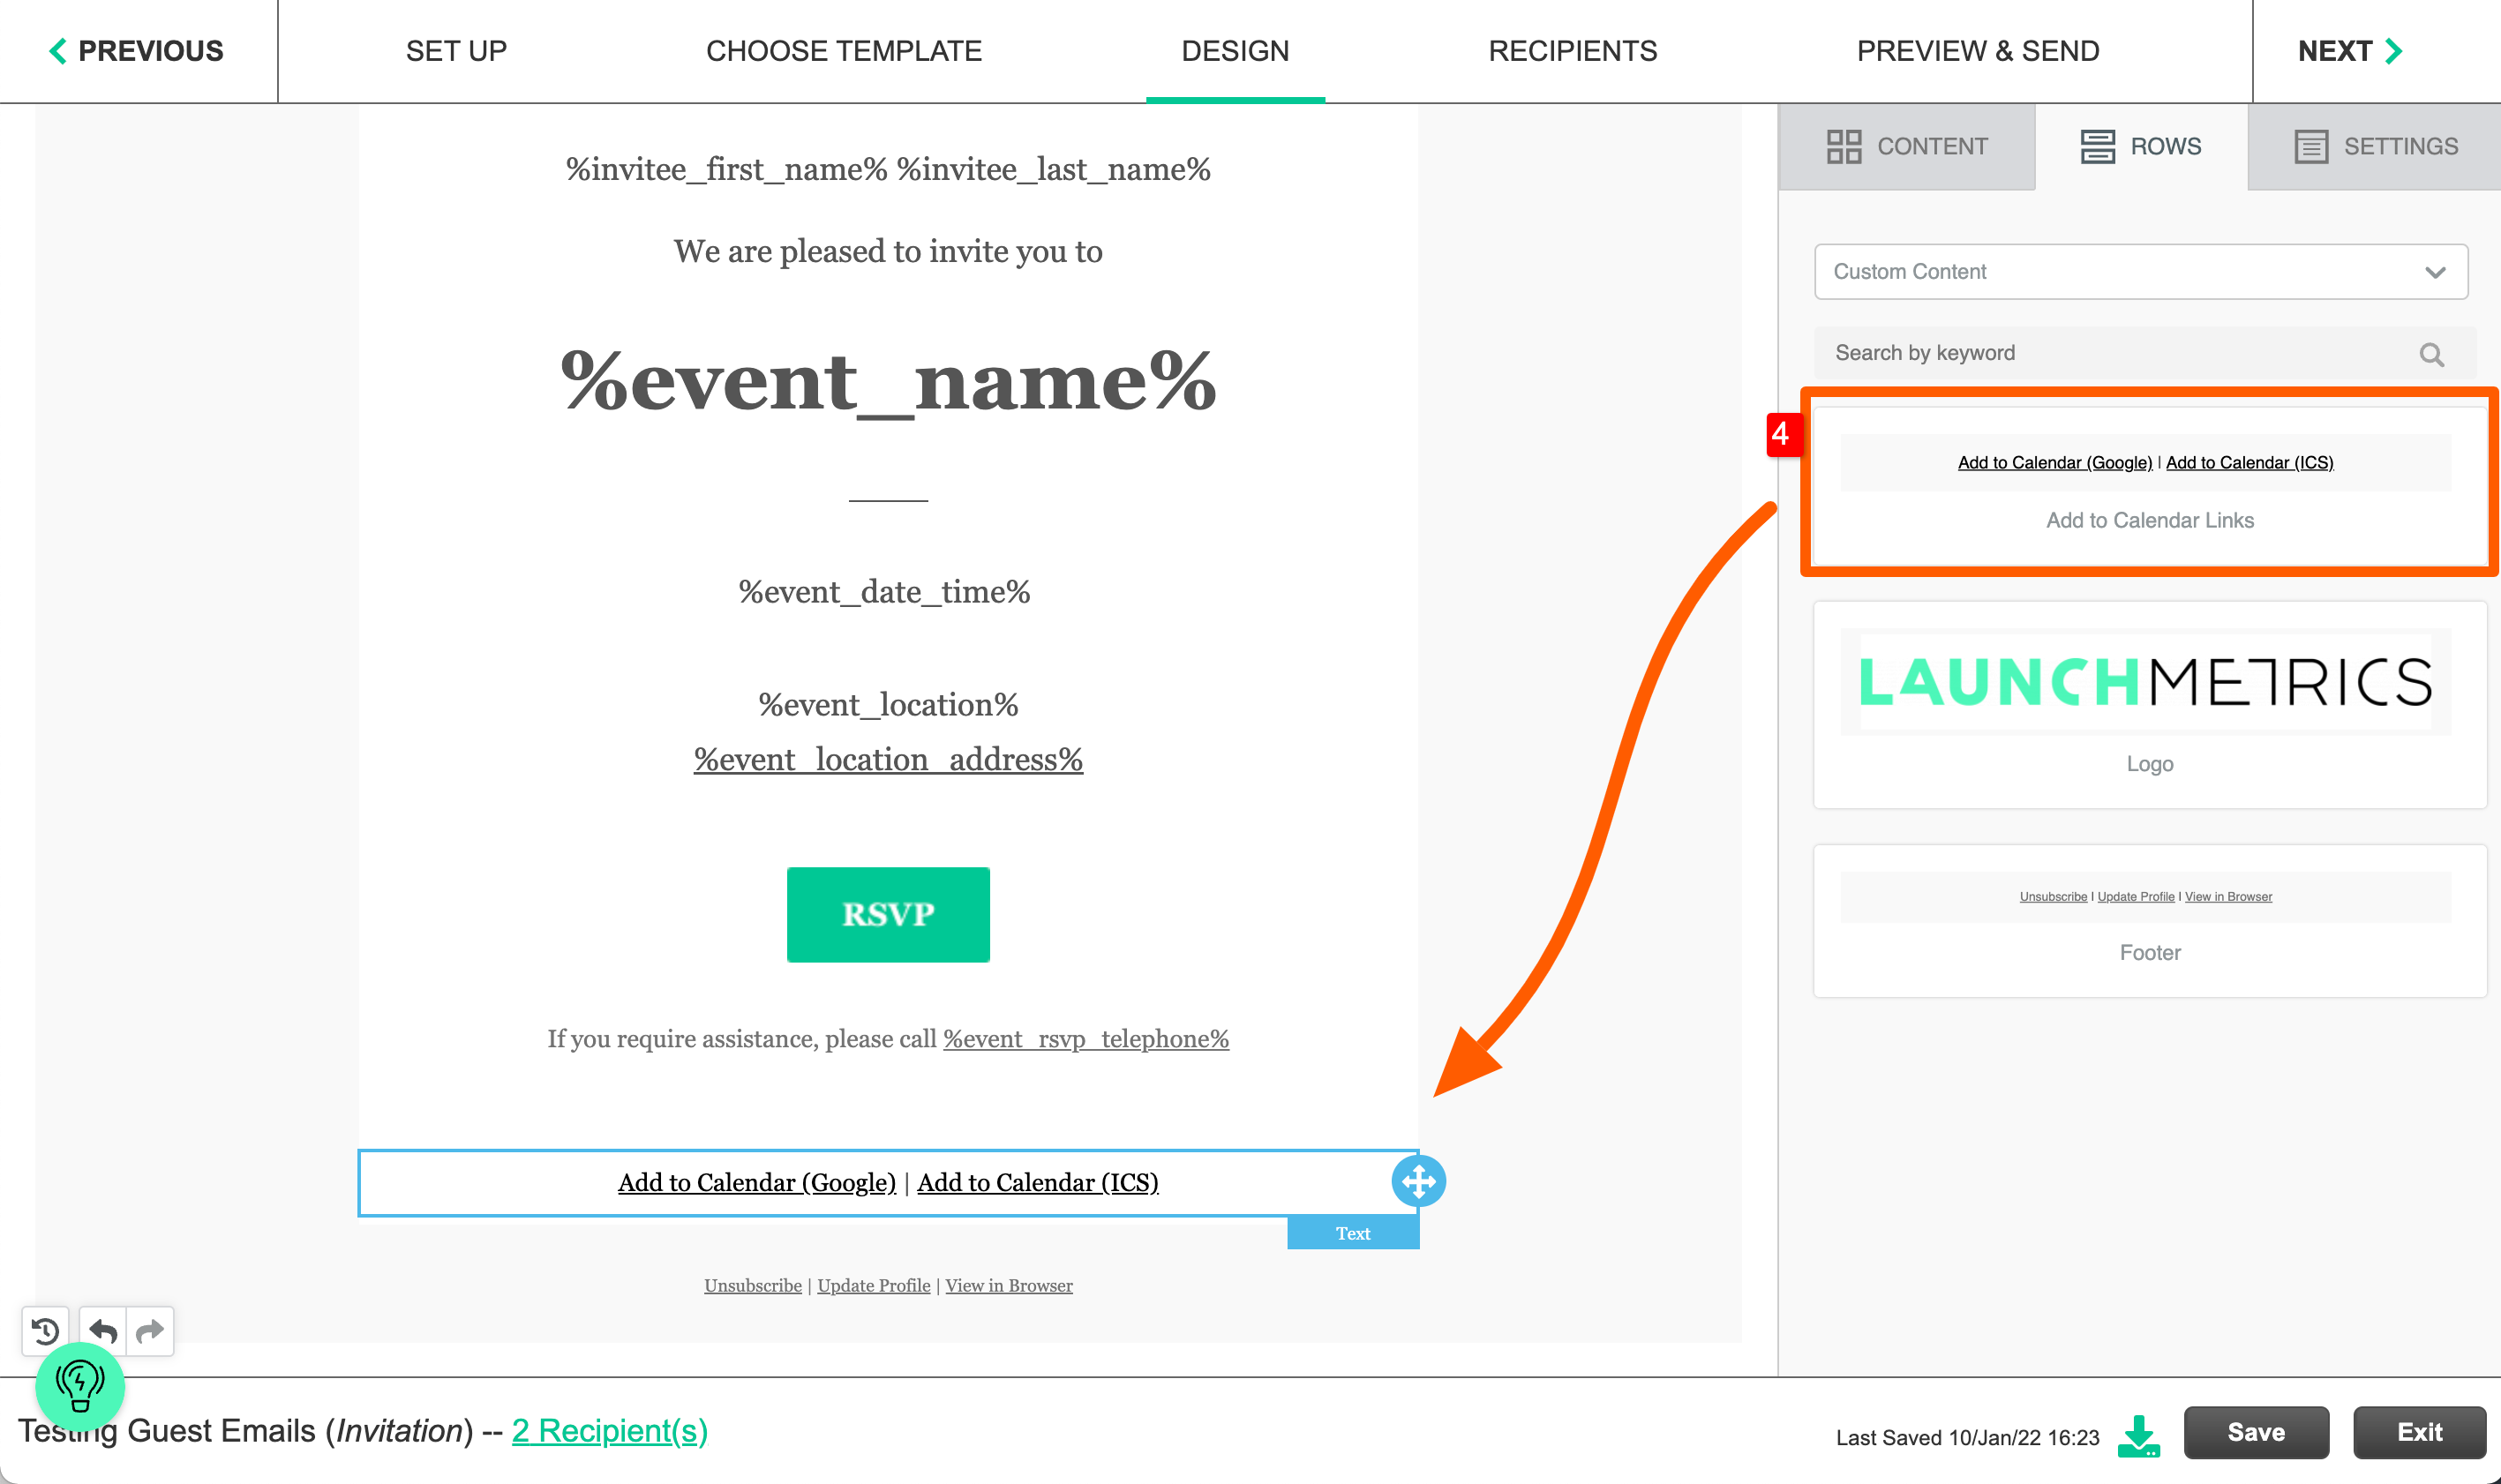
- Drag the element "Add to Calendar Links" to your design on the left
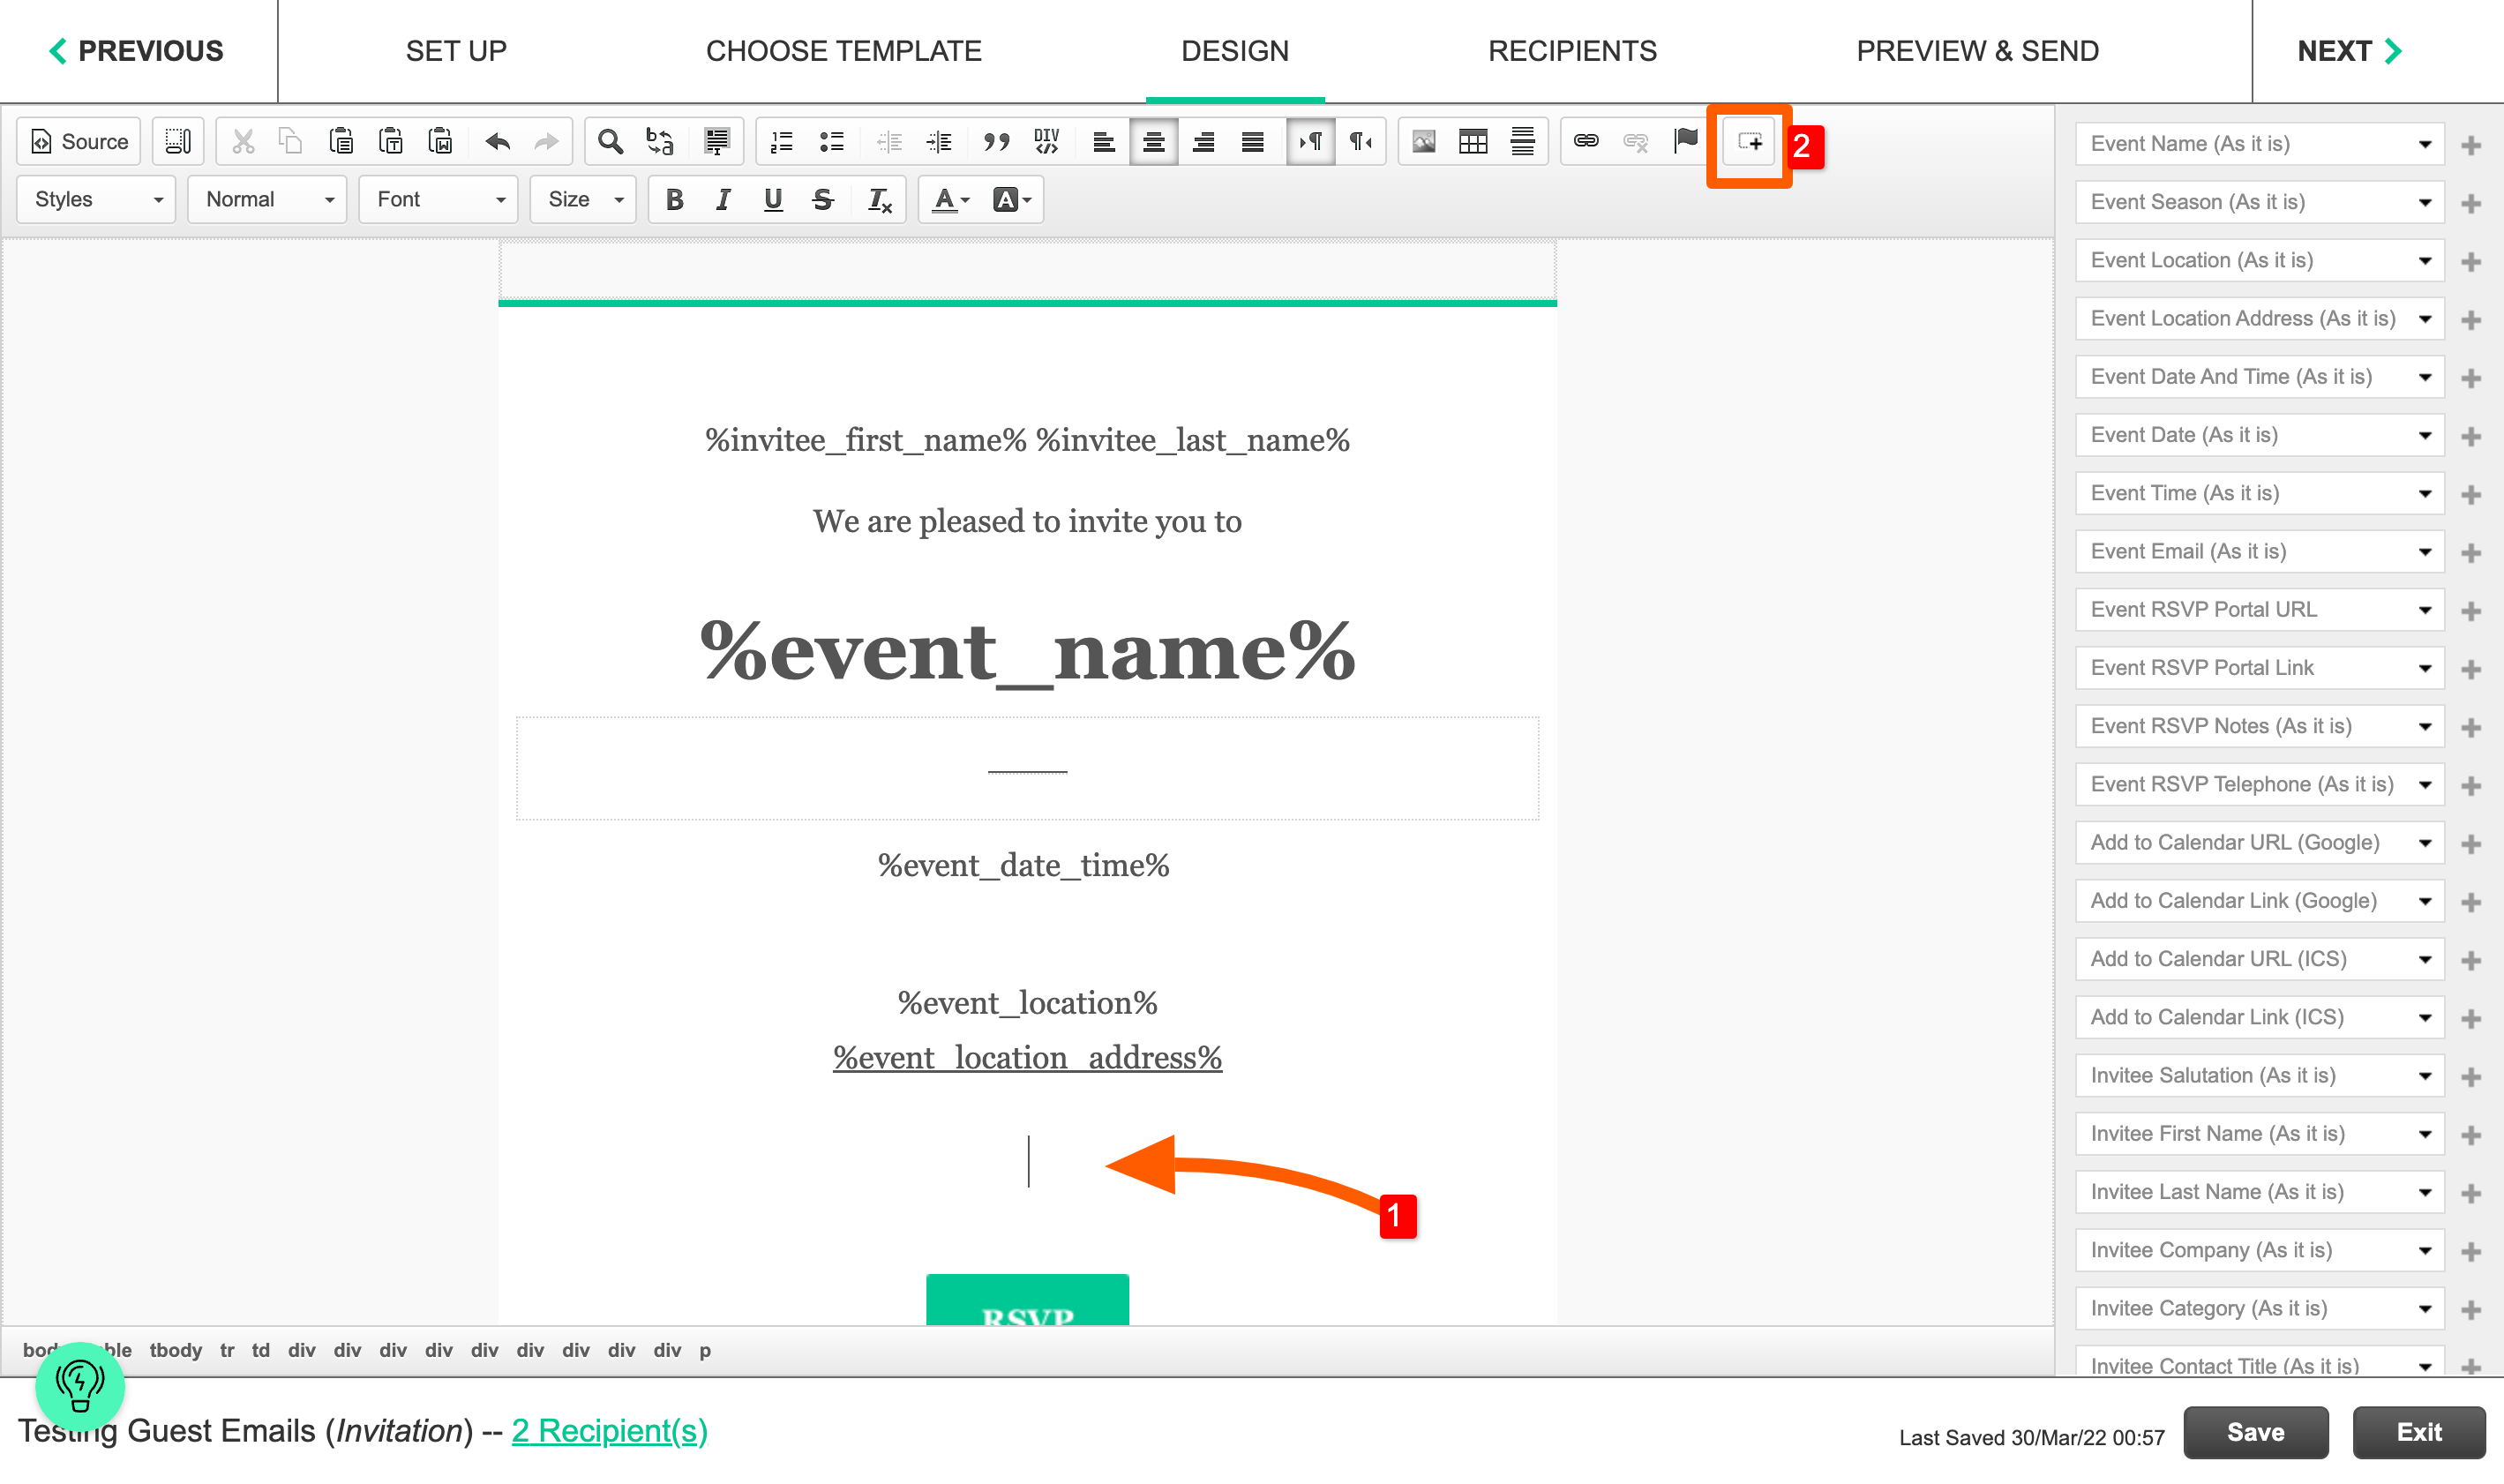
Manual Mode
- In the Design Step of your Mailing workflow, click where you want to insert the links
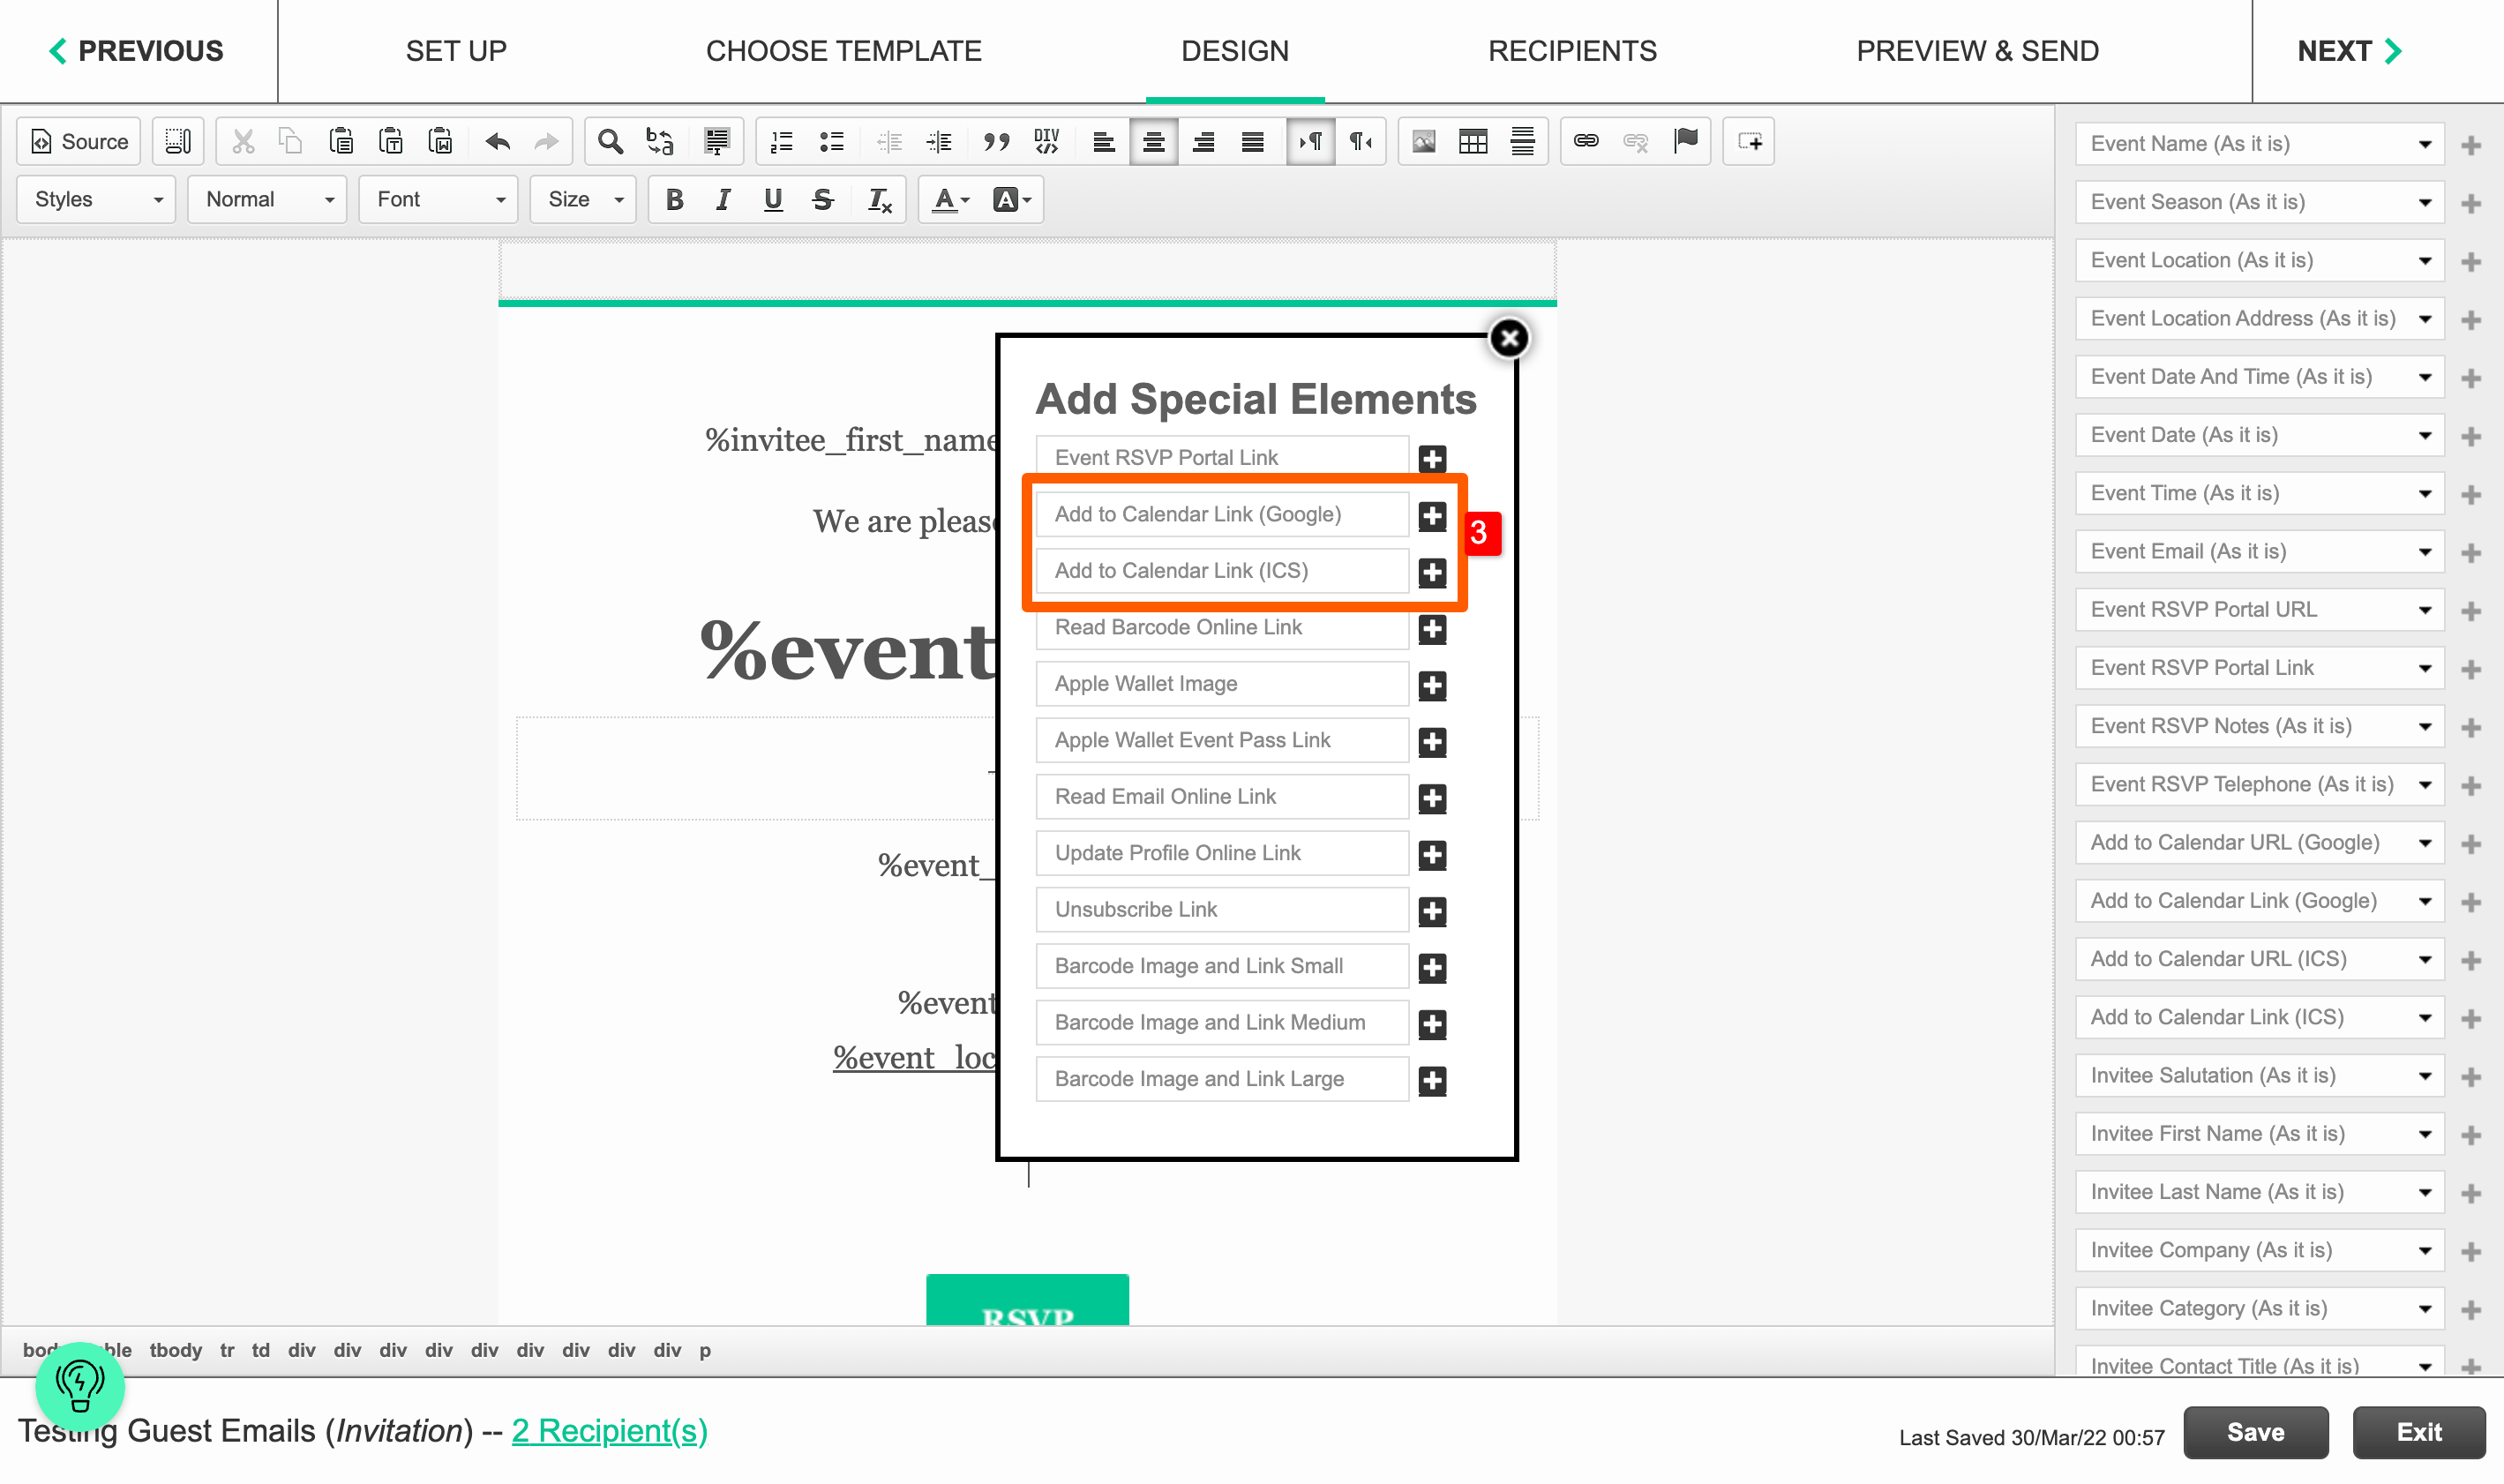
- click the "Add Special Elements" button

- click the + icon next to "Add to Calendar Link (Google)"
- click the + icon next to "Add to Calendar Link (ICS)"
Why did my GIF file break/stop animating once I uploaded it into the email?
The mailing tool will automatically resize the file if it’s wider than 600px and for the animation to work on a gif file, it needs to be saved in a specific way. Our mailing tool doesn't differentiate an animated gif so in the process the animation is lost. To fix this, always make sure the width of the file is 600px wide or smaller. You can use this free tool to resize: http://gifgifs.com/resizer/