
Preventing your Emails from being received into Spam
Internet Service Providers (ISPs), like Google, Yahoo, and Microsoft, use different types of authentication as a way to scan incoming emails for spam. Emails that fail this authentication are more likely to end up in a spam or junk folder. Because Launchmetrics is sending emails on your behalf, emails sent from the system look "unsafe" to recipients unless authentication is in place- especially to email addresses associated to big corporations who have their own set of email security in place. In these situations, emails are even more likely to end up in spam.
To ensure your emails reach your recipients’ inboxes there needs to be a custom authentication that denotes Launchmetrics as a "safe email sender".
There are currently 3 different types of authentications that you can put in place:
- DMARC - Starting February 2024, Google and Yahoo have introduced a new requirement for all email senders To ensure that your emails continue to reach your audience's inbox and not get filtered into the spam folder, it's now essential to have DMARC set up for your email domain. You can learn more hereYour IT team is likely already aware of these changes. .If your I.T team have not yet been made aware of this, we encourage you to reach out directly to your IT or DNS provider to request the creation of a DMARC record for any email domain that you use as a Send From Email. . This action must be completed by your local IT team or Domain Name Service provider (GoDaddy, Squarespace, etc.). Unfortunately, this is not an action that Launchmetrics is able to handle on your behalf as it's linked to your company's settings.
- DKIM (Required)
- CUSTOM BOUNCE DOMAIN (Required)
- SPF (optional)
You can check the status of your DKIM and Custom Bounce in Launchmetrics by navigating to your >> Email Domain Manager <<
DMARC
Starting February 2024, Google and Yahoo have introduced a new requirement for all email senders To ensure that your emails continue to reach your audience's inbox and not get filtered into the spam folder, it's now essential to have DMARC set up for your email domain. You can learn more here
Your IT team is likely already aware of these changes. .If your I.T team have not yet been made aware of this, we encourage you to reach out directly to your IT or DNS provider to request the creation of a DMARC record for any email domain that you use as a Send From Email. . This action must be completed by your local IT team or Domain Name Service provider (GoDaddy, Squarespace, etc.). Unfortunately, this is not an action that Launchmetrics is able to handle on your behalf as it's linked to your company's settings.
DKIM
DKIM adds data to your email, not visible to end user, that allows verification of the message and sender mail address, against tampering in transit.
Create a DKIM Record
Ask your representative at Launchmetrics to provide you with DKIM Keys specific to the domain you wish to authorise sending emails from.
Follow the steps given by your representative at Launchmetrics to modify your DNS Records. This will require two new text records being added to your DNS server.
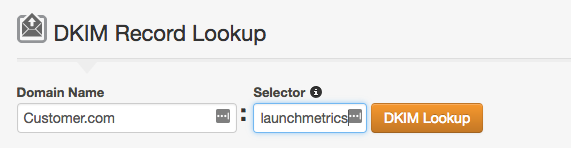
You can test if the setup on your side has been done correctly using tools such as this one: http://mxtoolbox.com/dkim.aspx
Notify your representative at Launchmetrics that your DNS record has been updated.
- Please wait for a confirmation for your representative at Launchmetrics, confirming that the DKIM Key setup has been completed before you begin sending any emails from our platform.
Custom Bounce Domain
Custom bounce domain is another term for the return path address. This is an email address specified during the SMTP protocol communication process that determines where the receiving mail server sends back its bounce and error messages.
To configure a bounce domain, choose the subdomain you would like to use (e.g. lm-bounce.company.com) and add the appropriate CNAME record to your DNS settings
Your Launchmetrics Support team member can also share instructions on this to share with your I.T. If you have access to the Email Domain Manager in Launchmetrcs, you can extract this information yourself. Please wait for a confirmation for your representative at Launchmetrics, confirming that the Custom Bounce Domain setup has been completed before you begin sending any emails from our platform.
SPF
SPF is a DNS record that you will need to input in your public DNS server, with a list of mail servers that allows you to send mail, with your domain name.
Do you have an SPF?
1. Use a browser to access http://www.kitterman.com/spf/validate.html
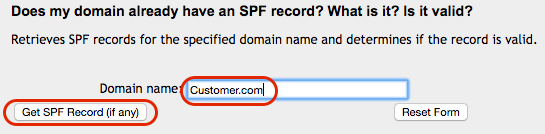
2. Type in your email domain and click "Get SPF Record".
- Your email domain is everything following the @ symbol. i.e. If your email address is xxxxx@clientname.com, then clientname.com is your domain
3. You will receive one of these responses (see below).
This response means you already have an SPF record:
Found v=spf1 record for clientname.com:
 v=spf1 …………………………... -all
This response means you don't have an SPF record:
No valid SPF record found of either type TXT or type SPF
If you DO have an SPF, please click “Modify your SPF” section below.
If you DO NOT have an SPF, please click “Create a SPF” section below.
Modify an SPF Record
- Log into your Public Domain Name Server (DNS) Administration console.
- Look for a page that will let you add or modify records for your DNS.
- Modify the TXT record adding include:_shortspf.launchmetrics.com to you record, before the ~all or -all.
Example: v=spf1 a mx include:_shortspf.launchmetrics.com ~all.
Use -all to instruct AntiSpam engines to reject all mail that came from an unauthorized server.
Use ~all to instruct AntiSpam engines to get the messages but send them to SPAM when they came from an unauthorized server.
-
Test the new SPF record before saving your records using the Kitterman tool found at: http://www.kitterman.com/spf/validate.html

Save your records. (This modification may take up to 48 hours to spread internally).
Create an SPF Record
Log into your Public Domain Name Server (DNS) Administration console.
Look for a page that will let you add or modify records for your DNS.
You may need to enable advanced configuration.
Create a type TXT record with next text: v=spf1 a mx include:_shortspf.launchmetrics.com ~all.
Use -all to instruct AntiSpam engines to reject all mail that came from an unauthorised server.
Use ~all to instruct AntiSpam engines to receive the messages but send them to SPAM, when they came from an unauthorised server.Save modifications. (This modification may take up to 48 hours to spread internally).