
GPS Events iPad App
Learn how to download and use the Events GPS iPad app
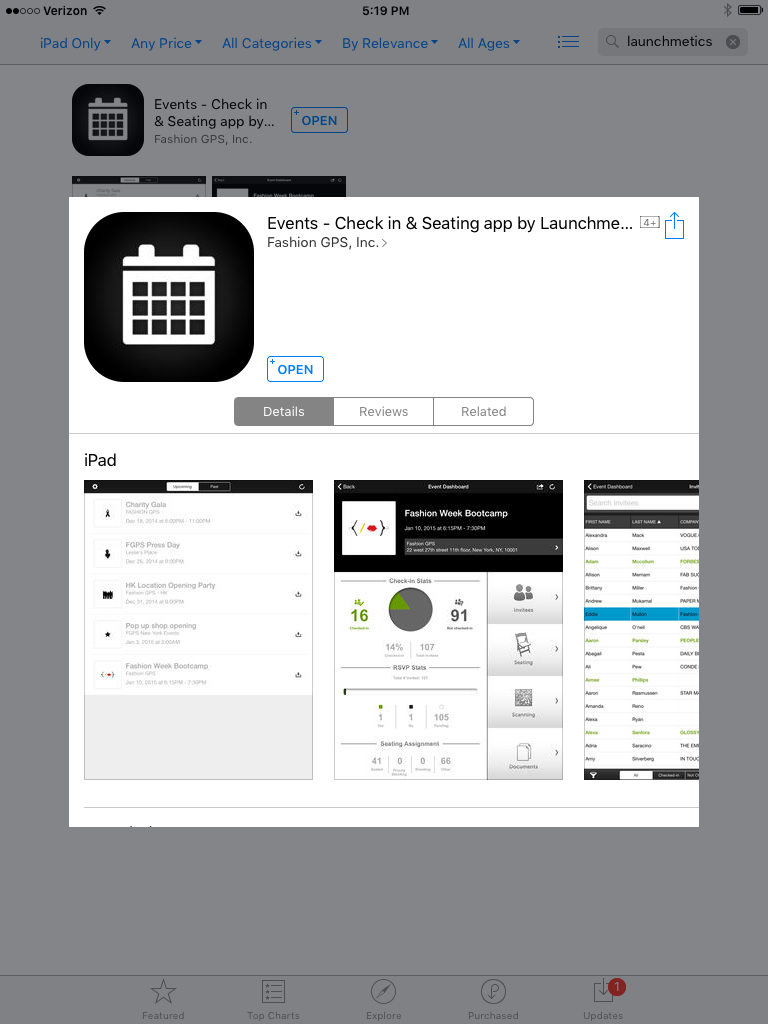
Download the GPS Events app from the Apple Store.
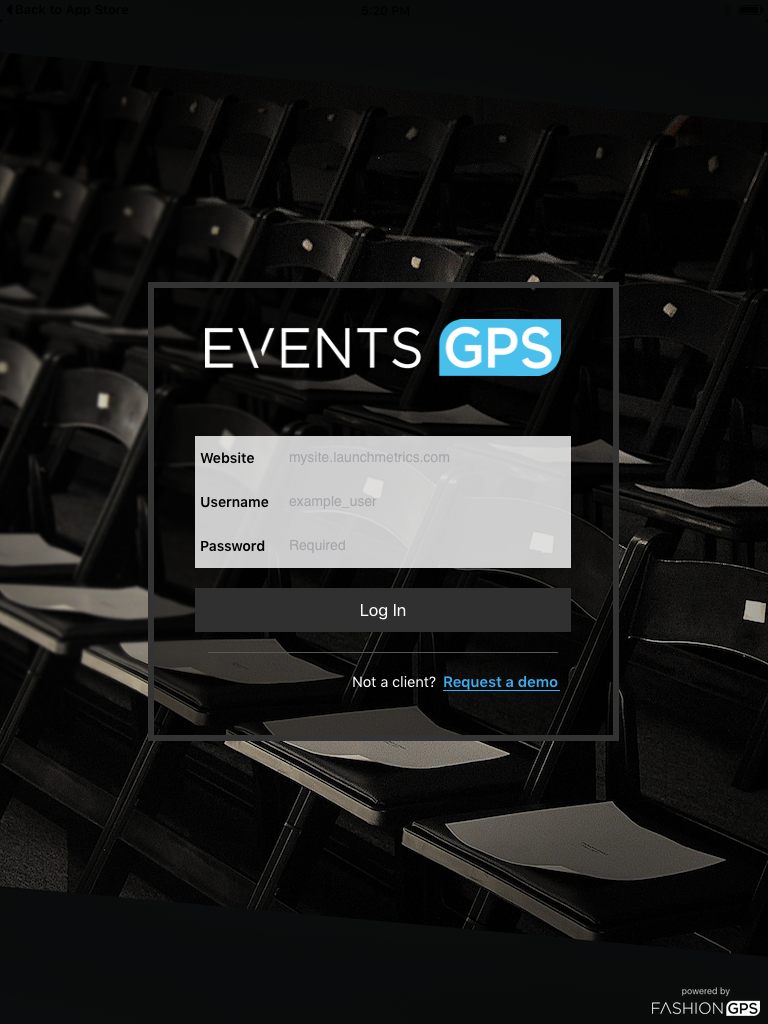
To begin, enter your Fashion GPS URL in the address bar. You can write “company.fashiongps.com” or just “company.” Then, enter the same username and password that you use to login to Fashion GPS on your computer.
Unlike the full system on the computer, you can use your log-in username and password on multiple iPads at once.
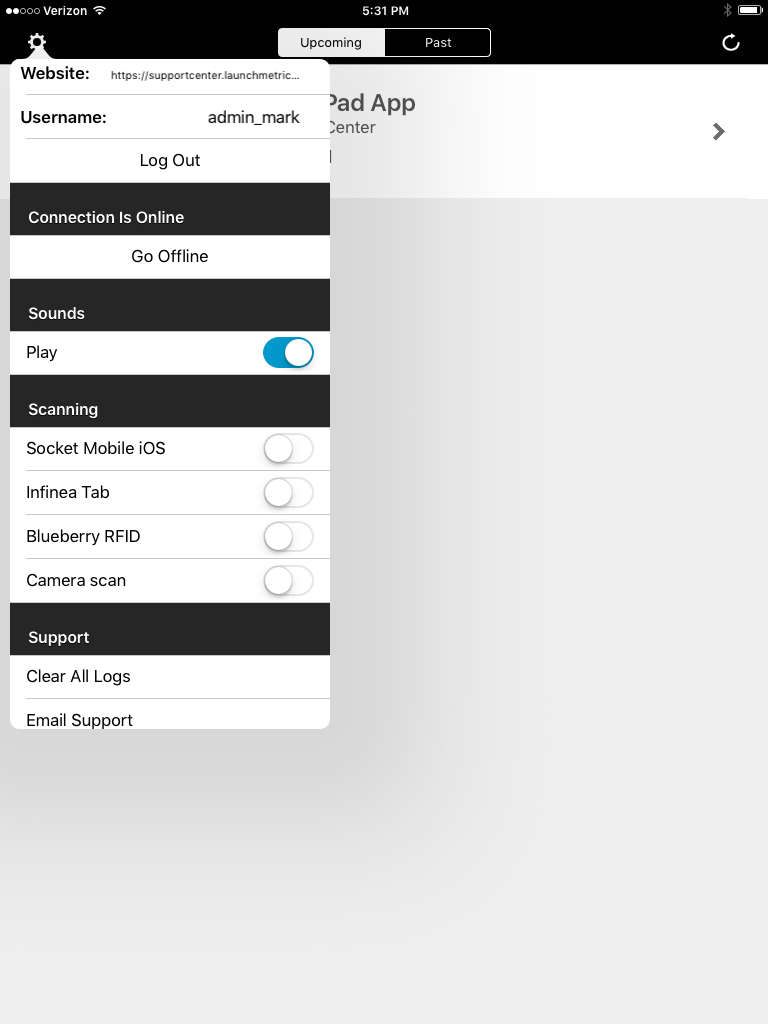
The Settings Menu is accessible by tapping the white wheel located on the upper left corner of the Events List page. Here is where you can turn your connection online (with Wi-Fi) or offline (on-site), enable scanning, contact support, or log out.
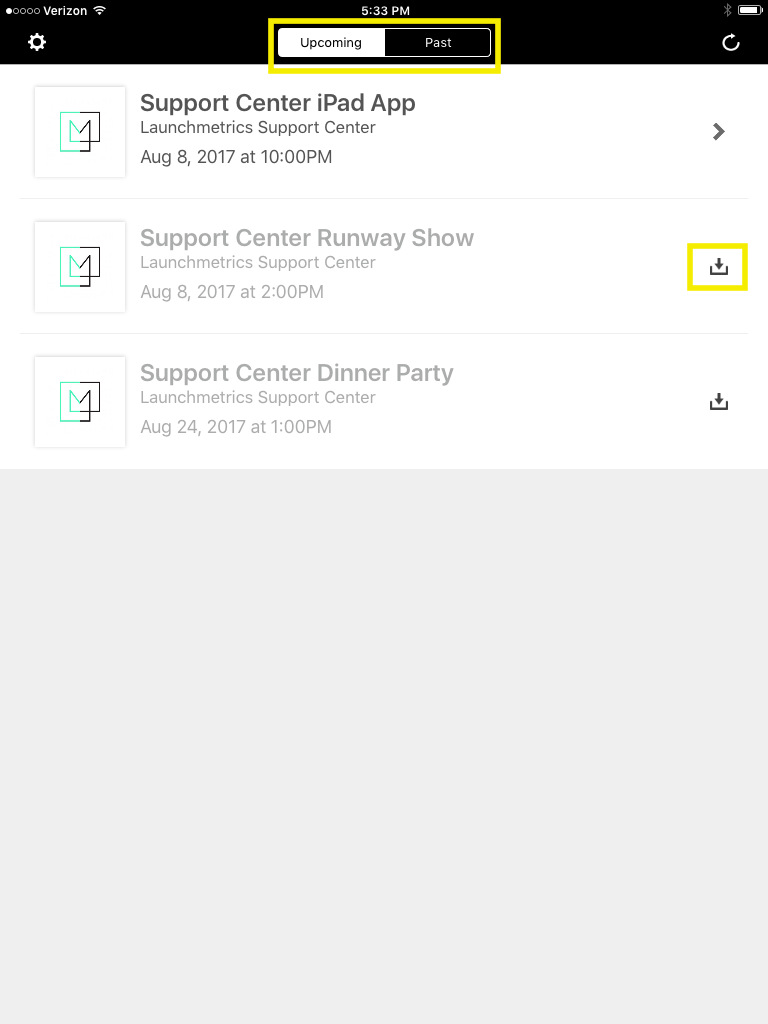
To manage an event on your iPad, you must first create it on your Fashion GPS website. When you login to the iPad app, all active events from your site will populate in the Events List. Choose the event you wish to download by tapping it once on this screen.
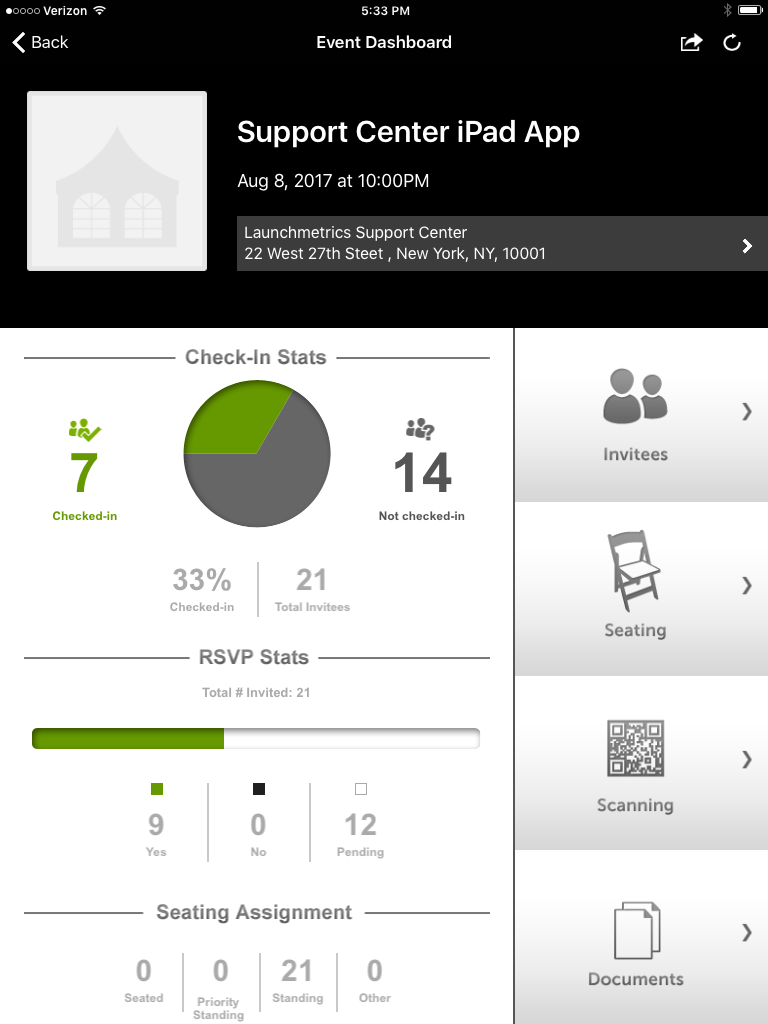
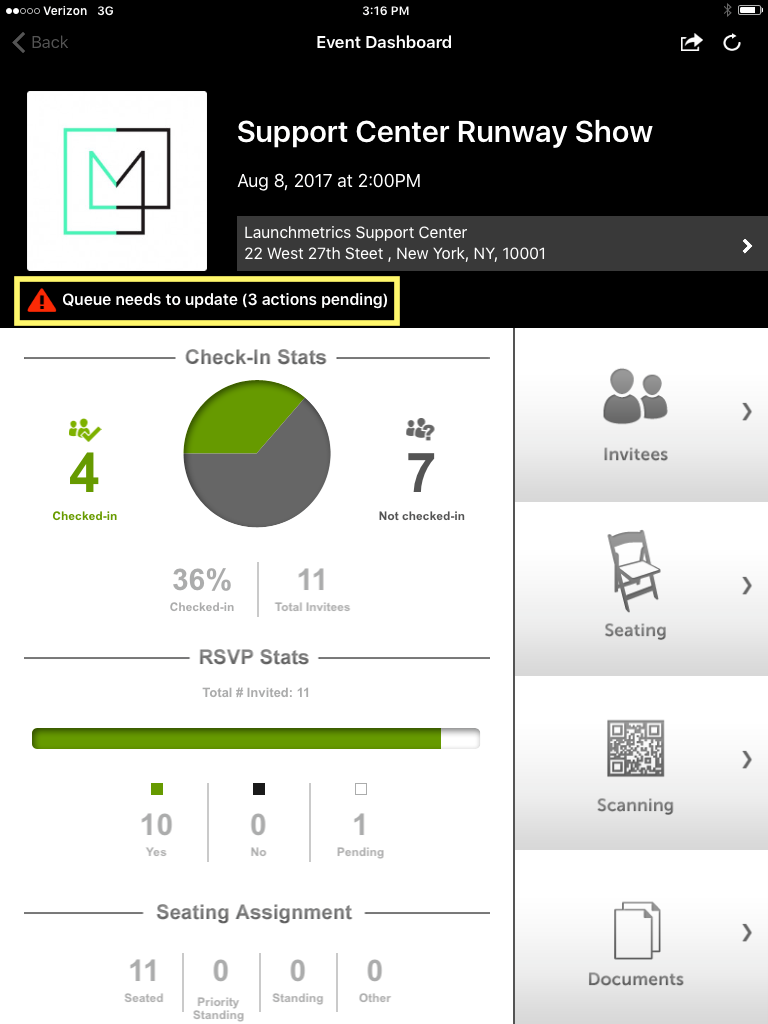
Once your event has downloaded, you will be taken to the Event Dashboard. From here, you can view a real-time overview of your event’s statistics, including check-in, RSVP, and seating totals.
-
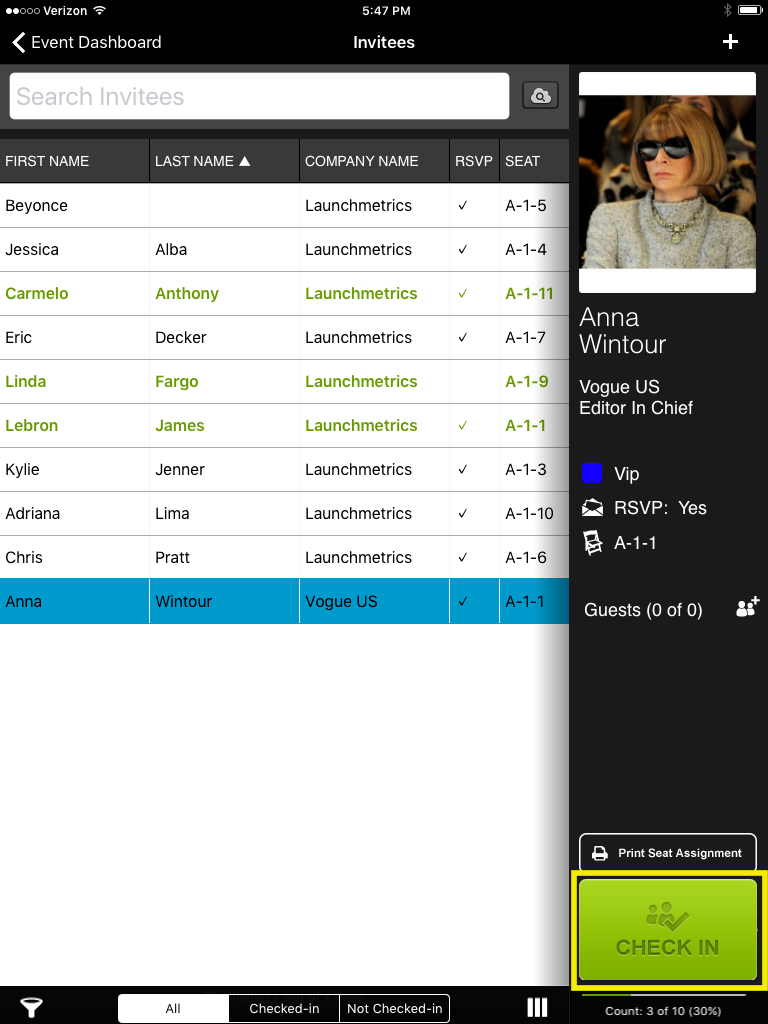
To begin checking your INVITEES in to your event, tap the “Invitees” button on the right panel of the Event Dashboard. Search for your invitee, select it once and then tap “CHECK IN” at the bottom right of the screen. You can search by name, company, or category.
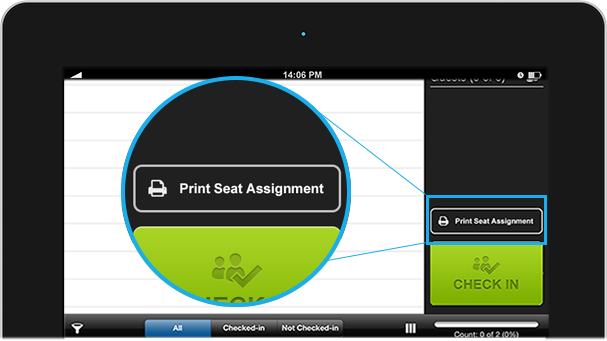
- You can print seat assignments wirelessly by clicking the "Print Seat Assignment" button above "Check In".

- Rotate your iPad to have a landscape view. You can fit more columns to view additional details about your guests.
Adding a new Invitee
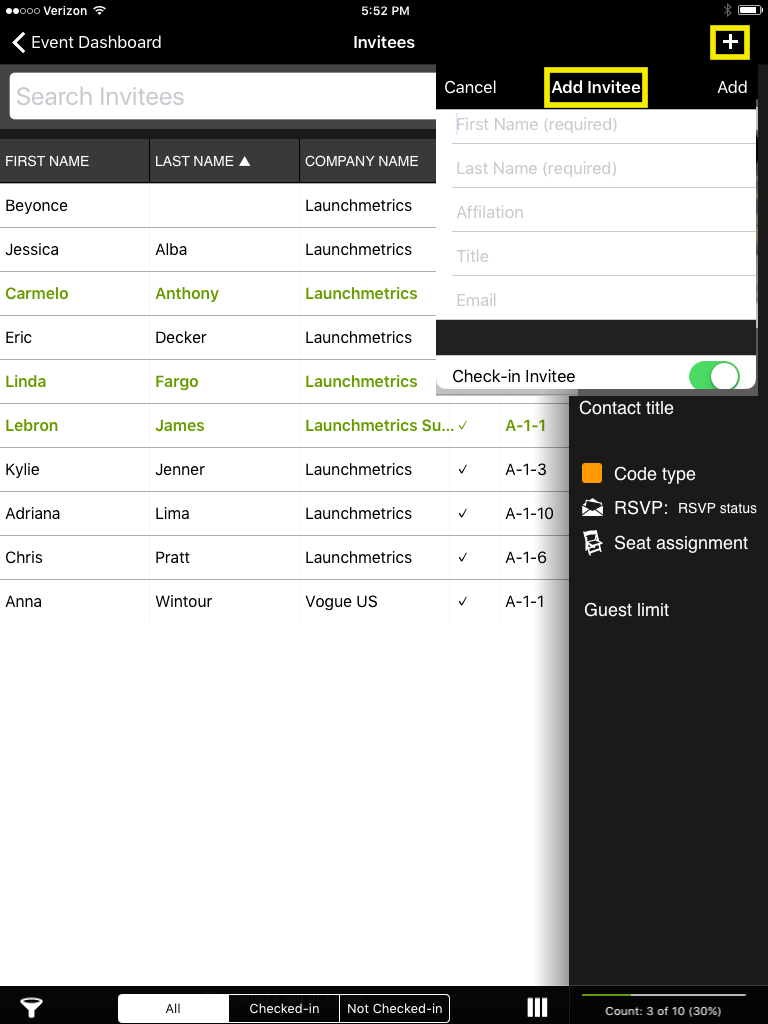
To add a new invitee, tap the “+” at the top right of your Invitees List. We recommend adding as much information as possible, because this will sync with your Fashion GPS contacts database online.
Adding an Invitee from Contacts

You also have the option of adding someone to your Invitee list from your Contacts database. Search for a name and click on the Cloud Search to run a search on all Contacts (not just Invitees).
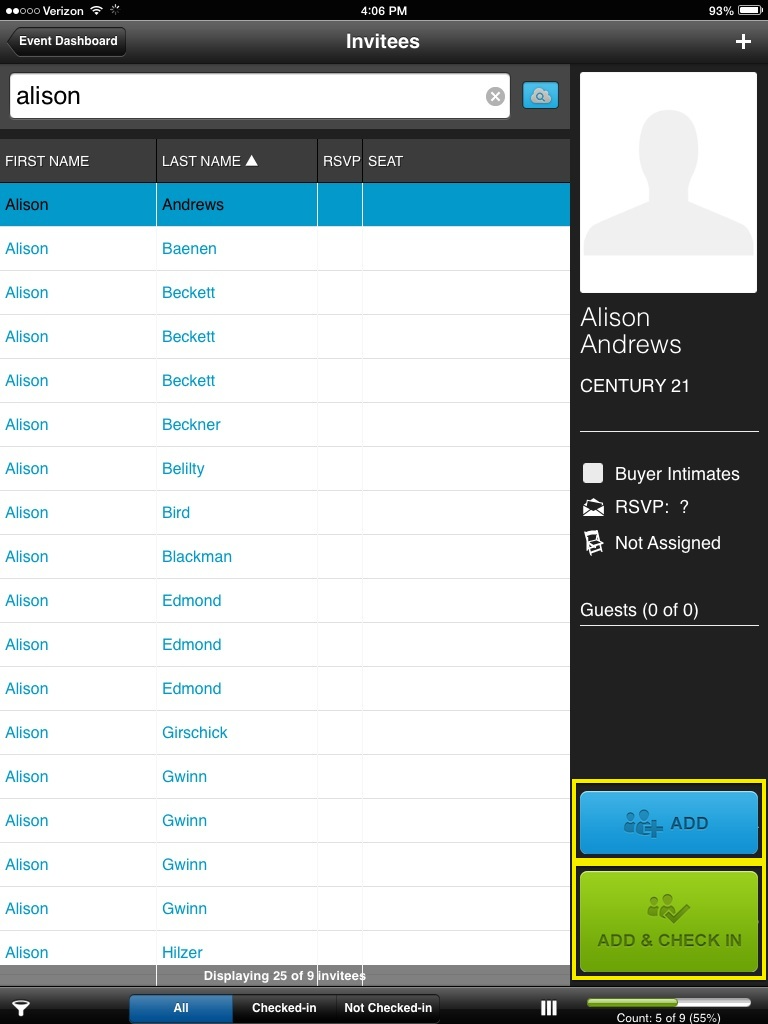
Once you select the Contact you want to add to the Invitee list, click on "Add" or "Add & Check In" to mark them as attended in one click.
Adding a Guest of an Invitee
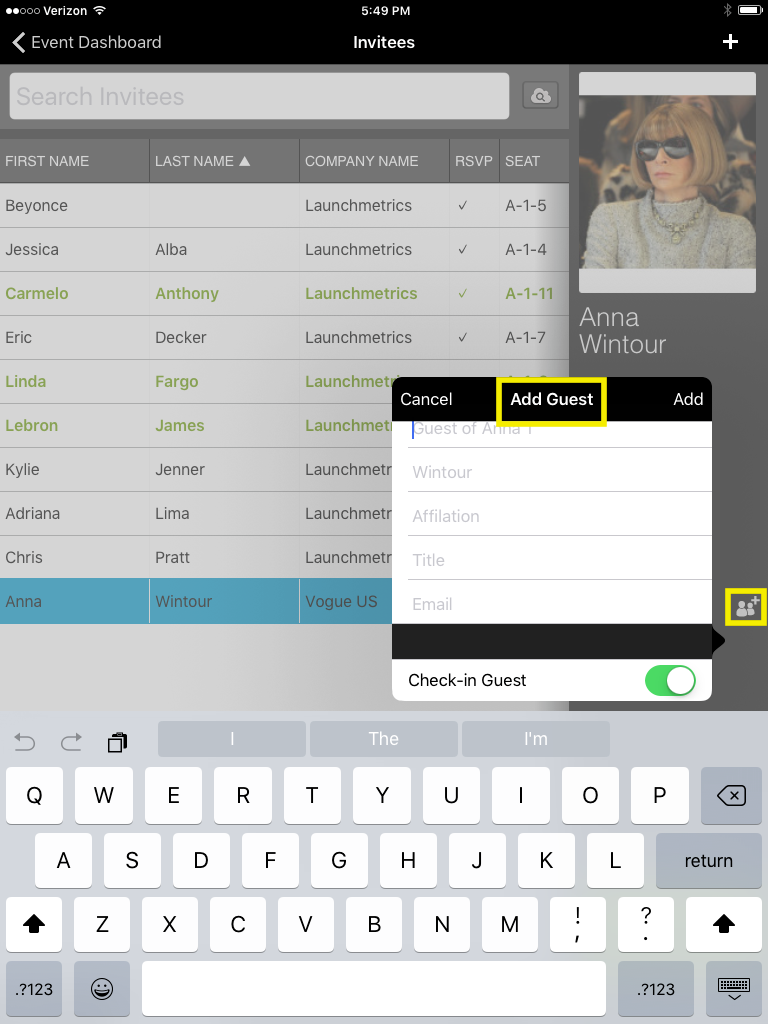
Select the invitee. Midway down the right panel, you will see the word “Guests.” Tap the small icon to the right and input the name of the guest. If you leave this blank, the guest will be added as “Guest 1 of Invitee.” The guests added will sync with your Fashion GPS Invitee list online.
Undo a Check In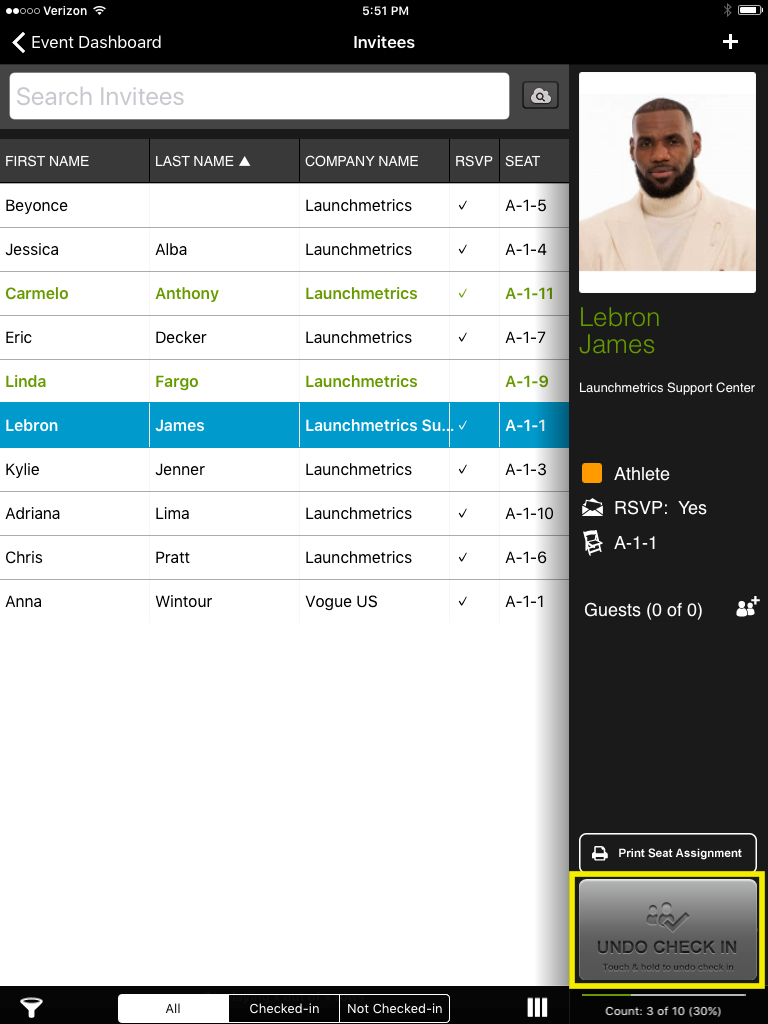
Tap the name of the person you wish to undo the check in for. Tap and hold the gray “UNDO CHECK IN” button on the bottom right of the screen until it turns pink to undo your check in.
Customizing your columns
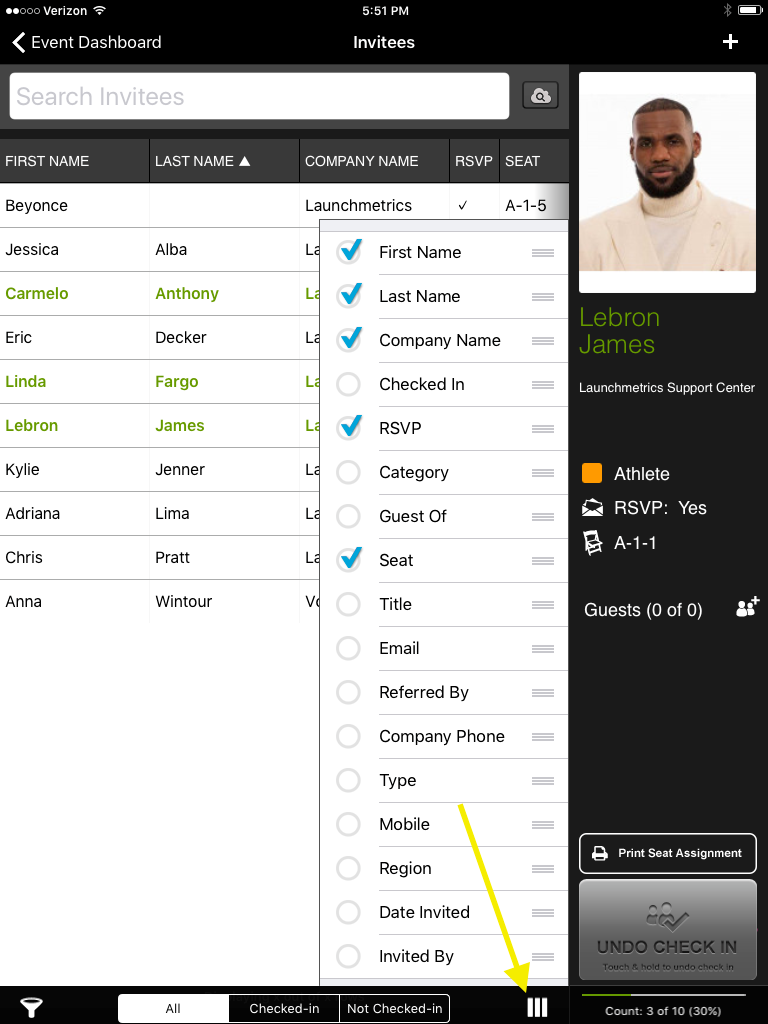
To customize which attributes of your Invitee List are visible, tap the icon with 3 vertical bars at the bottom right of the screen and select your desired headers. You can view up to 4 columns at once. Remember, even if you choose to not show first name, last name, or company, you can still search by these details.
Sorting by Column
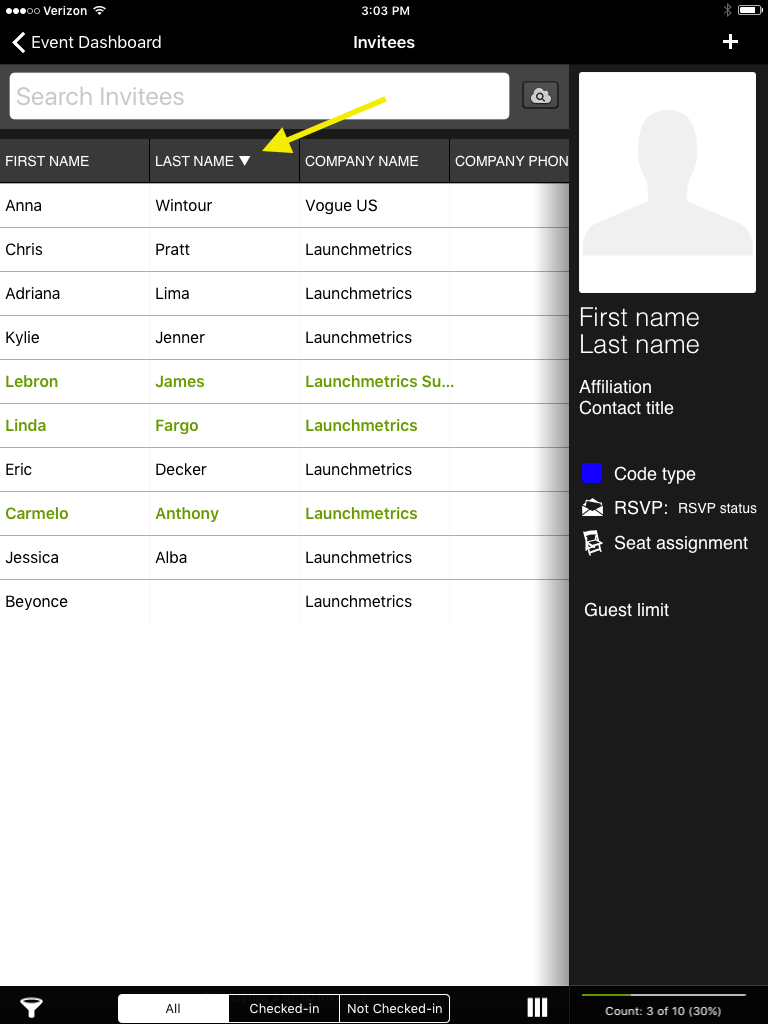
Tap the header of the column you wish to sort alphabetically by.
Filtering
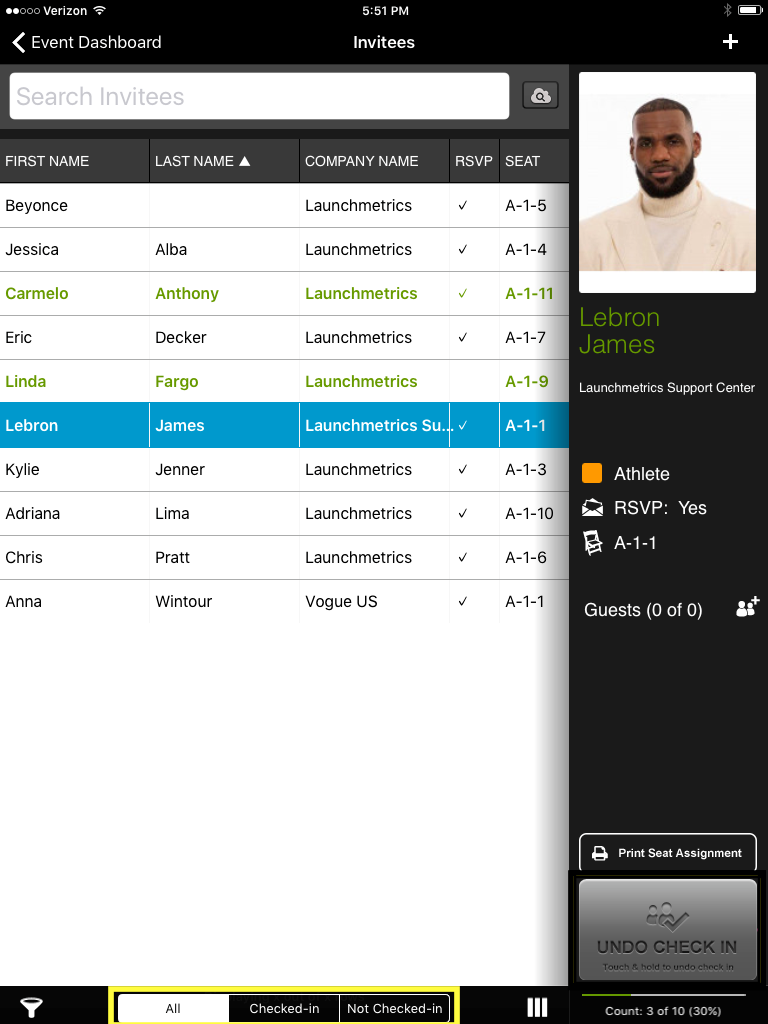
You can filter which invitees are visible by using the small filter icon at the bottom left of the screen, or by tapping the buttons “Checked In” or “Not Checked In.”

Click on the Filter Icon to change the Invitees displayed. For example, you can choose to show only Invitees who have RSVP'd YES. This can make your check-in process easier.
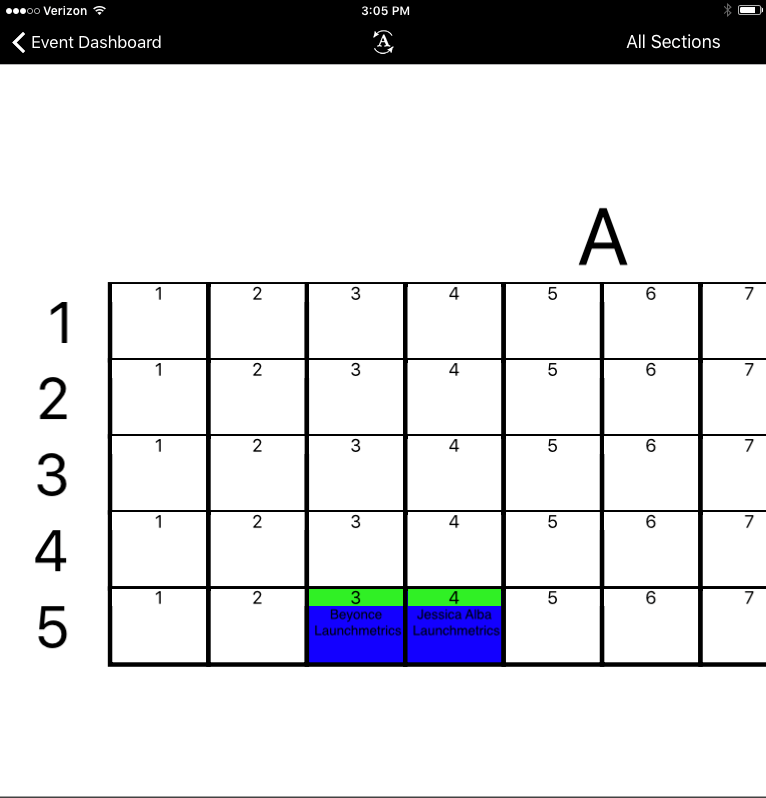
Seating
Filter Through Sections
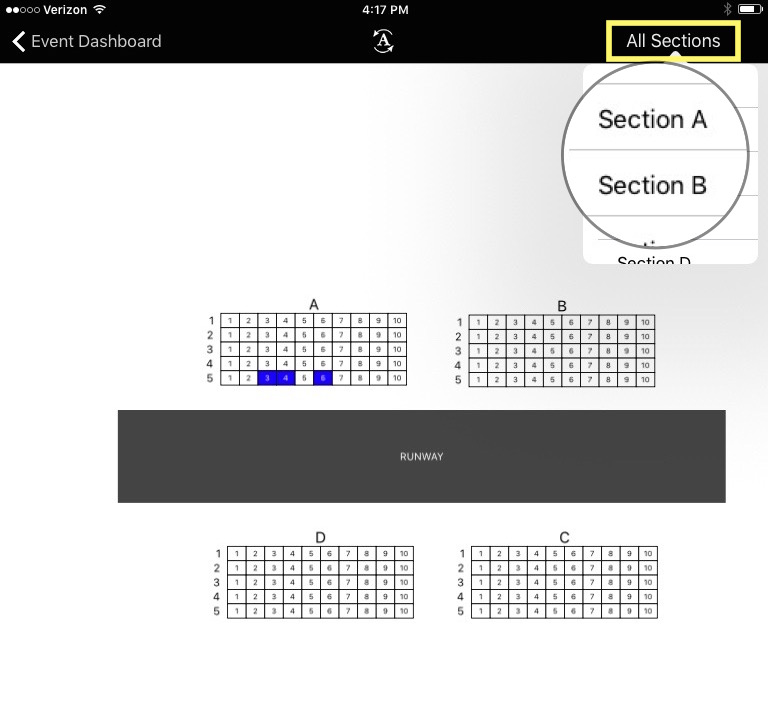
- In Seating, you can now filter to view only the sections you're managing at your event. Switch between different sections to suit your needs.
Seating an Invitee
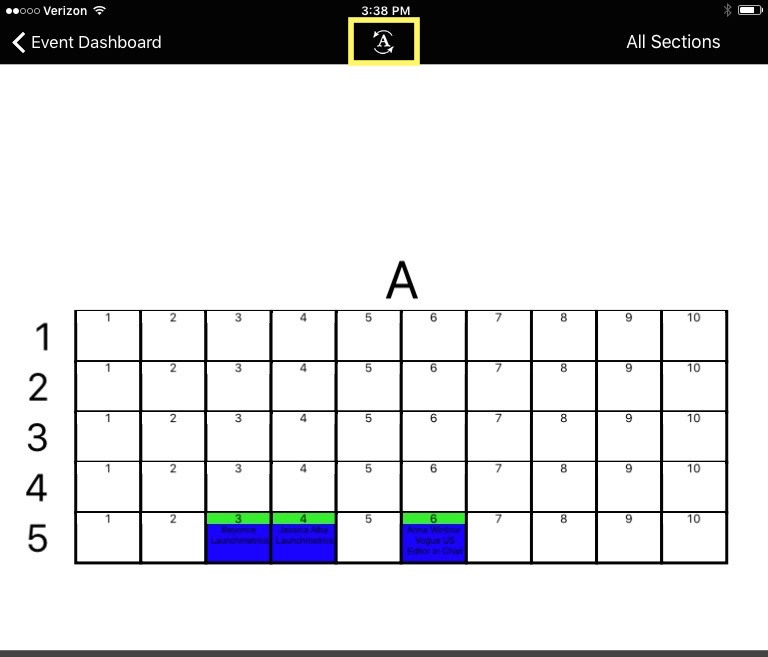
- Use the arrows on the top right corner to change the order in which the seats are displayed.
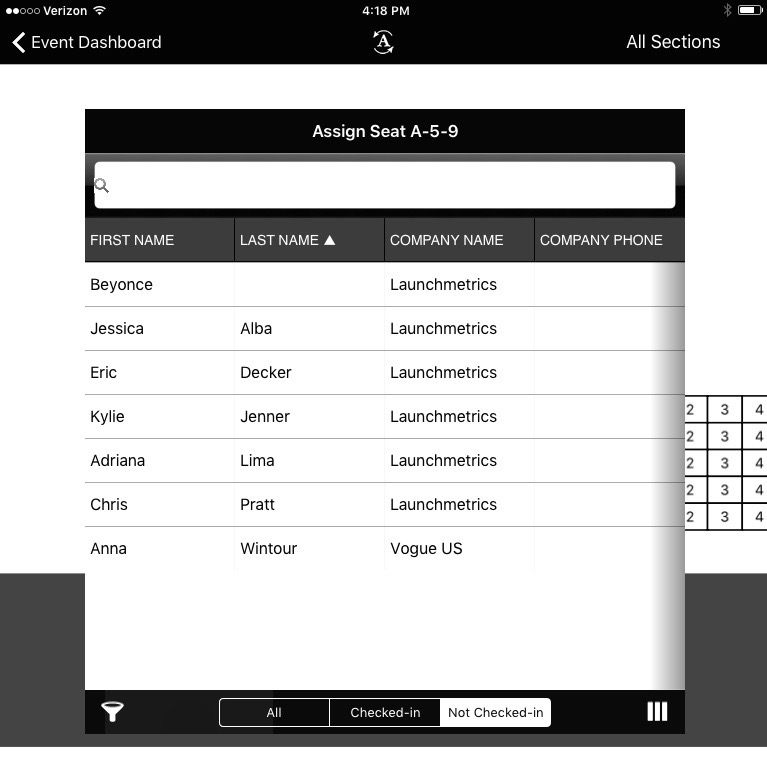
- Touch and hold down the seat you wish to assign until your invitee list pops up. Tap the invitee’s name once to place them in that seat

- To see which of your seats are "Double Seated", tap on the seat to view your double seated guest and unassign/reassign seats on-the-go.
TIP: Double tapping on an invitee’s seat will check that person in. 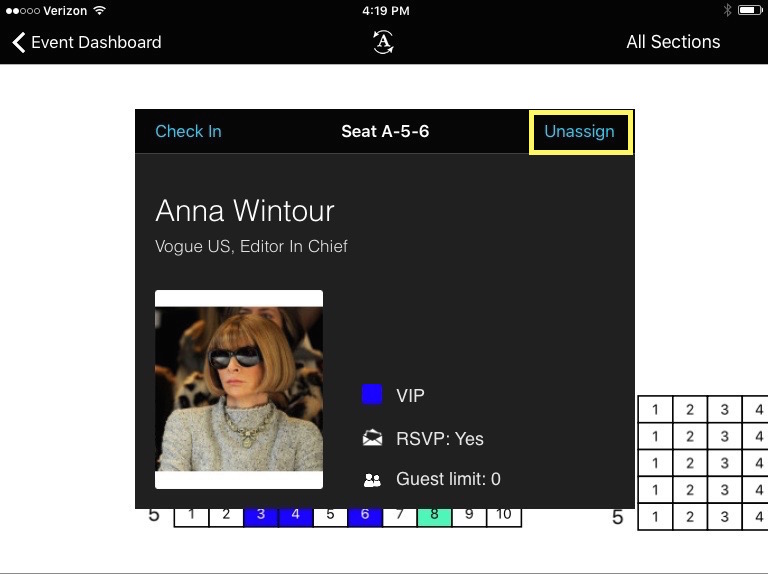
Click on a seat to un-assign it. The person's name will pop up and you will have to click "Unassign".
Using a barcode Scanner
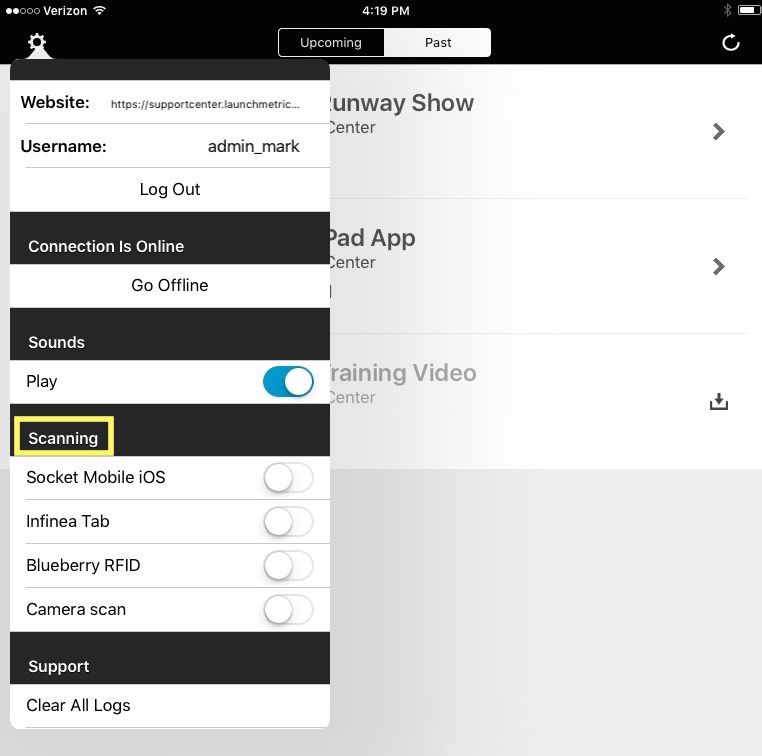
The GPS Events app works with Linea-Pro Scanners (for iPhone), Infinea Tab Scanners (for iPad), and Socket Scanners (iPad or iPhone). Ensure the scanner is paired from the Settings Cog before you start your check-in.
Documents
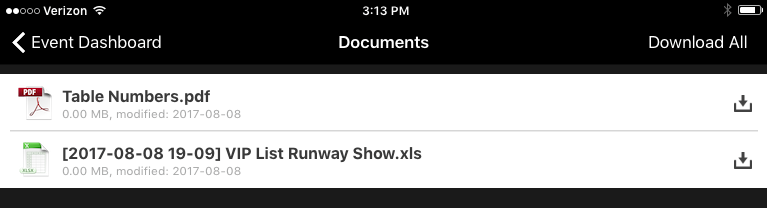
View PDF or Word documents pertaining to your event. To upload them, go to your Fashion GPS website. In the Events module, find the “Documents” tab in the main navigation bar. Select your event and upload your file. It will immediately be accessible to view on your iPad.
Working in Offline Mode
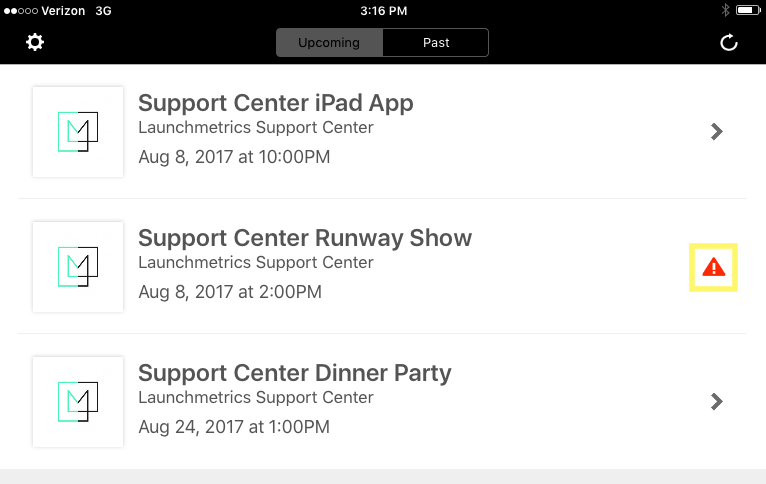
The GPS Events app works even when you don't have Wi-Fi. Any changes you make on the iPad will be saved locally until the iPad reconnects to the Internet. Look for a red icon to see if you have any offline information that needs to be processed.
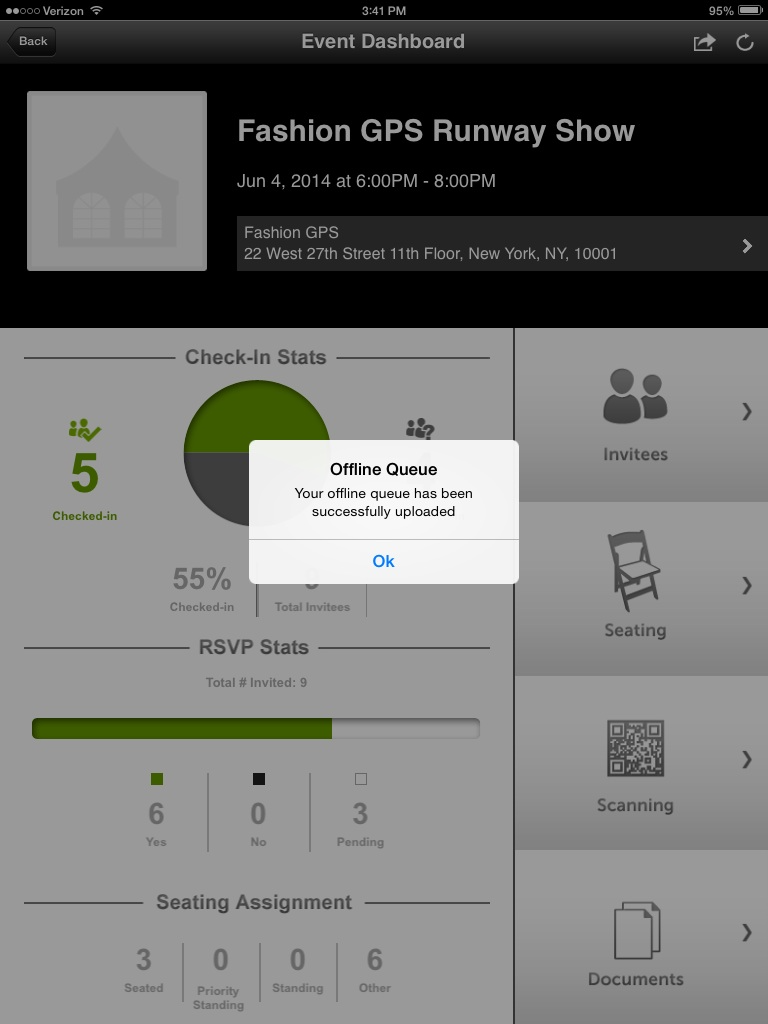
- When the iPad successfully processes the Offline queue, you will see this success message.

- Click on "Download All" for quick access to all of your uploaded documents from production floor plans to on-site staff lists.