Creating an Event
Learn how to create and edit your event

- To create a new event, click “Create Event” in the upper right corner of the page.

-
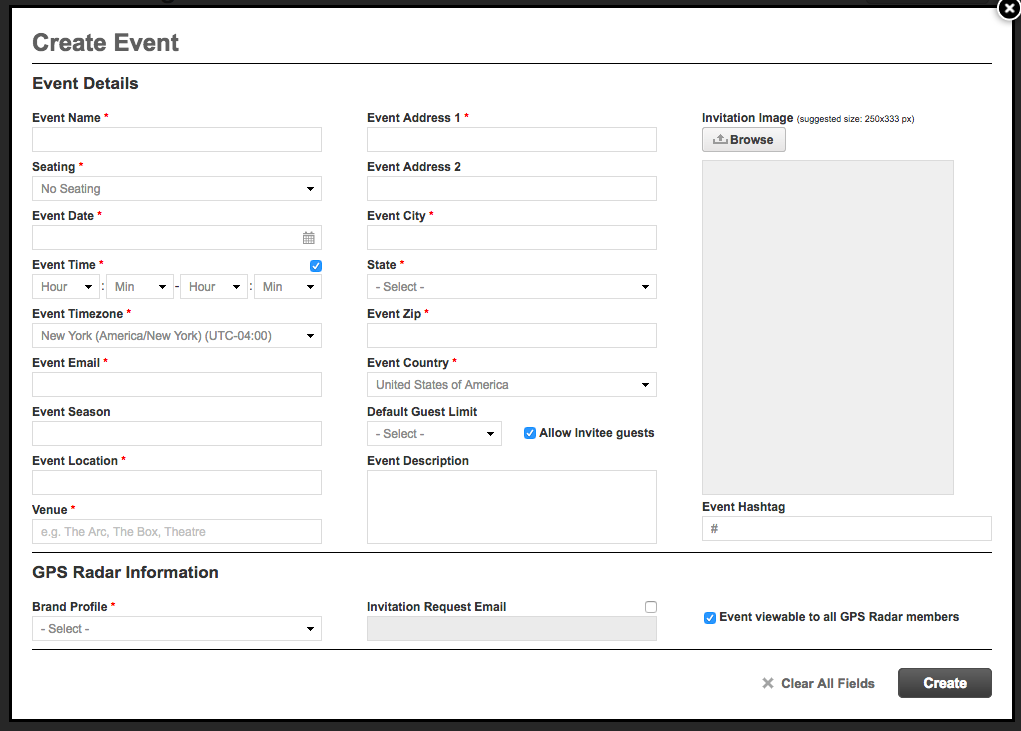
The required fields will be denoted with a red asterisk(*).
Keep in mind:
Seating: Select the seating style for the event. This option will enable the Chart Builder feature, if seated is selected.
- Event Time: This is the time of your event. Please note this is formatted using 24-hour time. To make the event time appear in a 12-hour format on your invitation, be sure to check off the box next to “Event Time”. Regardless of which format you choose, you still have to enter the event time using the 24-hour format.
- Event Email: Enter the email address that you want to associate with this event
Event Season: This is the season corresponding to the event.
-
Event Location: Enter the appropriate event location as it appears on your invite.
- Venue: If presenting on NYFW/NYFW:M make sure to write the name of the event Venue.
Event Address: Enter all appropriate address information
Guests: By selecting “Allow Invitee Guests”, you enable the ability to assign Guests to your Invitees. The default number designates how many Guests each Invitee will get. If you only want a handful of people to have Guests, tick off the box but keep the default at zero.
- GPS Radar Information: This is the information that gets published to GPS Radar about your event.
- Brand Profile: Use the drop-down to select the Brand Profile which the created event will publish to on GPS Radar. Reach out to the Launchmetrics Customer Success team to set up a Brand Profile page if you do not see your brand's name list.
- Enable invitation requesting: By selecting “Enable Invitation Requesting," you enable the ability for Radar users to request an invitation to your event. Do note, this does not mean they are invited to your event. Below the box to enable this feature is a field that reads, "Invitation Request Email." This is the email where requested invitations would be received.
- Event viewable to all GPS Radar members: By selecting "Event viewable to all GPS Radar members", the will enable your event to be published to the public Radar calendar for all GPS Radar members to view and if enabled, request an invitation.