
Managing an Event
Learn how to manage your event
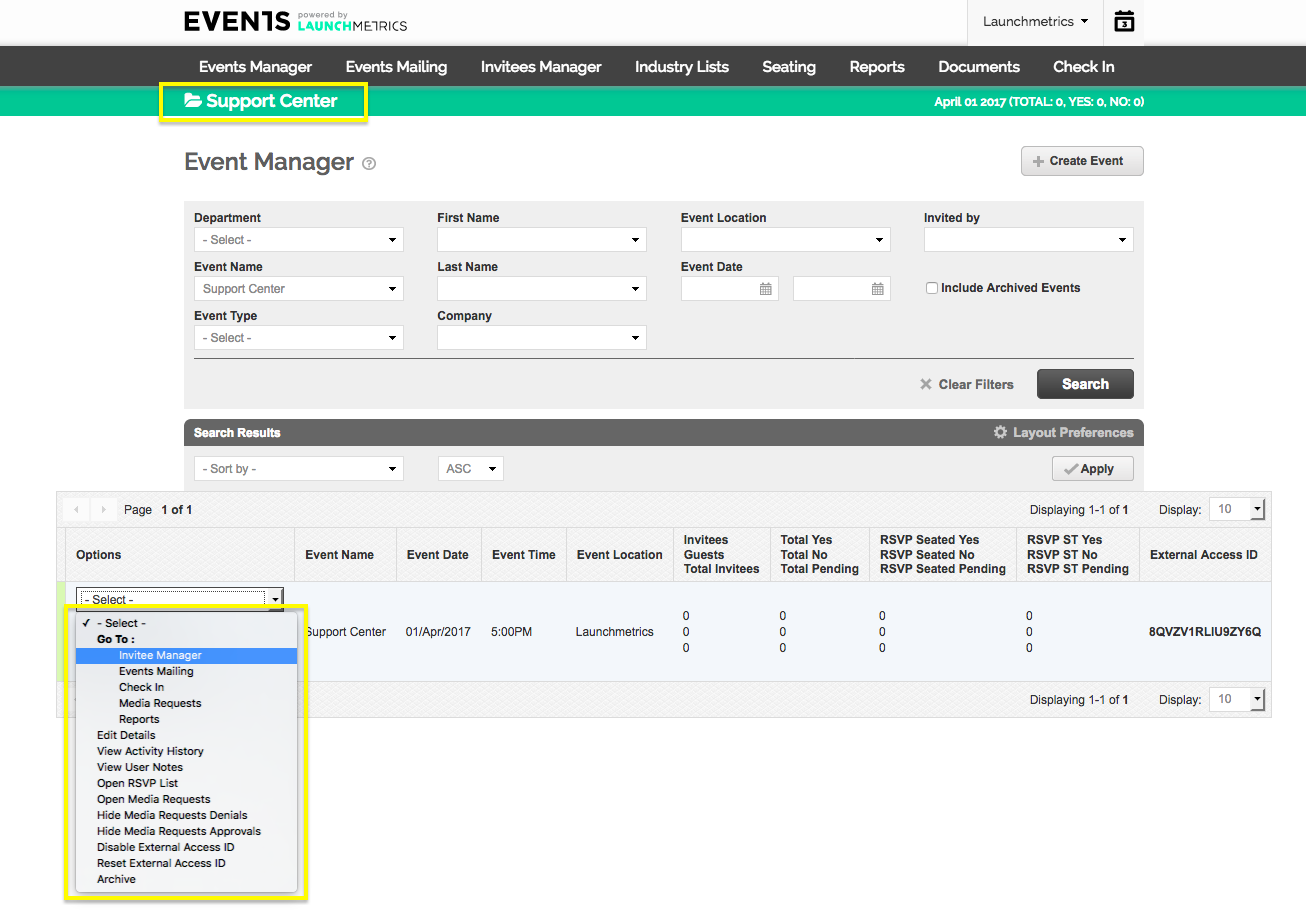
To begin working on an event, click the drop-down menu listed below the Options column.
NOTE: By selecting to take an action on an event, you are making that event active. This means that when you click the Events Mailing tab, Invitees tab, or any other tab on the main navigation bar, the system will assume you wish to see these aspects for this active event. Your active event name is always visible at the upper left corner of the page.
Select from the following options:
Invitee Manager
Events Mailing
Seating
Invitee Seating
Reports
Edit Details: Edit the previously inputted information pertaining to this event.
View Activity History: View the history of any changes made to the event. This includes when mailings were sent, when invitees were added, and when edits were made to the event details.
View User Notes: View or add notes for yourself or other users relating to this event.
Open/Close RSVP List: Allow / Disable your invitees from RSVPing to the event from the link in your invitation.
Disable/Reset External Access ID: Change the External Access ID so your site becomes inaccessible when you no longer wish to share it.
Unpublish from GPS Radar: Remove the event from Fashion GPS Radar.
Archive: Archiving an event will remove it from your main events manager page. You will still be able to generate event reports, but you will no longer be able to edit the event.
-
Delete: This will remove the event from the database. This action cannot be undone.