New York Fashion Week To-Do List
When Creating an Event
-Select “Using On-Site Fashion Week Check In” if you are presenting on-site.
Make sure to choose this option from the Event Configuration window. This will allow guests to use the self-service kiosks to expedite the check-in process on-site. 
-Select Seating Configuration for your event.
Selecting "Seated Event" enables Chart Builder, while selecting "No Seating" will automatically assign all invitees to a Standing seat assignment.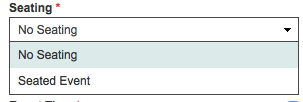
-Make sure to specify event details as much as possible.
It is important to enter the exact address, city, state, and zip code so the event can be properly pushed to Radar and viewable on a map. Also make sure to check the box next to “Event Time” to use a 12-hour time vs. military time to avoid confusion! 
-Remember to set your Default Guest Limit
The Default Guest Limit will be applied to ALL invitees and set the number of guests they are each allowed to add. If you only wish for certain invitees to have guests, set the Default Guest Limit to “Select” and check off the box marked “Allow invitee guests.”
-Mark your event as private or public on GPS Radar
The "Event Viewable to all GPS Radar Members" checkbox determines if the details of your event are shared with the Radar community. If you check this box, the event details and images will be viewable to all Radar members, but only invitees will be able to RSVP. If the event is marked as private, then only invitees will be able to view the event details.![]()
When Managing Invitees
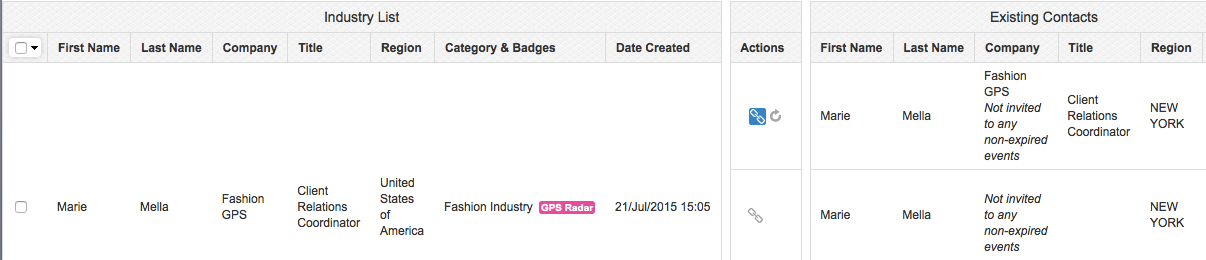
-Remember to link contacts with their matches on the Industry List
Linking enables your invitees to manage their events and RSVPs through GPS Radar.
-Stay up-to-date with all RSVP changes
- Select RSVP Status > Yes in Invitees Manager to view the latest changes in RSVP status.
- Keep on top of last-minute RSVP updates by electing to receive email alerts starting the day before your event (Events Manager > Edit Details > Notify with RSVP Changes after > enter your date).
-Send targeted follow-ups by searching RSVP Status
Use Invitees Manager to search for invitees who have not yet RSVP’d, using the RSVP Status filter, and send them reminder emails, or send seating assignments to invitees who have RSVP’d yes.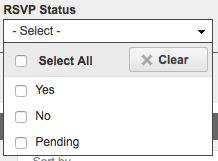
-Send Seat Assignments to GPS Radar
Keeping invitees’ Radar information up-to-date will allow for faster and easier check- in. To do this, go to Invitees Manager > Queue Invitees > Queue Options > Send Seat Assignments to GPS Radar.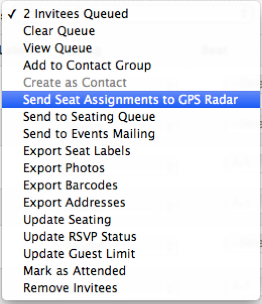
When Creating Event Mailing Templates
-Reformat your test
If your text looks chaotic in your Preview, paste it into Notepad or TextEdit to remove any preexisting formatting and paste again.
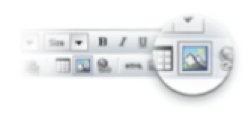
-Upload your images quickly and easily
Use the mountain icon to insert images and GIF files.
 -Size Recommendations
Ensure your images meet our size guidelines (recommended 600 pixels on the longest side and 72 dpi). You can re-size the image from within Fashion GPS’s mailing editor as you upload it.
-Double-check the appearance of Confirmation Emails
When an invitee RSVPs through the system, he or she will automatically receive a confirmation email. Make sure this template is customized to your liking before opening your RSVP list.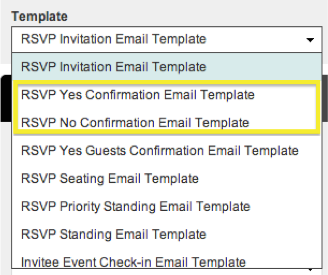
-Determine which email addresses to use for your invites.
Go to Events Mailing > Settings to determine which of your invitees’ email addresses will receive the event email.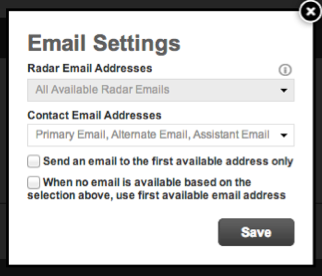
-Monitor your Invitation Status
In the Events Mailing tab you can view a real-time status of which Invitees have received your invitations and find explanations for any failed emails on the Sent tab and view emails that are in the Outbox tab. You can export lists from each mailbox to Excel or PDF for better tracking.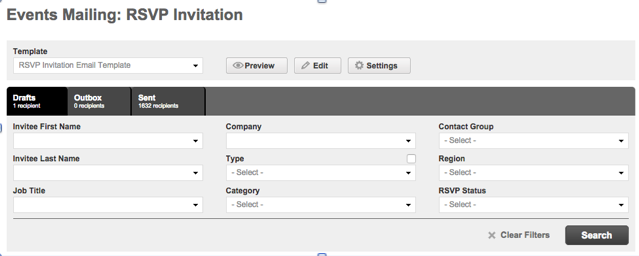
-Don’t copy/paste the RSVP link!
Each RSVP link is unique and specific to the contact that is meant to receive that email. Be sure to include either the “Event RSVP Link” or “Event RSVP URL” from the Custom Database Variables to ensure that each invitee can RSVP.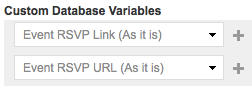
When Building your Seating Chart
-Remember to save your template for future use or if you wish to start again, restart your template.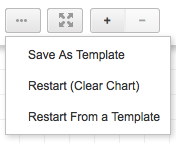
Before Your Event
-Assign all Invitees to Standing, Priority Standing, or Seating
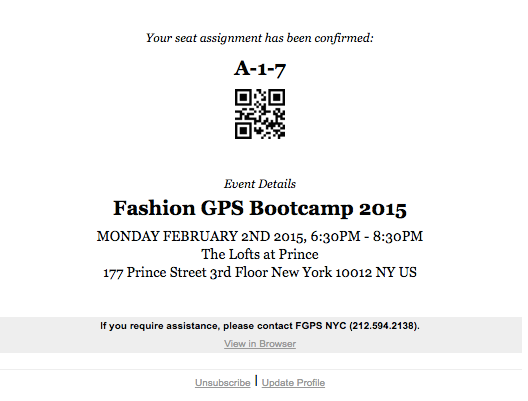
If assigning invitees to Seating, make sure to assign a Seat # as well. This will speed up the check-in process on-site.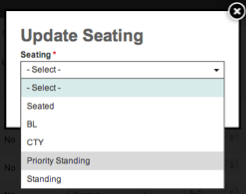
Send Seating Template Mailing to all invitees with their seat assignments and barcodes.