
Exporting Samples
- Navigate to your Samples Manager and perform your Search.
- Once you've found the Samples you'd like to export you'll need to scroll to the bottom of the page.
- You have the option to export your samples into:
- PDF format by clicking "Print"
- Excel by clicking "Excel"
- Email by clicking "Email".

- NOTE: The information displayed when you Export will be determined by your Template NOT the view in your Samples Manager.
- To add or remove fields to/from your export, click "+ Create Template".
- This will bring you to a new window where you can amend your template.
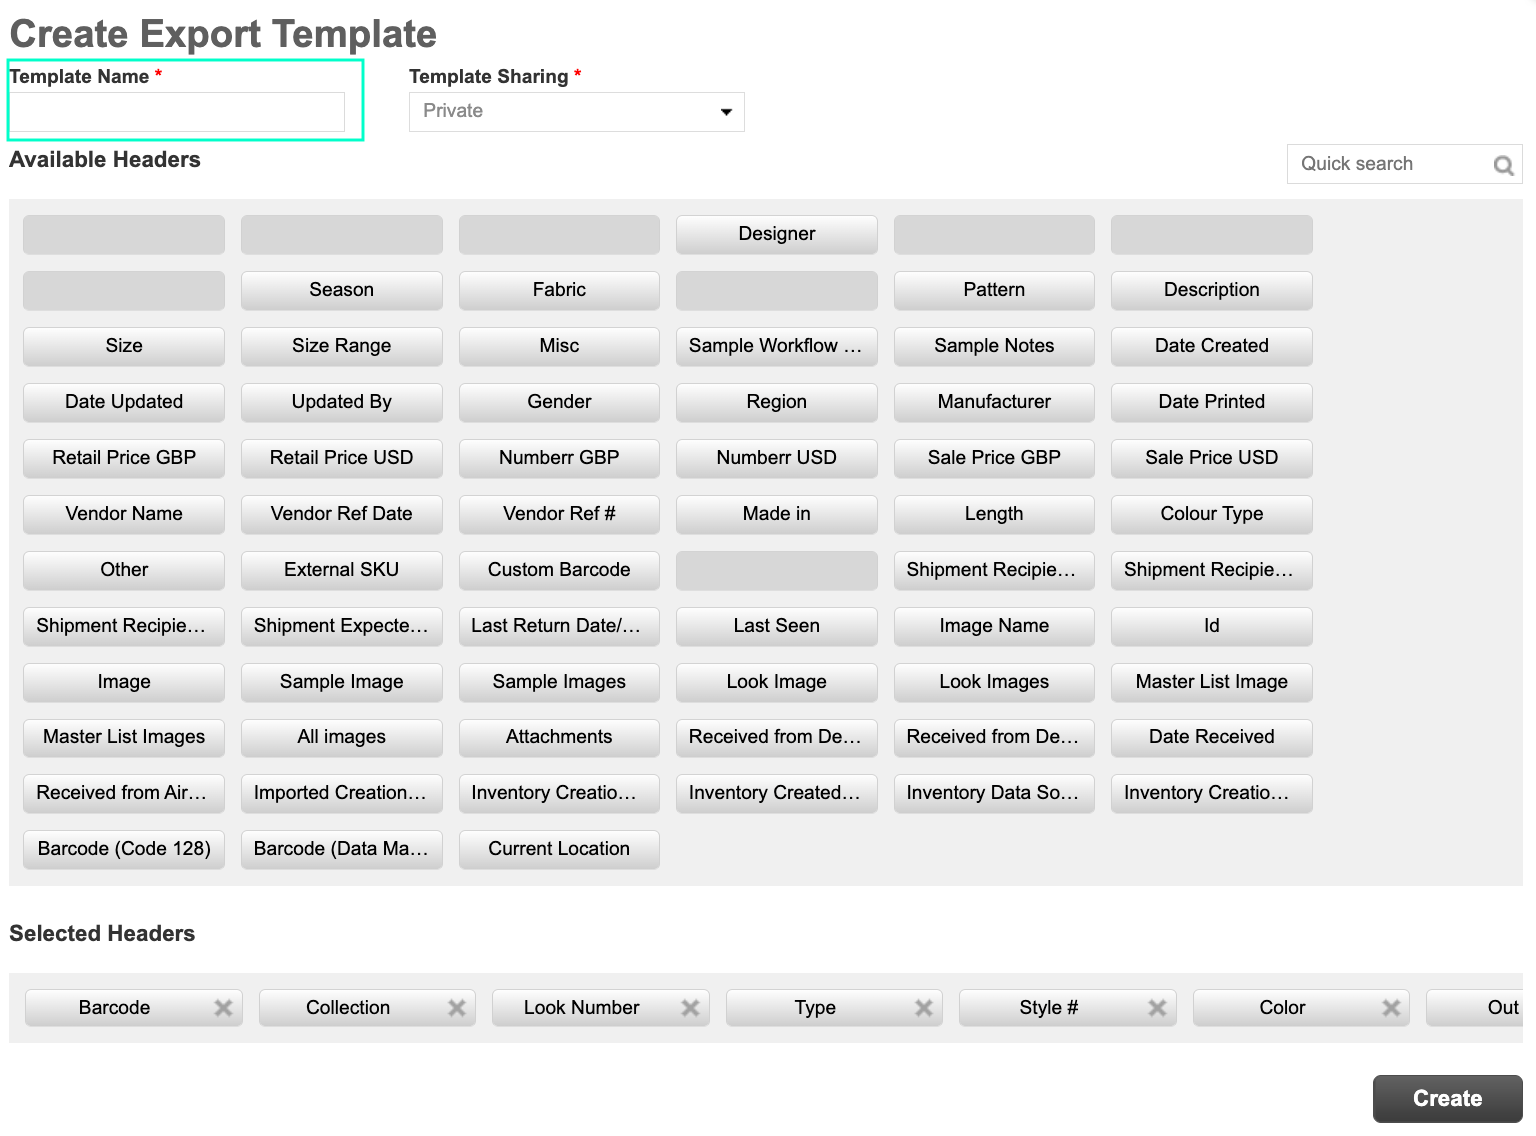
- NOTE: Please make sure to name your template or you will not be able to save it.
- NOTE: You can keep your template private or share with all users on your site.
- TIP: Try and keep the name generic if it's something your colleagues will be using too, such as "Weekly Inventory - UK" or "Image Template - UK".
- The Template works exactly the same as Layout Preferences. Select which information you want displayed by choosing from the "Available Headers" area and dragging and dropping to the "Selected Headers" area.
- Alternatively you can double click on a field for it to be added to the end of your Selected Headers.
-
To remove a field click the X on the right hand side.

- Once you're happy with your template click "Create".
- Remember to Select your template in your drop down menu when you've navigated back to your Samples Manager.
- NOTE: You can amend your template at any time by clicking "Edit".
