- You can find the Audit page in the main navigation
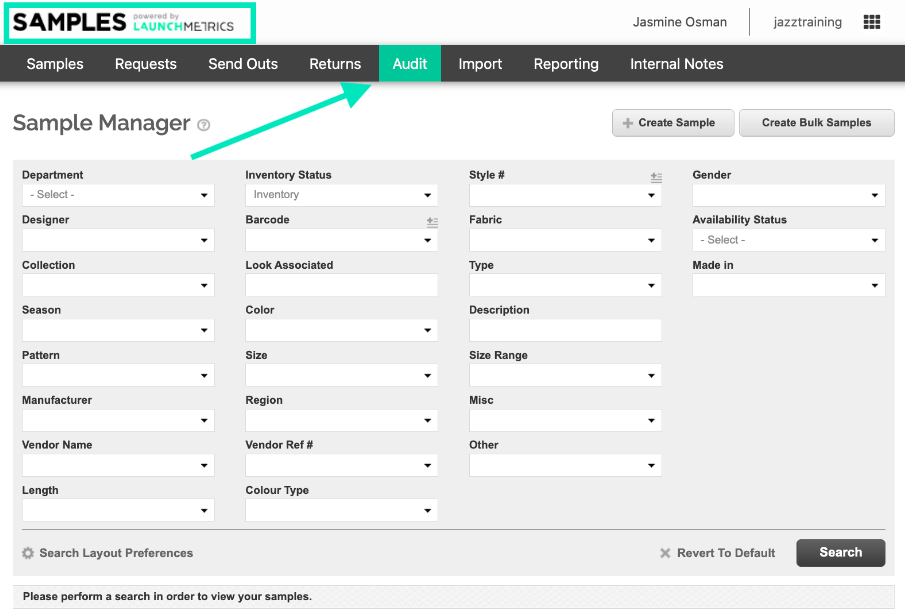
- To get started, click "+Create New Audit" on the top left hand side
- Here, you'll need to define the inventory subset you want to perform an audit on.
Fill in the required fields, which will be denoted by a red asterisk (*) and start session.
Name: This will be the name of the audit i.e. End of Season Audit.
Department: This is the department that you're currently auditing.
Current Location: The samples' physical location
NOTE: Use Designer, Season or Collection fields to define the stock you should have in your inventory stock. For example, if you know that your closet should only include items from the current season, specify it here so the audit can call out items left behind from a previous season.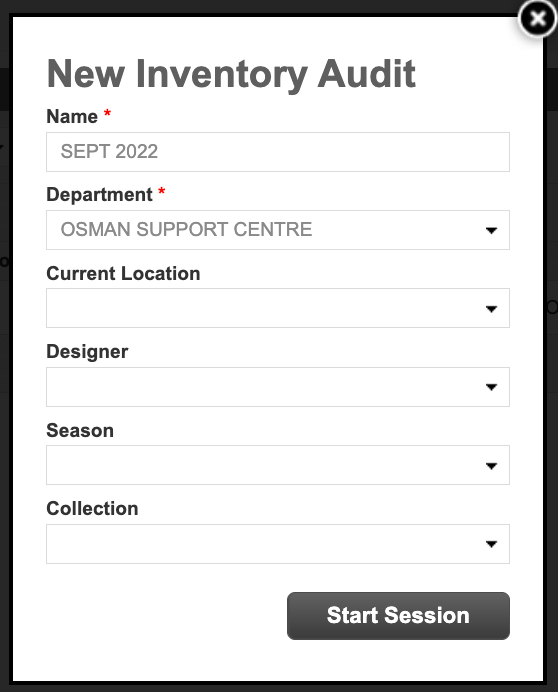
-
Scan all the items that you have on-hand in the inventory that you've defined in your audit.
You can do this directly in the Audit page in your web browser, or you can scan samples in the Samples iOS mobile app.
To scan in your browser, simply click into the Barcode field and scan or type the barcode number.
To scan via the mobile app, tap into the Audit page under "More" in the navigation, select the audit that you want to scan to, and scan using your camera or your handheld Zebra 8500 scanner.
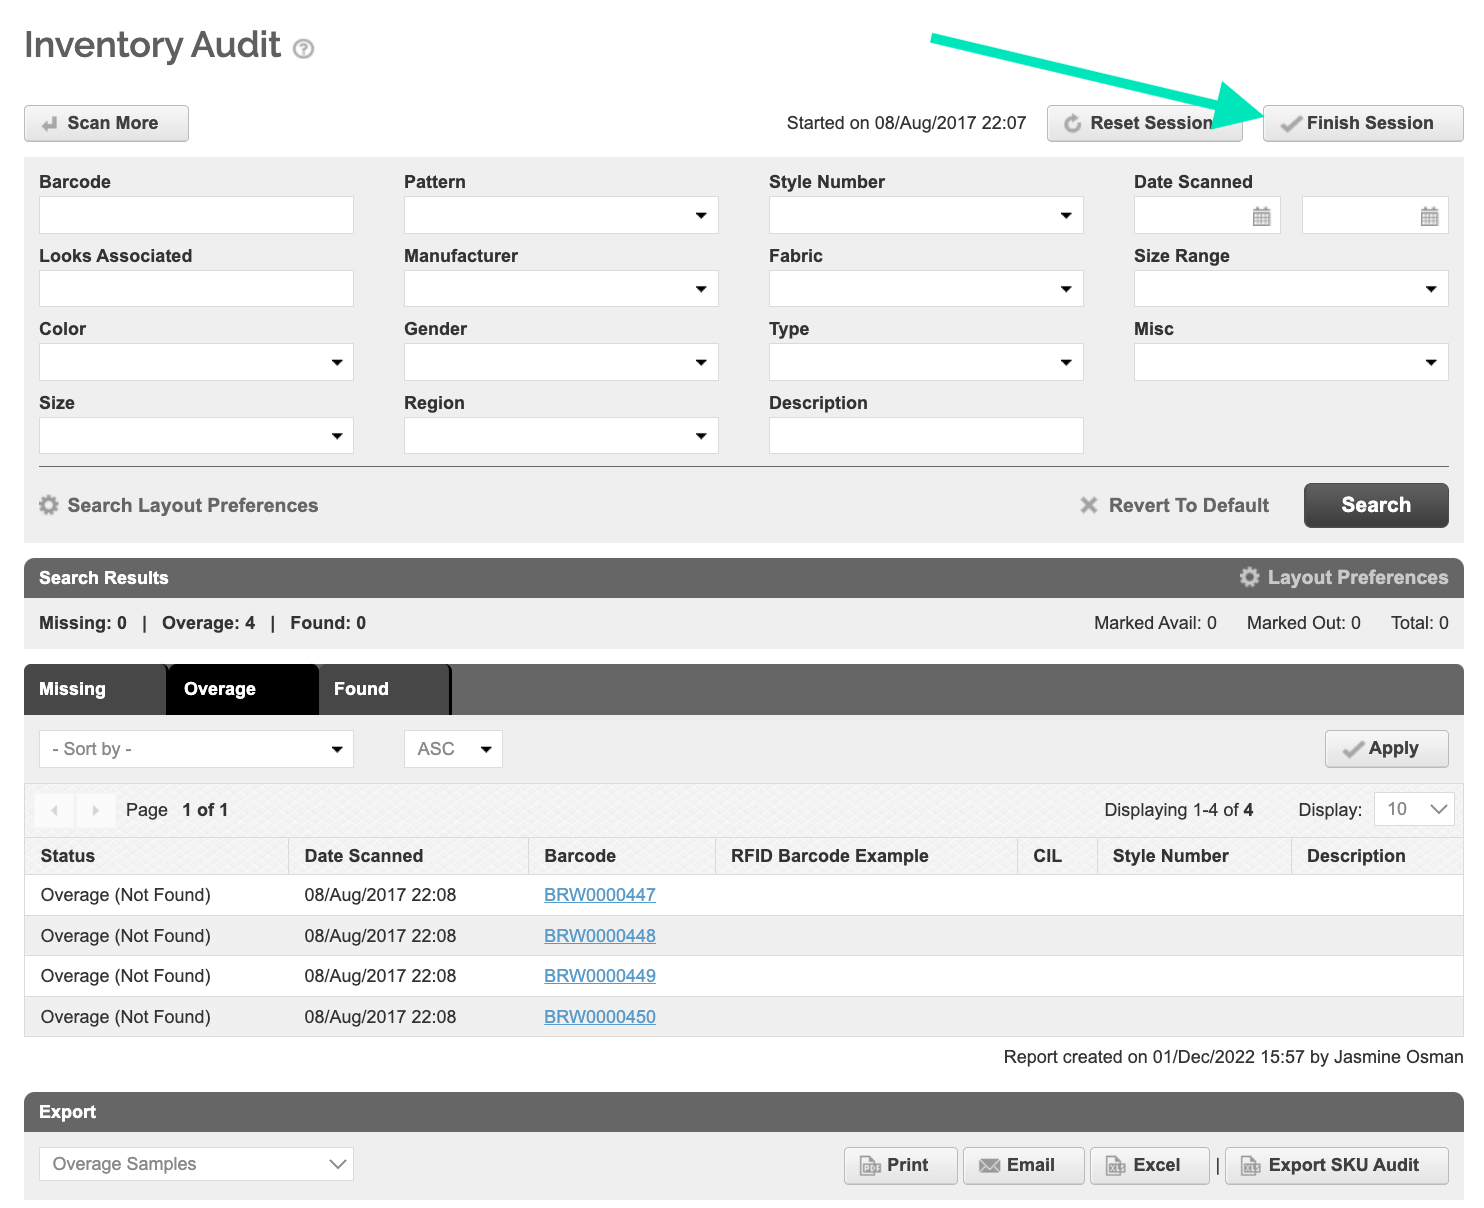
- As you scan, the Scanned Samples log will show the items that have been scanned along with the Sample Status. The sample status is an assessment, calculated live, based on your system inventory.
You can choose to reset your session — This will clear any scanned samples and allow you to start the session again.
TIP: Choose your Layout Preferences to display the fields you wish to see in this page.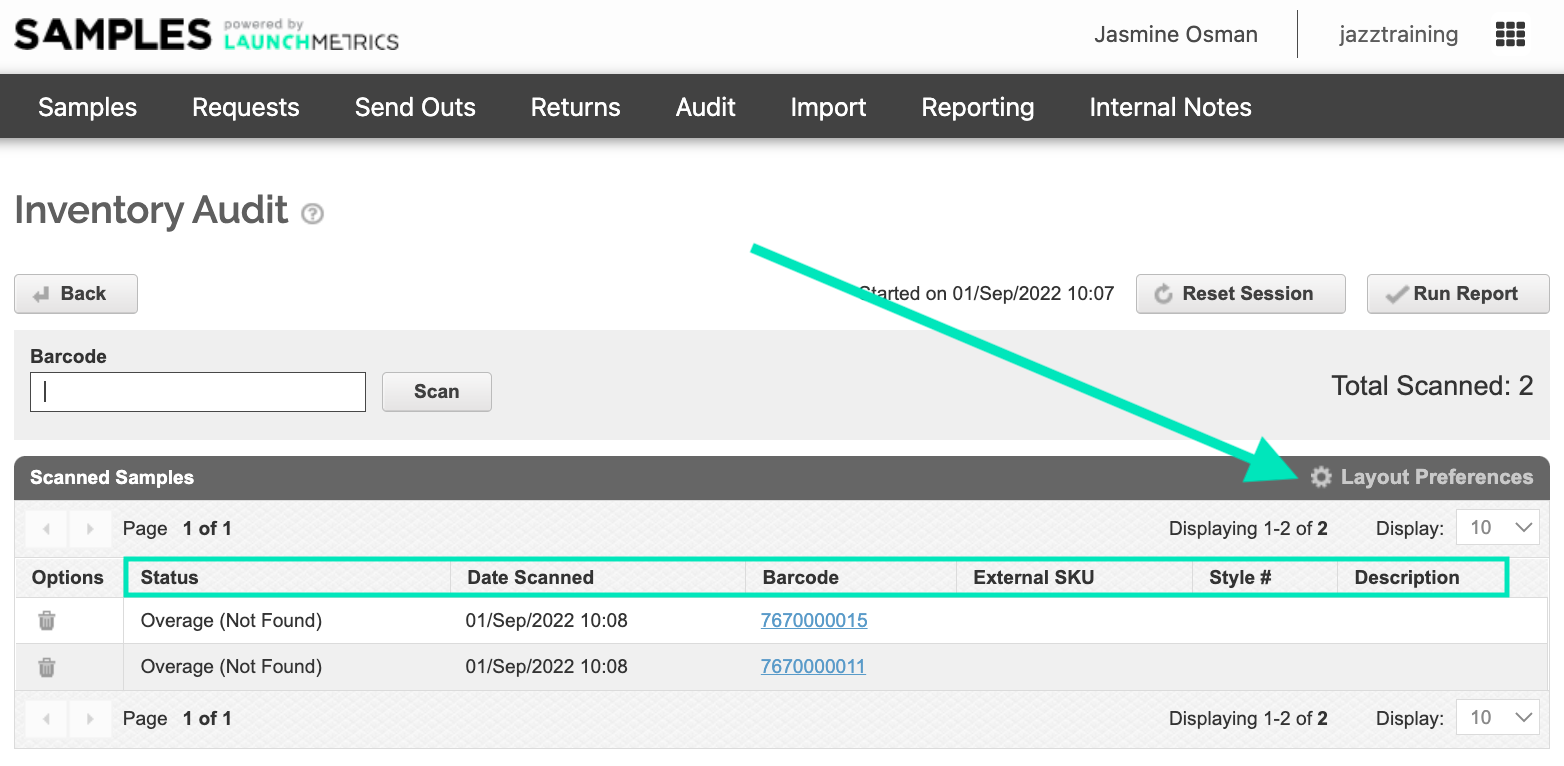
-
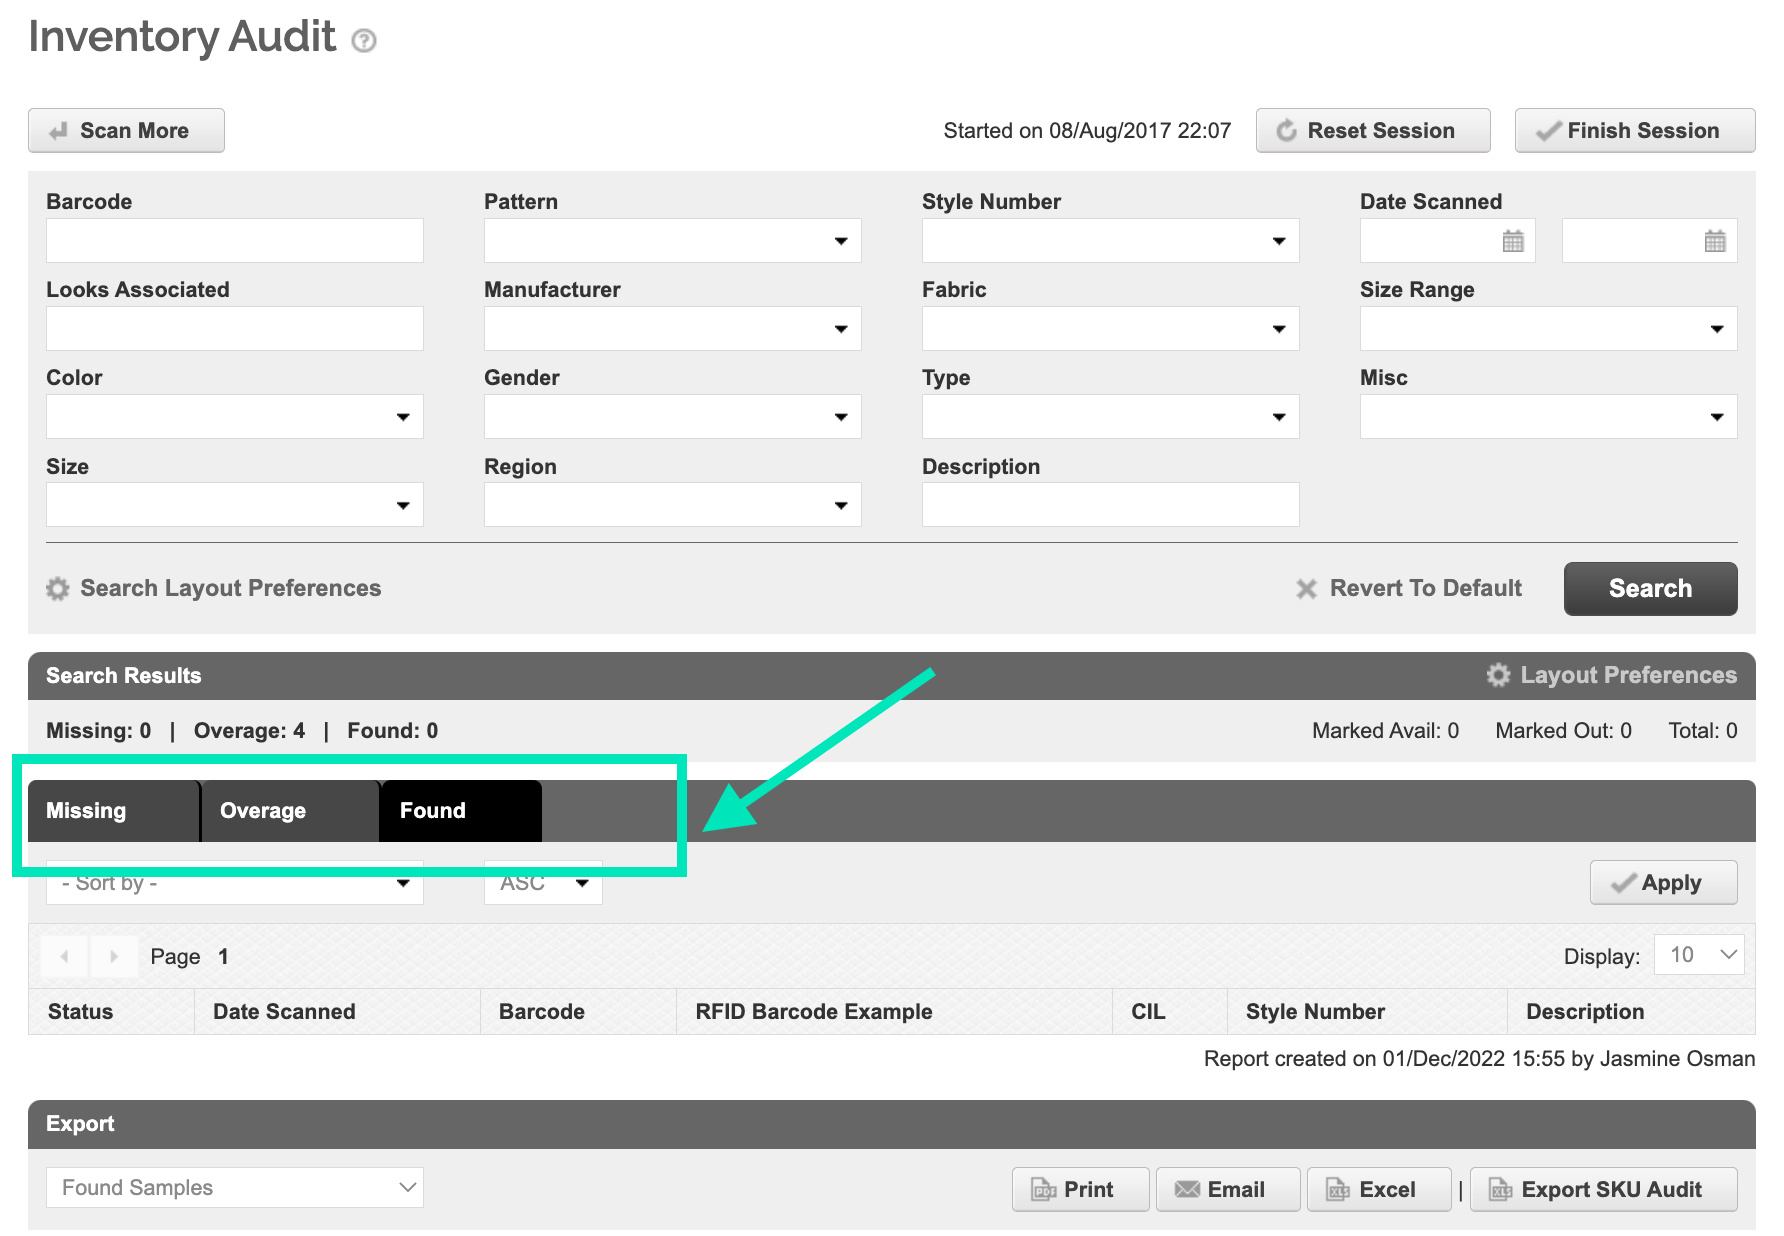
Run your report — Once you are done scanning your samples, you can click Run Report to get the full details of the audit. The system will assess all the items scanned & not scanned and compare it with what is supposed to be on-hand by looking at the live inventory & current send outs.
You will see three tabs in your report:
Missing - Items that should be available but were not scanned and accounted for.
Overage - Items that shouldn’t be available on hand. This shows items that have been physically scanned items but are still marked as out on loan indicating that someone on the team did not scan them back when they were first returned. It will also display unknown barcodes.
Found - Items that where correctly scanned and found on-hand, or items that were not scanned, and found on an open send out.
- Once you have scanned all samples, choose Finish Session to end the audit.
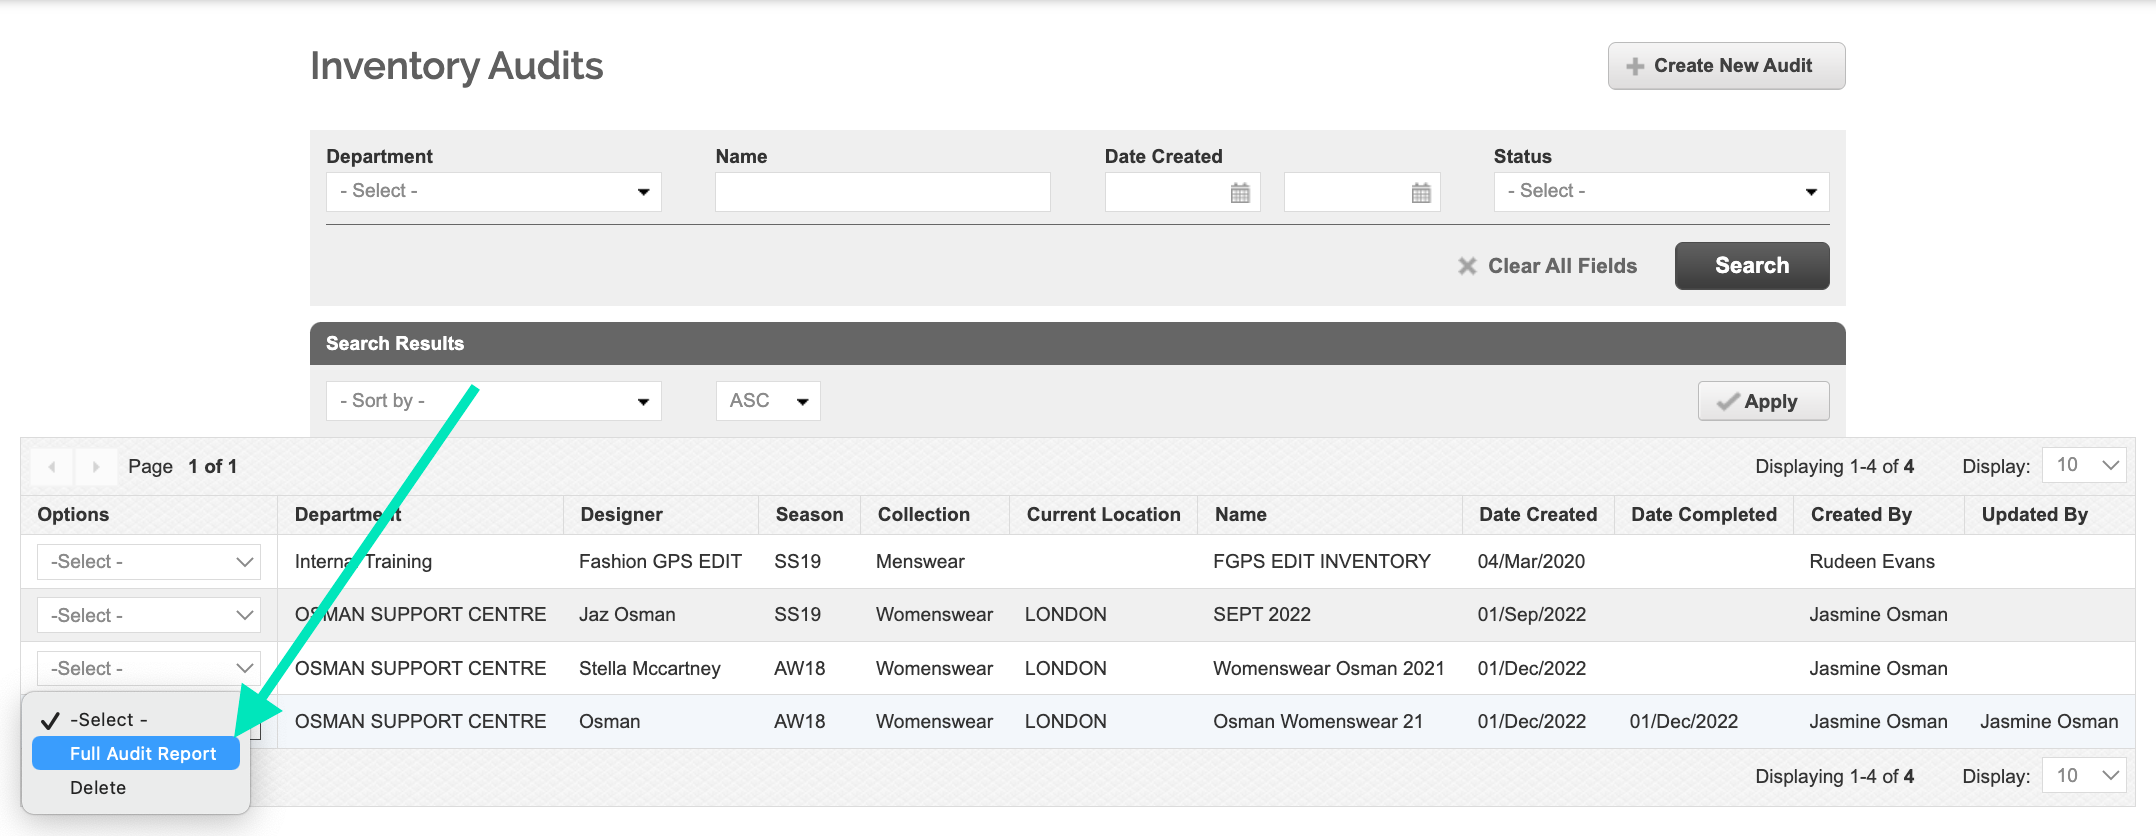
Once you Finish Session, this freezes the audit and you will not be able to edit or scan more samples, however you can view and see Full Audit Report, which will export the details into excel.