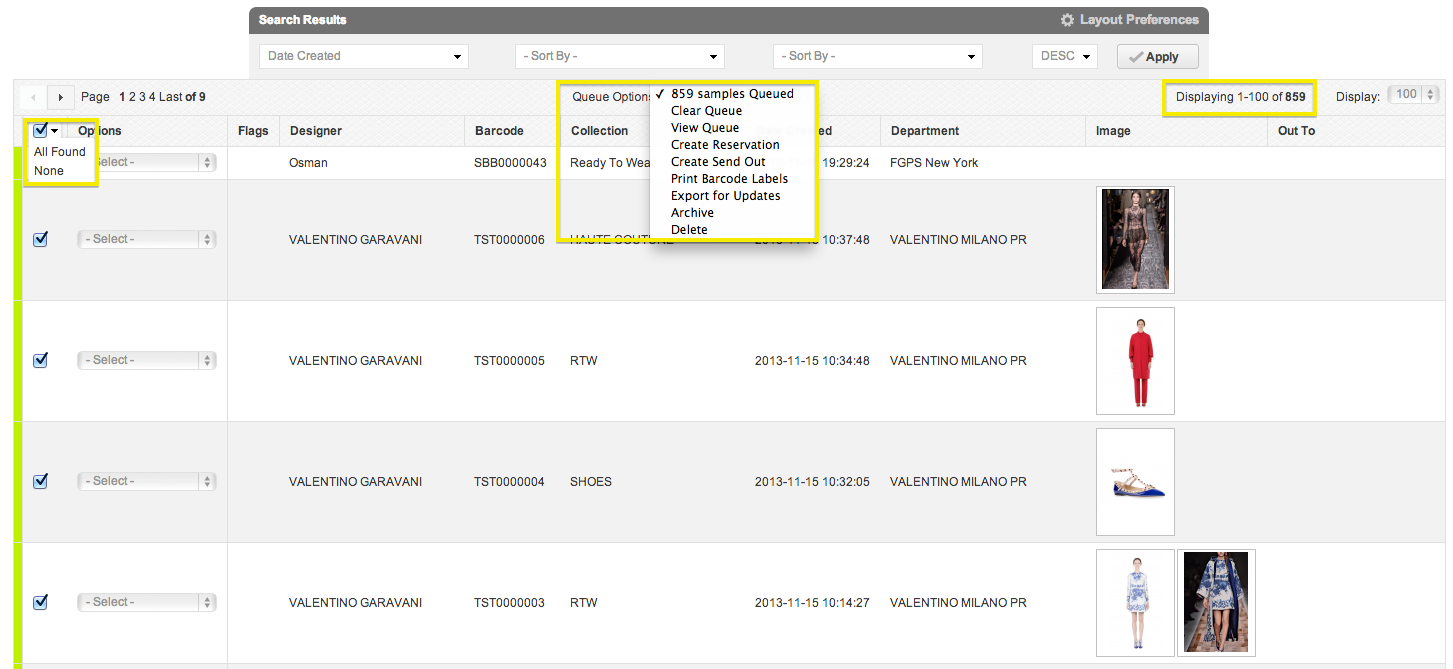
Queuing Samples
Create a queue in order to perform an action on one or more samples
Check off the small box to the left of each of the samples you wish to queue.
The number of items queued will be visible directly beneath the “Search Results” grey bar (e.g. if you have checked off two items it will say “2 Samples Queued”).

- To queue all your samples from a specific search, select the first check box at the top of the search results. This will queue all samples found.
Queue Options
Clear Queue: This option removes all samples from your queue. It is important to clear your queue if you decide not to take any further action, since samples remain in your queue until an action is taken (which could lead to mistakes on future lists).
View Queue: This option generates a pop-up screen with details of all samples in your queue. You can manage the layout preferences of this pop-up and remove unwanted samples from your queue.
Create Reservation: This option will take you to the Send Out tab and automatically select “Reservation” from the “Loan Type” drop- down menu (please see the Send Outs section for a more in-depth explanation of this option).
Create Send Out: This option will take you to the Send Out tab and automatically select “Loan” from the “Loan Type” drop-down menu (please see the Send Outs section for a more in-depth explanation of this option).
Print Barcode Labels: This option will print the barcode labels of all samples in your queue.
Archive: This option will send all samples in your queue to your archived inventory.
