To Create your new Looks, you'll need to start by adding in your Look numbers.
Creating Look Numbers
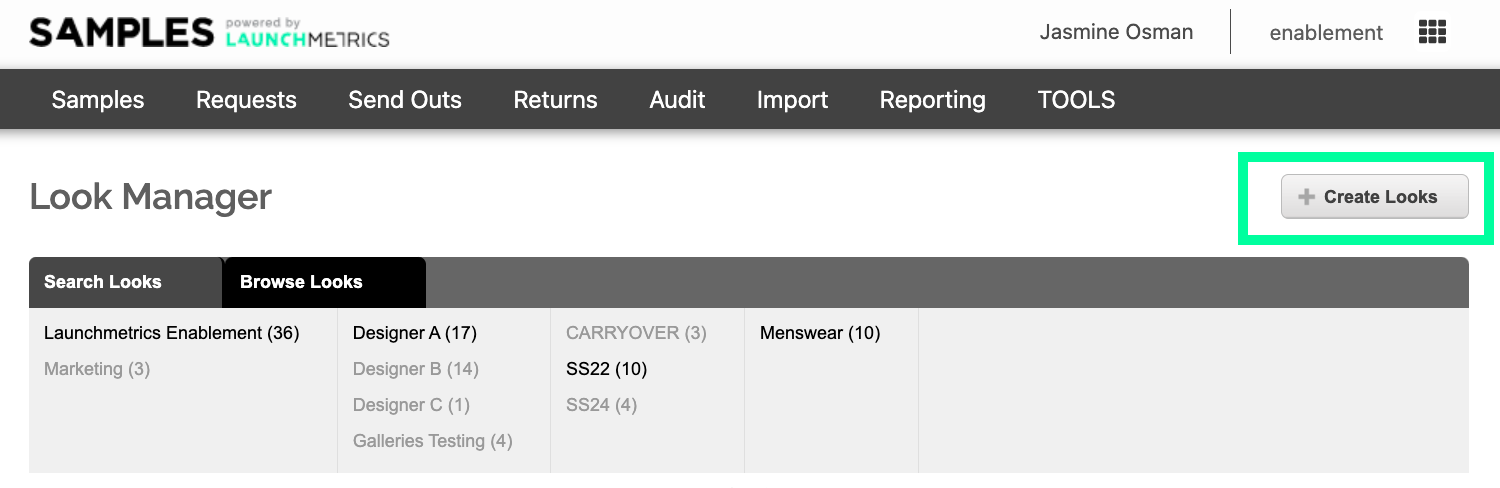
- Navigate to "Look Manager" which is located under your Samples tab.
- Click "Create Looks".
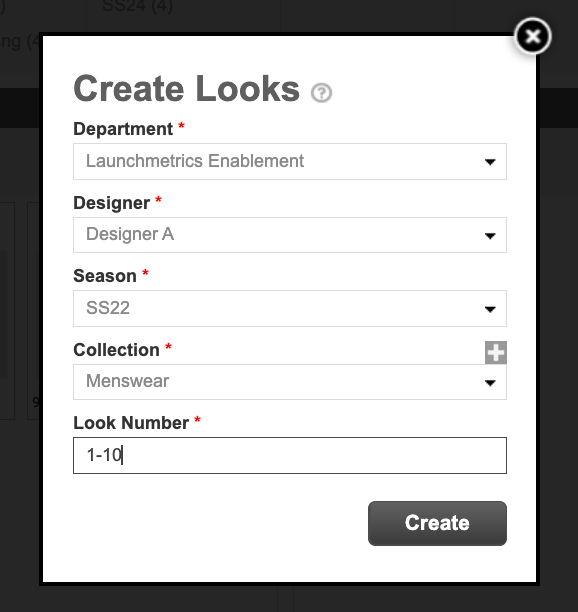
- Choose the Department, Designer, Season, and Collection you want to create Looks for. Under "Looks", type in the number of the Look you want to create, i.e. "1", "5" or a range "2-5", “1-10”.
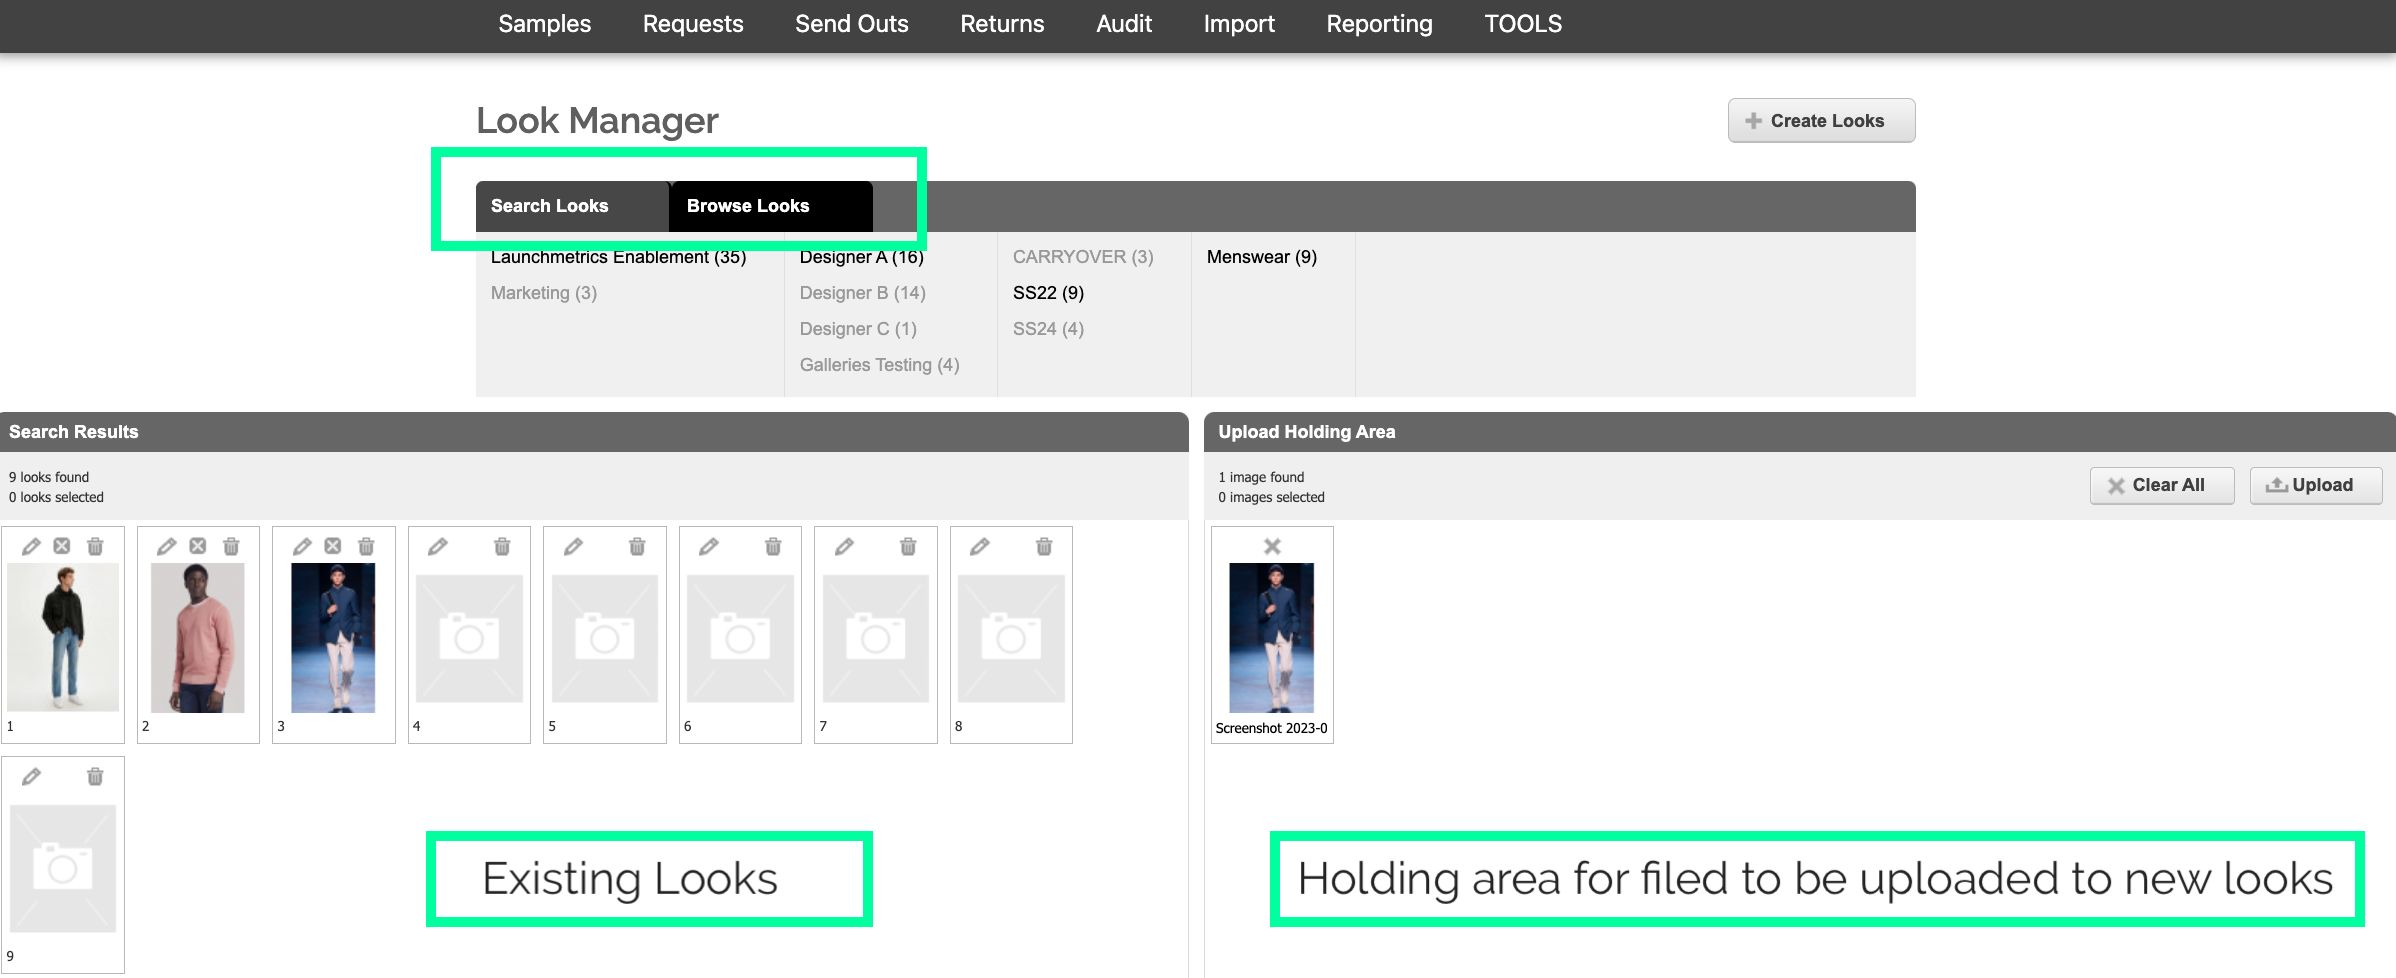
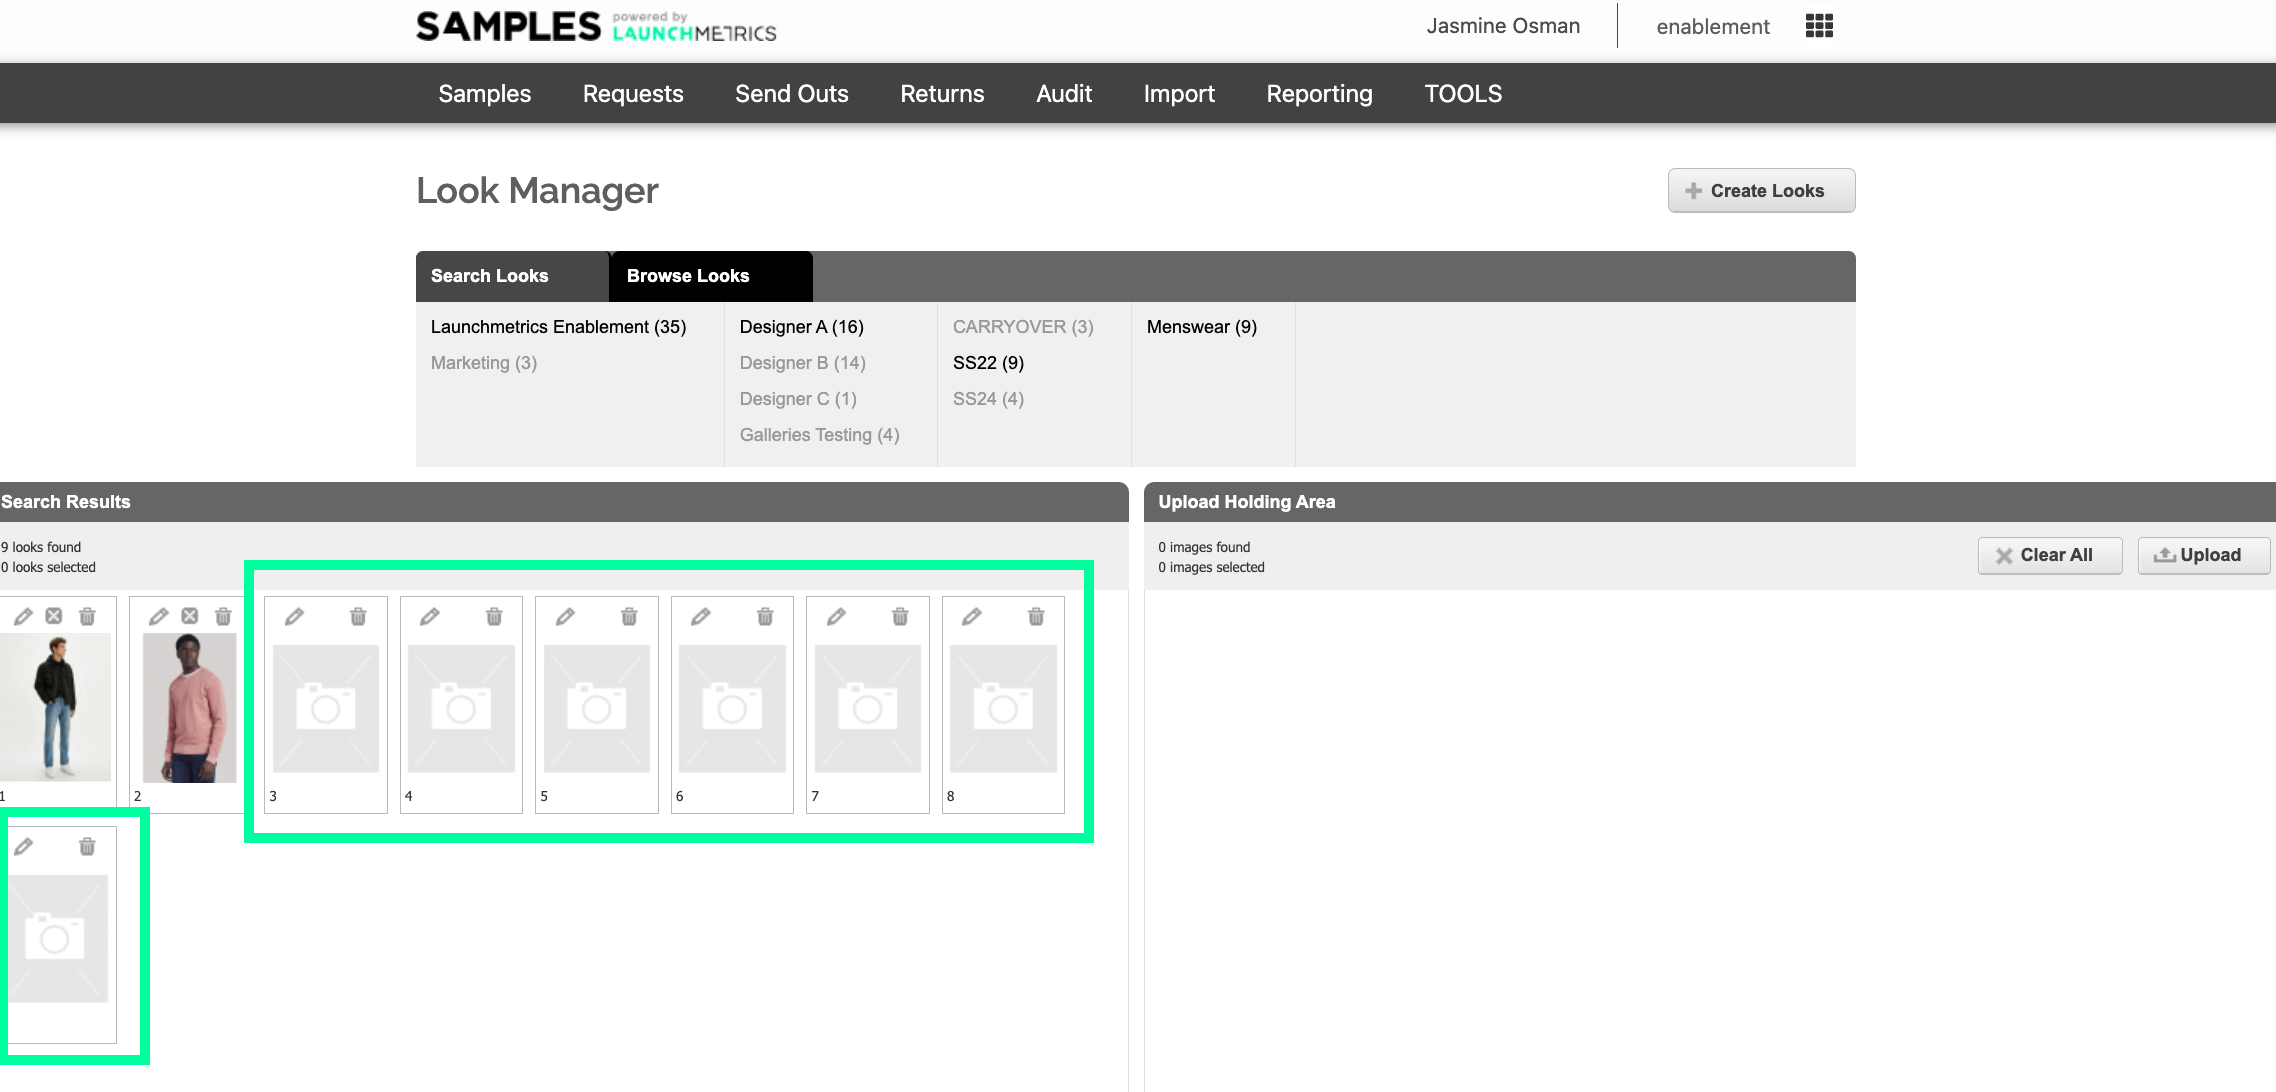
The new Looks Numbers are displayed in the Search results section of the Look Manager.
The next step is to add images to these Looks from your computer.
Adding Look Images
- Click the “Upload” button on the right hand side.
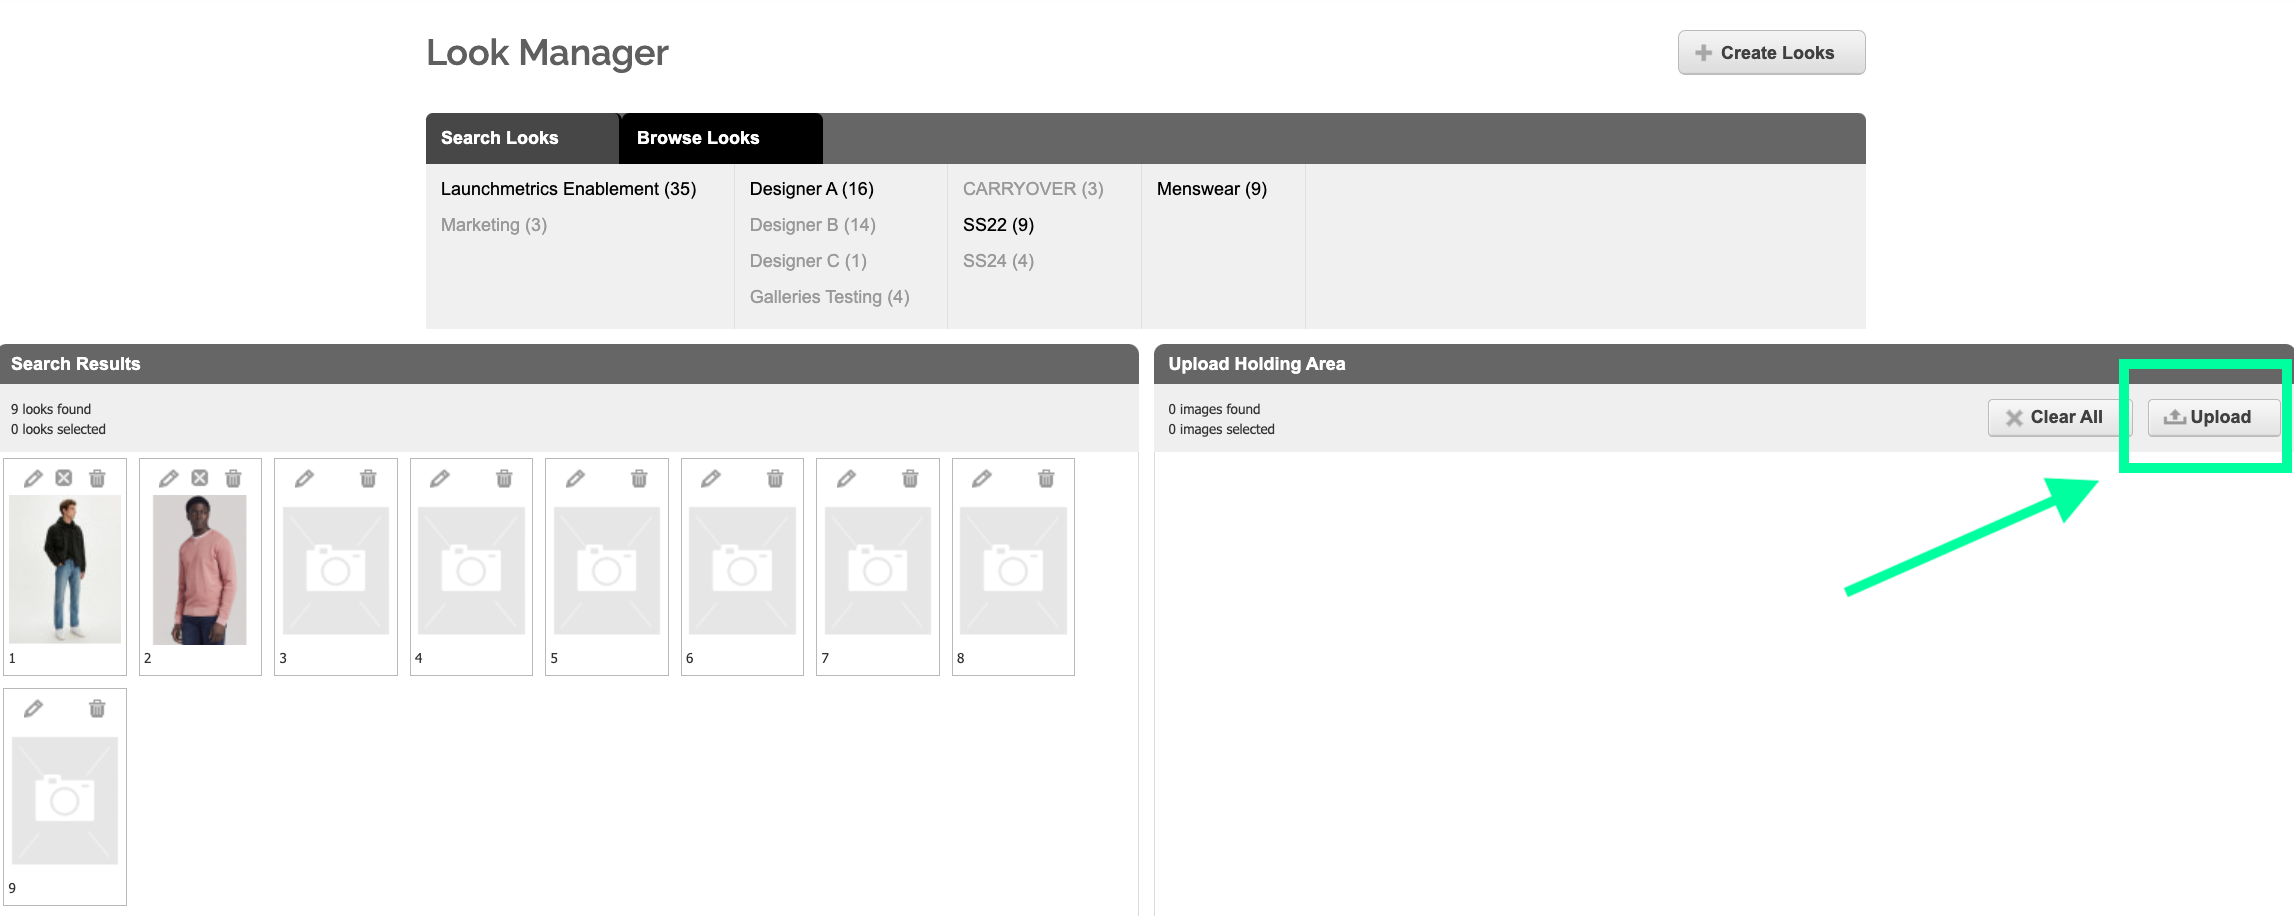
- Drag and drop your images from your computer into the new upload screen.
Note that In order for this functionality to work, make sure Java is up to date and that you are working on Firefox, Internet Explorer, or Safari. The multiple image uploader is not compatible with Chrome.
- Once dragged your images into the Upload Holding Area, drag the image from the Upload Holding Area on top of the corresponding look in the Search Results section on the left.
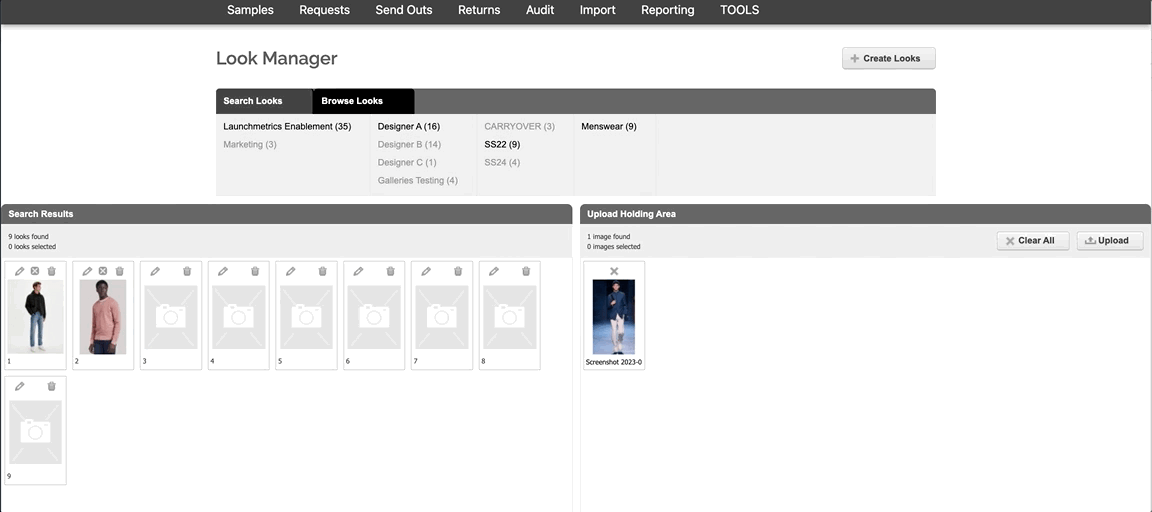
If you have a New look and haven't create the look number, you can drag the image to the front of the Search Results area to create a new Look. This will create the next consecutive Look. In the example above, this would create Look #10.
Editing Existing Looks
Once you have paired an image with a Look #, all Looks will appear under “Search Results” on the bottom left of the page, with the Look # appearing below each image.
- Click on the small icons above each individual look image to edit the Look, remove the Look image, or delete the Look (as with most places in the system, hovering over each icon will tell you its function).
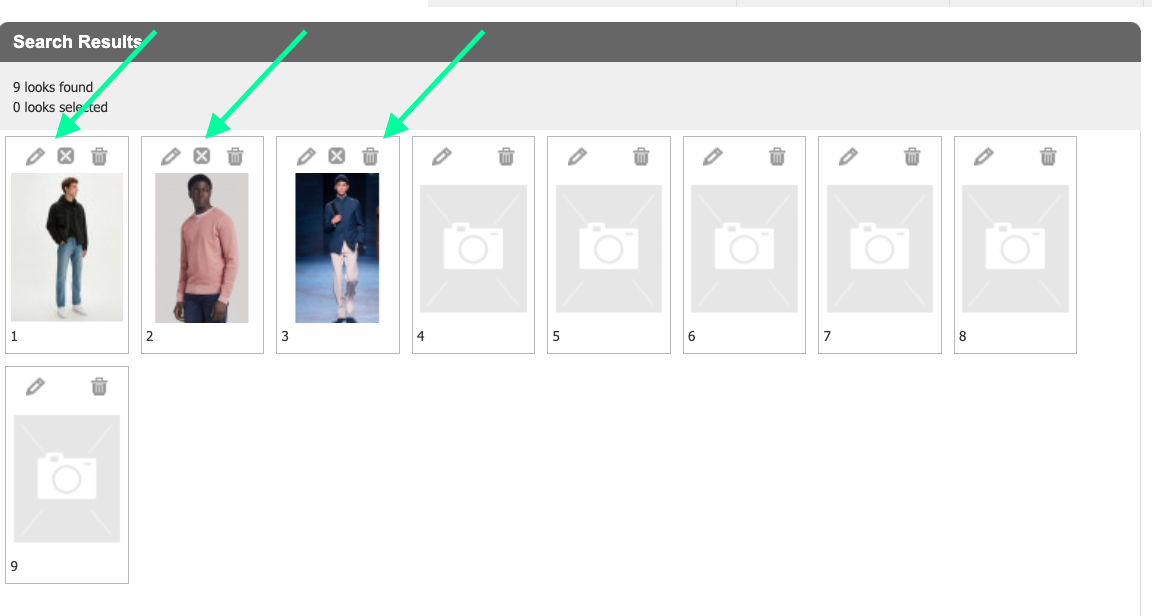

You can multiple select your Look images by holding the Shift button on your keyboard and selecting the images.
Click “Clear Selected Images” to remove the look images associated with the looks you have selected.
Click “Delete Selected” to delete the entire look(s) you have selected (i.e. the images and the look numbers).
Viewing your Looks
You can view your looks by using the Search and Browse Tabs
- Search Looks: This option is best if you know specific details of the Designer, Season, and Collection you are searching for. Typing in these details will bring up all Looks associated with that Collection under the “Search Results” section of the page.
- Browse Looks: This option is best if you do not know the specific details of look you are searching for. This search method uses a tree-view format where you ca select a Designer, from here you will be able to select from the available seasons and finally available collections.