
Contacts Custom Field editor allows you to manage custom fields in Contacts.
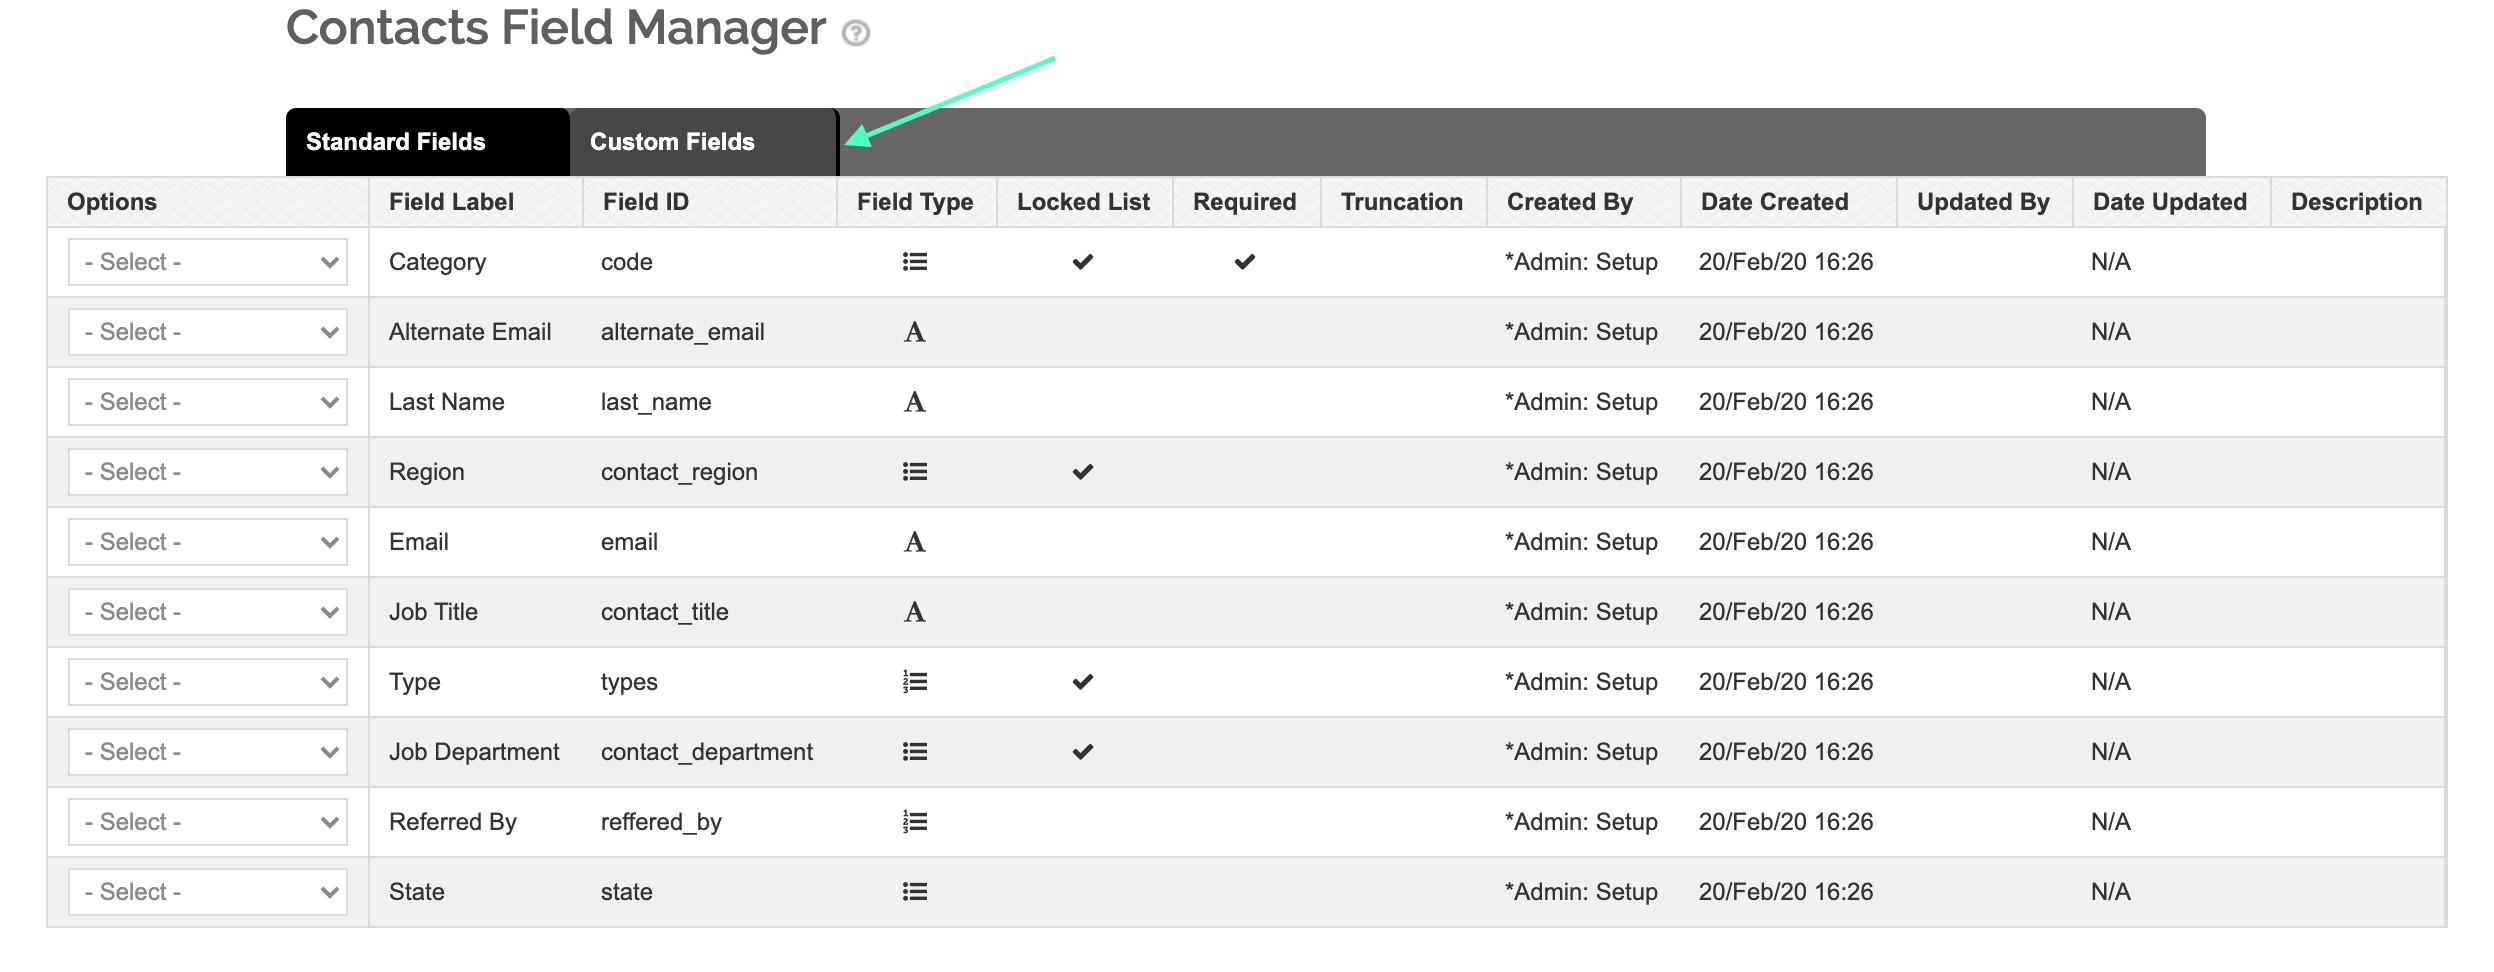
- Find the Contacts Field Manager page in User menu on the top right corner of the site, a drop down list will open and you will need to select " Contact Field Settings". Note that there is a user privilege required in order to access this page.
- Then click on the Custom Fields tab
- To add a new custom field, click on "Create Custom Field" in the upper right corner of the page.

- Define the name of your field and the field type
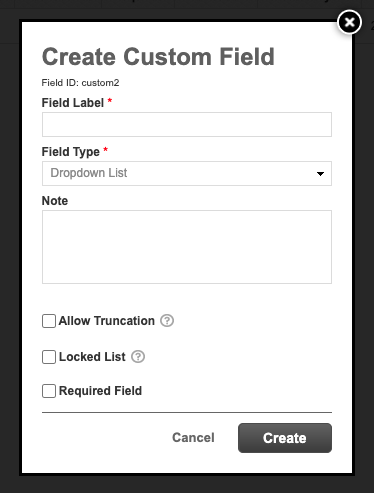
Field Types:- Dropdown List: A dropdown list will appear, allowing you to select a pre created option
- Date Picker: Select a date range using a calendar.
- Free Text: Allows you to type freely
- Dropdown Multi Select: Allows you to pick more than one option from a drop down list
- Configure any other desired settings and then click Create.
Other options available:- Allow Truncation:Upon import, allow field value truncation if length exceed 200 characters.
- Locked List: This is a feature that prevents new values to be created upon import. If this setting is turned on, all values being imported must be pre-created in order for the import to be successful. This is useful when importing using excels. We recommend turning this off if using data integrations for import processes.
- Required Field: Select this is you would like this field to become mandatory.