
Configuring & Editing Newsletters
Learn to configure and edit daily or weekly newsletters for your focuses
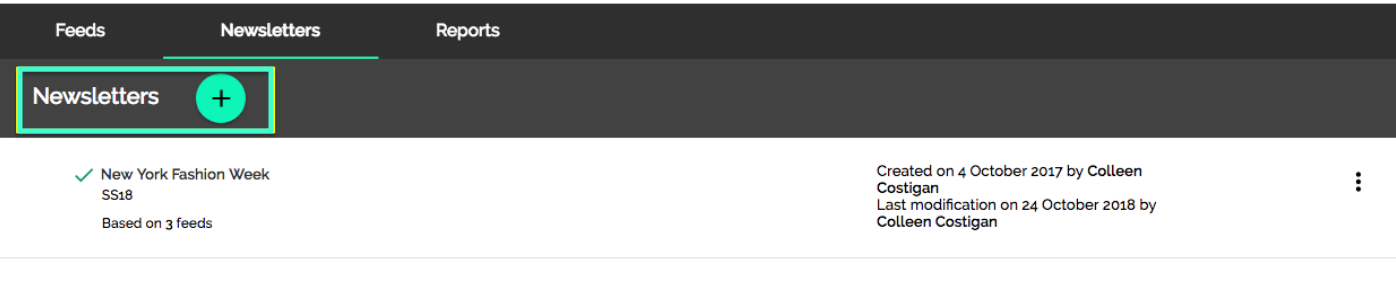
Navigate to the Newsletter tab and click on the "+" icon next to Newsletter to create your newsletter. This is where all previous newsletters will be found. Use the 3 vertical dots button to edit, remove, or disable any existing newsletters. Disabling a newsletter, will mark a newsletter as deactivated and it will not be sent out until re-activated.
Sections of The Newsletter
Setup
Status
Design Type
-
Brand
Please note for Online results to be included in your report you'll need to select the Brand you're working on to generate your Online Branded MIV, without selecting the Brand you will not receive Online content.
Delivery Mode
Focuses & Feeds
Preferences
Newsletter Logo
Frequency
Time
Emailing
Recipients
Saving
Please Note: Fields with an * are required.
Setup
Name - Generally just the topic of the newsletter, for example "New York Fashion Week".
Description - This can be a concise or detailed explanation of the newsletter topic, for example "SS18".
Status
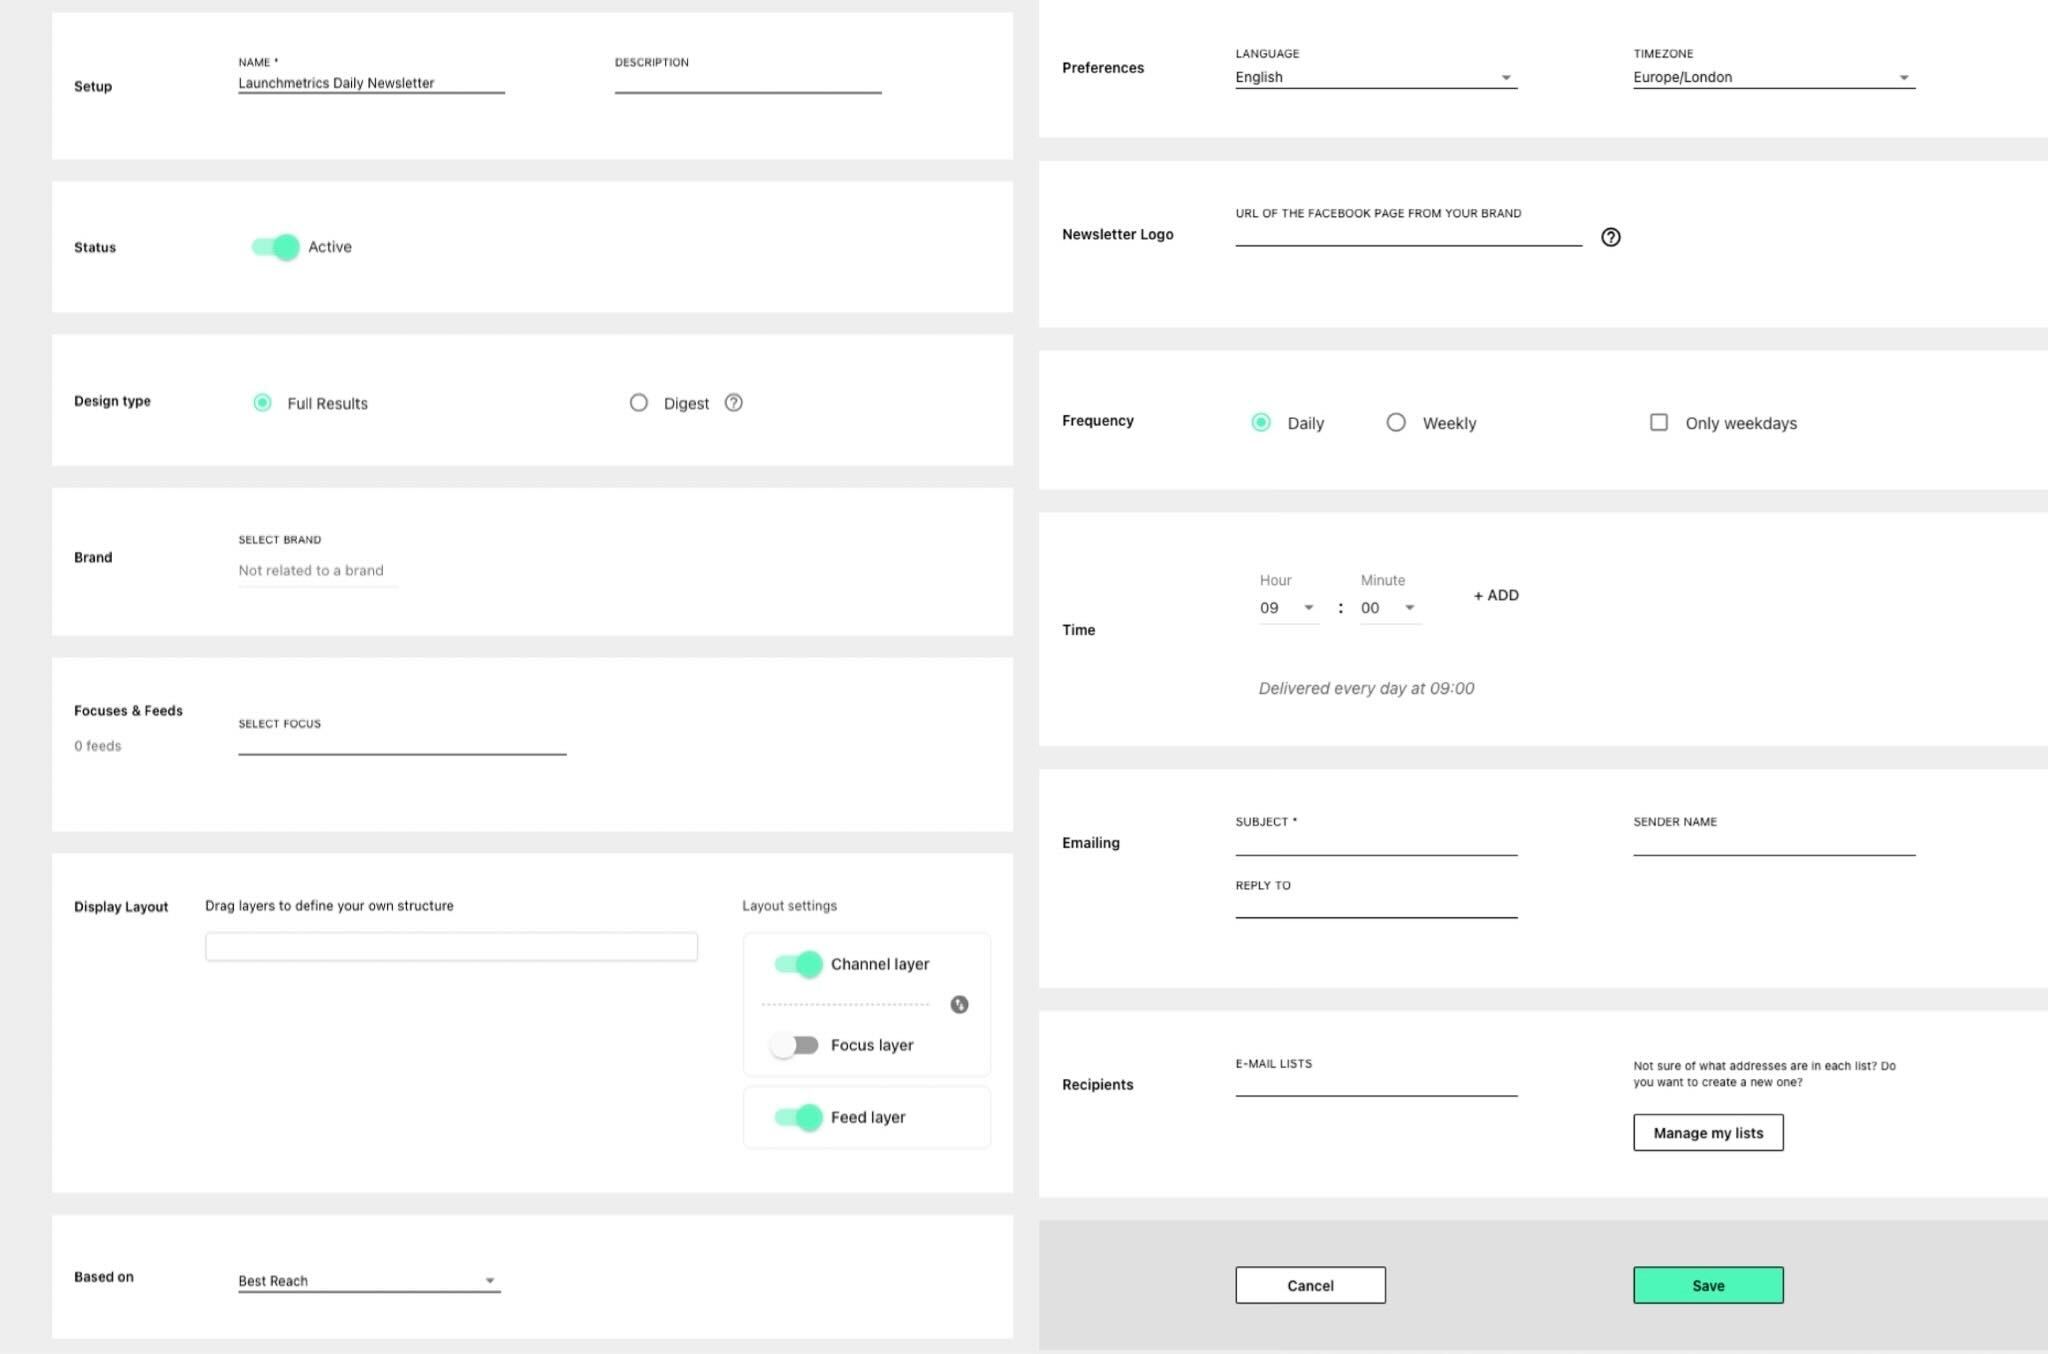
Status - Toggle the newsletter status between "Active" or "Inactive". If a newsletter is active, daily or weekly newsletter will be sent.
Design Type
-
Digest - Newsletter displays a selection of the best placements you've received during the defined period. If selected, Delivery Mode options will be available.
-
Supervised mode - The newsletter will always be first sent to the editor. The editor at this point will then have the ability to make any edits to the content prior to being sent to all recipients. Email of Editor will be the user who "supervises" the Newsletter and approves for the Newsletter to be sent out to list of emails.
To learn more about editing your newsletter in Supervised mode, please scroll down to the end of this support article.
Direct - The newsletter will be sent straight away to recipients without having the editor mark the newsletter as perfect.
-
Full Results - All placements results will be shown in the Newsletter. For Print media, both the cover page and placement page will be shown.
Focuses & Feeds
Select a Focus to Add - Use the drop down to select the Focus which the newsletters will base their mentions on.
Preferences
Language - Use the drop down to select the language which the Newsletter will be in.
Timezone - Use the drop down to select the Time Zone of when the Newsletter will be sent.
Newsletter Logo
URL of your brand Facebook page - Insert your brand's Facebook URL to use the brand's profile picture as the Newsletter logo.
Frequency
-
Select the newsletter to be sent either Daily or once Weekly.
Day - If Weekly has been selected from the sending time, use the drop down to select the specific date that the newsletter will be sent.

Emailing
Email Subject - The will be the subject line in the email of the newsletter that gets sent out.
Sender Name - This will be the send from name of the Newsletter email.
Reply To - This will be the email address who will receives any "Reply-to" emails from recipients of the Newsletter.
Email list - Type in the name of the previously created e-mail lists to select who the recipients of the newsletter should be. Learn more about managing e-mail lists below.
Recipient & Email List Management
To get started managing e-mail lists, click on the "Manage my lists" link shown above.

Add new list - Create a new list by first giving the name to the list. Type in the name and click "Add". Examples may include, "PR Managers" if you want to make an e-mail list of all the PR Managers at the brand which you would like your newsletters to be sent to. The number to the right of the e-mail list name shows the amount of e-mails that existing within that e-mail list.
List name - Use this search option to search for the lists which have been previously created. Names of existing lists will populate under this field. Use the pencil icon to edit the existing list or the "x" icon to delete the list.
To exit the "E-mail list management", click the "x" icon in the far top right corner of the page. This will redirect you back to the Newsletter configuration page.
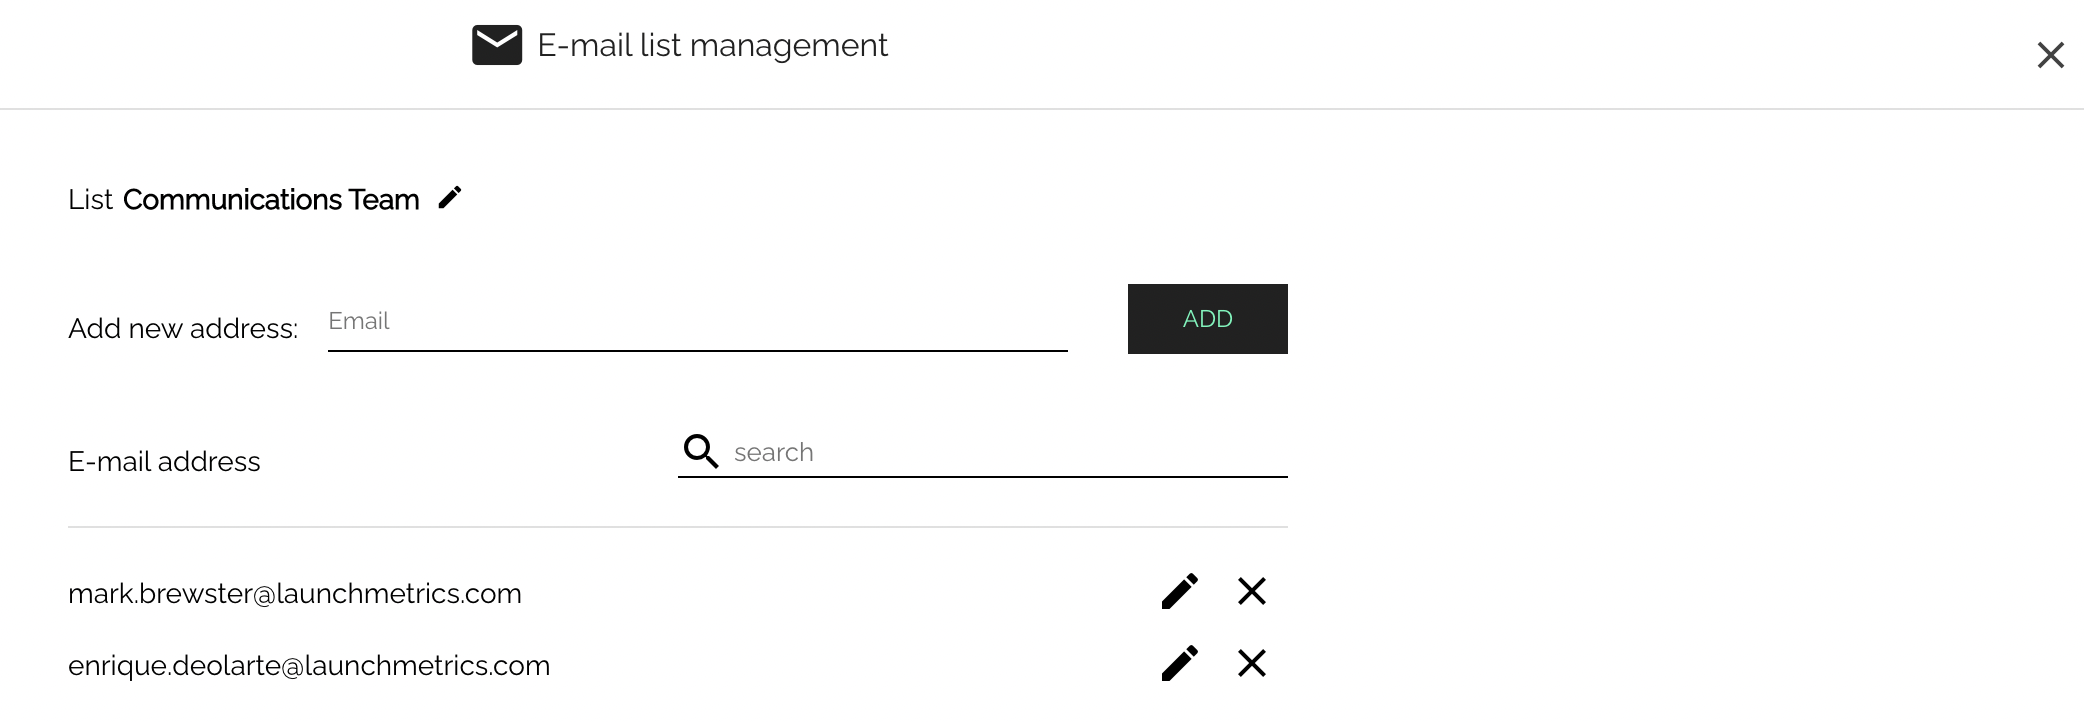
The image above shows what the screen would look like when clicking on the pencil icon next to the existing list "Communications Team", seen in the previous screenshot.
-
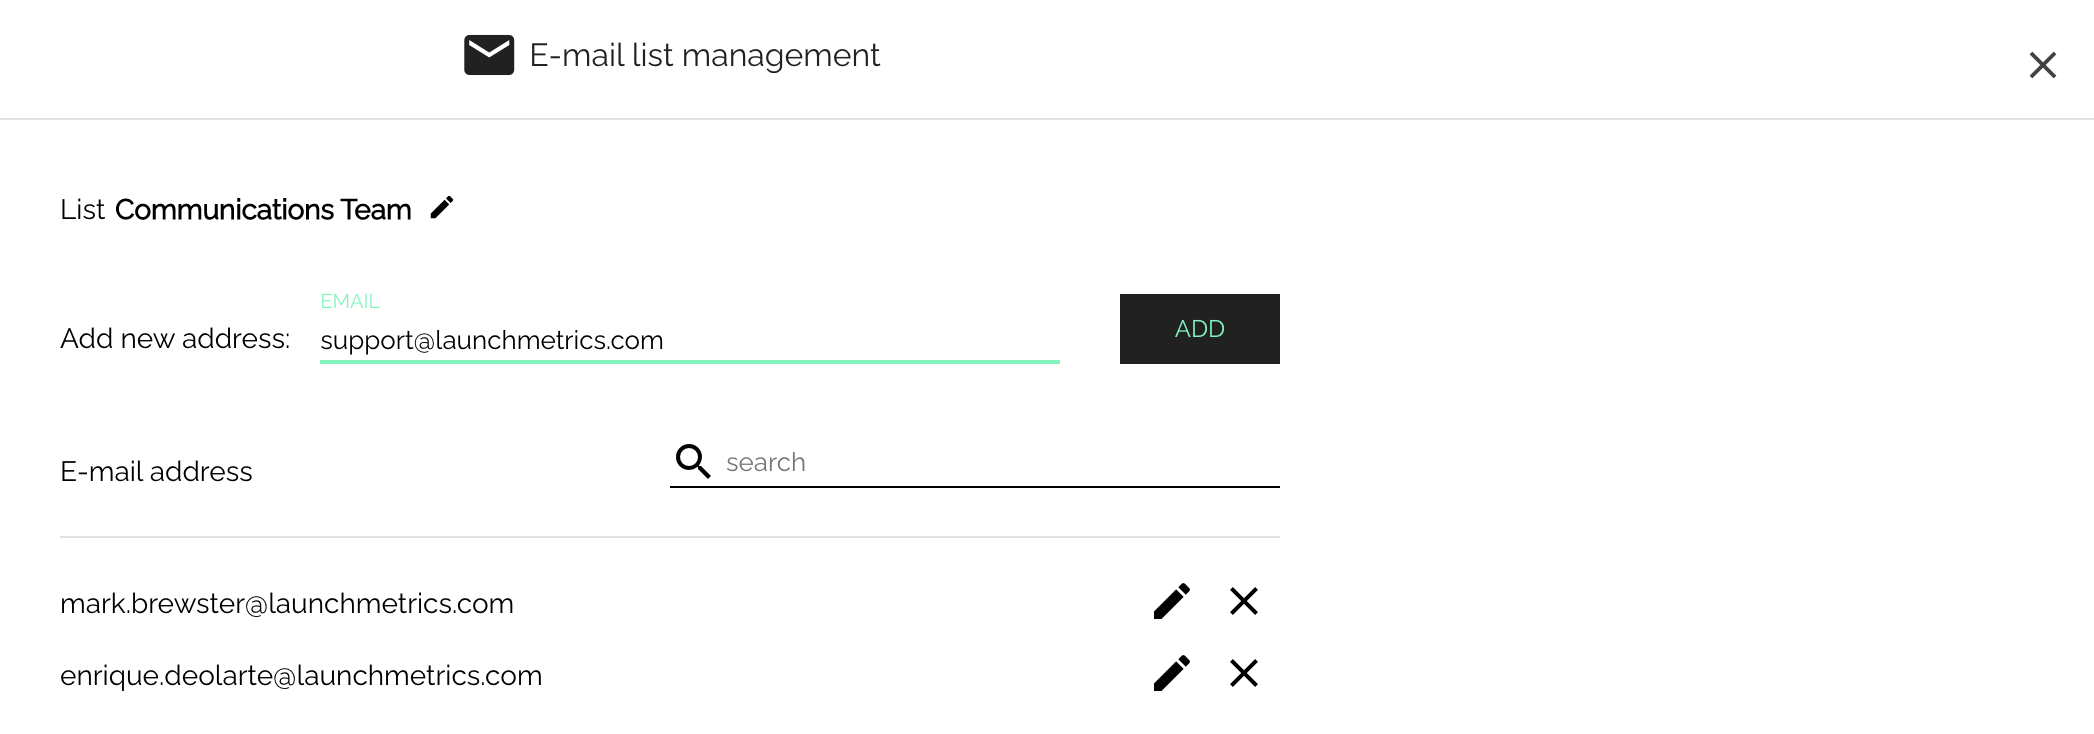
Add new address - Enter in the email address of the recipient whom you want to add to the list "Communications Team". The image below shows user adding "support@launchmetrics.com" as a new email address to this list.
Click the pencil icon to edit the email address or the "x" icon to remove the email address.
To return back to the full list of e-mails, scroll to the bottom of the page and select "Return To All Lists".
SAVING
Once all information has been completed within the Main Information, Frequency, and Emailing make sure to save your digest by clicking the Save icon at the bottom of the page or cancel if needed. Saving will change the "Save" icon from black to gray and will keep you on this page.
Editing Newsletters
If the Delivery Mode of your newsletter has been set to "Supervised", the "Email editor" will always first receive a copy of the newsletter before the other recipients from the select email lists. The "email editor" will receive this either daily or weekly depending on what has been selected from the "Sending Time".
-
When the newsletter has been received by the "Email editor" at the footer of the email, there will be a gray box asking "What now?". This is where the editor has the ability to click:
Digest is perfect - This selection will send the newsletter to all recipients immediately.
It needs to be edited - This selection will take the "email editor" back to the Newsletter editor.
-
If "It needs to be edited" has been selected, the user will be redirected to the Newsletter editor in Discover. From here you are able to edit the following prior to sending:
Remove mentions you don't want
Change pictures, texts, or the order of your mentions
Once the digest has been edited to your liking, select "DIGEST IS PERFECT NOW" for the email to be sent to your mailing list right away!