
🗓 released July 11th
For this release we've made several improvements to the printing experience that helps to better support both low volume day to day printing as well as large volume and specialized enterprise printing. So, whether you are printing to 2 printers simultaneously, printing in large batches or just re-affixing lost labels, these changes may help improve your workflow.
✅ Expanded number of Barcode Label Types
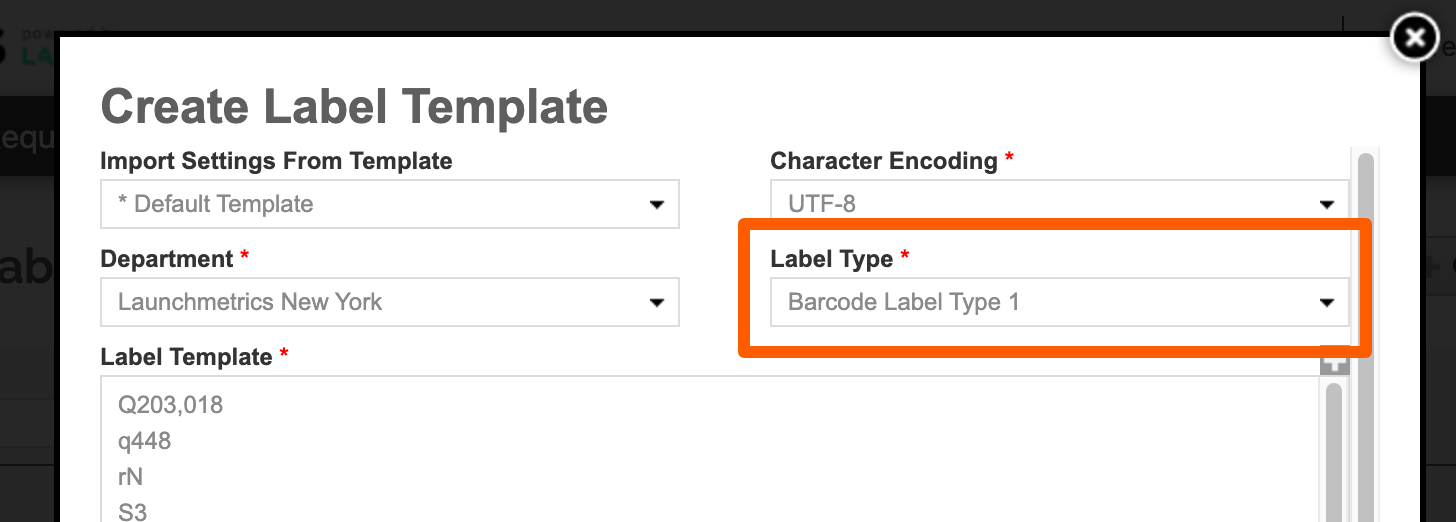
Previously there was only the possibility to have 2 Label Types named Regular & Circular. We have extended the number of Label types to 3 barcode labels and 1 RFID label. This, in effect, expands the number of templates that can be saved per department. Since each department can save 1 template per type, you can now save up to 4 templates per department (including an RFID label).
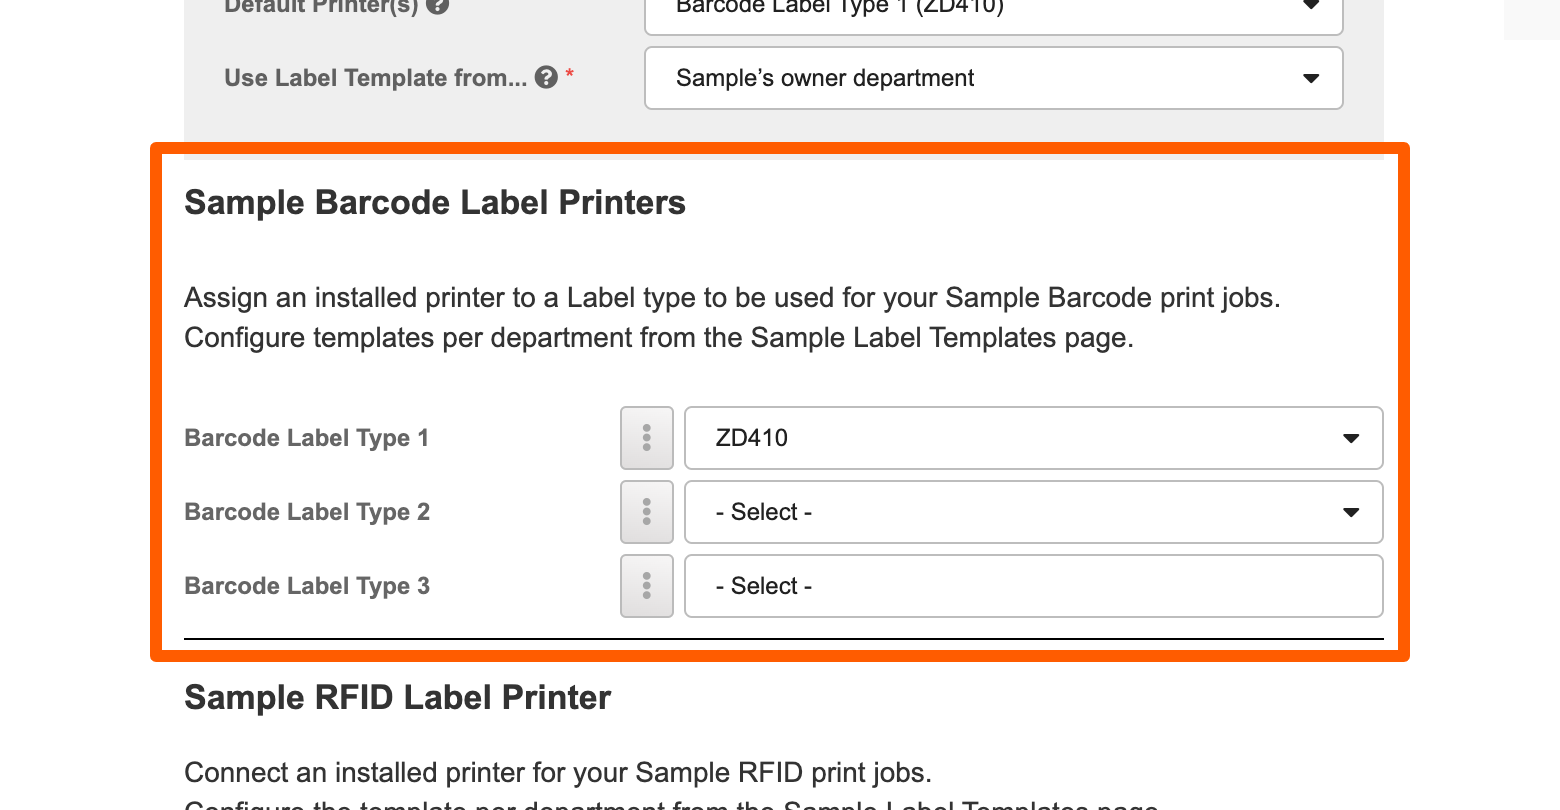
The Barcode Label Types can also now be renamed.
Things to know:
- Be aware that this rename affects all users on your site.
- If you are an existing customer, we have left the "Regular" & "Circular" naming convention the same on your site with the addition of a 3rd called Barcode Label 3, all of which you can rename.
- For all others, they will be called Barcode Label 1, Barcode Label 2, and Barcode Label 3 by default.
- We recommend naming them in a way that describes the template or label. So that can be, for instance, by it's size, by label feature such as RFID or Textile, by the contents of it such as "Label with Product SKU"
How to rename:
- Go to the Printer Setup page
- In the Sample Barcode Label Printers section, click on the menu button (3 dots) next to one of the Label Types.
- Click Edit Label Name
- Change the Label Name and then click Save


Using the Label Types:
Just like before, in order to print, you must first assign a template to your Barcode Label Type, then assign an installed printer to the type. Note that this must be done by each individual user — this is because in order for a printer to be used, it must be directly installed on the user's machine or visible via network). Once a printer has been assigned to a Barcode Label, it can be selected as a Default (optionally). See next section for more about Default Printers.
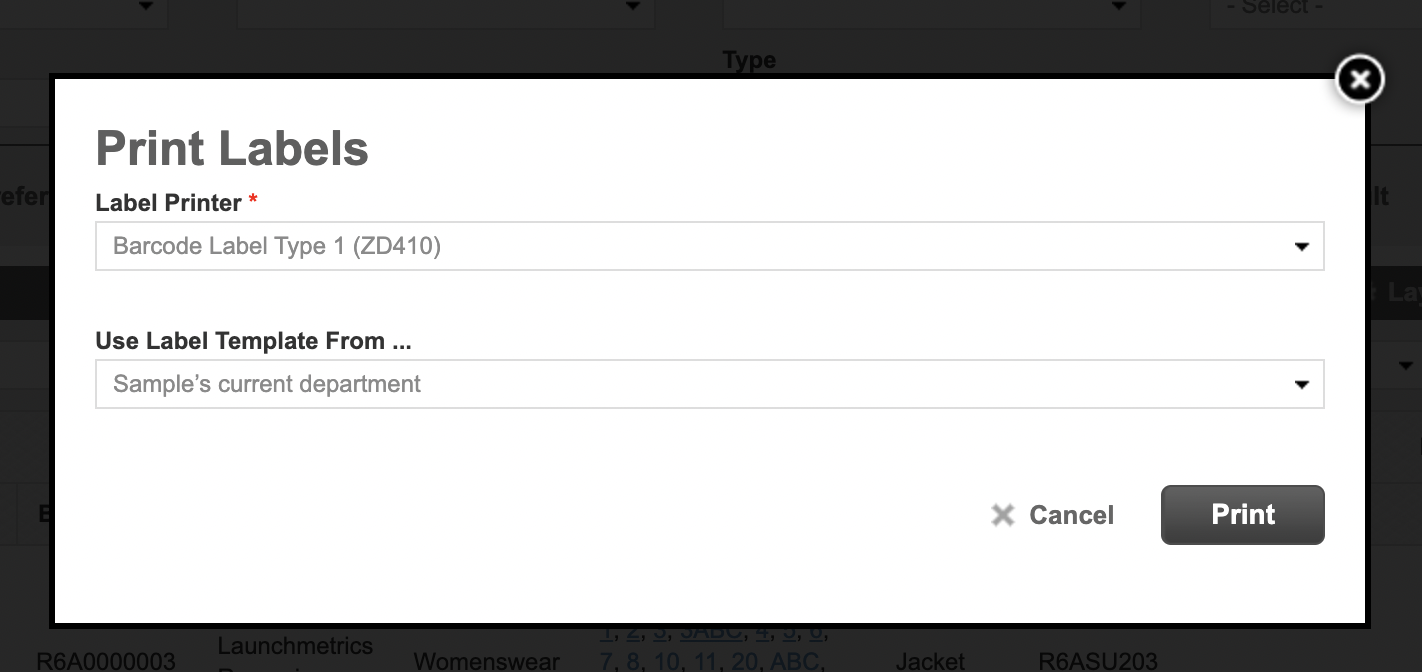
✅ Multiple Default Printers
The Default Printer functionality has now been extended to support multiple printers.
The purpose of the Default printer is to know which printer to send a barcode print job to, and also, to know which template to use. Now you can choose to multiple printers as your default. This means that every time you print a barcode, it will print to all of your default printers.
This can be particularly useful for those with more than one type of printer such as.
- An RFID paper label and a barcode label
- A textile label and a paper barcode label
Note that if you have the new Print Dialog feature enabled (see next section for more info), the Default Printer will simply act as a pre-selection on your Print Dialog window.

✨ Print Dialog
There is now an option to turn on a Print Dialog which will allow you to choose what printer(s) you would like to print to on the spot each time. This is especially useful if you tend to print to different printers depending on where you are in your building or if you have multiple types of printers (e.g. Textile, RFID, Barcode Label) and need to print to a specific ones at times.
To turn this on:
- Go to the Printer Setup page in your username menu.
- Find the Print Dialog setting and set to ON
- Scroll to the bottom of the page and click Save
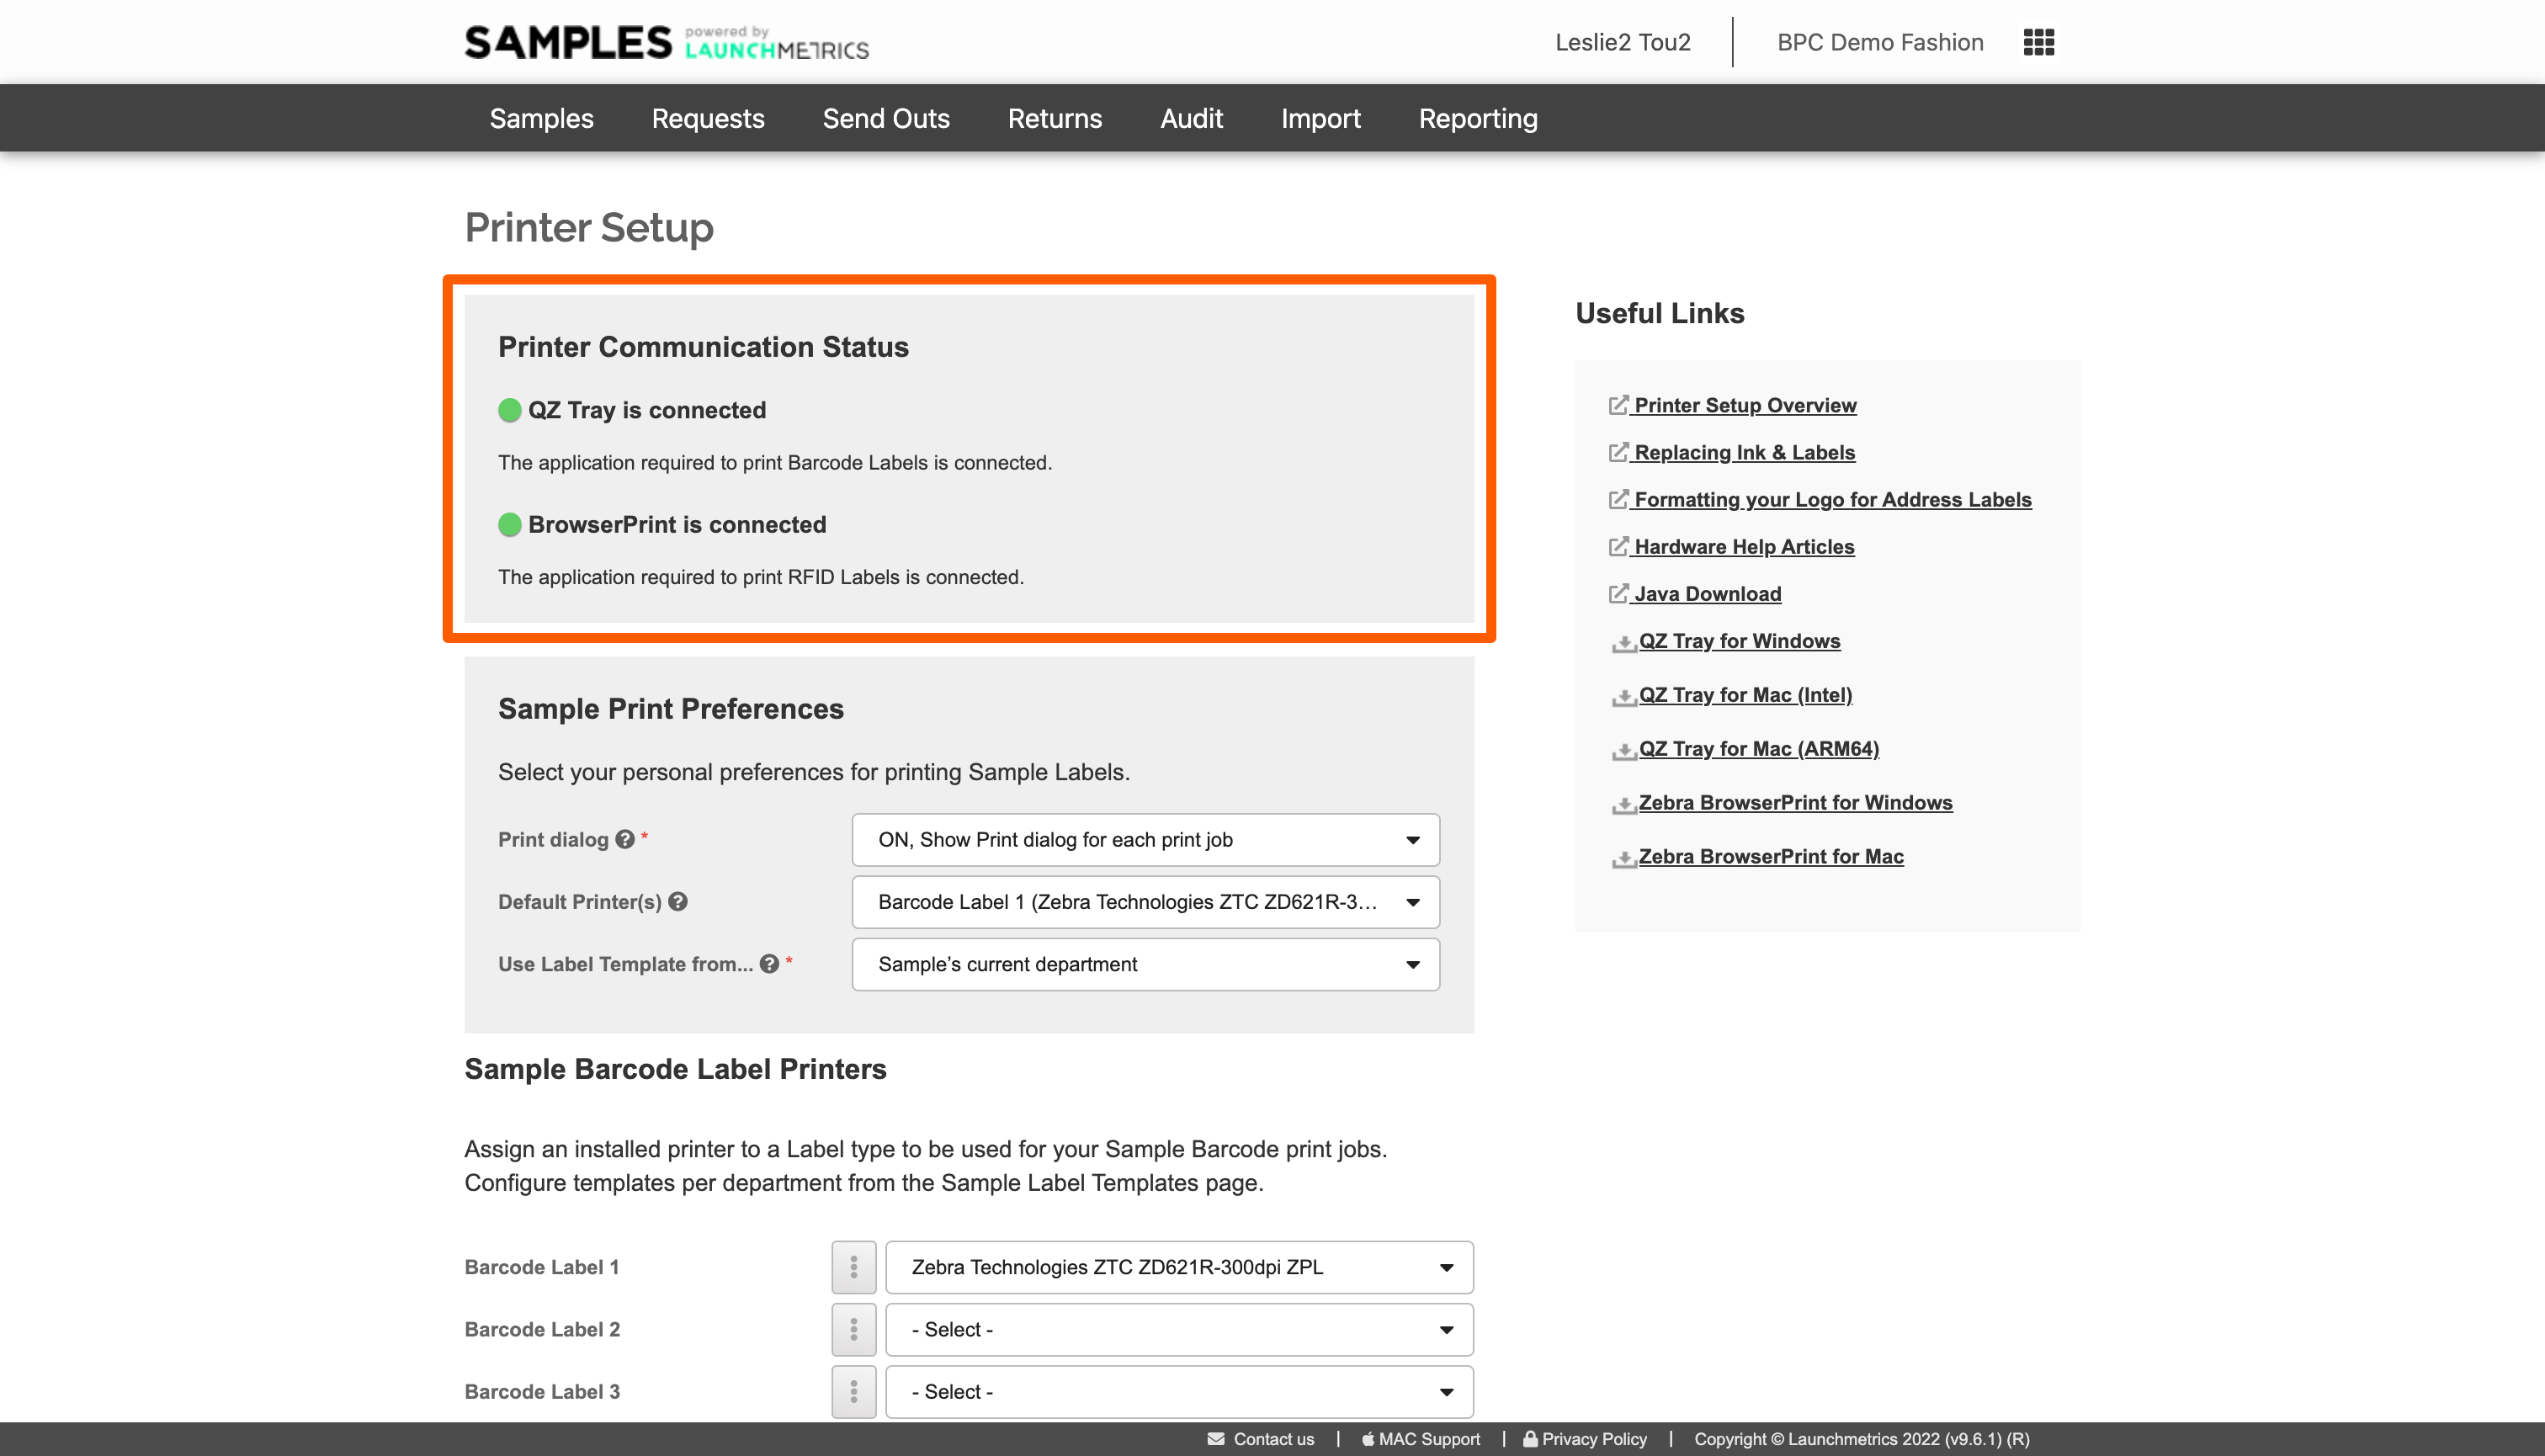
✨ Printer communication status
In order to easily identify printer communication issues, within the Printer Setup page you can easily see if QZ tray (and BrowserPrint if you are using RFID Printing is able to successfully communicate with your Launchmetrics Samples site.
✨ Printer job handling & queue
The way that Samples sends barcodes to the printer has been changed to send each label as an individual print job instead of as one batch. The main purpose for this was to have a more accurate reflection of the Date Printed as well as to account for any potential communication errors.
Now, the Date/time printed will accurately reflect if Samples was able to send that barcode to the printer successfully. Note that there is no way for Samples to know if the Printer successfully printed a label since this is not information that is fed back to the system, we only know if the label was successfully sent.
Additionally, you will see that for every batch of samples you print, a Print Jobs tab will appear. This page will show you in real time which labels have successfully printed, and which are left to print.
If there were any failures, you can attempt to retry after the entire batch has finished.