
Your logo needs to be formatted to fit onto the label and to be installable onto your printer
The dimensions of the logo should not exceed 600 px x 100 px with max file size 1M
You will need photo editing software such as Photoshop or Gimp (Free)
https://www.gimp.org/downloads/
How to format using Gimp On Mac
Resizing the Logo file
-
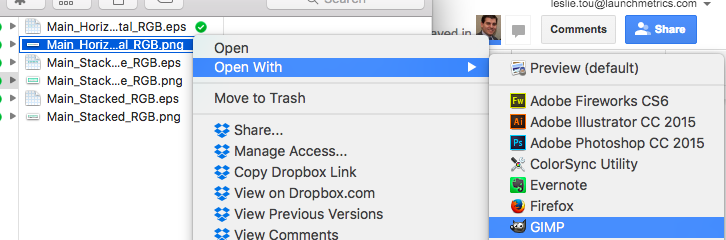
To open your file in Gimp, on the menu bar > select File/Open > Select your logo file
-
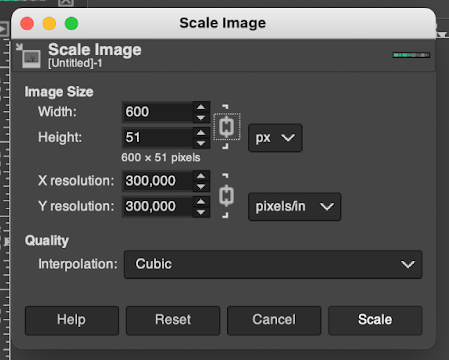
In the menu bar > Select image > scale image > a menu will appear
-
You can set the width or height without deforming the proportions of your logo.
- You'll want to set either the width to 600 OR height to 100, choose whichever makes your logo look the biggest but still contained within 600x100px.
- In this example, if I set the width to 600, the height is still under 100...good! But if I set my height to 100, my width would go beyond 600.
-
Click on scale > you should see your logo scale on your screen
Rotating the Logo file
The file needs to be rotated because when you print the Address label, the orientation of the label is rotated.
In the menu bar > select Image > Transform > Rotate 90* clockwise
Export the Logo file
Next you'll need to export the file as .png to be installed on your printer
- In the menu bar > select File > Export.
- You can see in the name it is the format is already PNG. Just give your file a name.
- Click Export
- You'll see a second menu > click Export
- Once you did that you’ll have your png file
- You can quit GIMP without saving your project (or you can save it if you feel you may need to edit it later)