Importing Samples through FTP have several benefits. Firstly it can be used to integrate with PLM or ERP systems and automate Sample imports & updates. The feature can also be used as a way to streamline manual user imports.
By building import “Maps”, you can easily export a file from another system, and import that file into Samples without touching or modifying the file. No need to paste data into pre-labeled columns or format the data to be compatible with the LM system.
Prerequisites
To use the FTP integration you need:
- User Permissions that allow access to the Importing Map page and Importing Batches page.
- Your site configured to allow FTP imports
- FTP login credentials — Only if you are planning to set up an integration
Reach out to your Customer Success Manager, Solutions Consultant or Local Support Team for assistance
Required Steps:
Creating an FTP Processing Map
Creating an FTP Import Processing Map
An FTP processing map allows you to map fields from an exported file (e.g. your PLM) to Launchmetrics seamlessly. Follow the steps below to create your map:
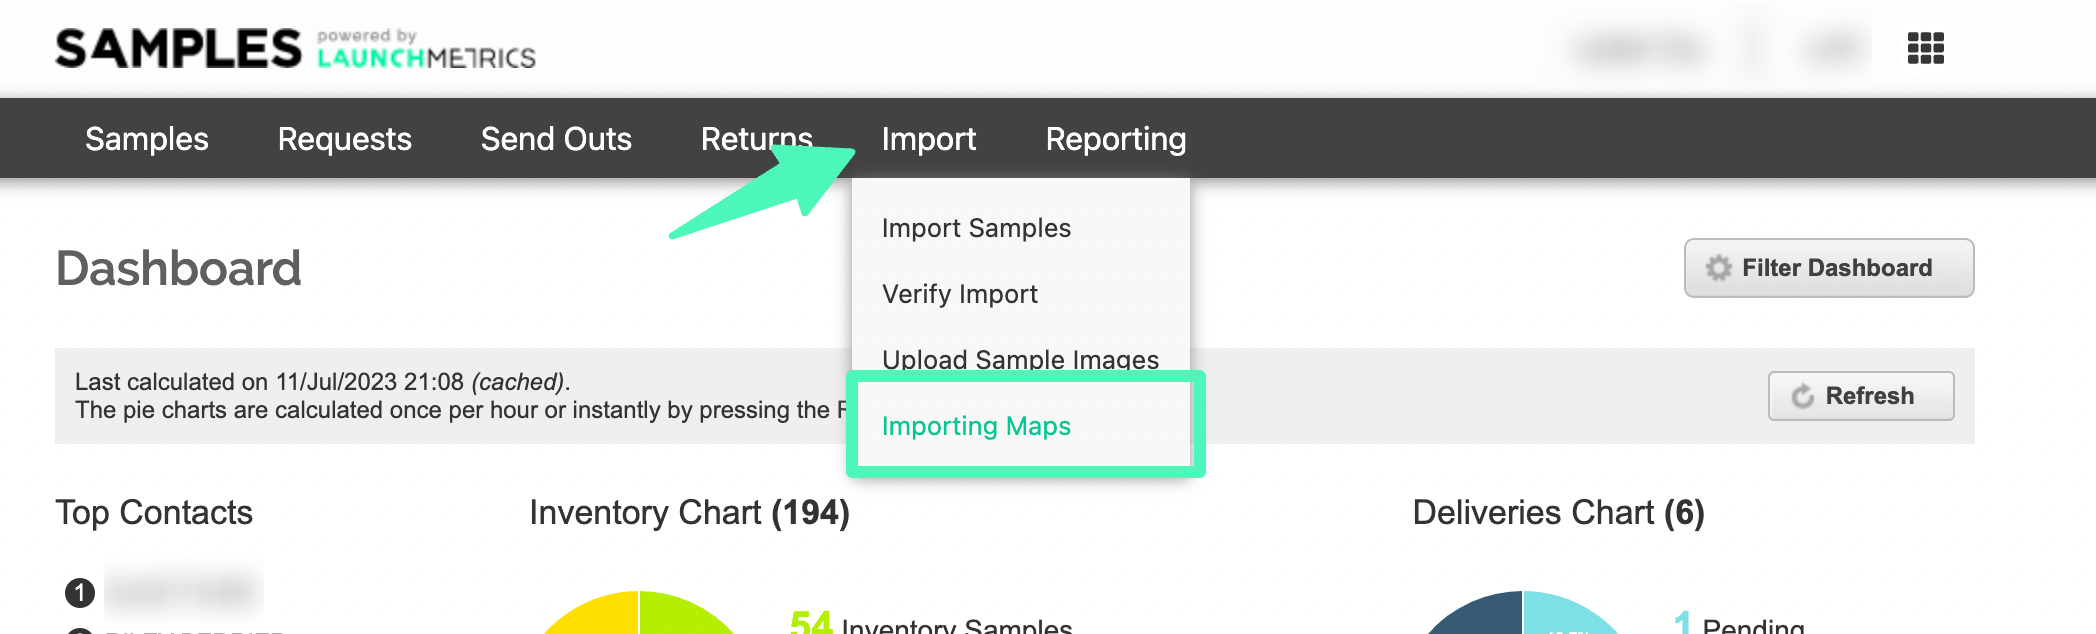
- Navigate to the Samples App
- In the main navigation, under IMPORT select "Importing Maps". This page allows you to view/edit existing mappings, or create a new one.
- Click the Create Map button
- Fill in all the information, please note all fields are mandatory.
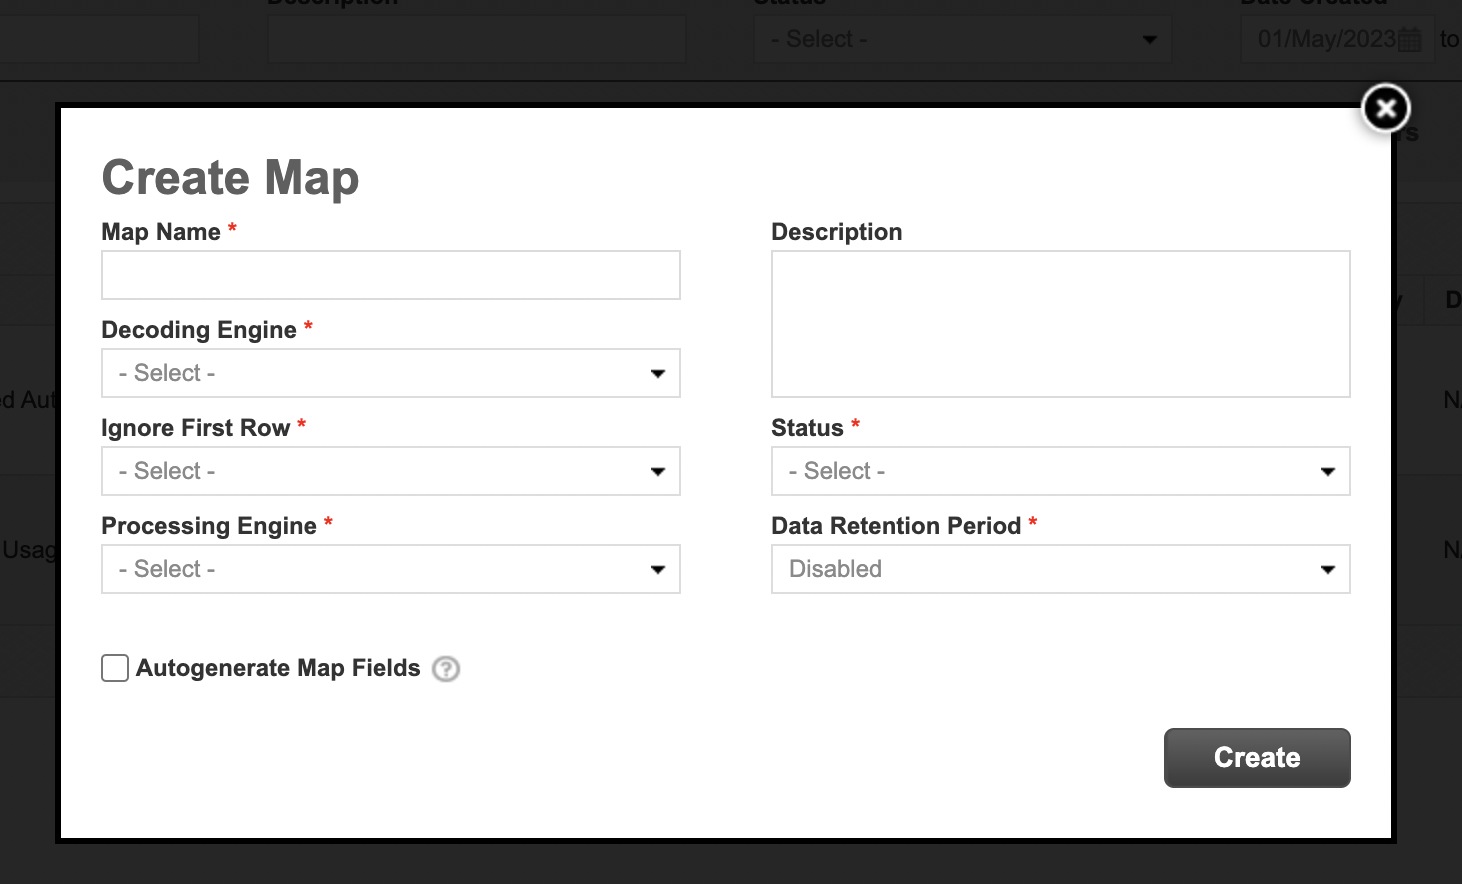
Map Name
A folder with the same name will be created on the FTP, so avoid using special characters
Decoding Engine
Here you can choose between 3 supported formats for your input file: CSV (Comma Separated Values) , Excel and JSON
Ignore First Row
If you have headers in your file, select this to skip it
Processing Engine
Here you tell to the system what you want to do with the file:
- Master List import — to create or update master list records)
- Inventory from Master List — to create actual samples in the inventory, based on Master List samples
- Imported from Master List — to create samples in Imported, based on Master List samples
- Create Imported — to create samples in Imported, not linked to any master list sample
Description
A free text field in which you can provide details for your own info
Status
Enabled/Disabled mapping
Autogenerate Map Fields
When enabling this option, all fields will be automatically created and assigned a column. The fields that are created will be determined based on the Processing Engine you pick. Autogenerating fields is useful if you plan to use all or most fields. If you are only using a small subset of the existing fields, it might be easier to create them manually from scratch.
Managing your Maps
The "Importing maps" screen will display all maps you've created.
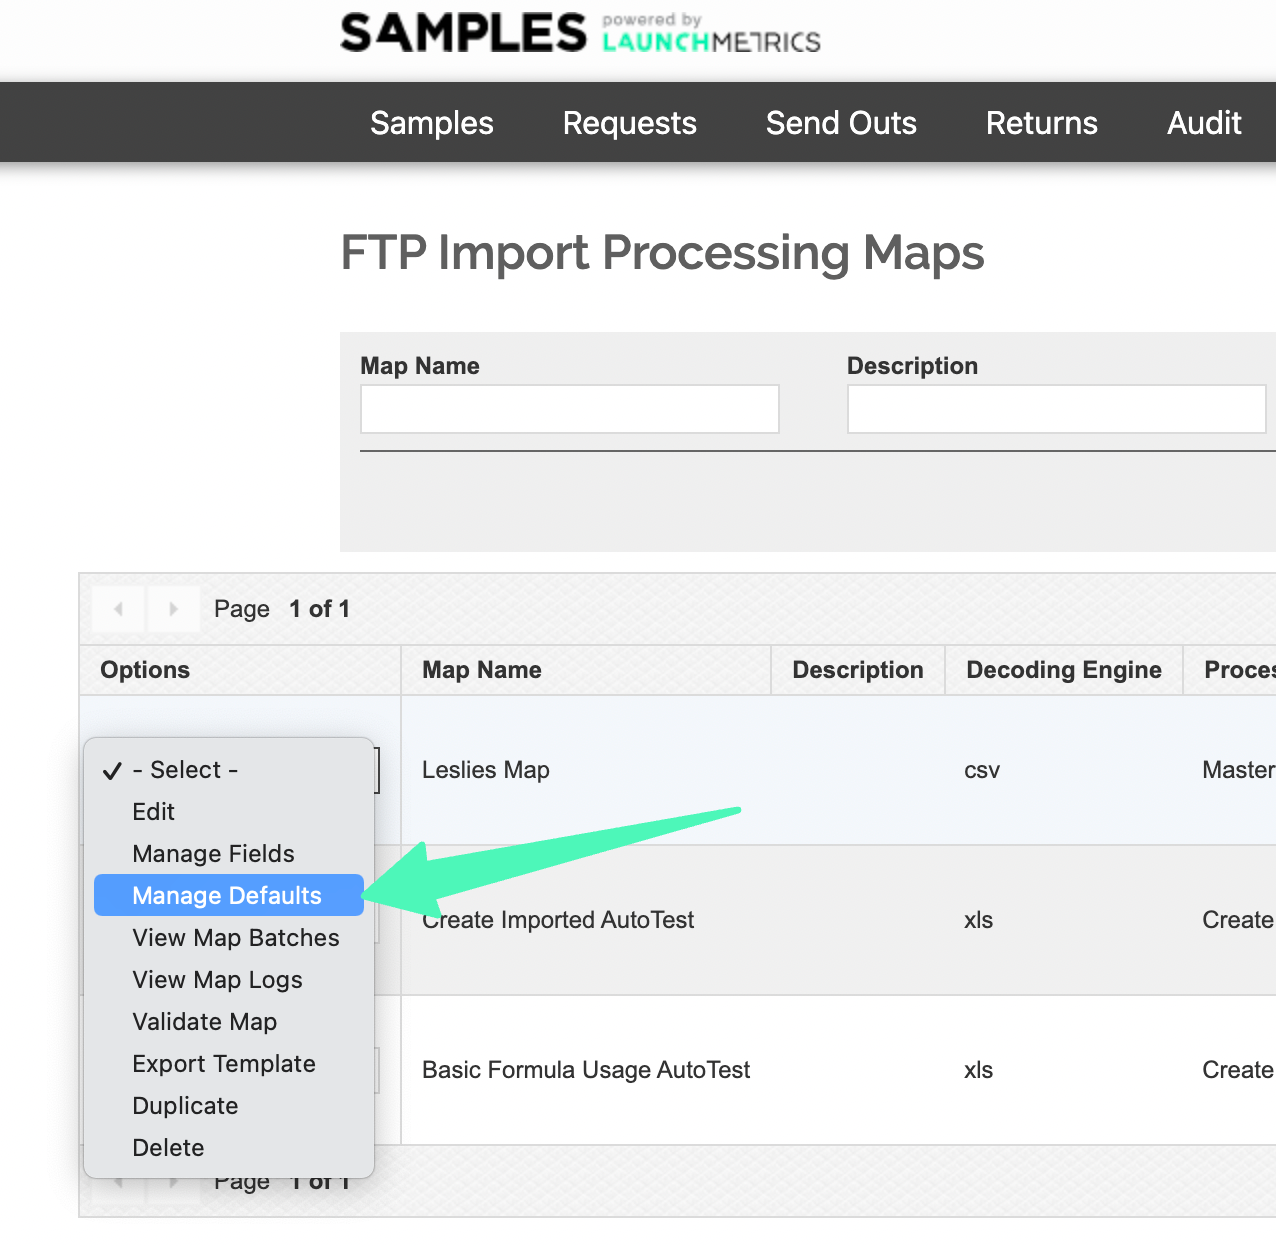
For each map you have access to a list of options that can be accessed from the drop down menu on the left.
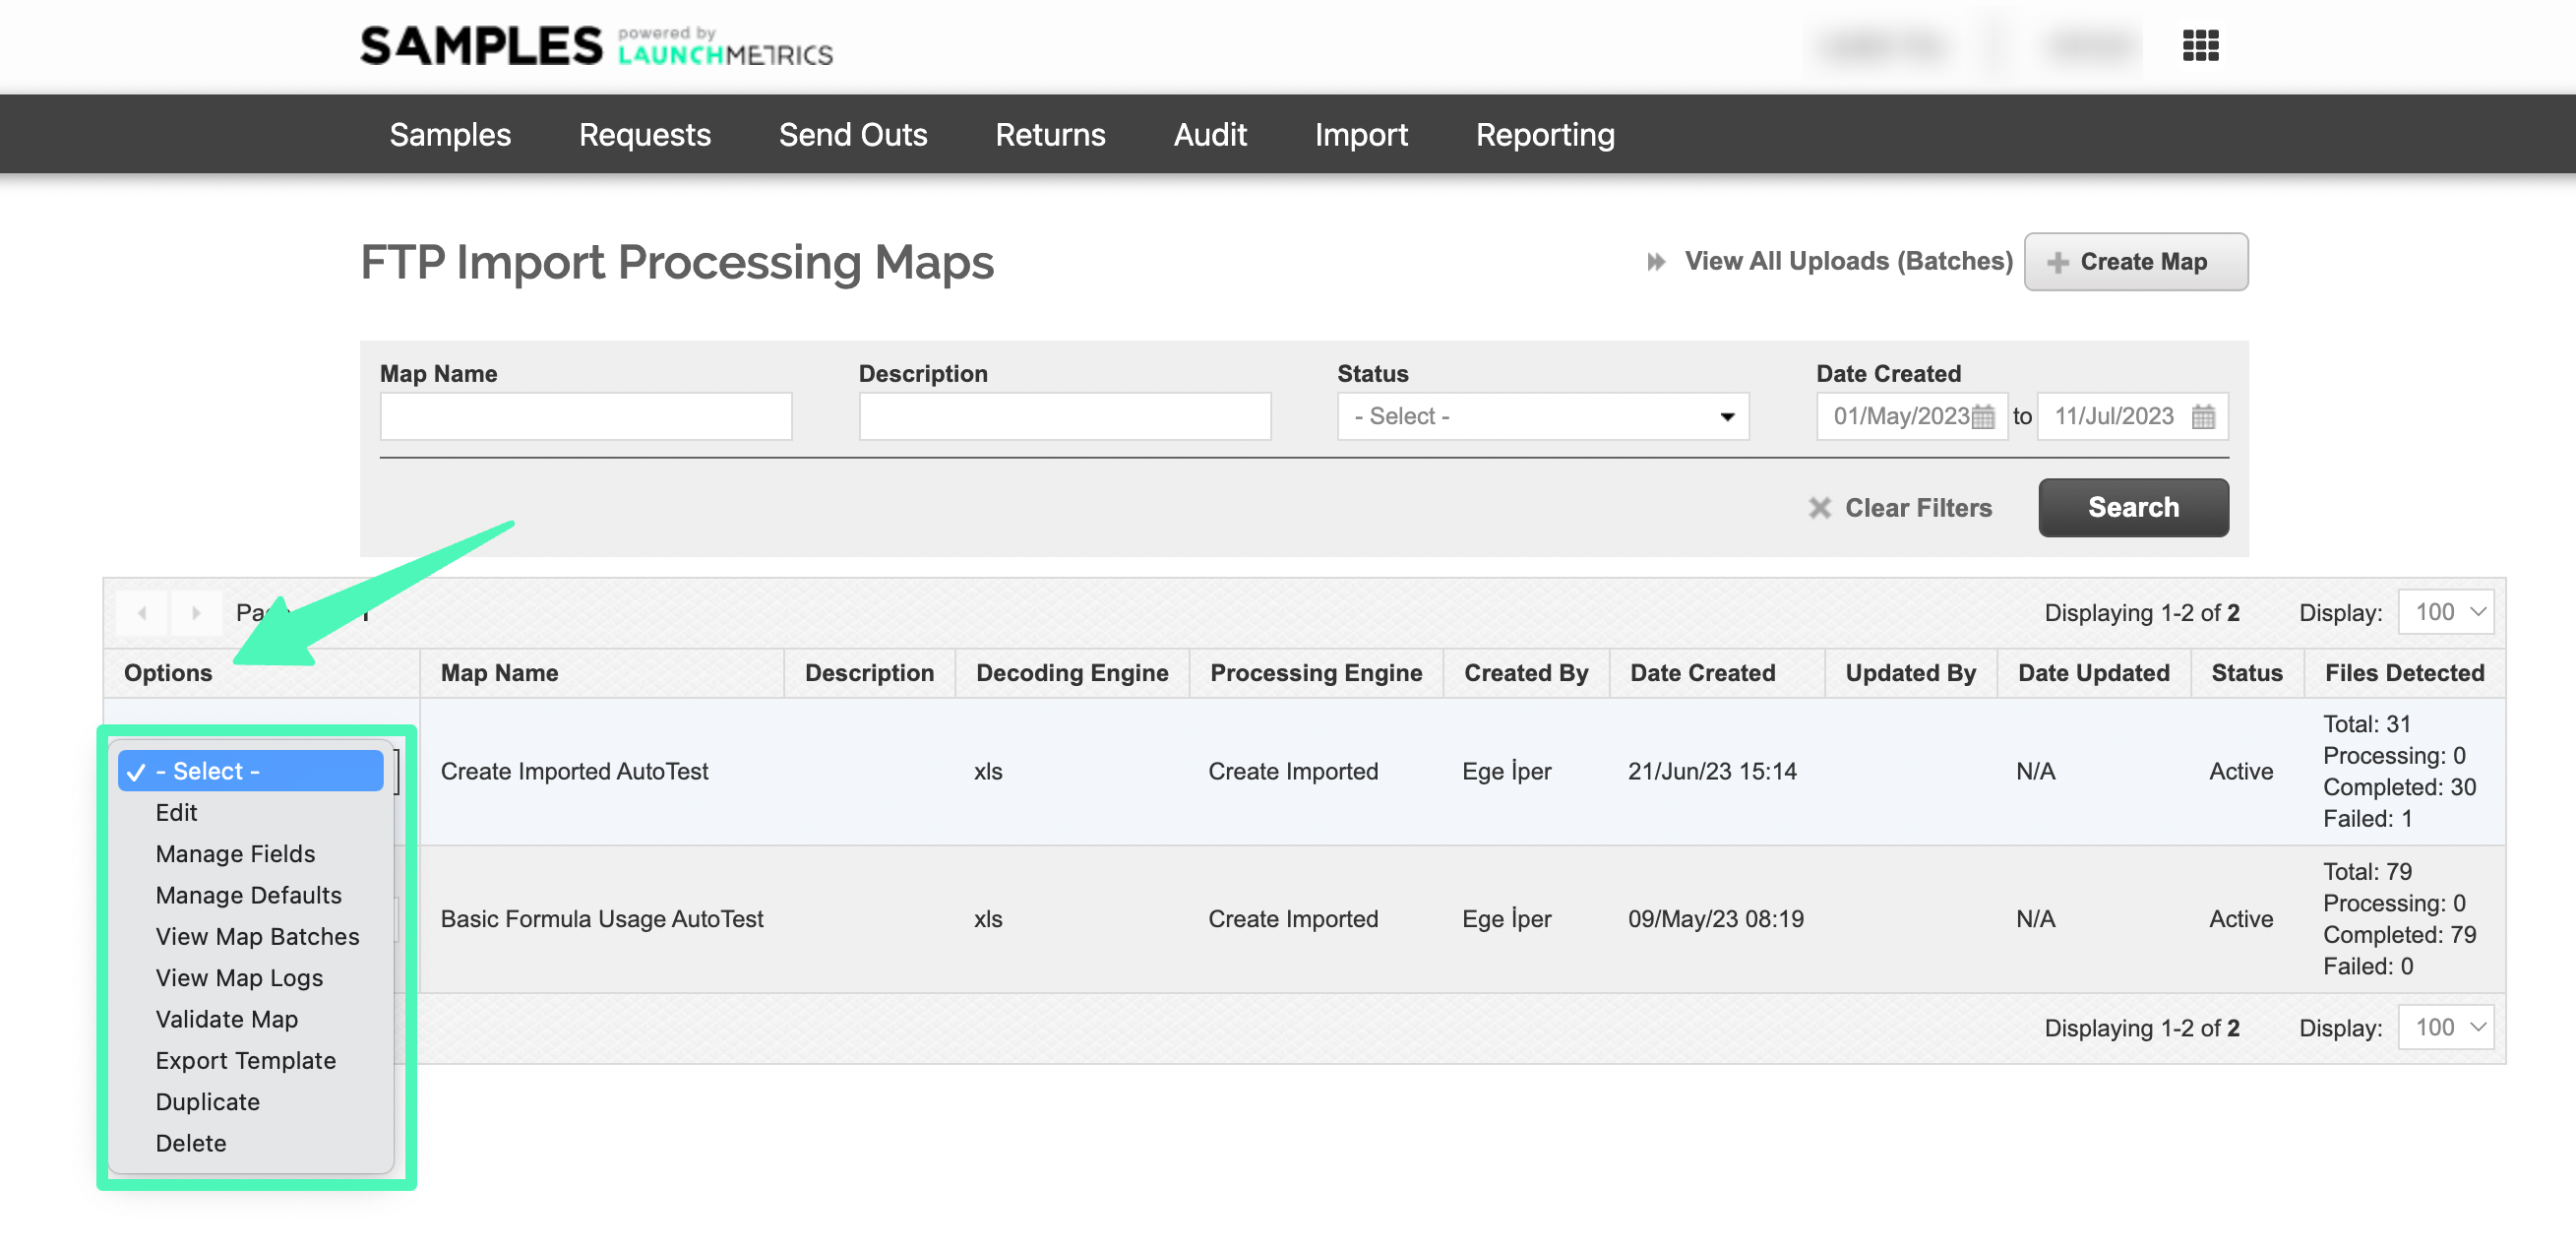
Options
Edit
This menu leads you to the edit screen of the map
Manage Fields
This menu allow you to define the mapping between the info in your input file and Sample fields. More details in the following section
Manage Default
If you don't have a specific info in your input file and all samples should have the same value, you can force the value from this menu
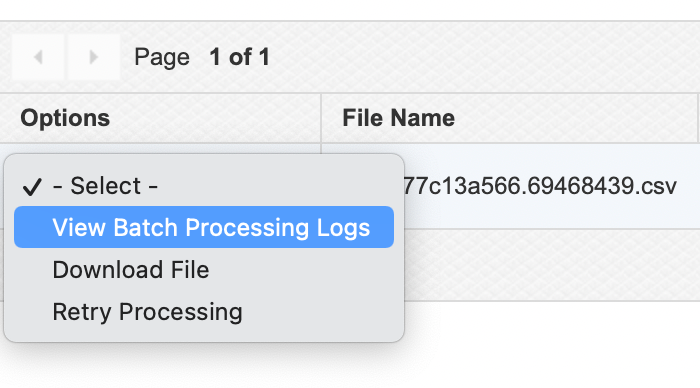
View Map Batches
The menu leads you to all imported files of this mapping
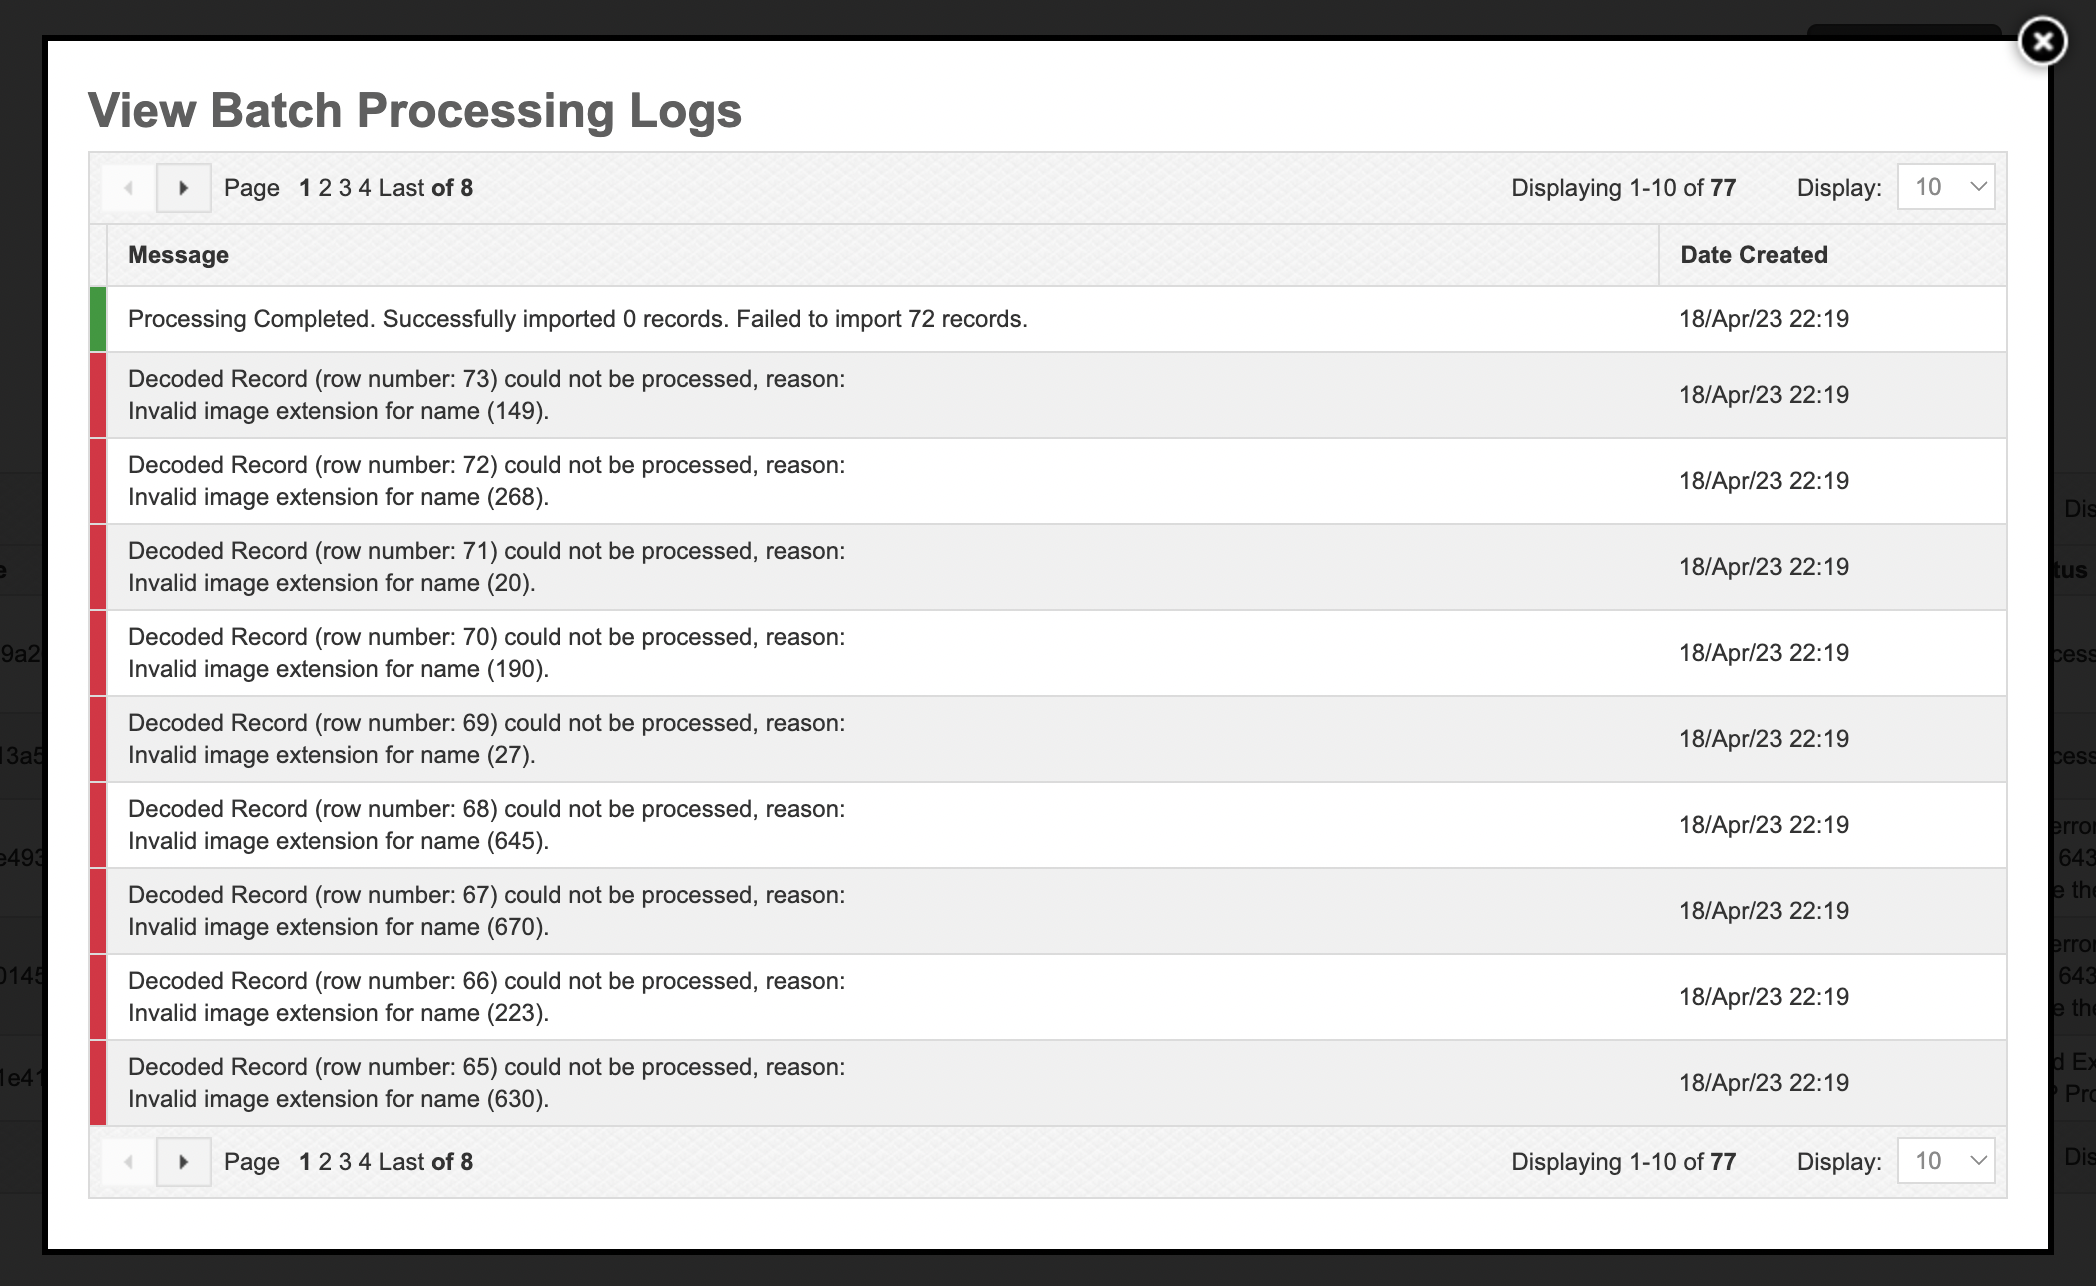
View Map Logs
This menu leads you to all modifications provided to the mapping
Validate Map
This menu validates the map, i.e. it will tell you if there is anything badly configured, like a missing mandatory field
Export Template
This menu generates a blank template file according to the definition of your mapping
Delete
Deletes the mapping in Samples + folder in the FTP
Mapping fields, Defaults & Forumulas
Mapping fields, Defaults & Formulas in FTP Import Map
Mapping fields
Once you have created your first FTP Import map, you must then ensure all your fields are mapped correctly.
If you Autogenerated your fields
You should see all field pre-created. You still need to edit them to ensure the Internal Field Name is mapped to the correct column in your file.
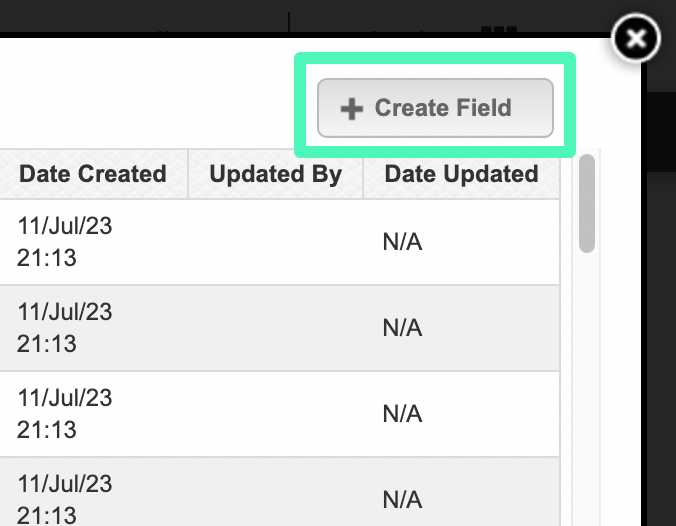
To access the mapped fields, click the Options dropdown of the map and click Manage Fields
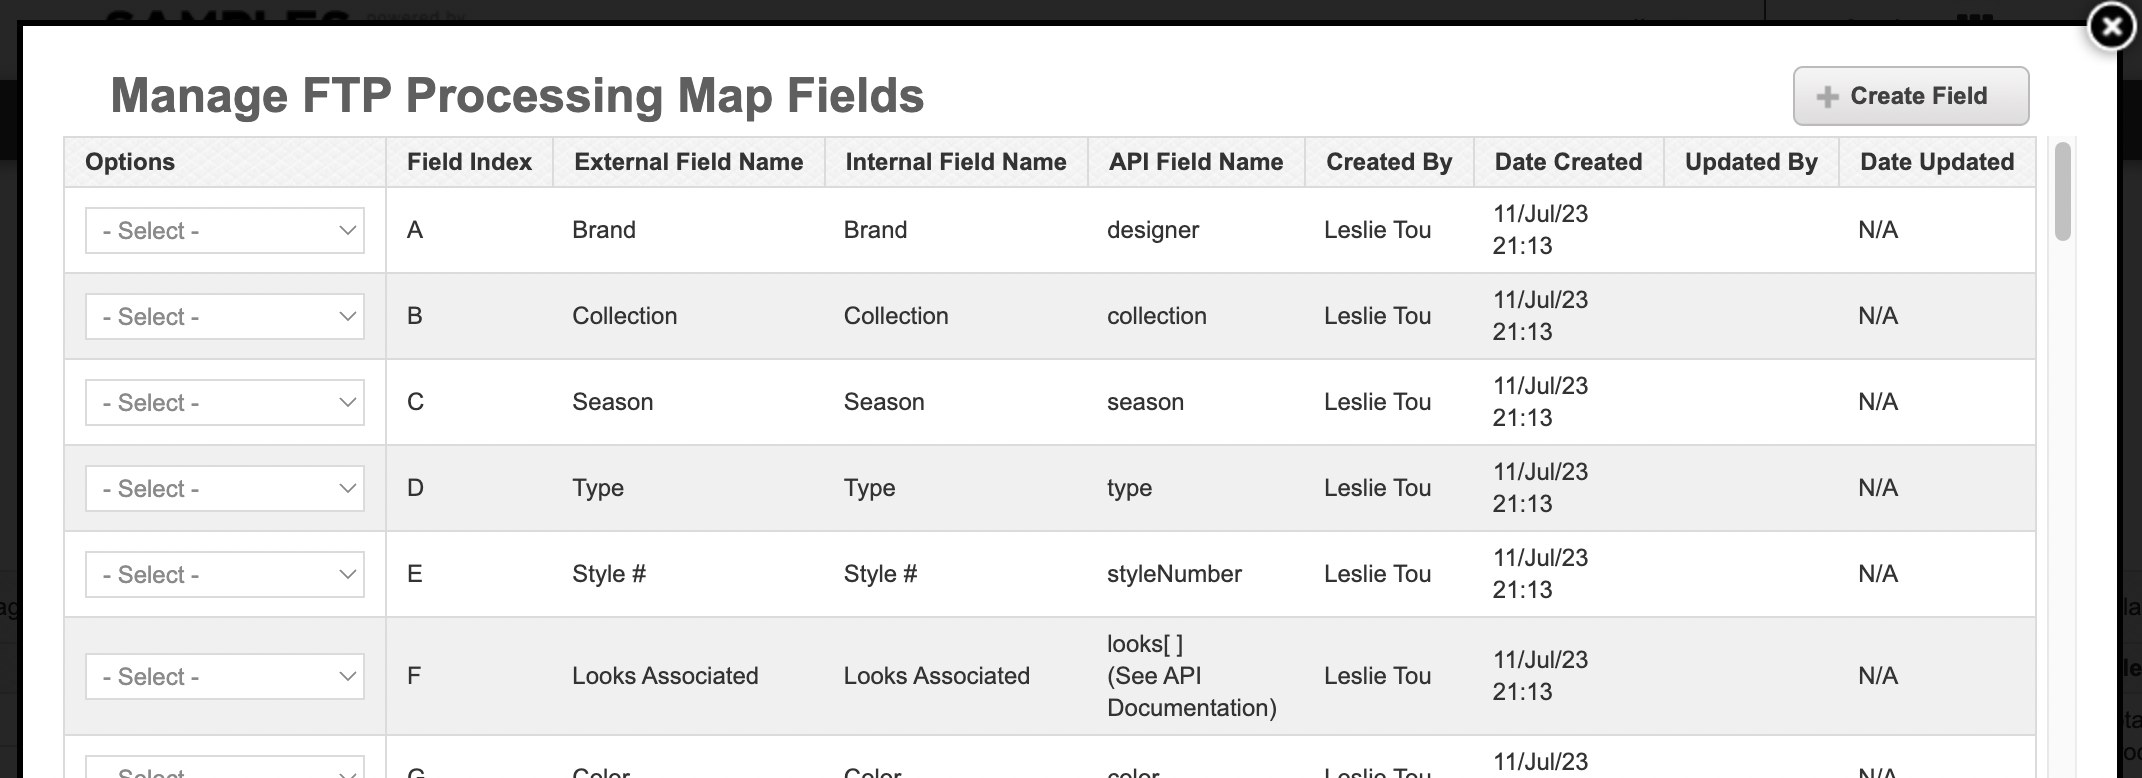
If you did not Autogenerate your fields
You will have to create each field manually
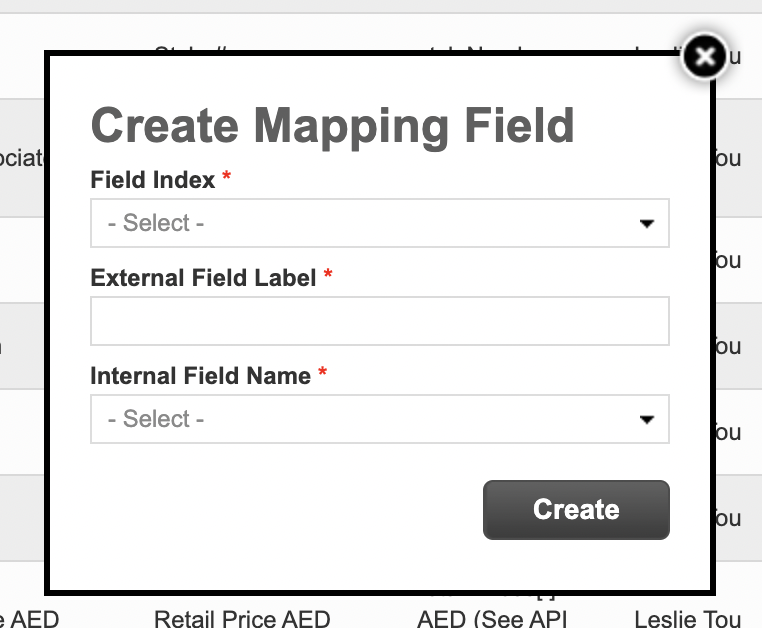
Field Options
Field Index
The position of your field column in the file
External Field Label
The label of your field in the file
(This is just for informational purposes and is not functional)
Internal Field Name
The corresponding Samples field
Important
Once you have finished the mapping of all your fields, be sure to use the "Validate map" Option to check that all mandatory fields are mapped.
If any fields are missing, you can create your Default directly from this screen. (Learn more about Defaults below)
Managing Defaults
Defaults allow you to pre-define data (fixed text or with formulas) that might be missing or incorrect in the source file.
For missing data — In cases where a field is not provided in the source file, you can define a default value to ensure the field is always populated.
For fixing data — In cases where the data in the source file might be formatted incorrectly.
How to define a default
- Navigate to the Importing Maps page
- In the Options dropdown for your map, select Manage Defaults
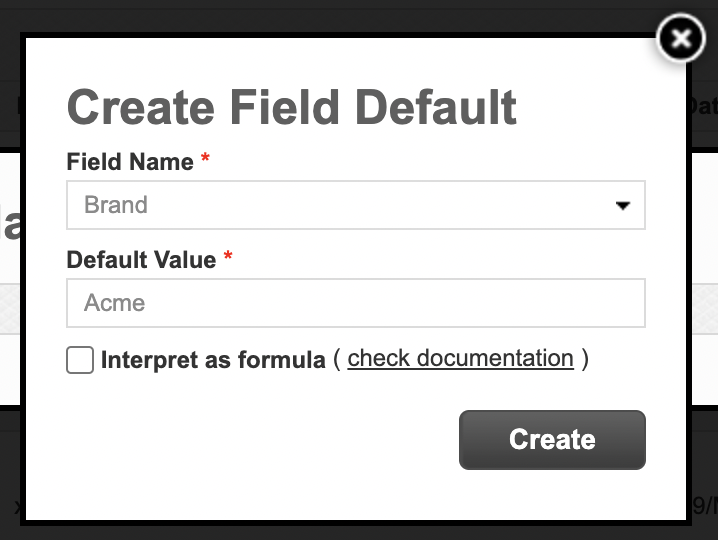
- Click “Create Field Default”
- Choose the Internal field for which you want to define a default
- Fill in your Default Value
- Fill it in as plain text
- Fill in a formula
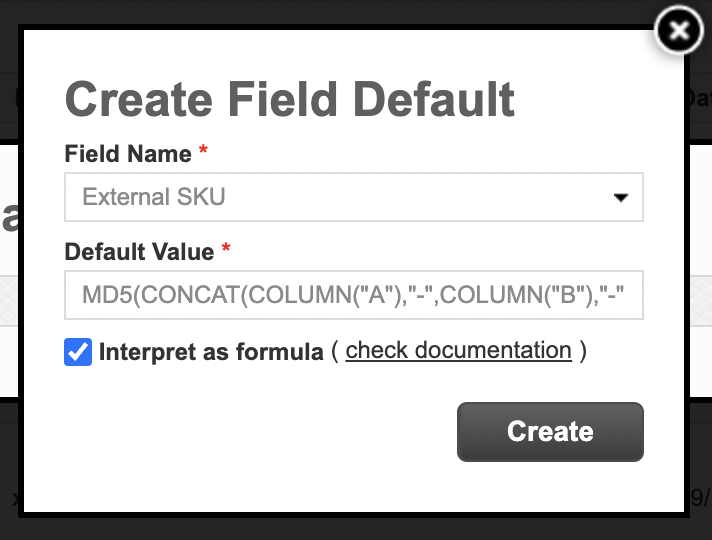
- Fill it in as plain text
- If defining a formula, select “Interpret as Formula” checkbox.
- Click Create
Leveraging Formulas
When defining defaults you can write formulas to transform data provided in the source file or generate data from scratch.
Use formulas similar to Excel or Google Sheets to fill in or transform data.
List of compatible formulas (list is always growing)
- CONCAT (text1, [text2], ...)
- LEFT (text, [num_chars])
- MID (text, start_num, num_chars)
- RIGHT (text, [num_chars])
- TRIM (text)
- FIND (find_text, within_text, [start_num])
- REPLACE (old_text, start_num, num_chars, new_text)
- SUBSTITUTE (text, old_text, new_text, [instance])
- EXTRACT (text, delimiter, piece_number)
- LENGTH (text)
- COLUMN (identifier)
- SUM (number1, [number2], [number3], ...)
- PROD (number1, [number2], [number3], ...)
- NOTEQUAL (value1, value2)
- EQUAL (value1, value2)
- IFERROR (value, value_if_error)
- IF (logical_test, value_if_true, value_if_false)
- NULL ()
- NOW()
- will populate with the current UNIX timestamp at time of processing
- UNIQUEID()
- Produces a 32 hex character string completely from scratch that is unique. Does not require any input or source data to generate this number
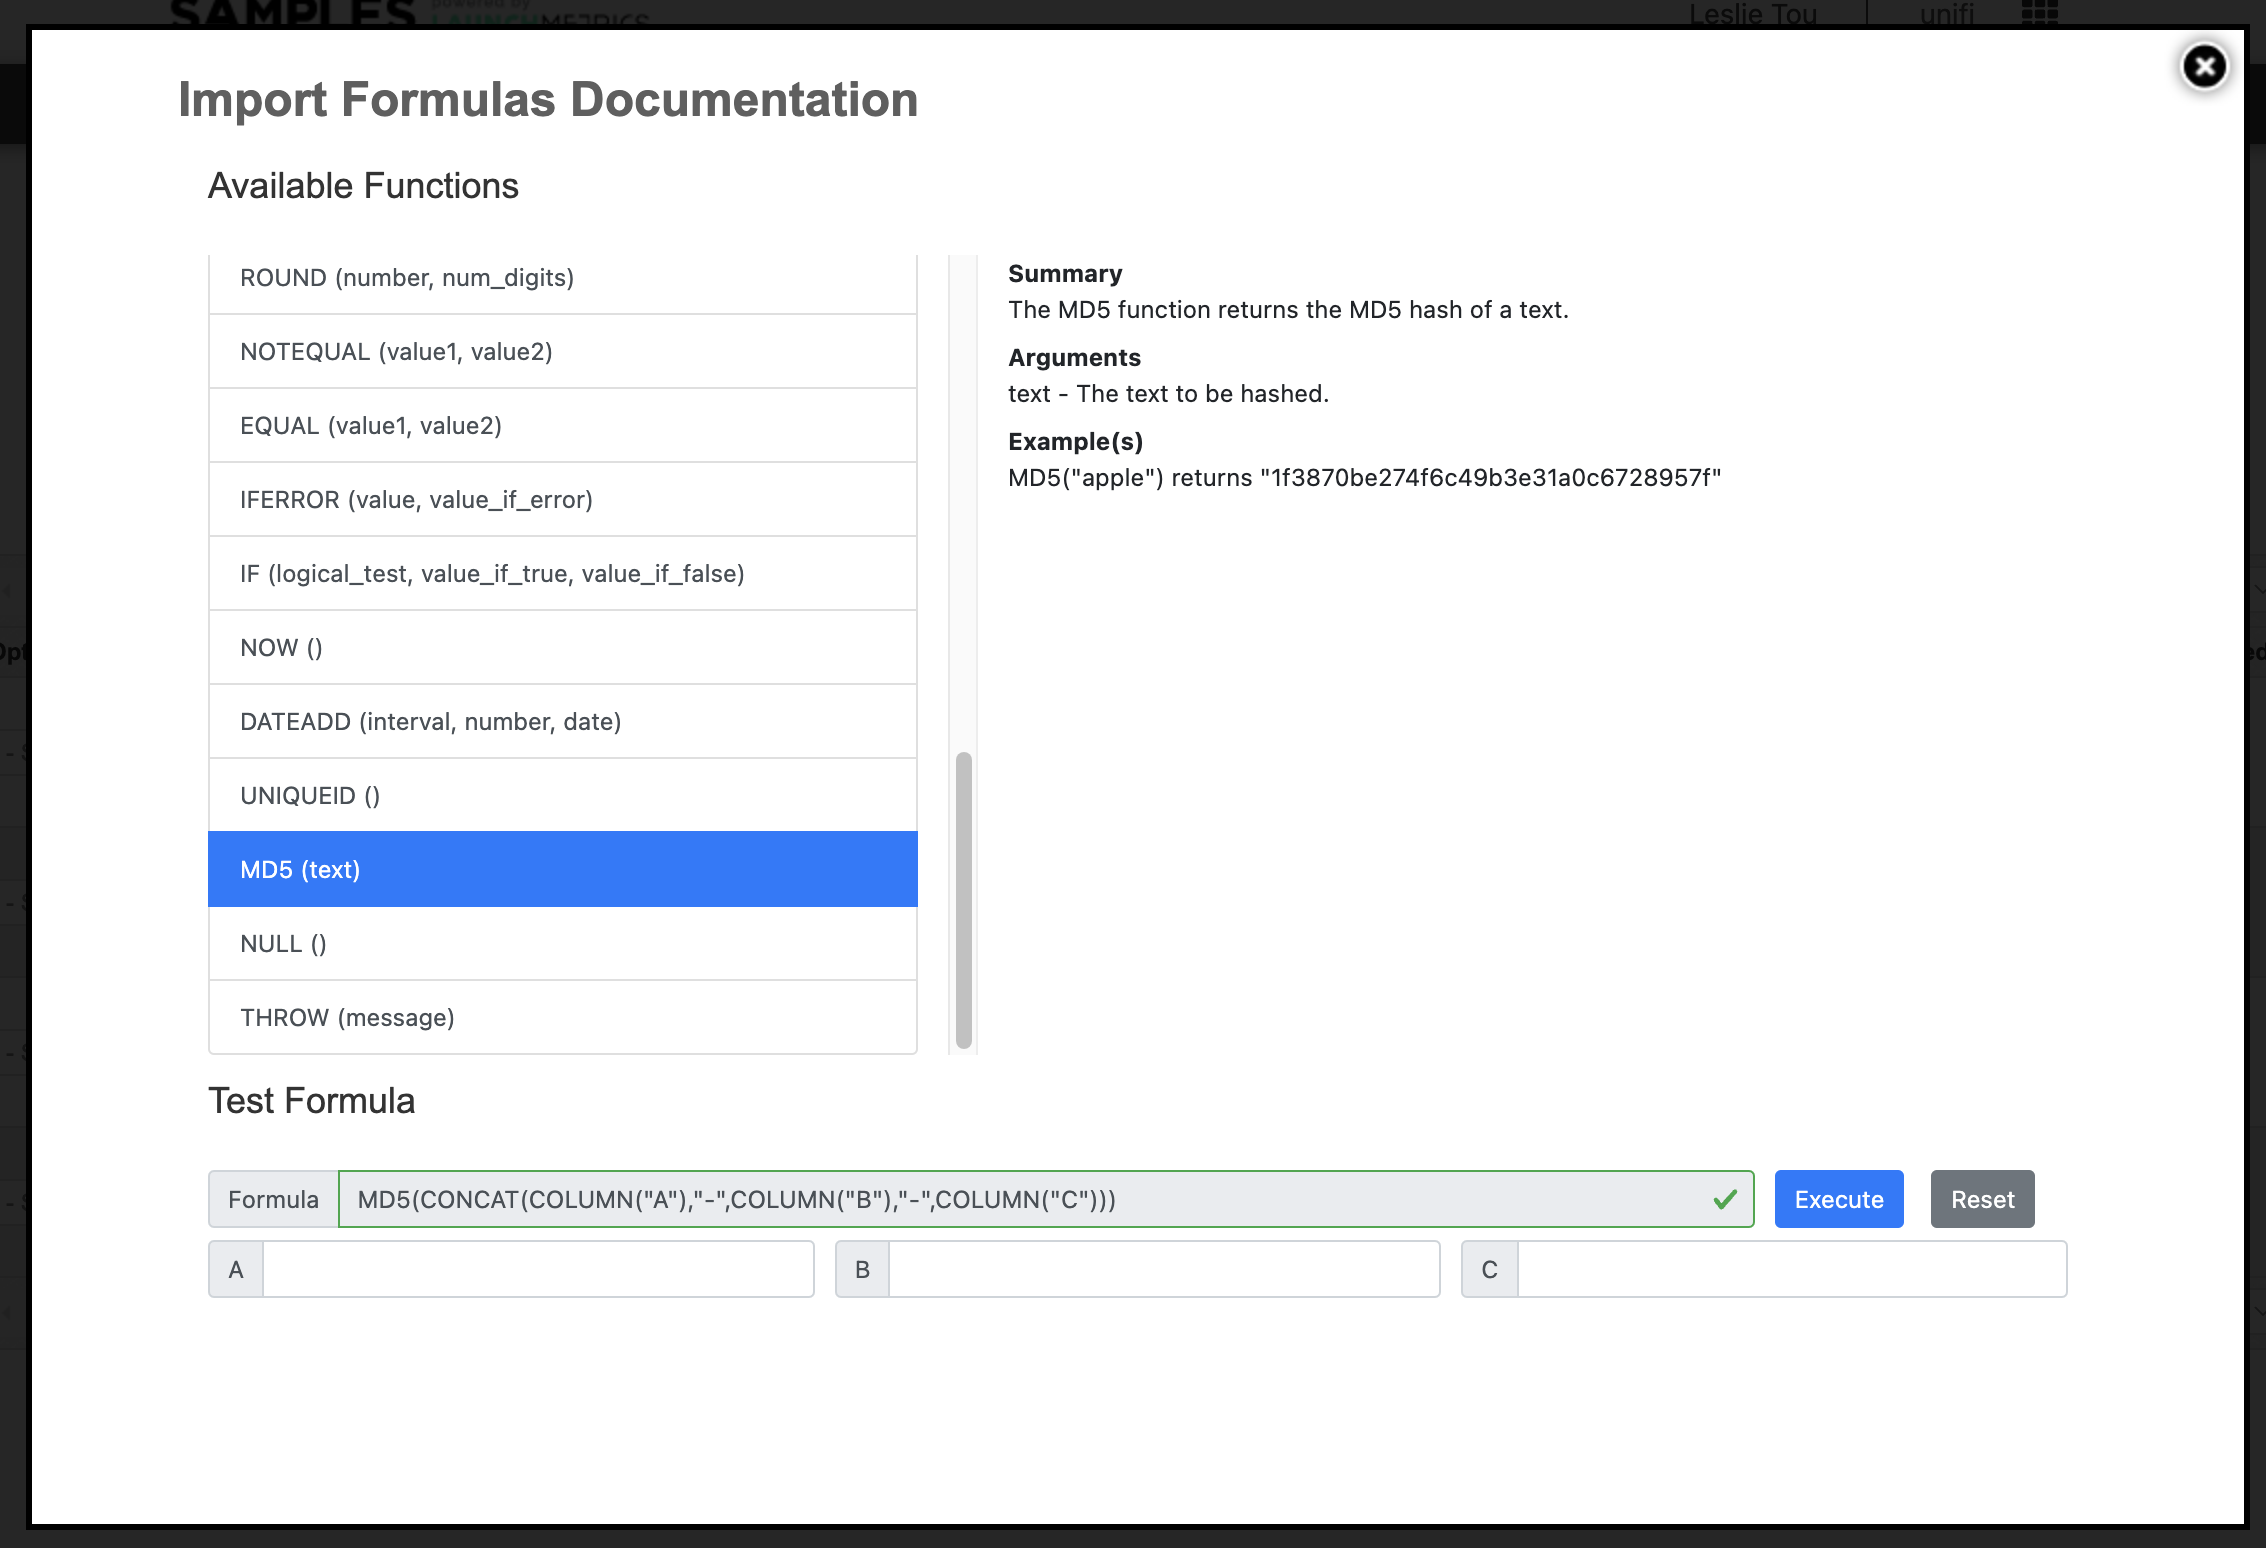
- MD5()
- Also produces a 32 hex character string but requires some source data. In this case you might want to concatinate data from other fields that could uniquely describe the product. For instance Color+Fabric+Pattern transformed using this formula would give you a unique number. Note that if you have samples that have the same color+fabric+pattern, in this case, would transform into the same number.
- Also produces a 32 hex character string but requires some source data. In this case you might want to concatinate data from other fields that could uniquely describe the product. For instance Color+Fabric+Pattern transformed using this formula would give you a unique number. Note that if you have samples that have the same color+fabric+pattern, in this case, would transform into the same number.
How to use formulas
- Navigate to the Importing Maps page
- In the Options dropdown for your map, select Manage Defaults
- Click “Create Field Default”
- Choose the Internal field for which you want to define a default
- Fill in your formula
- Use the following format to populate data from another column
COLUMN("X")
- Use the following format to populate data from another column
- Check the box that says “Interpret as formula”
- Click Create
Testing your formula
In the Edit Field Default window, click the Check Documentation link to open up a helper that outlines all of the available formulas and allows you to validate your formula.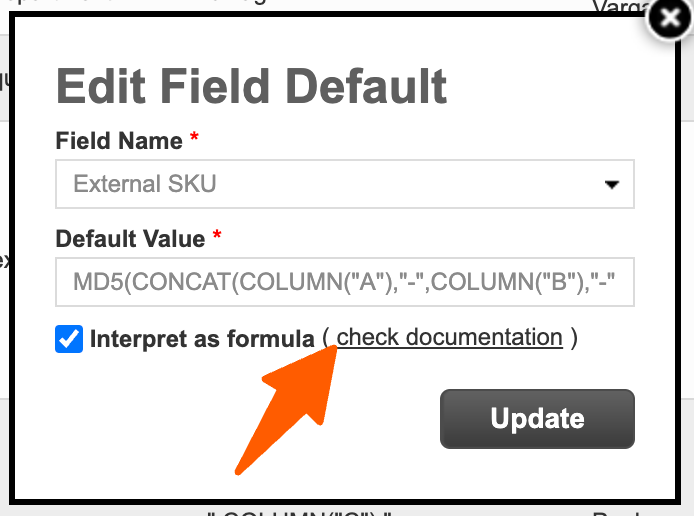
Example uses
Customer does not have any SKUs or Style numbers data available to import but they need them to use the Masterlist or some other functionality.
- Use CONCAT if we know that their SKU is the combination of a other available fields such as color+size
- If the CONCAT produces a value that is too long (over 50 characters), use the UNIQUEID() formula to generate a shorter string
- If the customer does not have any useful data to use as the source data, use MD5() to generate a code from scratch.
Another example could be when the customer has their product image files named in a standard convention such as style-color.jpg. Now using FIND, LEFT, RIGHT and/or MID formulas, we can pre-populate the image placeholder so that the user can easily mass upload the images.
Uploading a file & Managing Batches
Uploading a file to an FTP map & Managing Batches
Uploading via FTP
Direct Upload via browser
Directly upload files from the Samples browser app
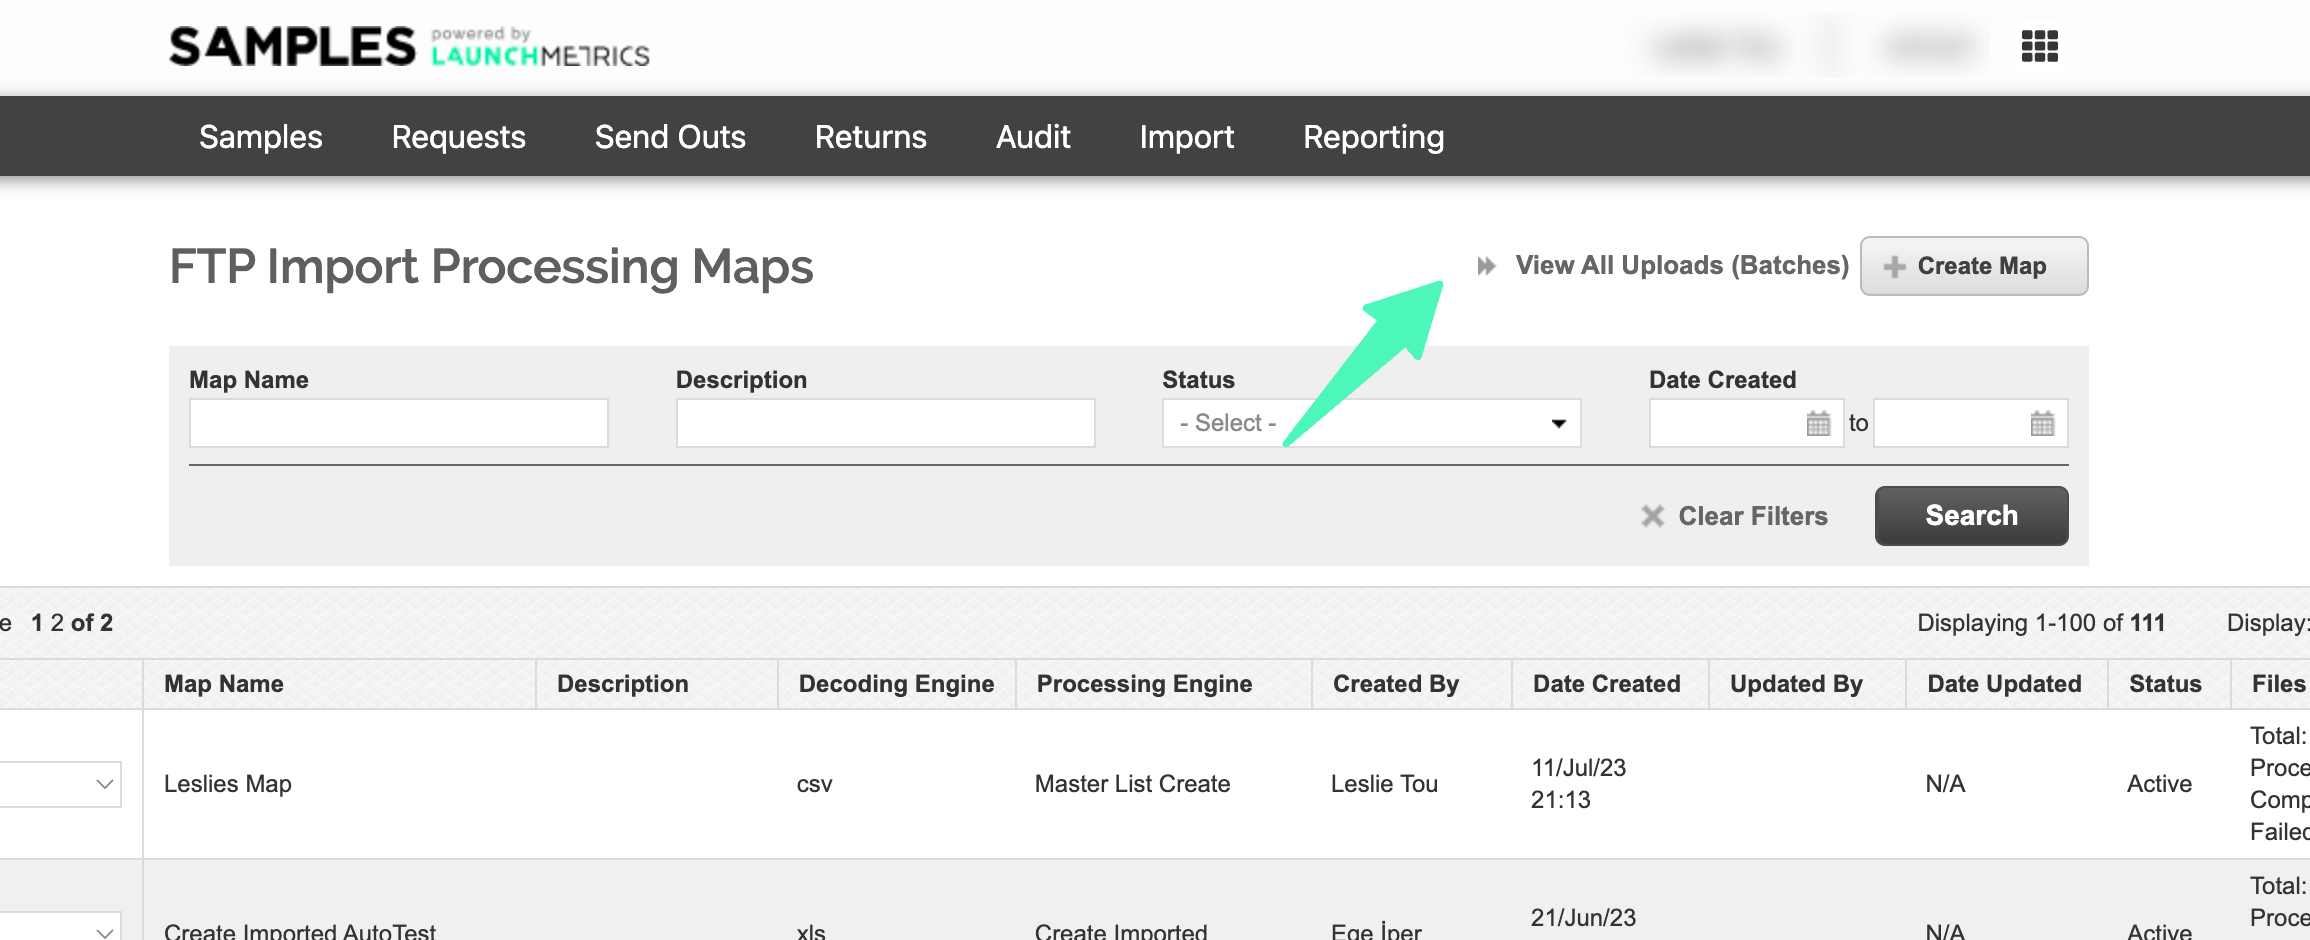
- From the Import Maps page, click the button called View All Uploads

- Select the Map
- Click Upload

View Batches