
Collection Editor
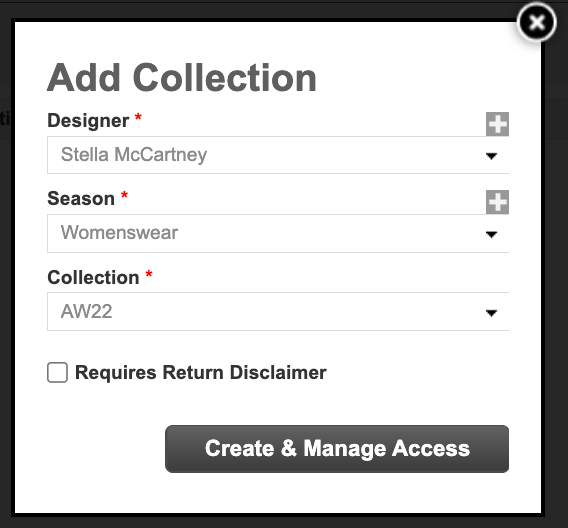
Before you can create any samples, you'll need to pre-create your collections. A collection consists of a Designer, Season and Collection Name. For example, the below is a Collection.
- Designer: Stella McCartney
- Collection Name: Womenswear
- Season: AW22
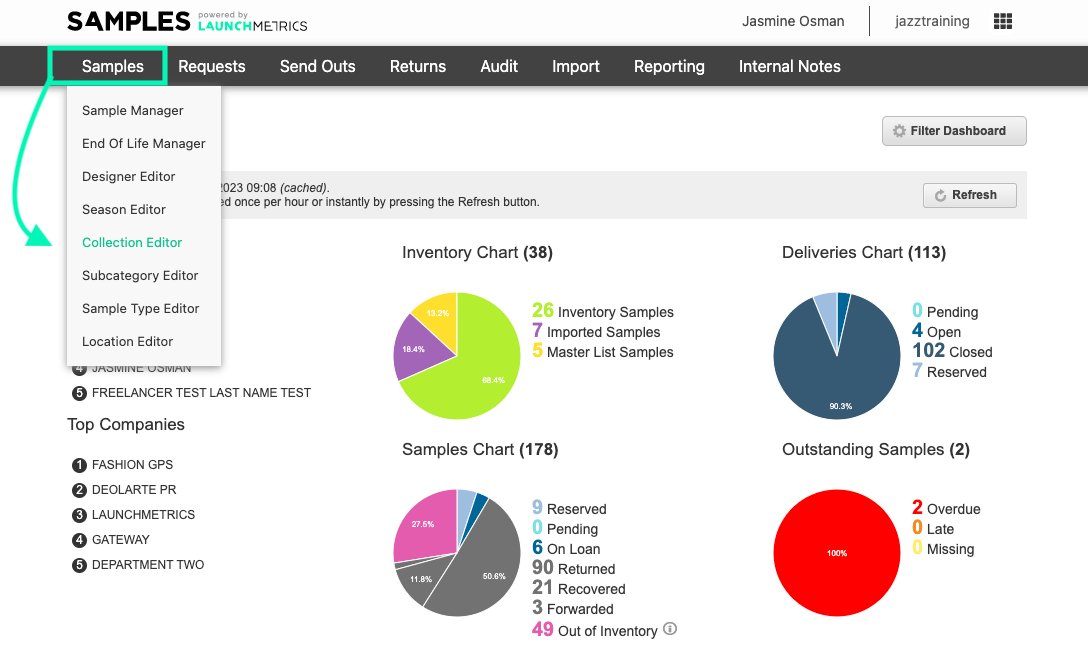
Creating a Collection
- To create a Collection you'll need to hover over your main Samples tab and click "Collection Editor".
- Click the "+ Create Collection" button on the top right hand side.
- You'll need to fill in the Designer, Collection and Season Field. You'll notice "+" Icons next to each field, this allows you to add in data that you may have not already added, such as a new season you may have forgotten to add ahead of creating your Collection.
- Click Create.
Note: Information on Retail Stockists and Return Disclaimer are listed under "Additional Information" at the end of the article.
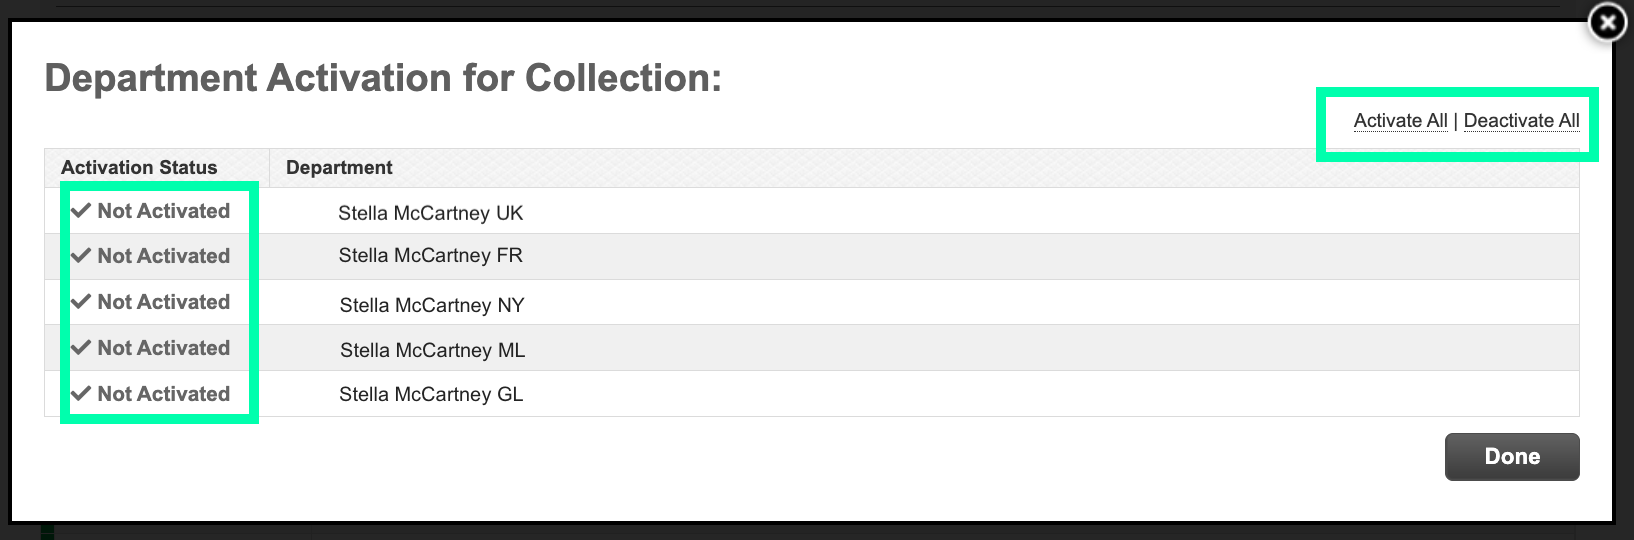
When you have created your collection, you may be presented with a screen that allows you to activate the collection for multiple Departments. You would use this if you know that you other regional offices are going to be receiving the same collection as your office. This is called "Department Activation".
If you do not have access to this and would like to enable it, please reach out to your Customer Success Manager or the support team and they will be able to assist you with this.
Editing a Collection
- To Edit a collection you'll need to Search for it by using the Search filters provided, followed by clicking "Search".
- Once you have found the Collection you would like to edit, click the "Options drop-down menu" and click "Edit Details"
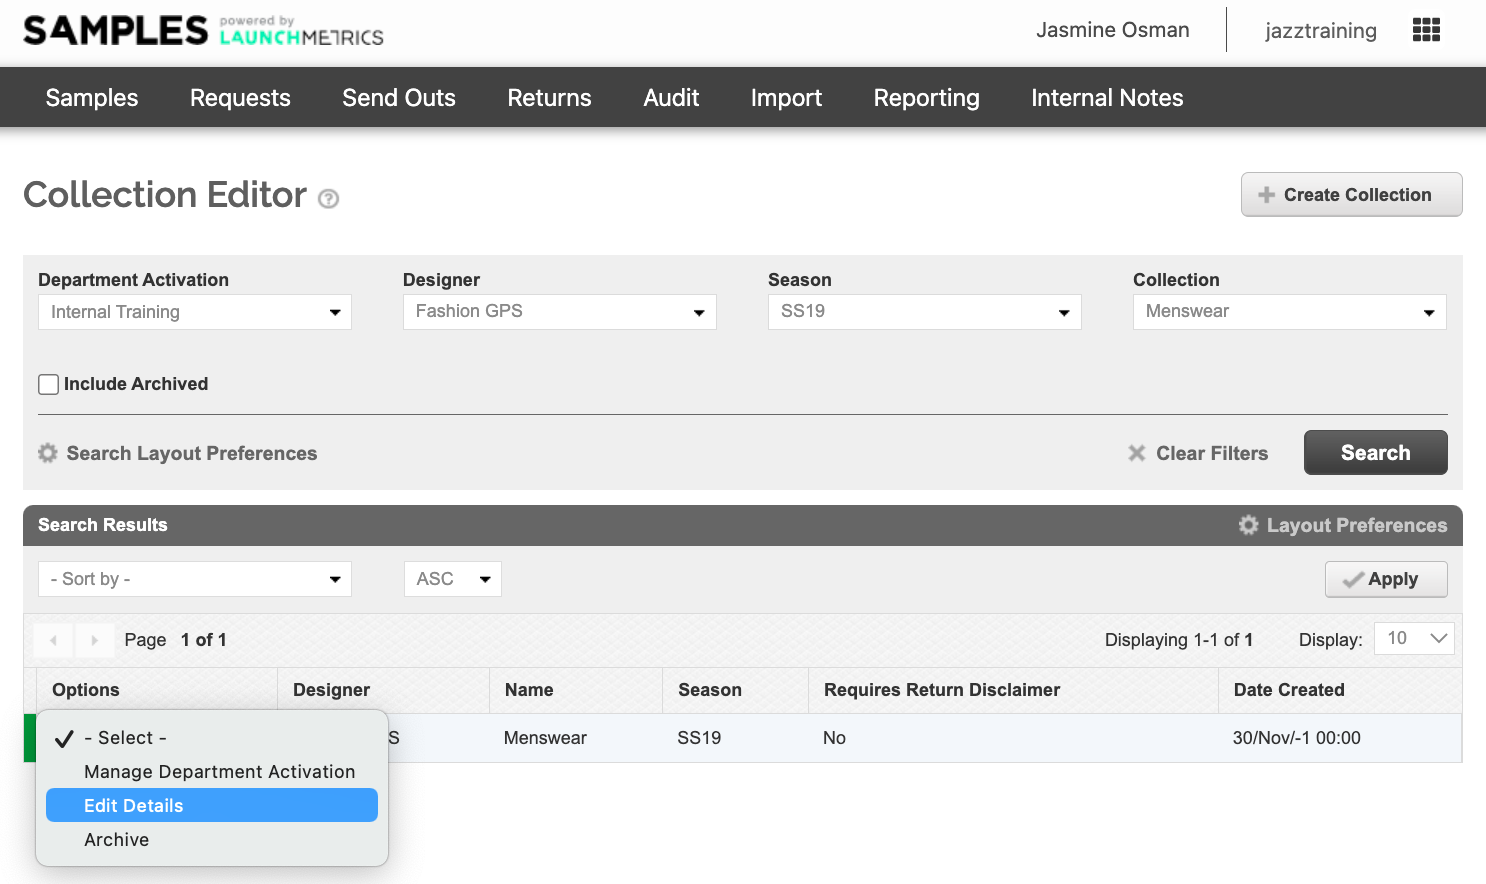
You also have the ability to Archive and Delete a collection from this page to keep your database clean.
- Upon archiving/deleting collections, these collections will be hidden when adding or editing a Collection to keep you collections lists clean!
- You can search for your Archived Collections by clicking the "Include Archived" tick box.
Additional Information
Retails stockists can be added to a collection for reference when filling out a Credit Request. That way, when filling out credit information for a sample, the stockist will be saved for that collection.
- Note Stockists are assigned on a per collection basis - if the entire collection is not available at the same stockist, leave this field blank.
Return Disclaimer can be required on Delivery Memos any time a sample from that Collection is sent out. You will still be able to edit the Return Disclaimer by clicking on the bottom of the Delivery Memo template. 
If you have further questions on Collections, why not check out our Samples FAQ!