
Adding Guests To Invitees
Learn how to add guests to your event.
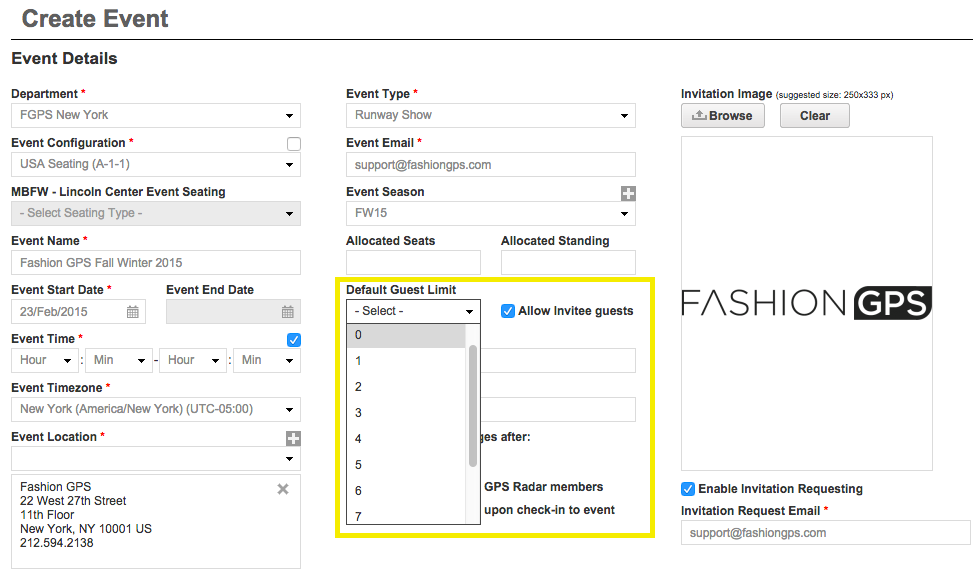
- To enable the ability to assign Guests to your Invitees, you must first select "Allow Invitee Guests" within 'Event Manager'. The 'Default Guest Limit' number designates how many Guests each Invite will get.
- If you only want a handful of Invitees to have Guests, tick off the box but keep the default at zero.
- If you wish for none of your Invitees to have Guests, simply un-tick "Allow Invitee Guests".
- Setting a comfortable 'Default Guest Limit' from the start of your event planning will save you time and possible confusion.
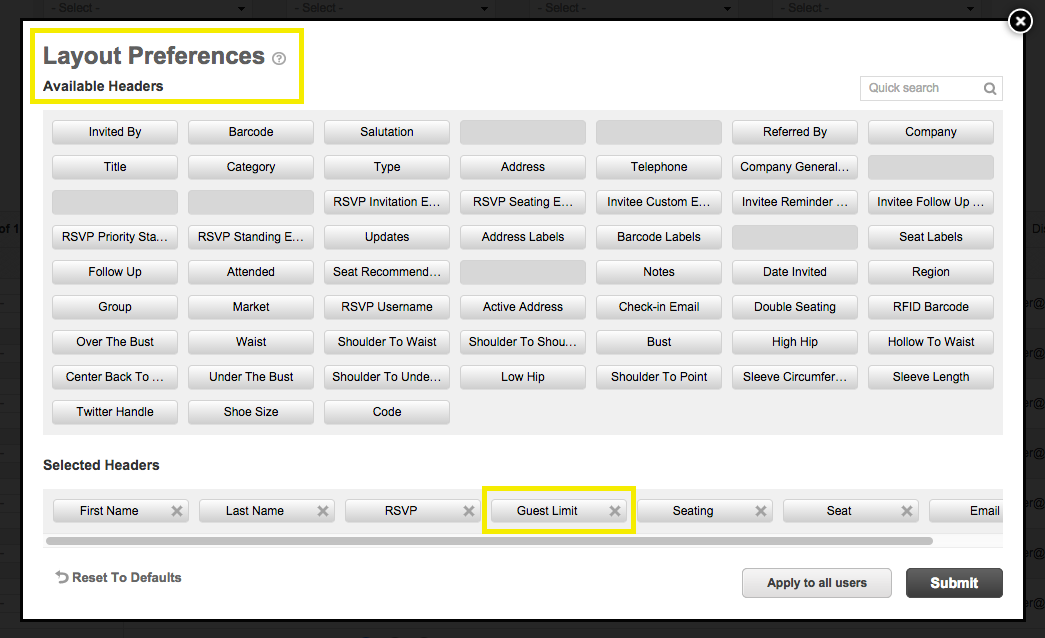
- Within 'Invitees Manager', you are able to view the amount of Guests that each Invitee has been allocated for your event. Remember to make sure that 'Guest Limit' is selected using the Layout Preferences tool.
Facts About Adding Guests
The following will serve to summarize key facts about adding Guests:
- Guests cannot RSVP on their own
- Invitees must RSVP for their Guests
- All added Guests are automatically RSVP'd "Yes" regardless of their Invitee's RSVP
- RSVP statuses for Guests can be manually changed via 'Invitees Manager'
- Guests do not receive 'RSVP Invitation' emails
- If the Invitee enters an email address for their Guest, they will receive the 'RSVP Yes Confirmation' email directly. Otherwise, the Invitee will receive the Confirmation email on behalf of their Guest.
- Guests can receive seating emails
TWO WAYS TO ADD GUESTS
- Within 'Invitees Manager', Guests are able to be added as both a temporary 'Event contact' (meaning the person will not be saved to your 'GPS Contacts' database) and from your 'GPS Contacts' database.
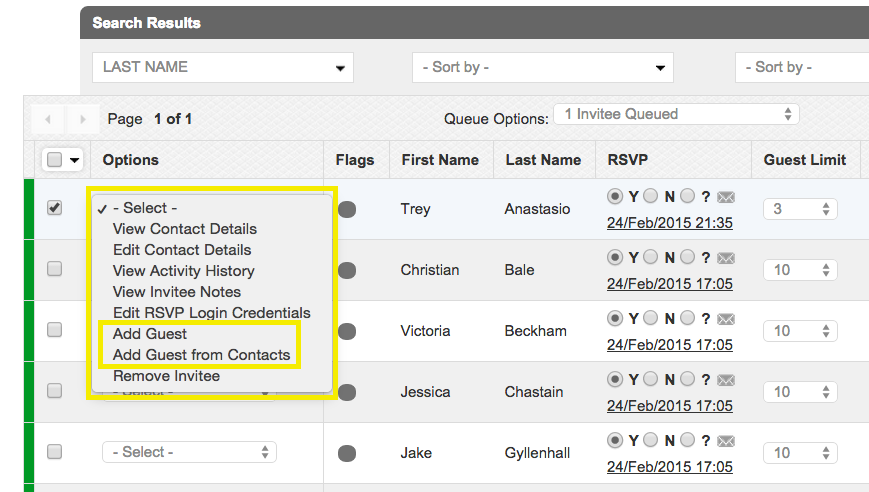
1. ADD GUEST
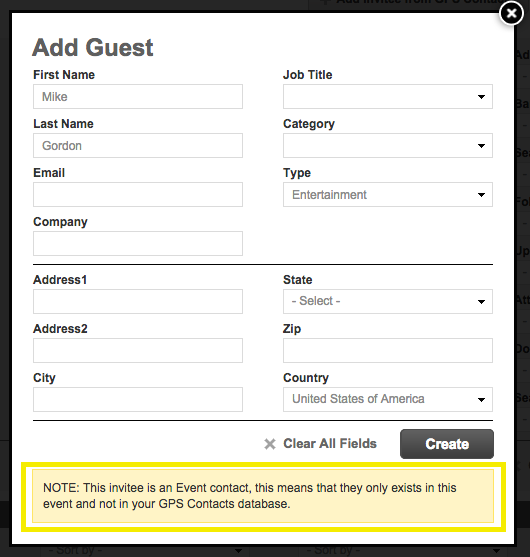
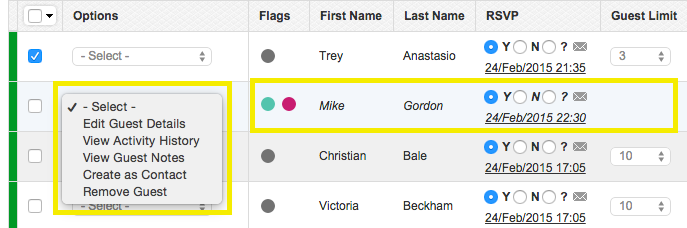
- By selecting 'Add Guest' from the 'Options' menu drop-down, the Invitee's Guest will be added as a temporary 'Event contact' and will not be saved to your 'GPS Contacts' database.
- After selecting 'Add Guest' you will be prompted to fill out information regarding the Guest. Not all fields need to be complete. Click 'Create' to add Guest to the associated Invitee.
- Each Guest will be identifiable by it's italicized name underneath the associated Invitee.
- Guests will have specific colored coded 'Flags' identifying them as a Guest and denoting as a temporary 'Event contact'.
- Each Guest will have 5 options that allow you to 'Edit Guest Details', 'View Activity History', 'View Guest Notes' which allows you to view and create notes on each Guest (ex: Does not eat shellfish, Gluten free), 'Create as Contact' which allows you to convert temporary Event contacts to your 'GPS Contacts' database, and lastly to 'Remove Guest'.
2. ADD GUEST FROM CONTACTS
- By selecting 'Add Guest from Contacts' in the 'Options' menu drop-down, the Invitee's Guest will be searchable from your 'GPS Contacts' database and able to be selected from that view.
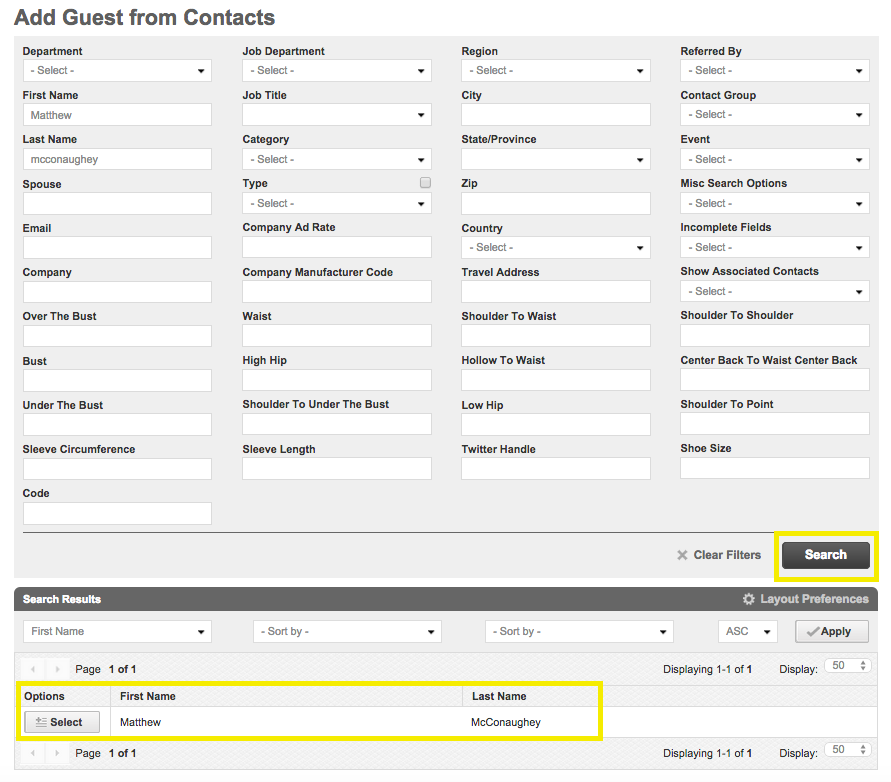
- To invite the Guest, simply click 'Select' and the Guest will appear in 'Invitees Manager' under the associated Invitee.
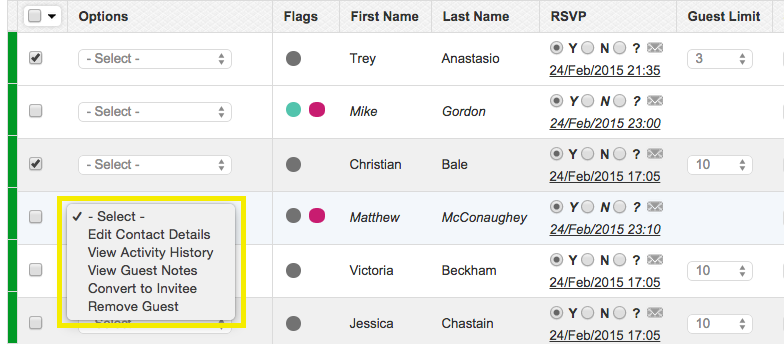
- Each Guest will be identifiable by it's italicized name underneath the associated Invitee.
- Guests will have specific colored coded 'Flags' identifying them as a Guest and denoting as a 'GPS Contact'.
- Each Guest will have 5 options that allow you to 'Edit Guest Details', 'View Activity History', 'View Guest Notes' which allows you to view and create notes on each guest (ex: Does not eat shellfish, gluten free), 'Convert To Invitee' which allows you to convert a 'GPS Contact' to temporary 'Event contact', and lastly to 'Remove Guest'.
Increasing & Decreasing 'Default Guest Limit'
INCREASING
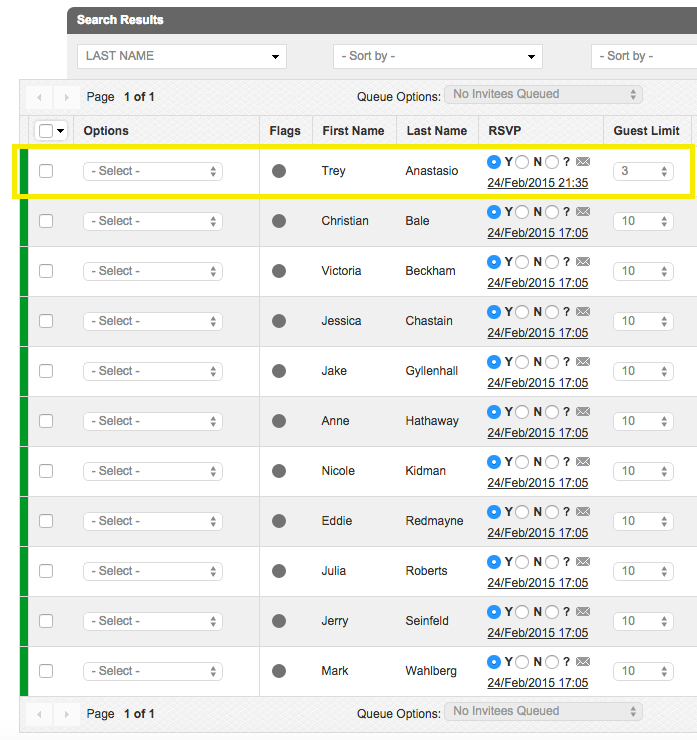
- If you INCREASE the 'Default Guest Limit' from 'Event Details' this change will apply to all current and new Invitees. In this example, the 'Default Guest Limit' will be increased to 10.
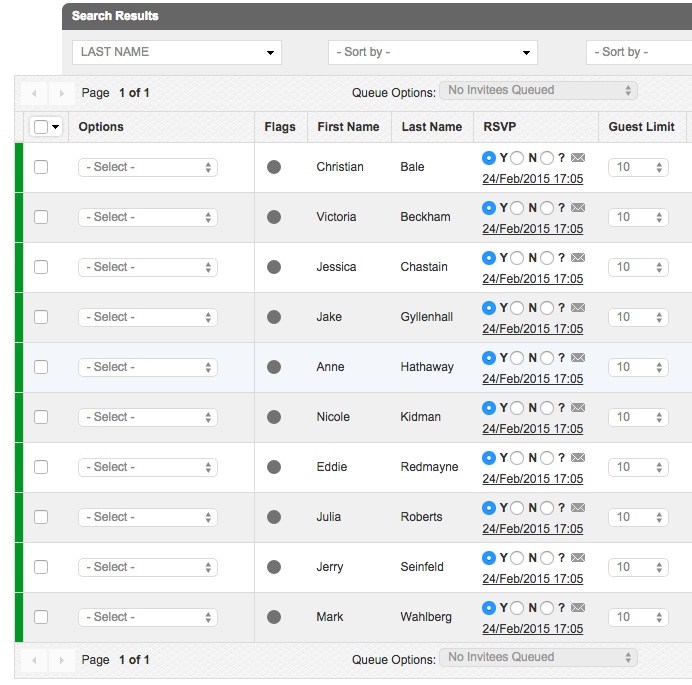
BEFORE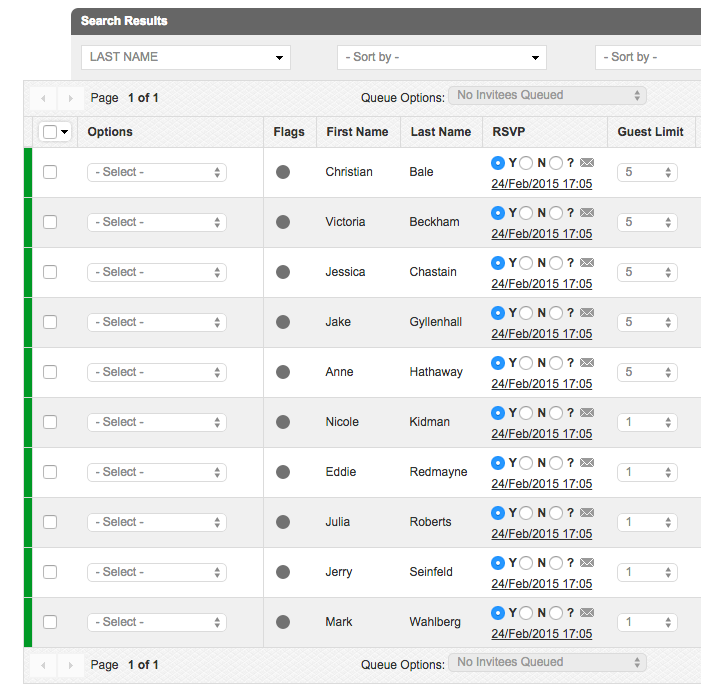
AFTER
- If you decide to DECREASE the 'Default Guest Limit' from 'Event Details' this change WILL NOT apply to all current Invitees. This change will only apply to any new Invitee added. In this example, the 'Default Guest Limit' will be decreased to 3 and a new Invitee will be added to reflect the above explanation.
BEFORE

AFTER
- DECREASING the 'Default Guest Limit' for Invitees can be trickier than increasing. This is why it is advisable to set a comfortable 'Default Guest Limit' from the start of your event planning.
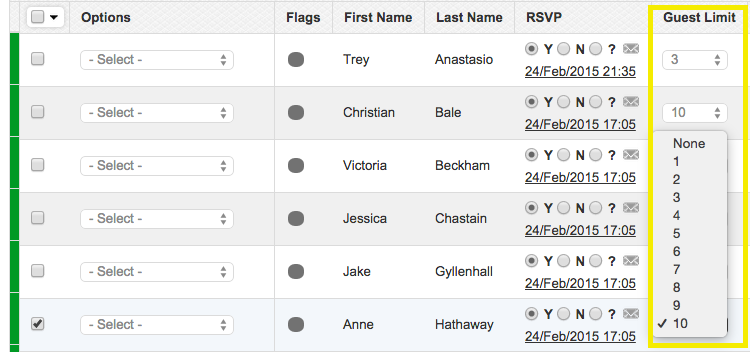
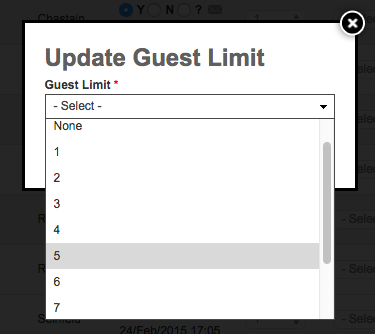
- To DECREASE (or even increase) the number of Guests for a single Invitee, simply click the drop-down icon under 'Guest Limit' and select.
- To DECREASE (or even increase) the number of Guests for multiple Invitees, queue each appropriate Invitee, and click 'Update Guest Limit' from the Queue Options drop-down.
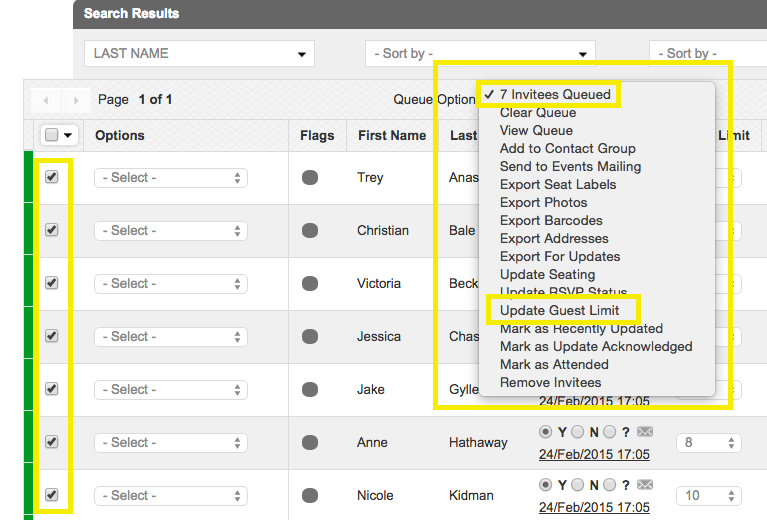
- Select the new Guest limit. These updated changes will be reflected in 'Invitees Manager'.
RSVPing for Guests
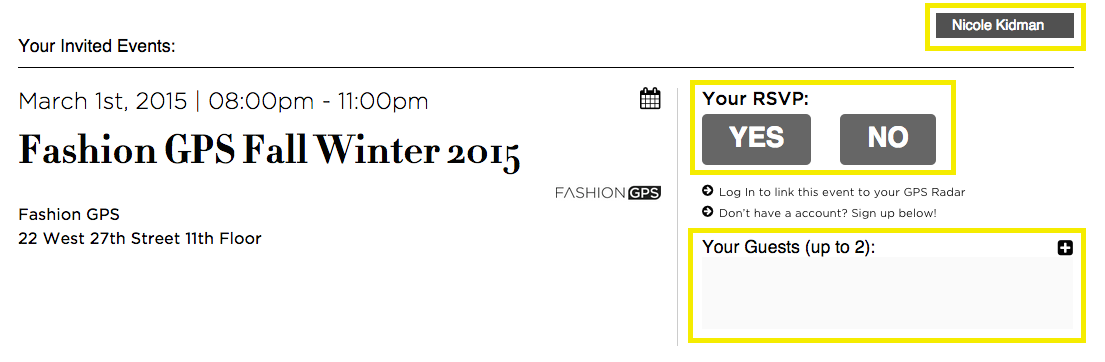
- Once an Invitee has been emailed their 'RSVP Invitation' from 'Events Mailing', that Invitee will be prompted to 'Click To RSVP' for your event within that email.
- The Invitee will be redirected to the above page where they will have the options to RSVP "Yes" or "No", as well as add their Guests. An Invitee will be able to see how many Guests they have been permitted to invite.
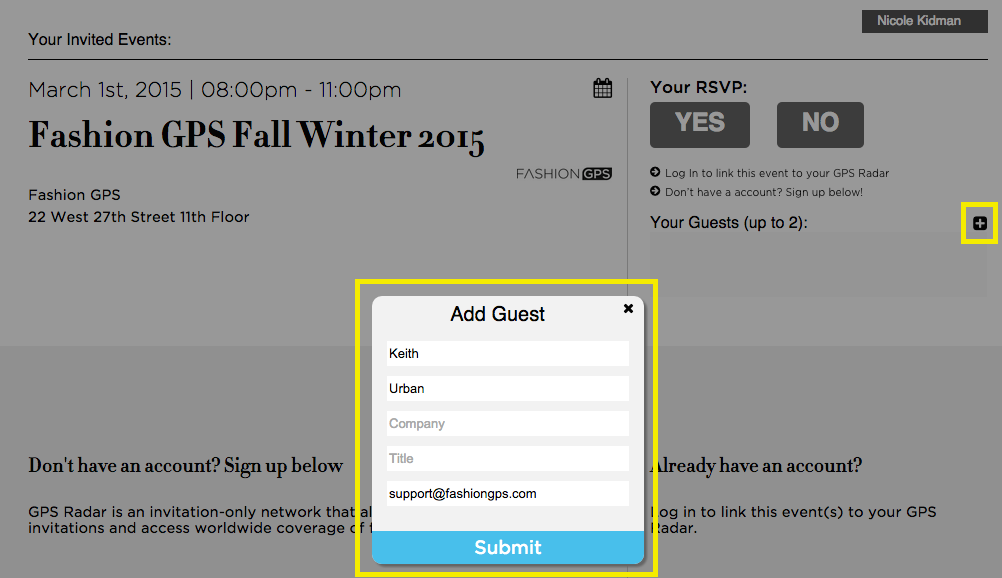
- Once the Invitee clicks on the [+] button, they will be prompted to enter the information for their Guest. When all Guests have been added, they will be shown underneath the RSVP options.
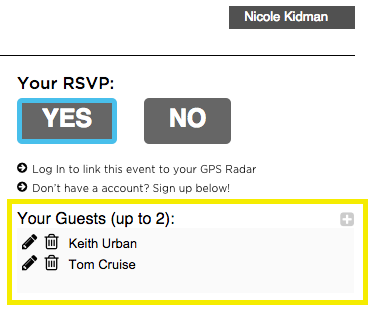
- Each added Guests will automatically be RSVP'd according to their Invitee's RSVP status.
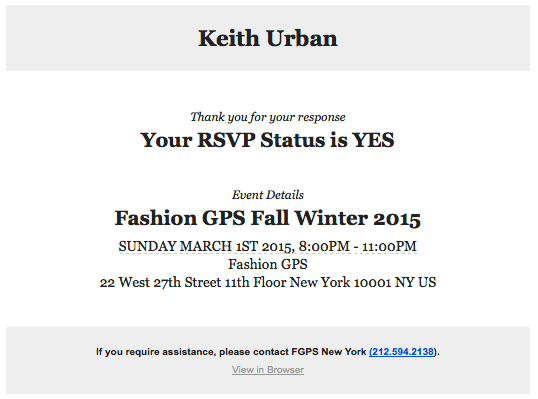
- Guests do not receive 'RSVP Invitation' emails. They will only receive 'RSVP Yes Confirmation' emails.
- To ensure that each Invitee and their Guest will have seamless check-in at your event, make sure to assign the Invitee and Guest their seating using 'Invitees Manager', and send an 'RSVP Seating' email. By clicking 'Send to Full List' you will have successfully invited all parties to your event.