
Download the Samples mobile app search "Samples By Launchmetrics" inside the Apple App Store.
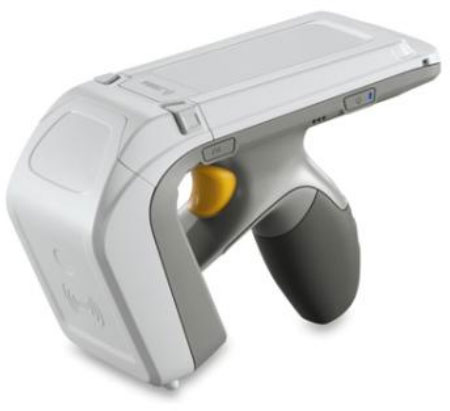
The Zebra RFD8500 RFID Reader allows users to connect via Bluetooth on their iPhone devices to the Samples Mobile app. Click here for a link to purchase the RFD8500.
Additional iPhone mounting accessories for the RFD8500 can be found below. These are not required for usage with the RFD8500.
Some other things to keep in mind:
- Learn more about the benefits of RFID sample tags
- RFID functionality is a setting that must be enabled by your CSM. Reach out if you are unsure that it is enabled.
- Please note that users are able to use both RFID tags and traditional Barcode labels to manage their sample inventory. RFID scanning is an additional way to make sample management even easier when using the Samples Mobile app. Within Samples Mobile, users can toggle between both RFID scanning and Camera scanning to accommodate all samples and departments that use Launchmetrics. This article will focus on just using the app with RFID scanning. Click here for our support article on Sample Mobile without using RFID.
Pairing RFD8500 With iPhone
- Power on the RFD8500
- Open up System Preferences > Bluetooth in your iPhone
- When pairing the RFD8500 to a mobile device for the first time, a blue light on the scanner will start blinking fast. To authorize the Bluetooth connection, pull the yellow trigger on the RFD8500. For more information on pairing, please see this video from Zebra.
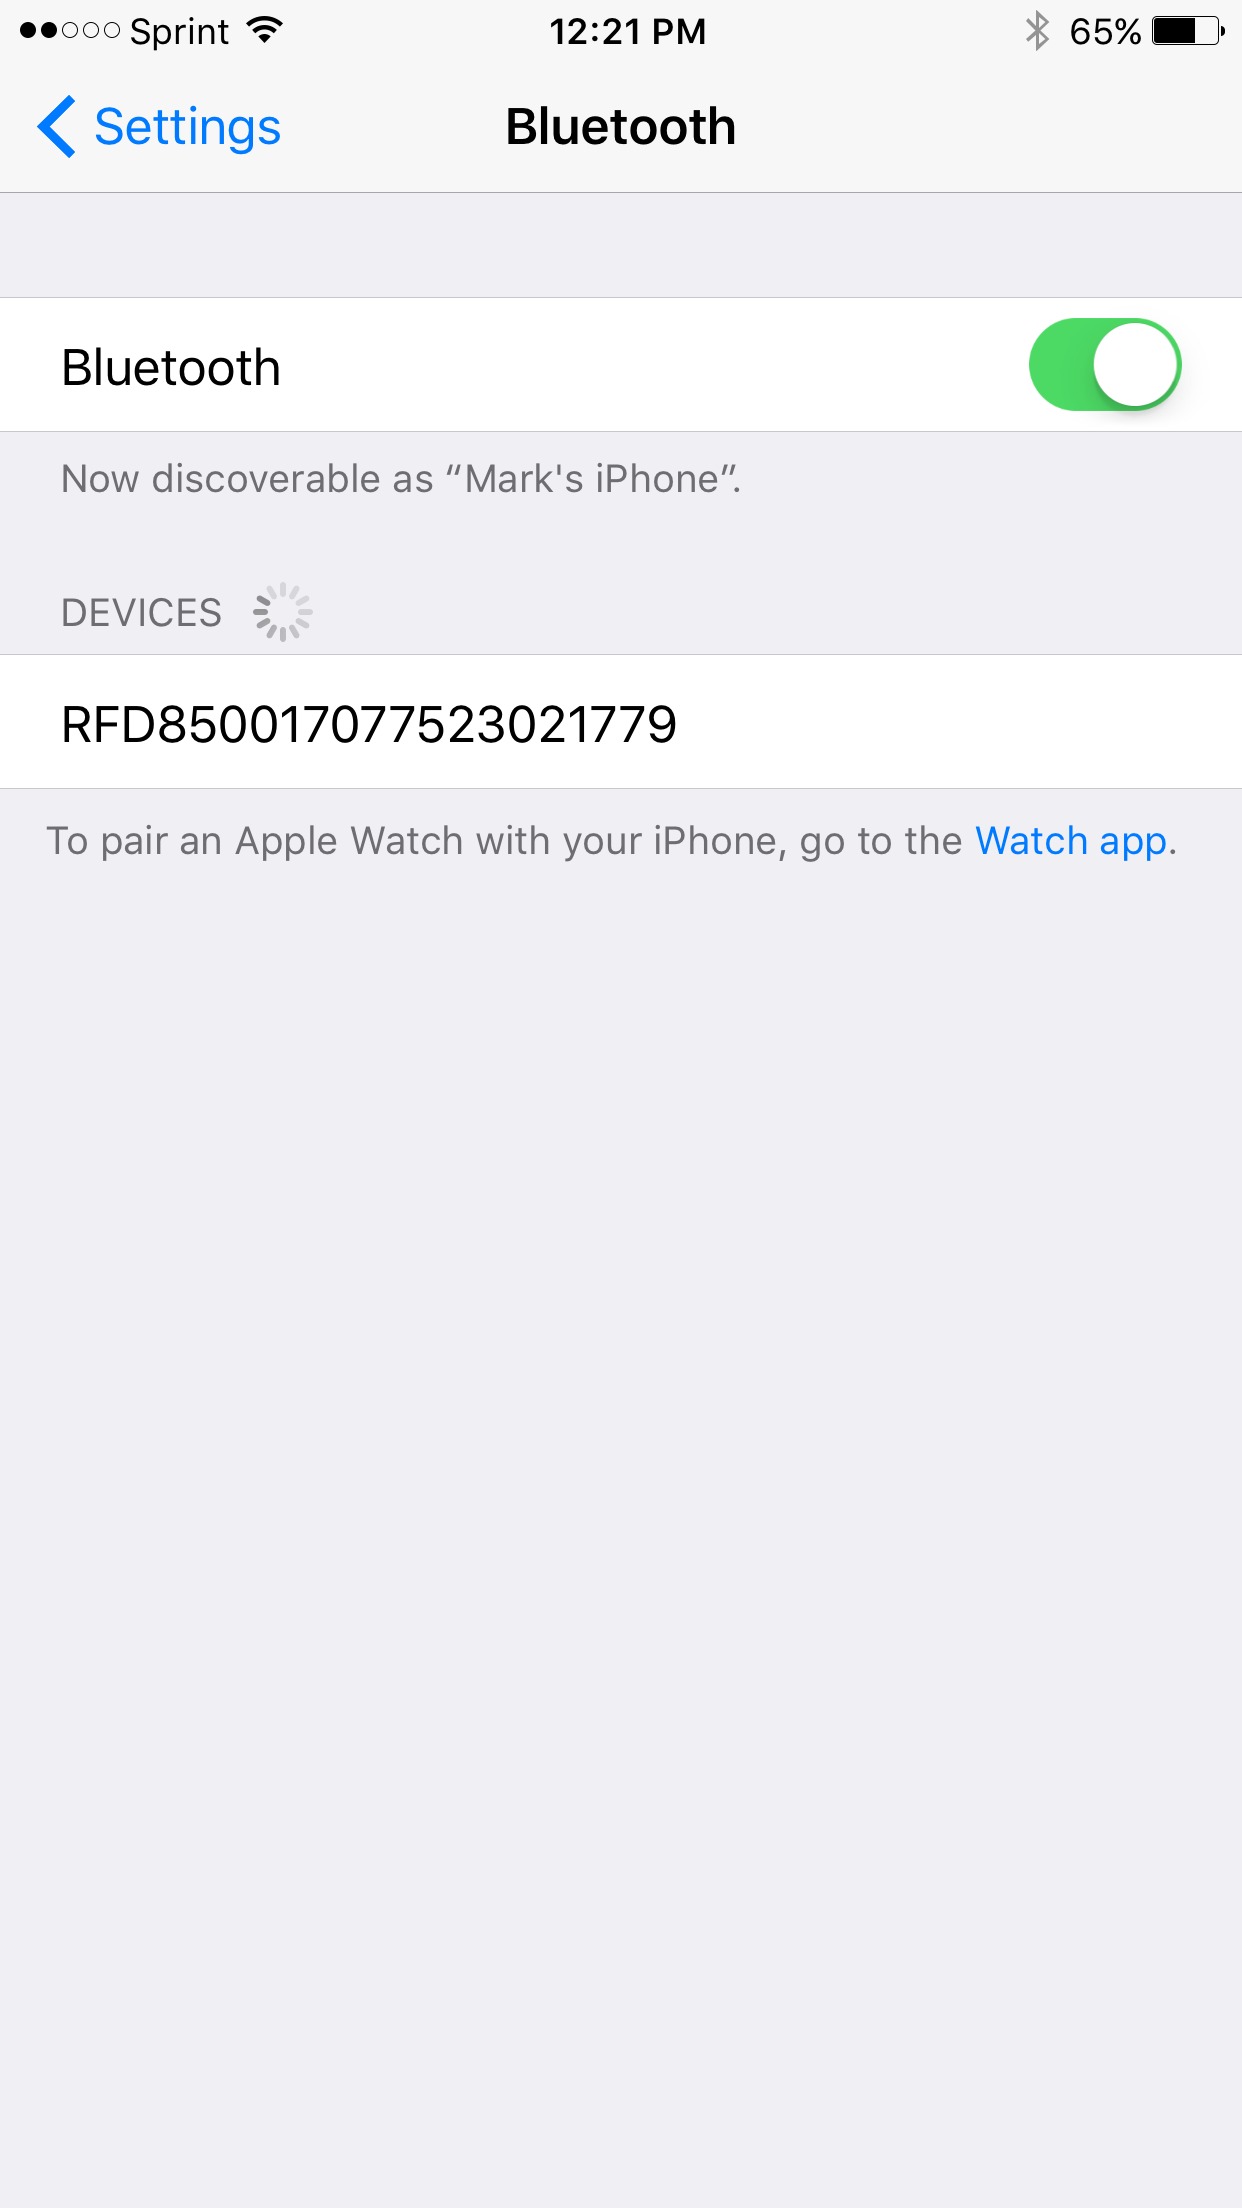
- Click on the Settings icon within Samples Mobile. To confirm your iPhone is connected to the RFD8500 you will see the RFID Scanner options.
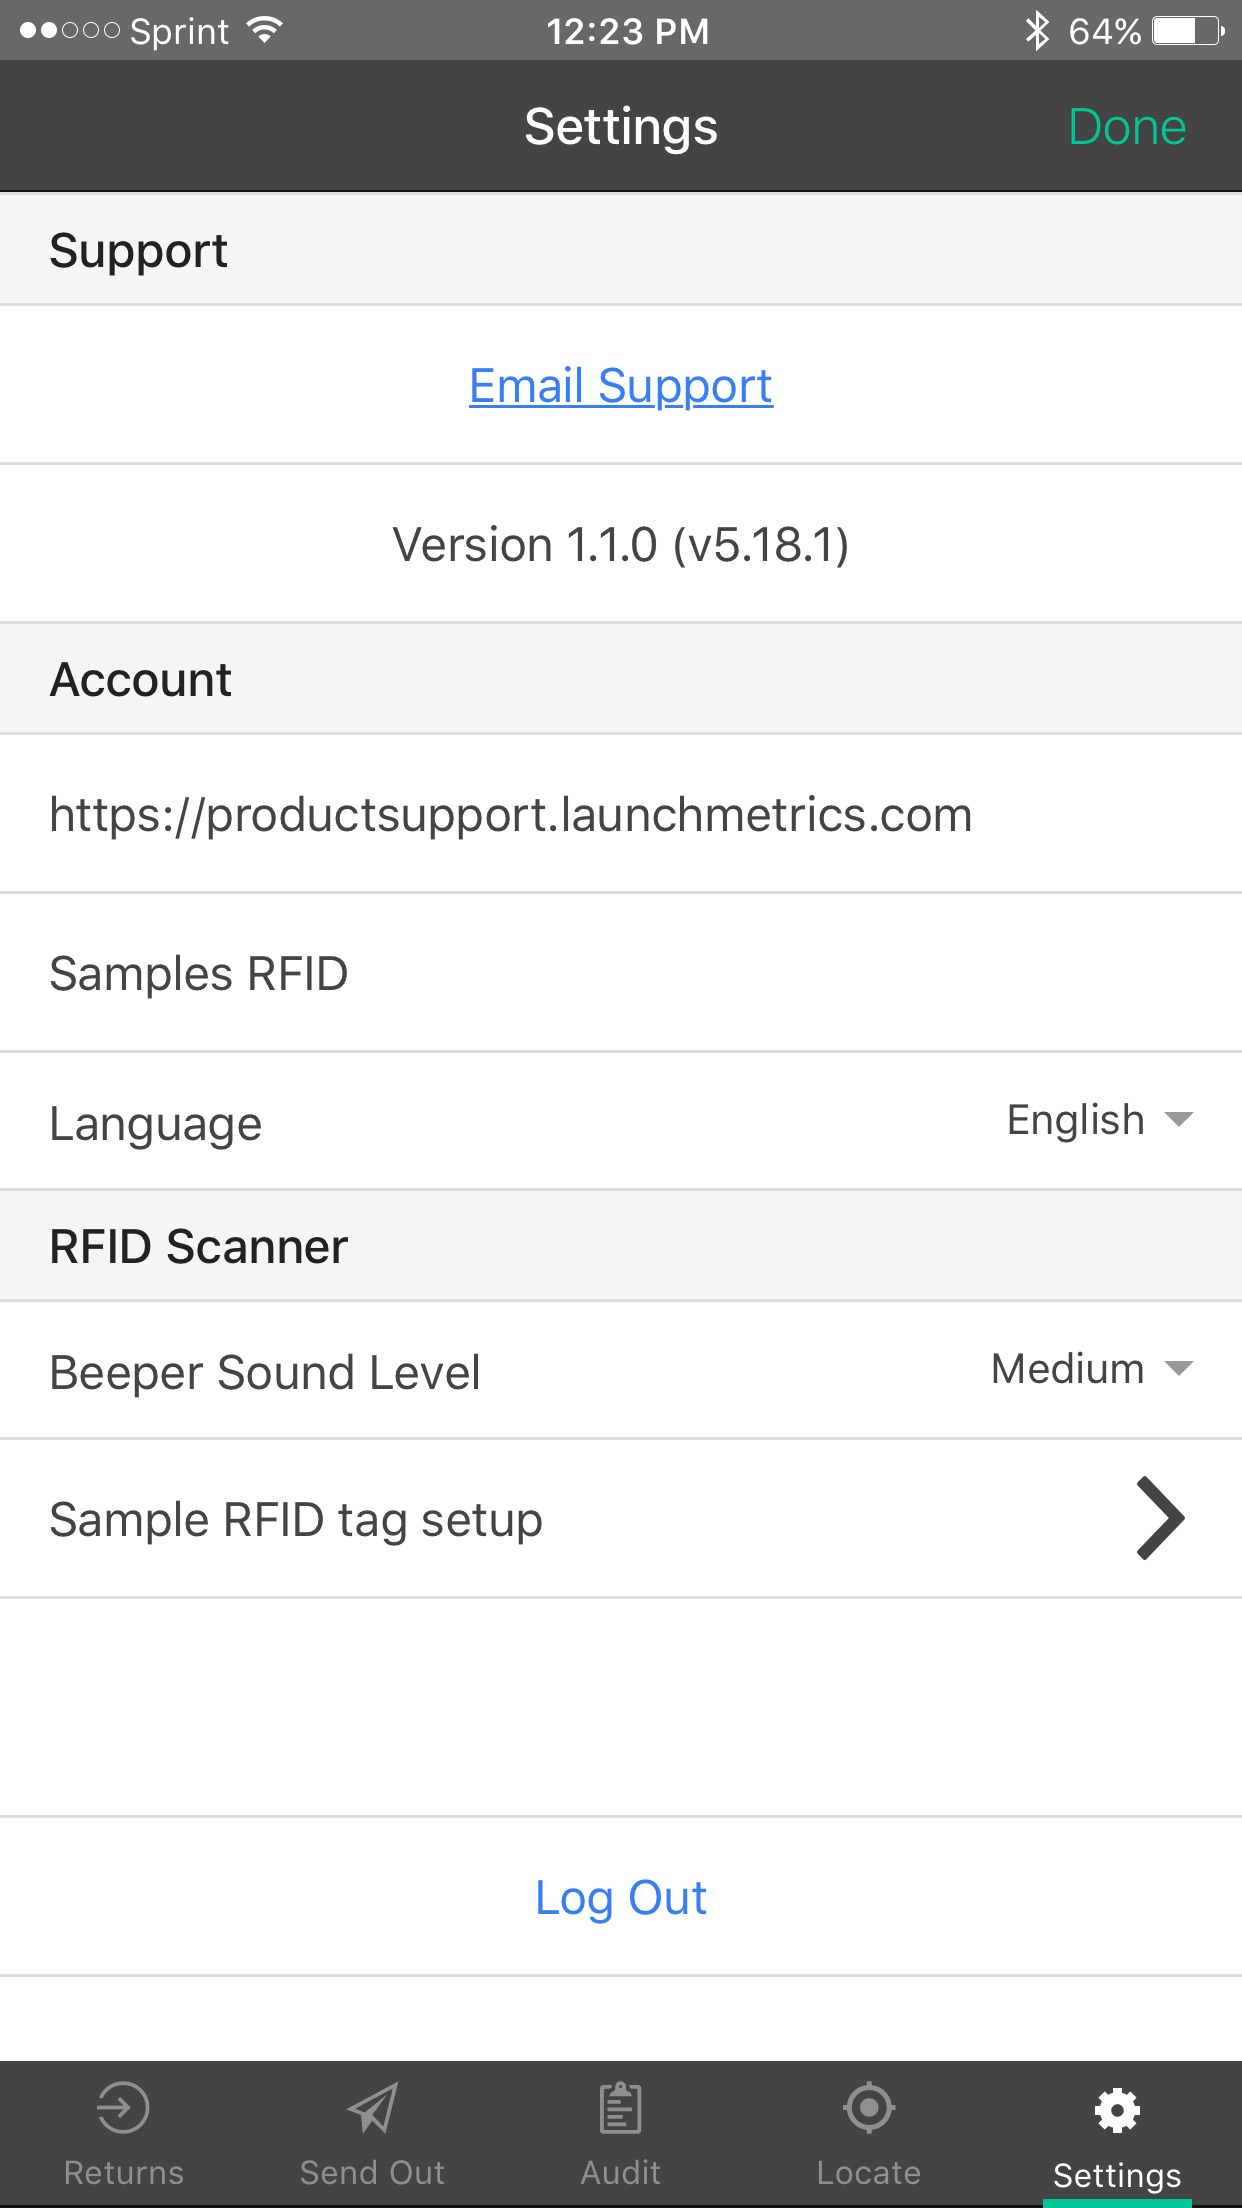
- If you would like to adjust the audio level of the beeps when scanning, click 'Beeper Sound Level'. Sound levels include Mute, Low, Medium, and High.
Creating a New Send Out
- Tap on the 'Send Out' icon in the bottom navigation, followed by "Create New Send Out" button, to initiate a new 'Send Out'
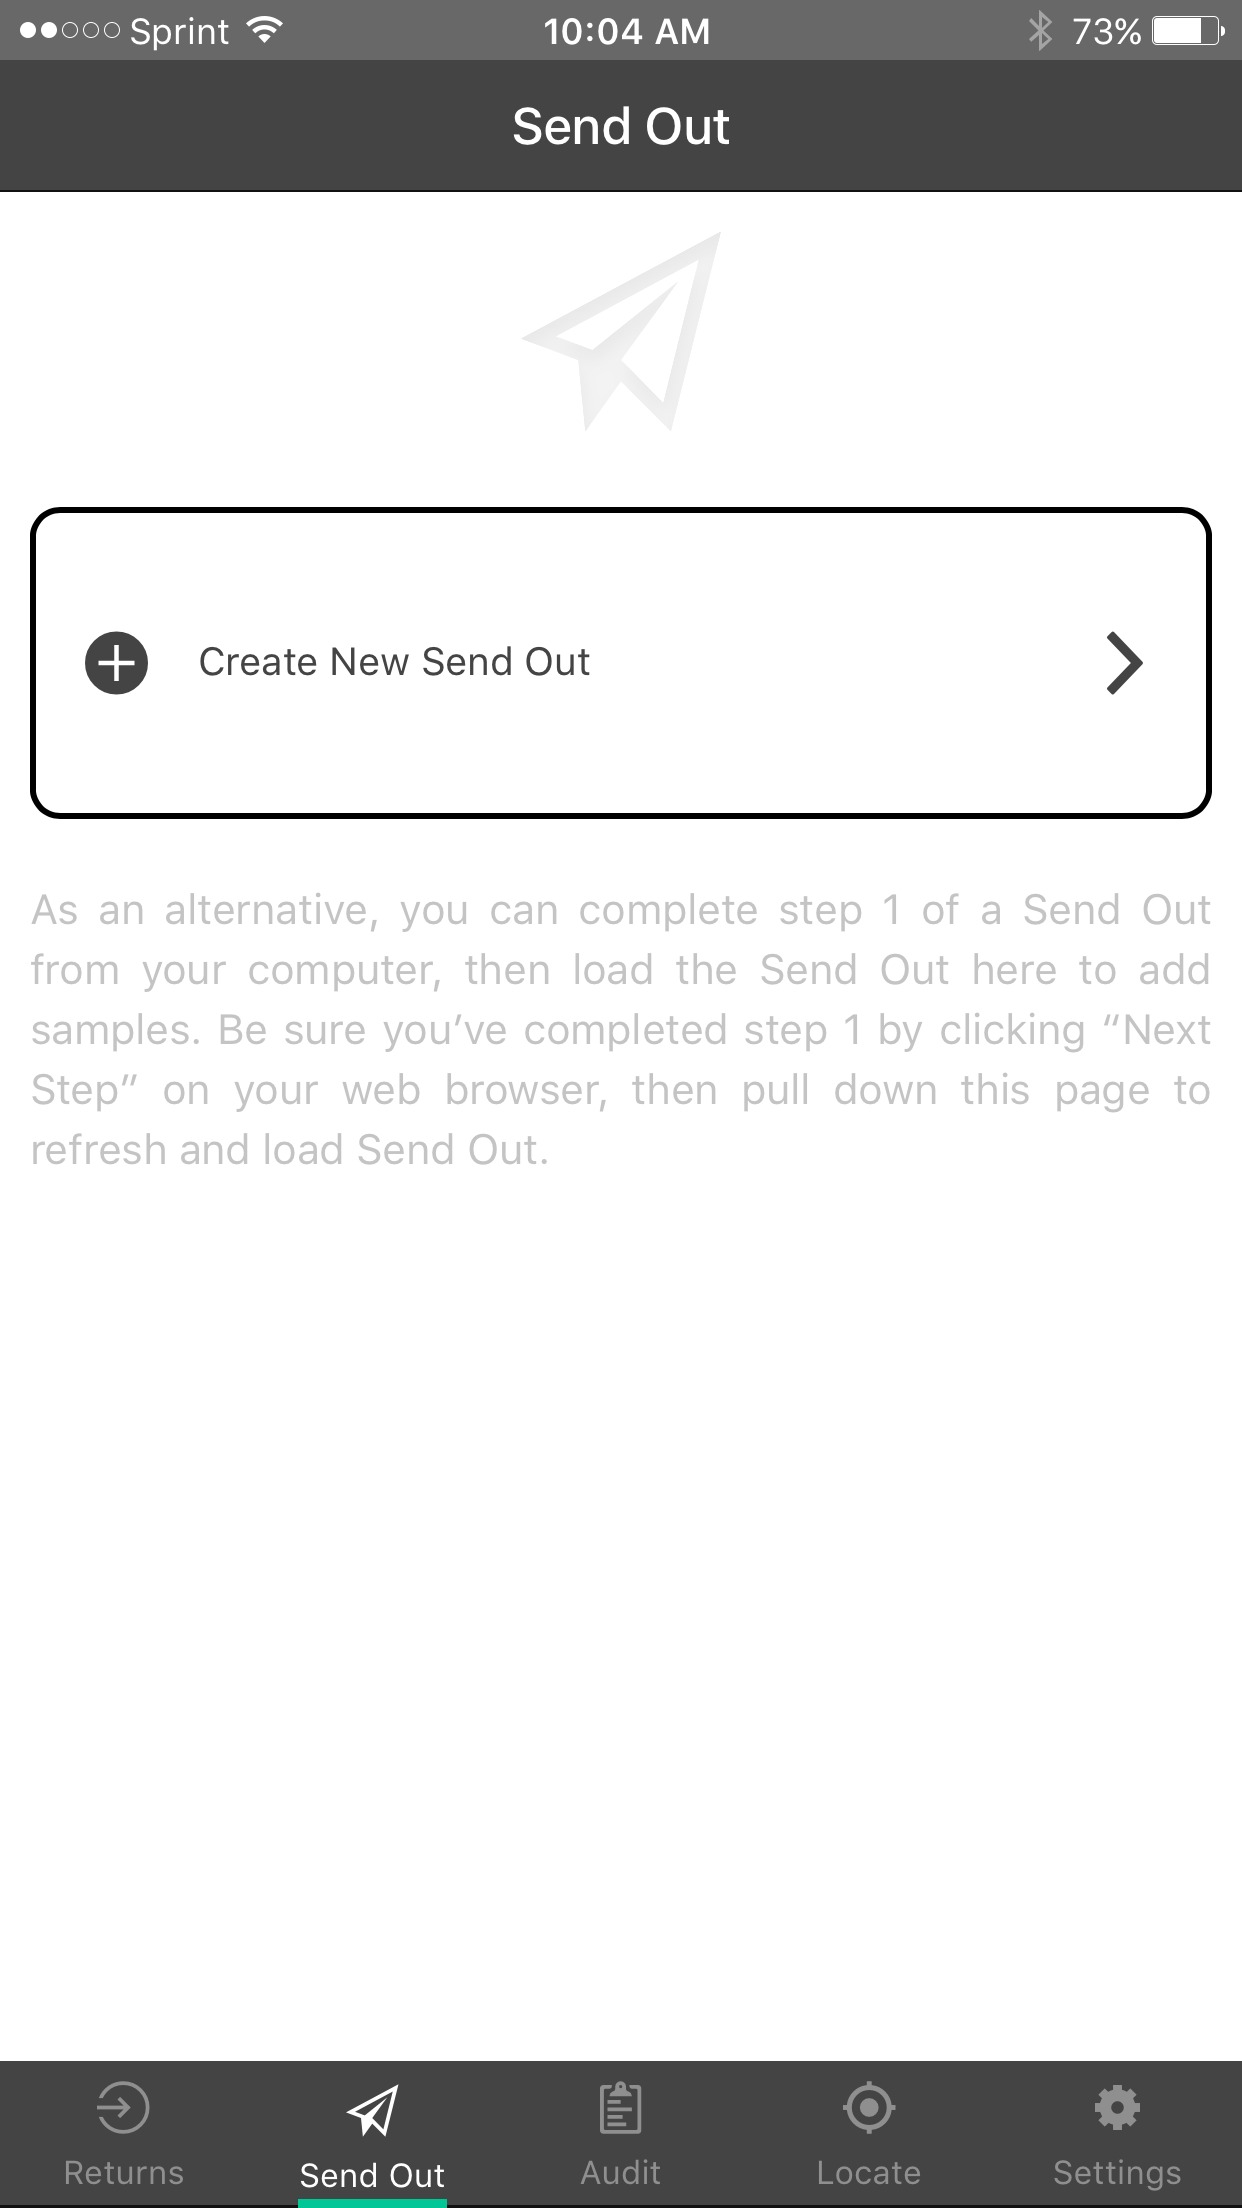
- Fill out the 'Send Out' details > tap Next to start adding samples
- Physically separate out the samples you would like to add so that other samples are not in the same vicinity
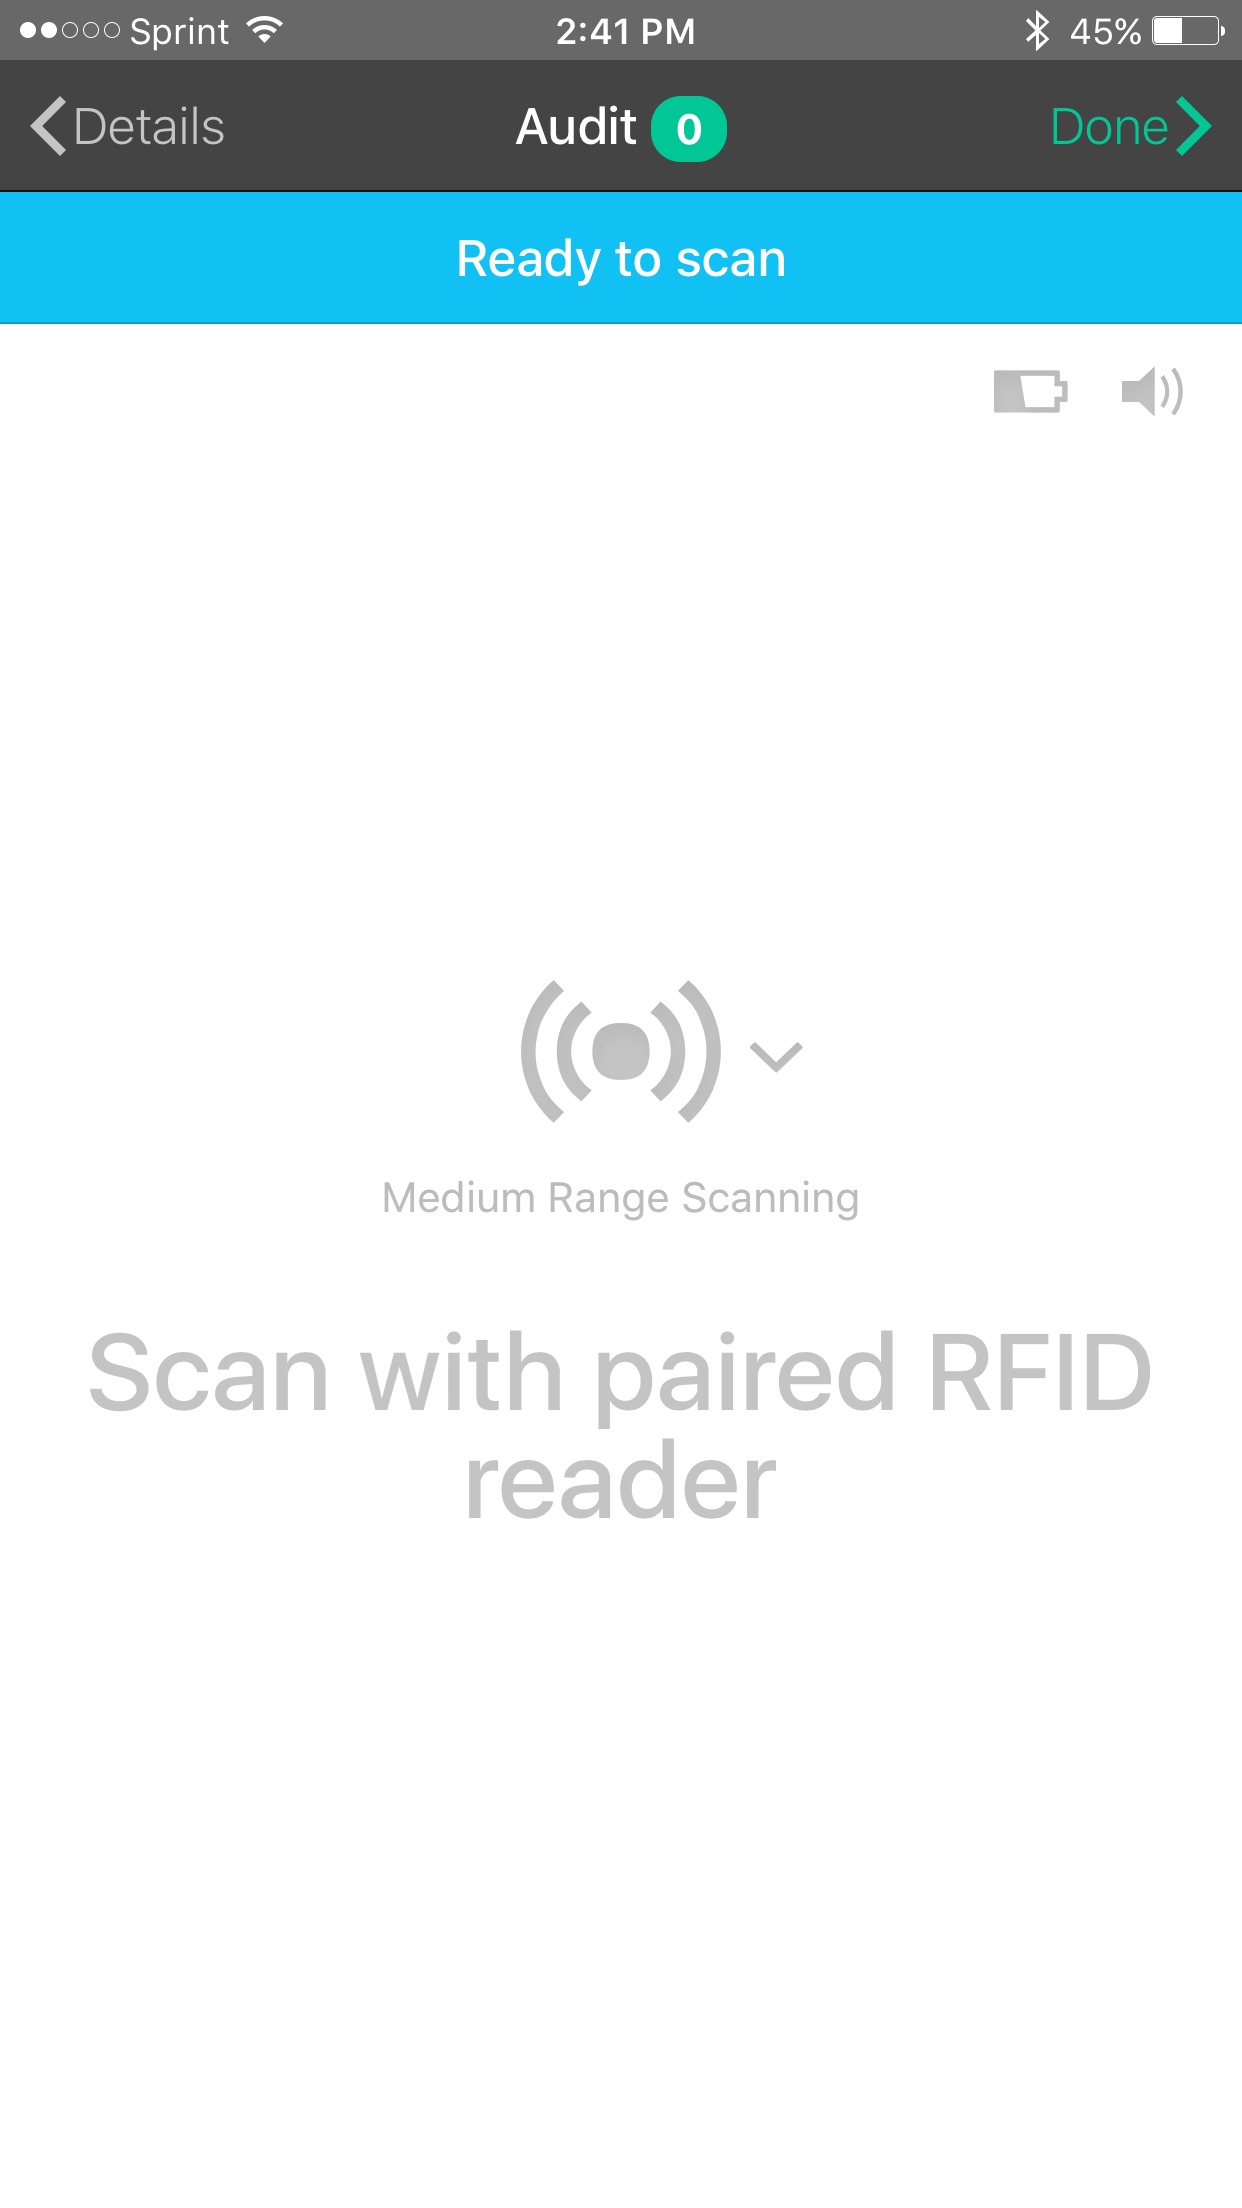
- Pull the trigger on the RFD8500 scanner to begin scanning RFID tags. You may have to wave the scanner around while holding the trigger to capture all the samples.
You will begin to see the number increase as the scanner detects more RFID tags. When you are finished release the RFD8500 trigger.
- Tap the volume icon to adjust the sound of the beeps.
- If you feel that the scanner is too sensitive and picking up items that are not in the vicinity, you can adjust the range. Tap the down arrow > Adjust Range > Close Range
- If you need to scan a 2d barcode you can either toggle to camera mode, or, if you have the RFD8500 with 2d scanner, you can simply press the "Mode" button on the side of the scanner. the green led light will turn on to indicate that it is in 2d scanning mode. You can proceed to scan barcodes using the scanner.
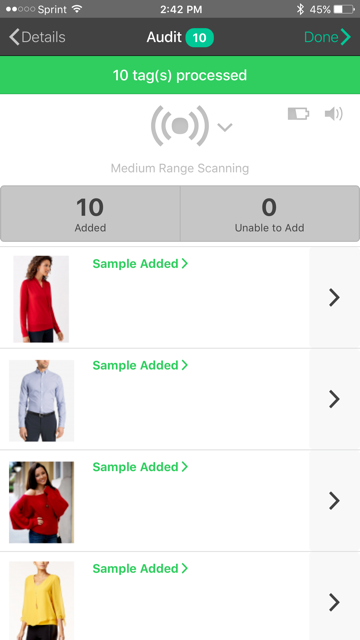
- Once you release the trigger, everything that was scanned will be processed and put into 3 buckets.
Added — Samples that are currently 'Not Marked On Loan' will be successfully added to the new Send Out.Swipe left on the sample line to give the option to "Remove" the sample from the 'Send Out'.
Unable to add — Samples that are currently 'Marked On Loan' will be added to the list of samples that are 'Unable to Add'. This is because the sample is currently unavailable and on a prior 'Send Out'.
Unknown Tag — RFID tags that have been scanned and not found in the database will be marked as 'Unknown'.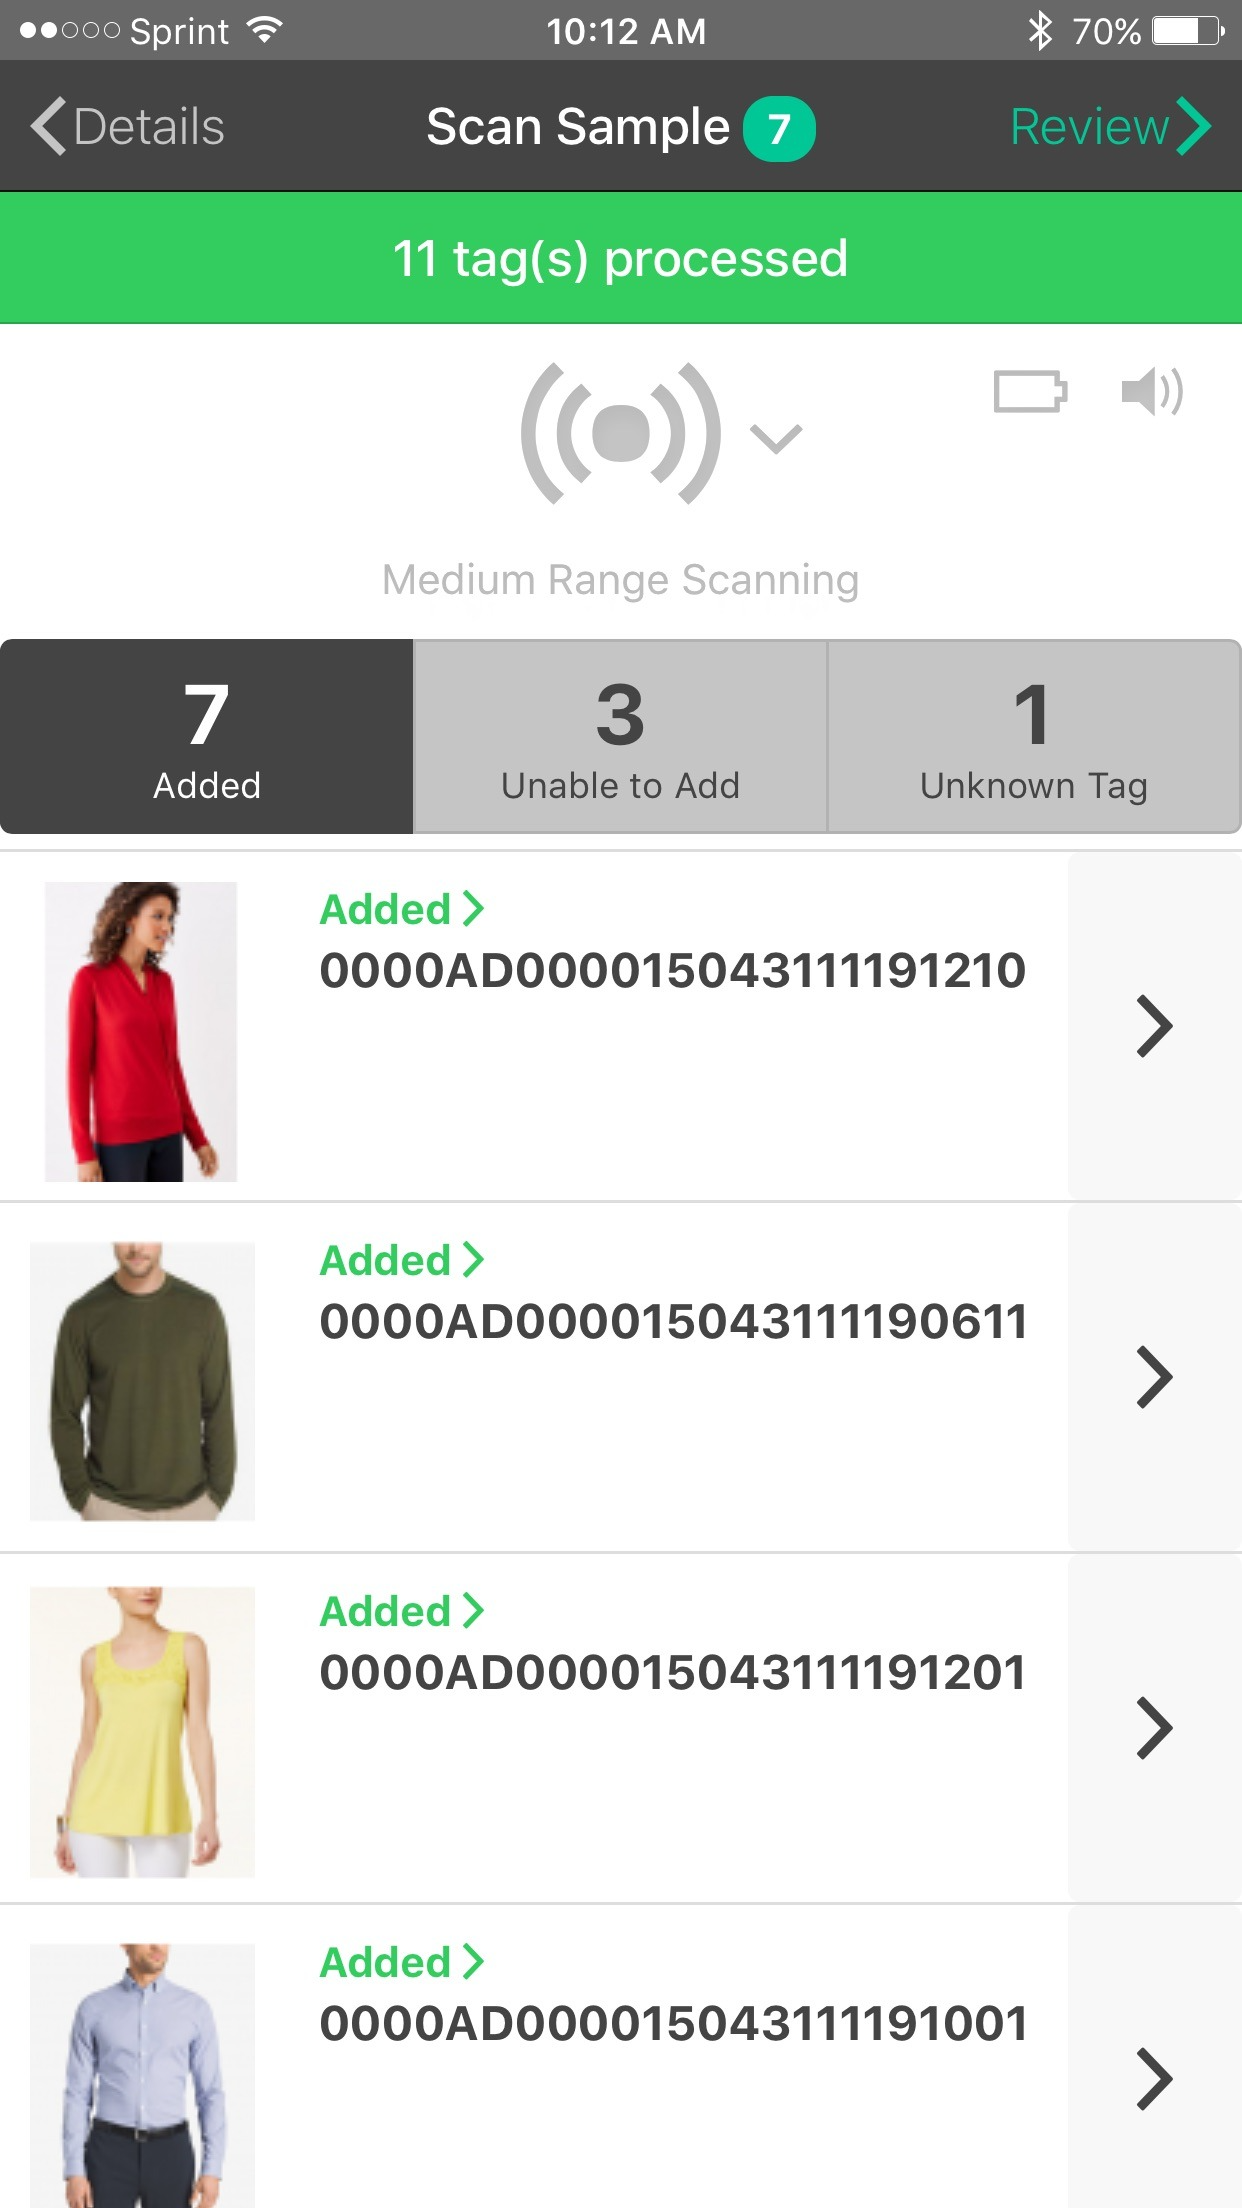
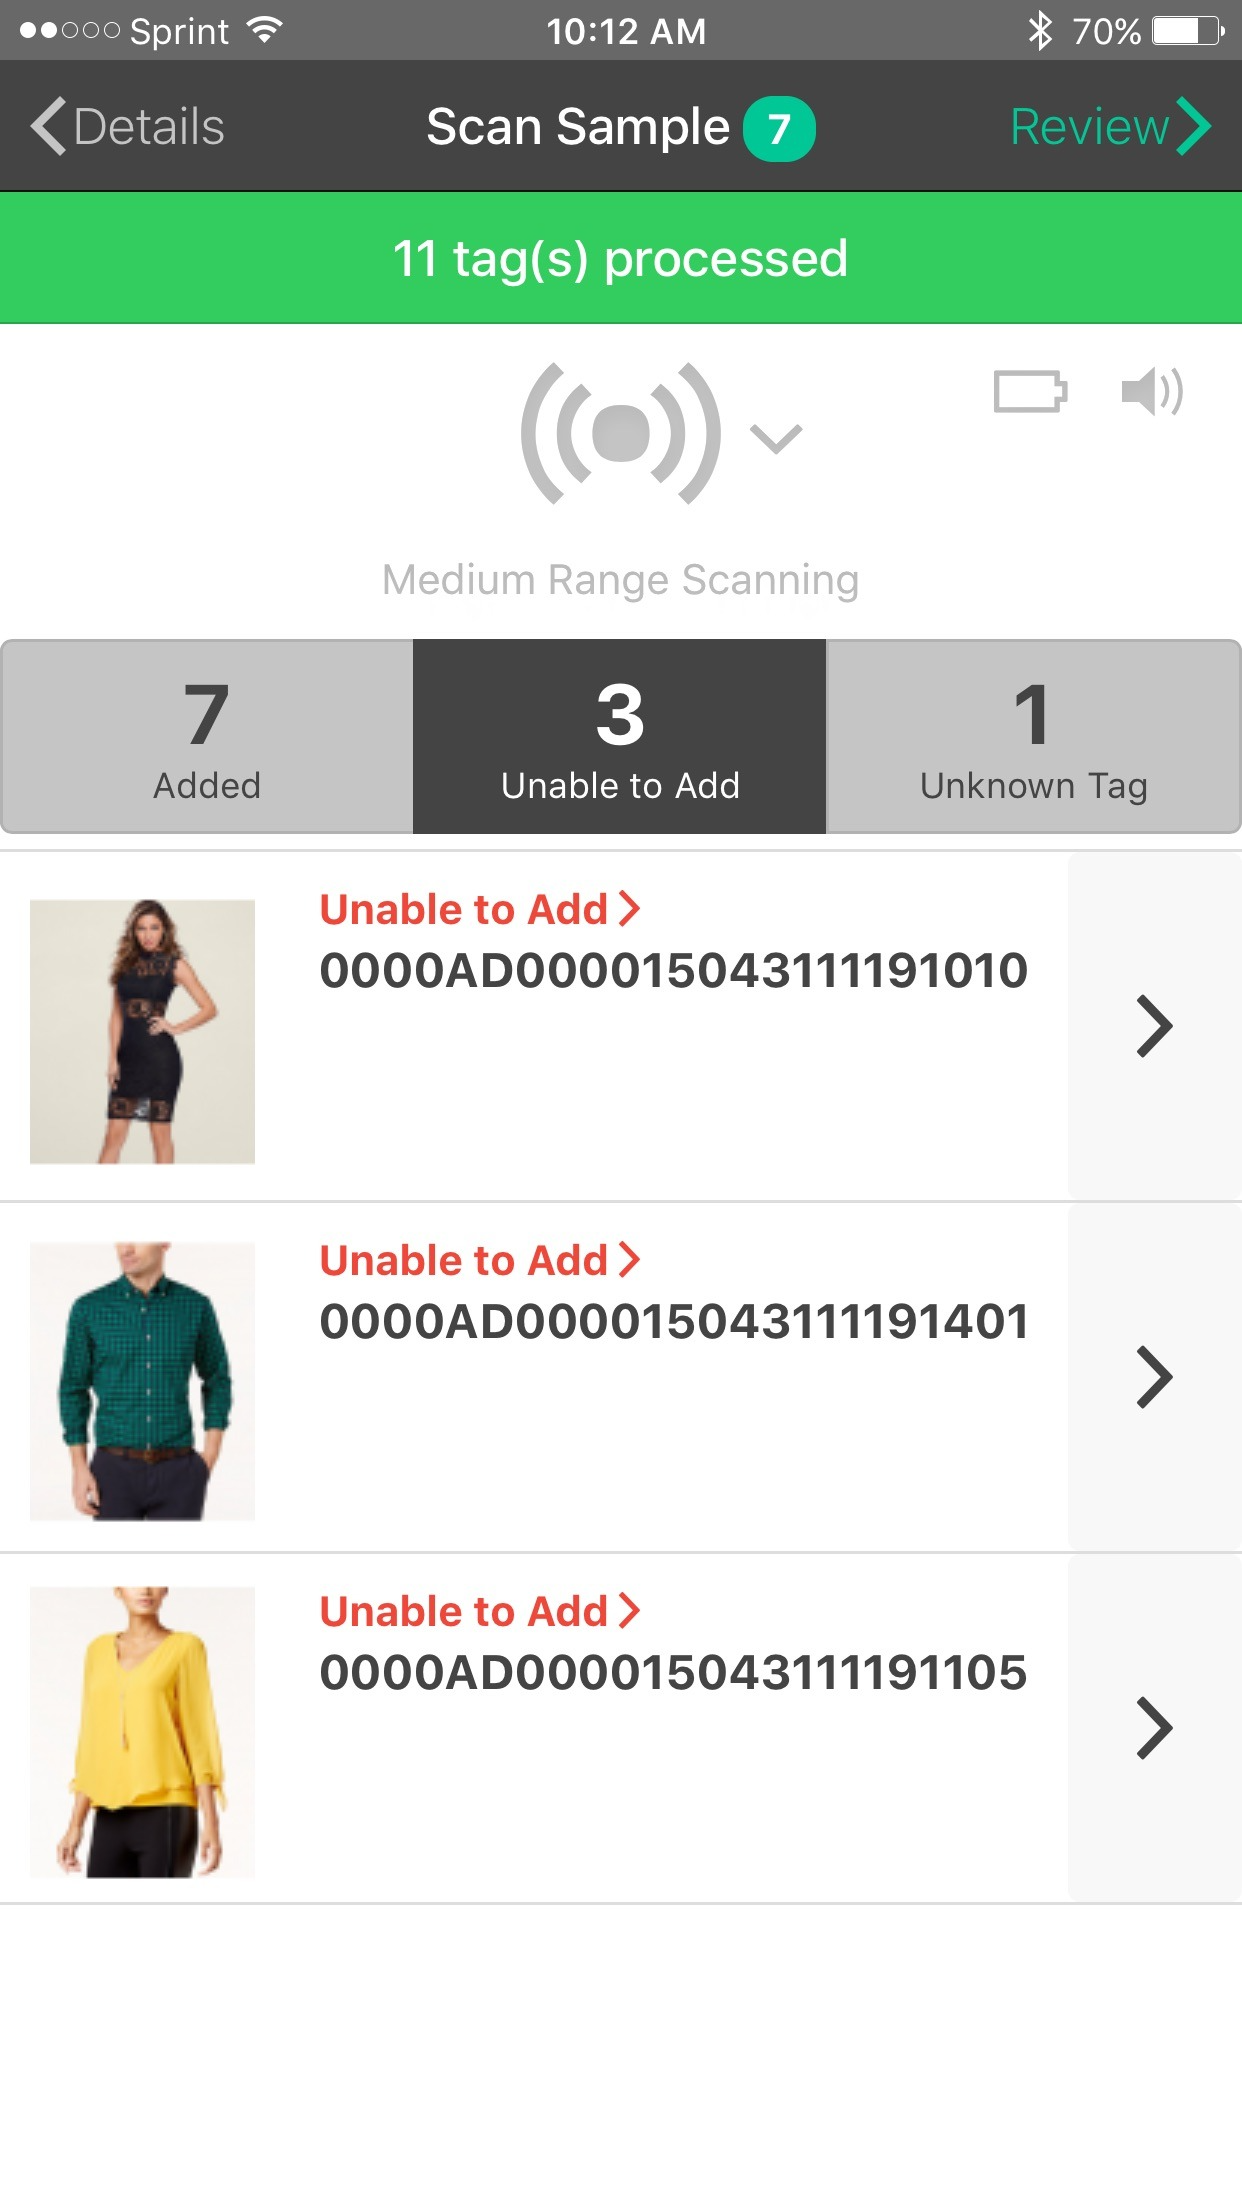
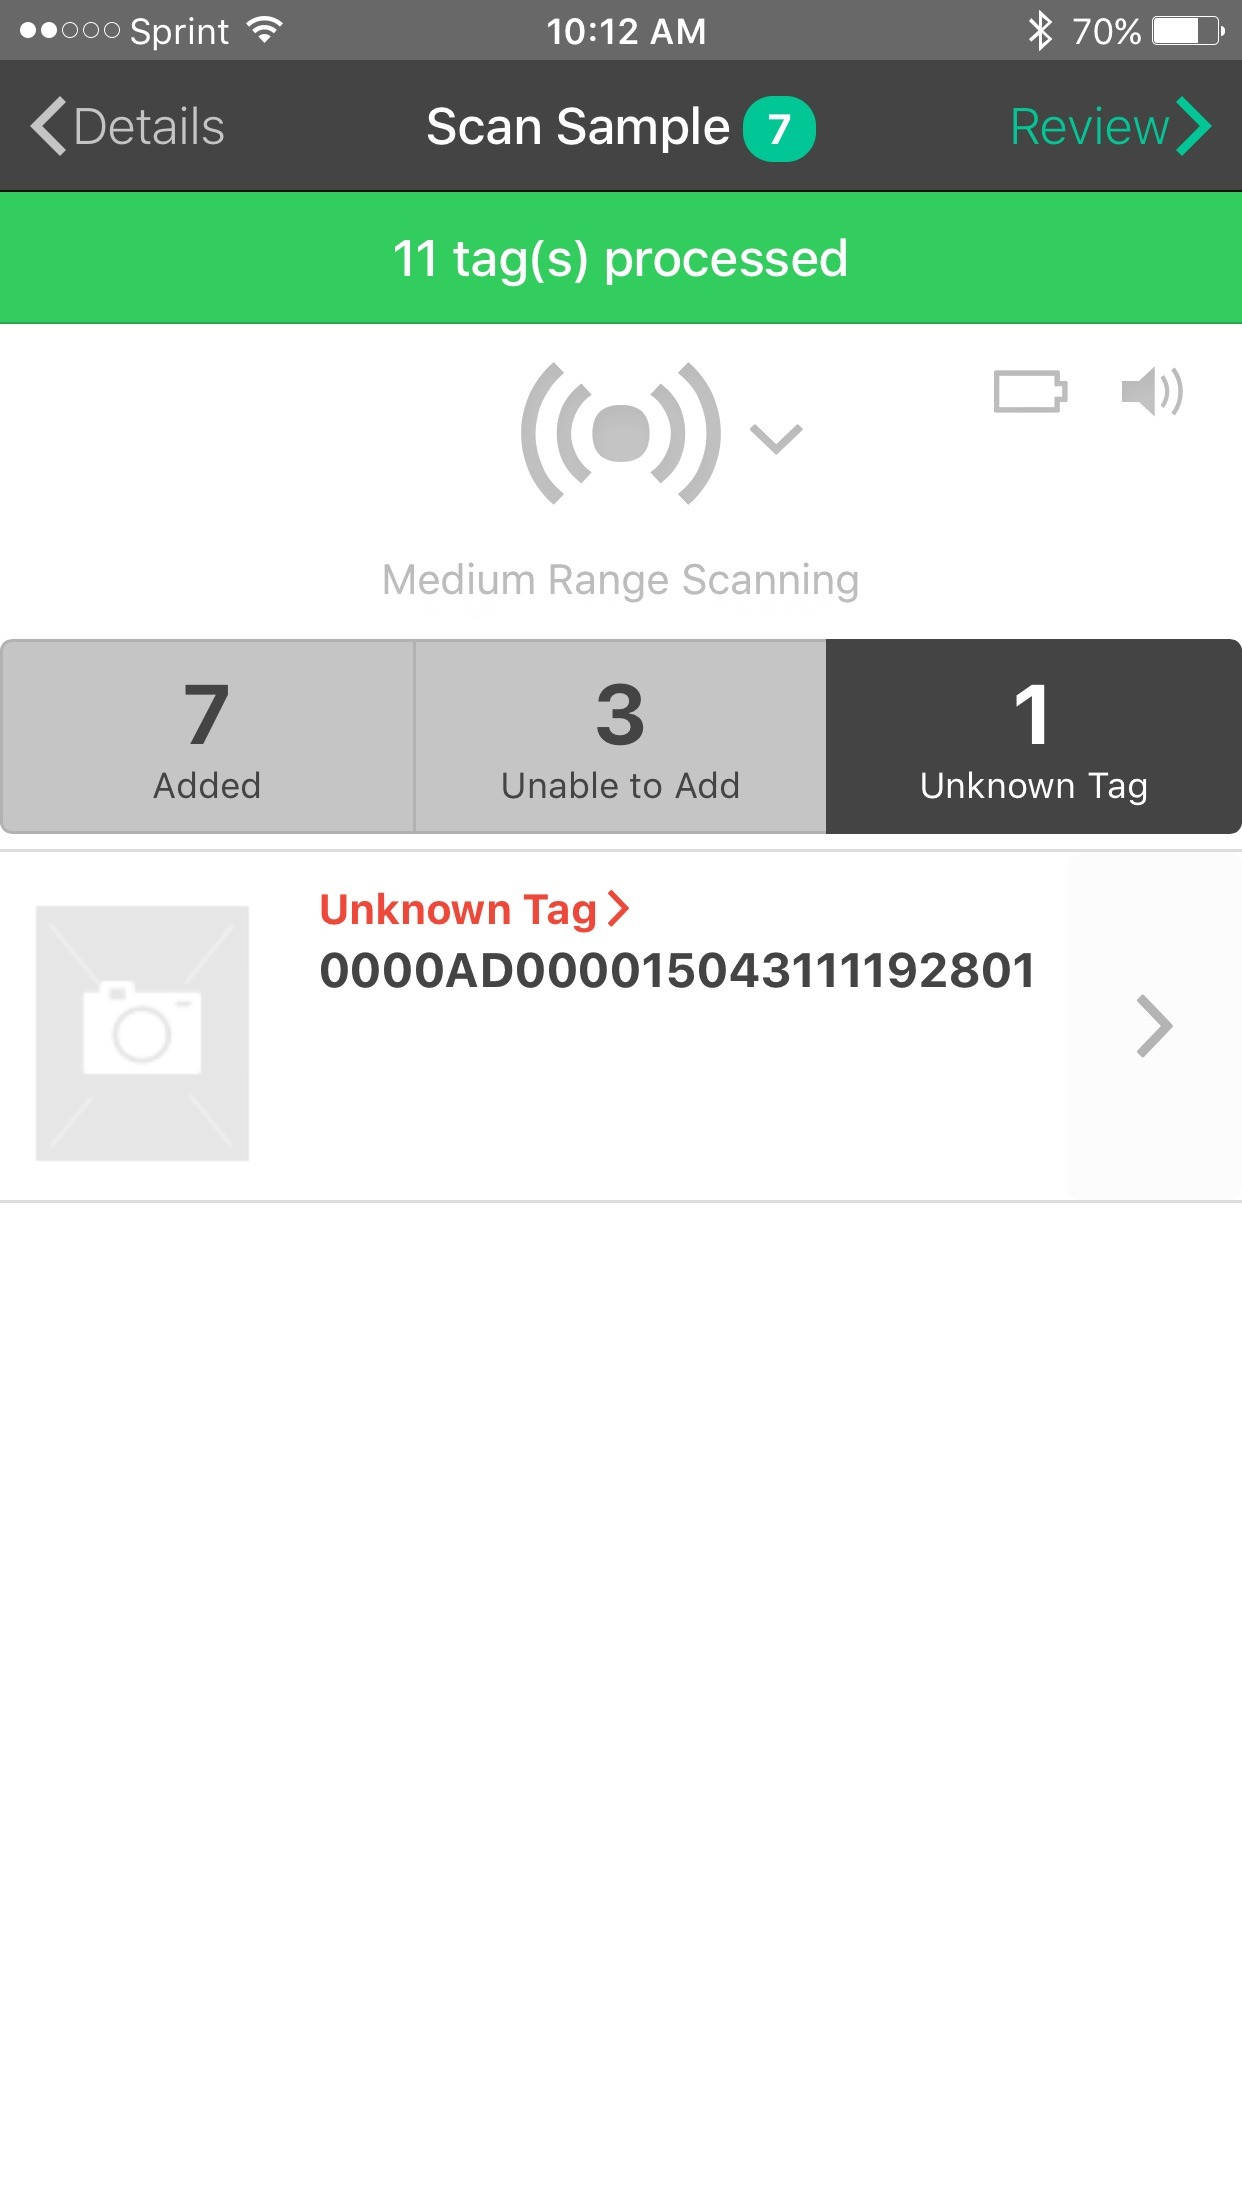
Tap the status at the top of each row for more details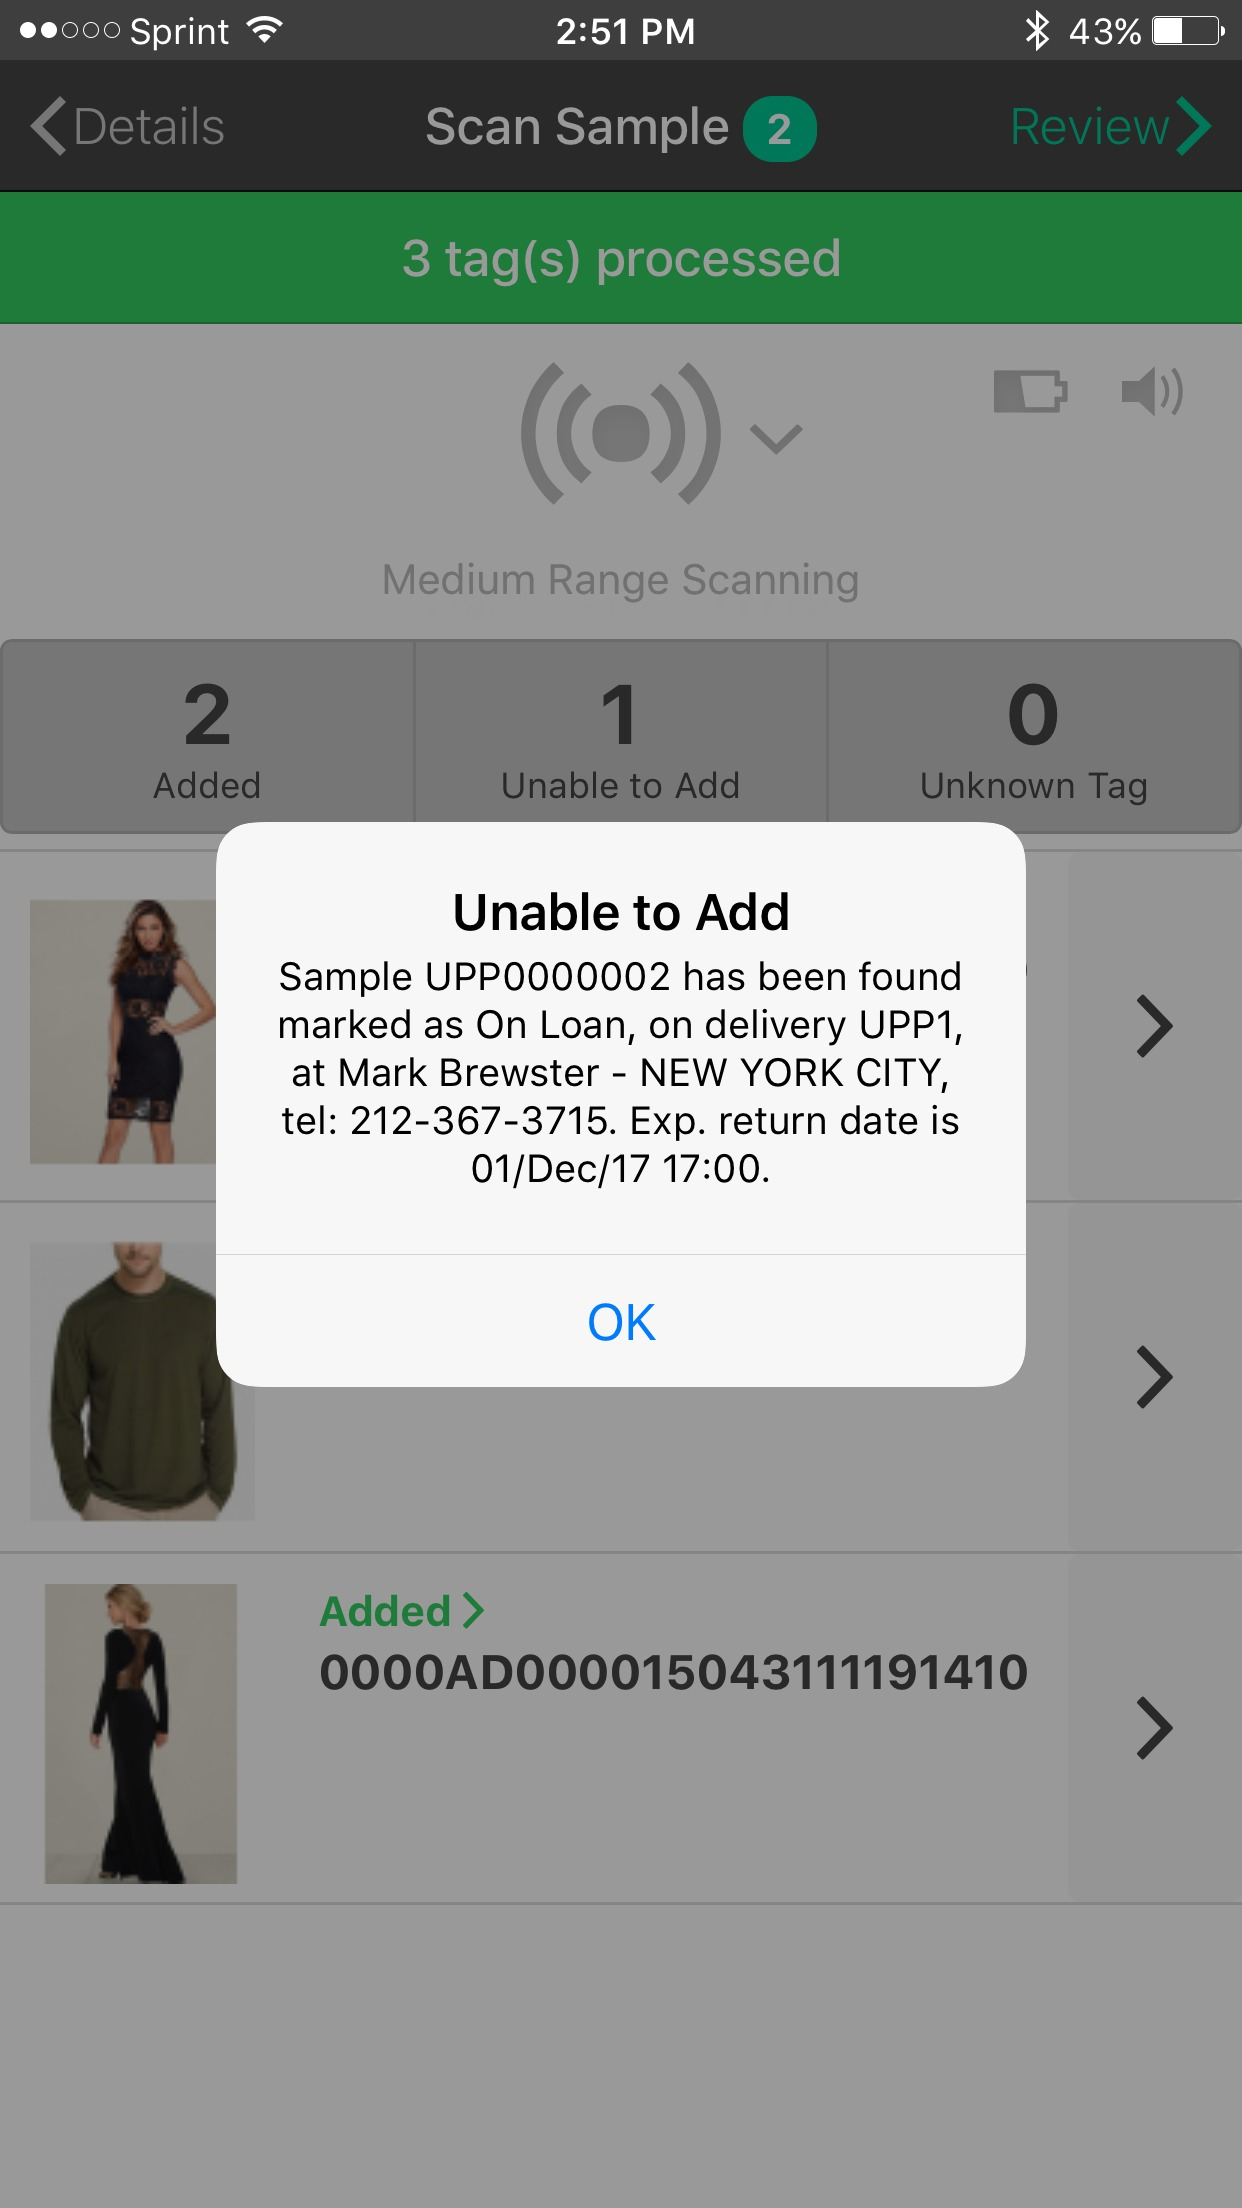
- Once you are finished scanning, tap the Review button in the top right corner to review the samples that have been selected for this Send Out.
- Click "Finish" to complete the 'Send Out'.
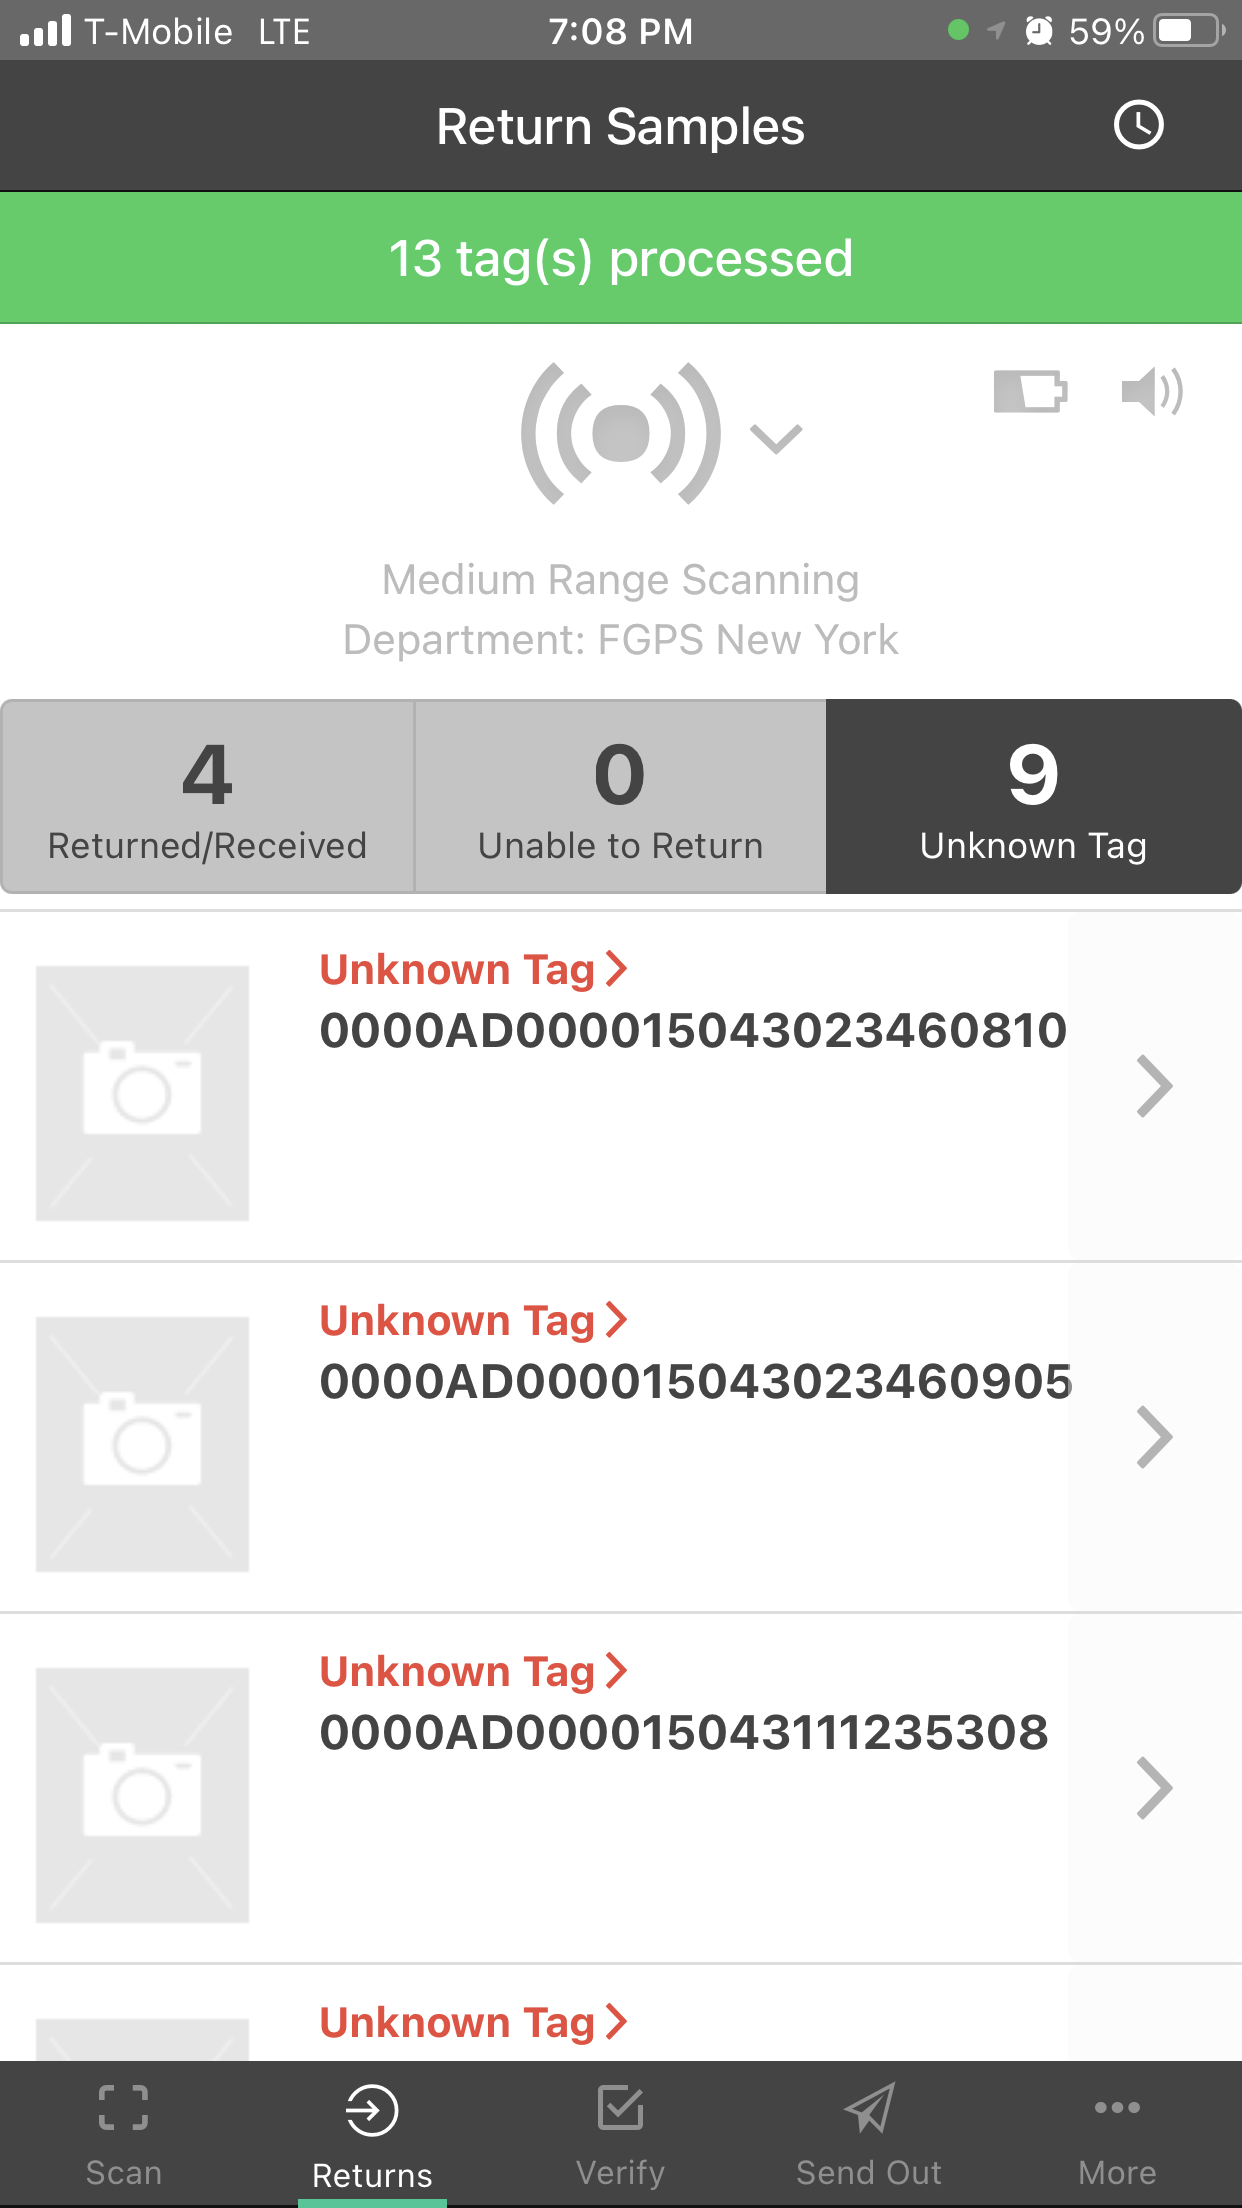
Returning Samples
- In the bottom navigation, tap on 'Returns' icon
- Separate out samples that you would like to return so that other samples are not in the same vicinity
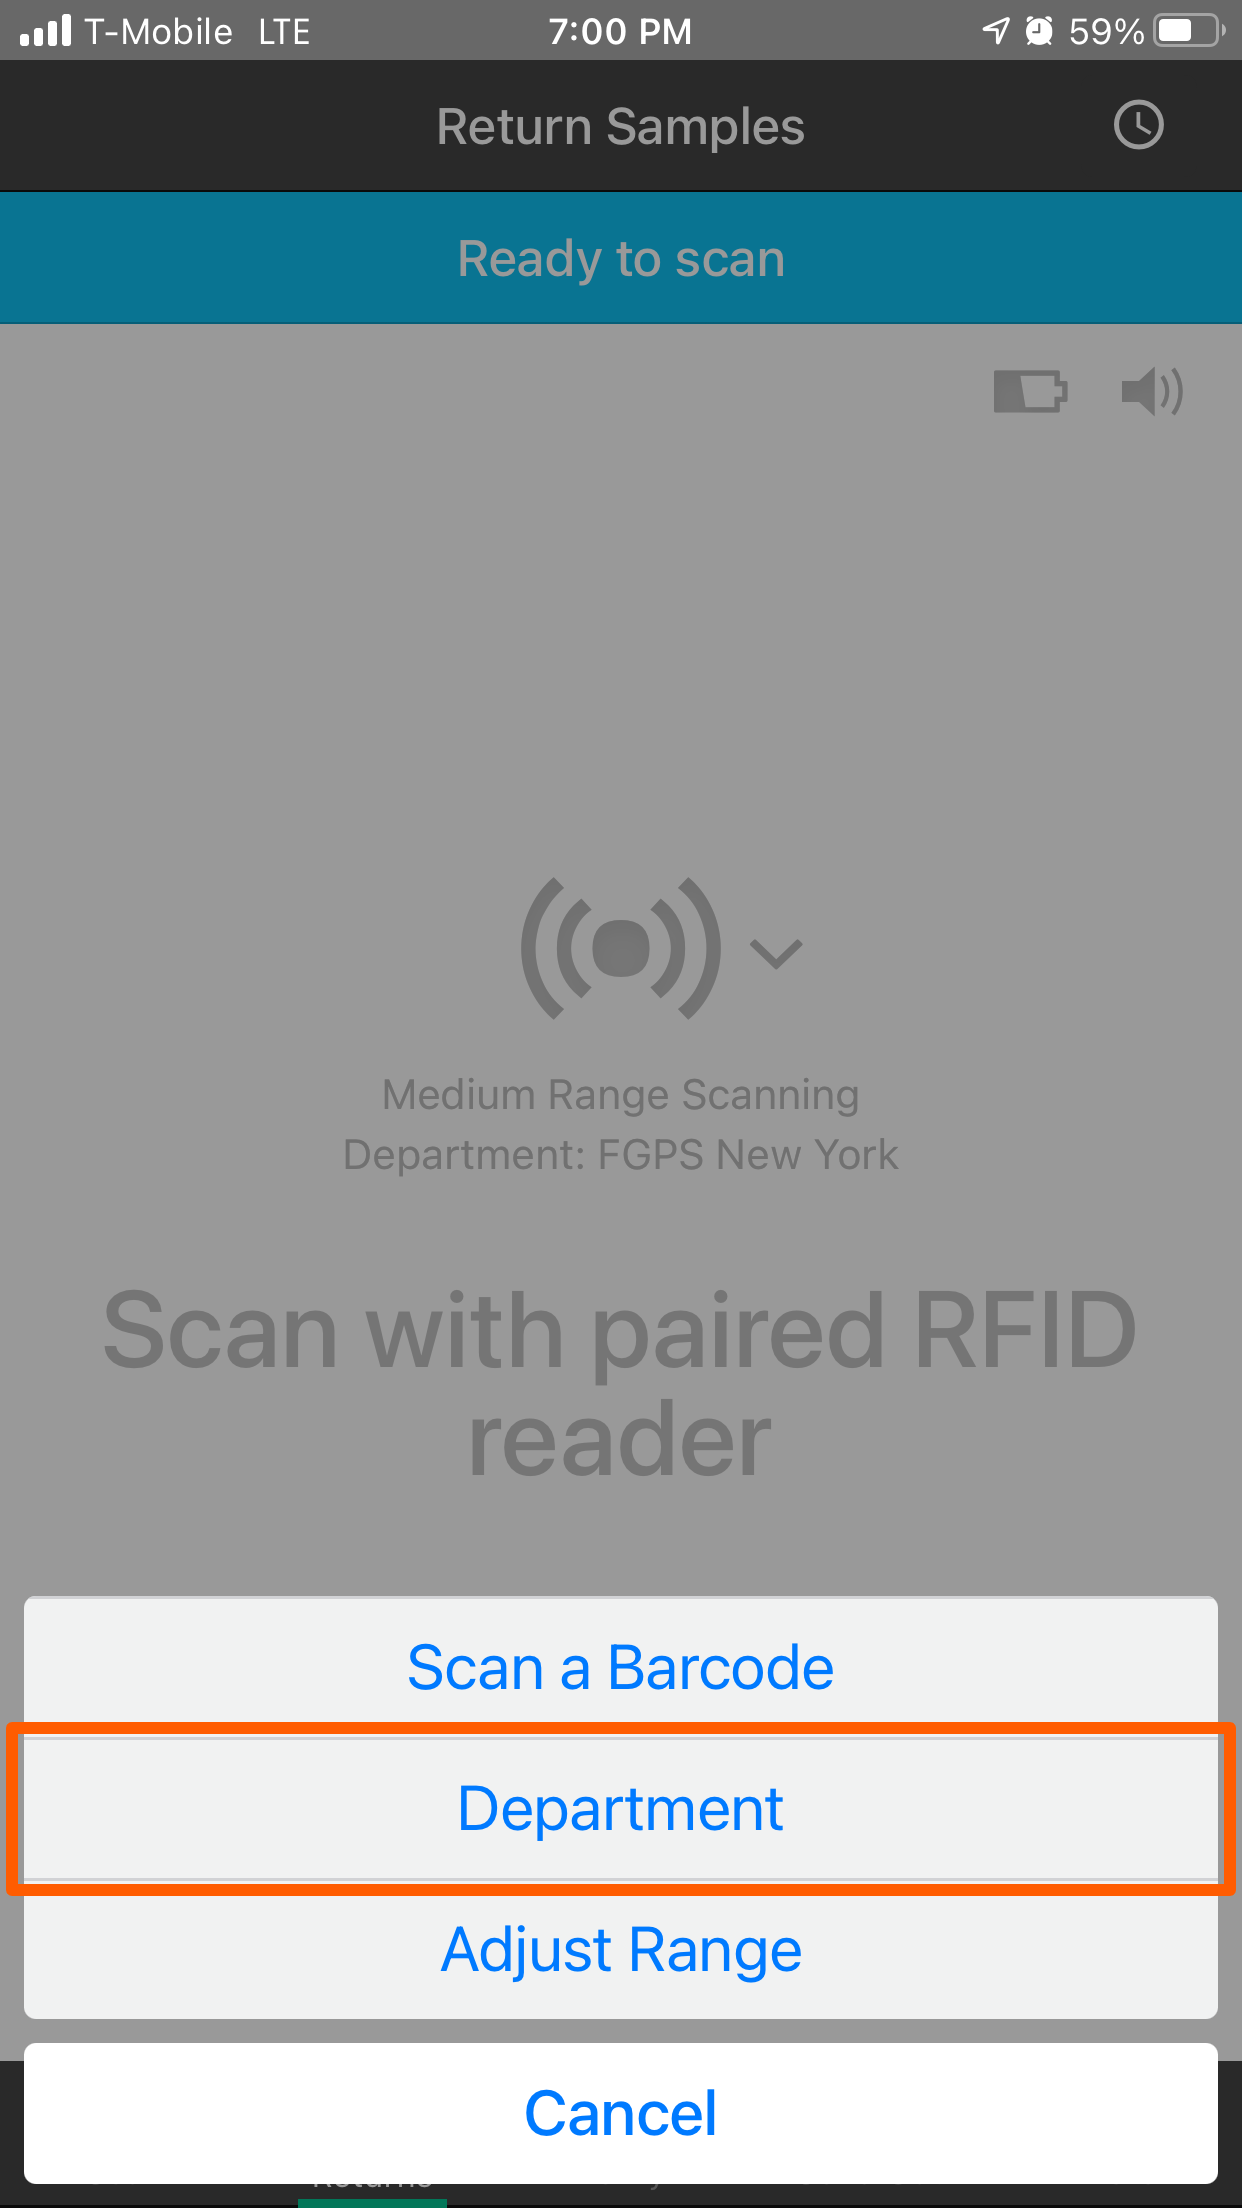
- Ensure you are returning or receiving in the right department. To change the department, tap the middle of the screen > Department
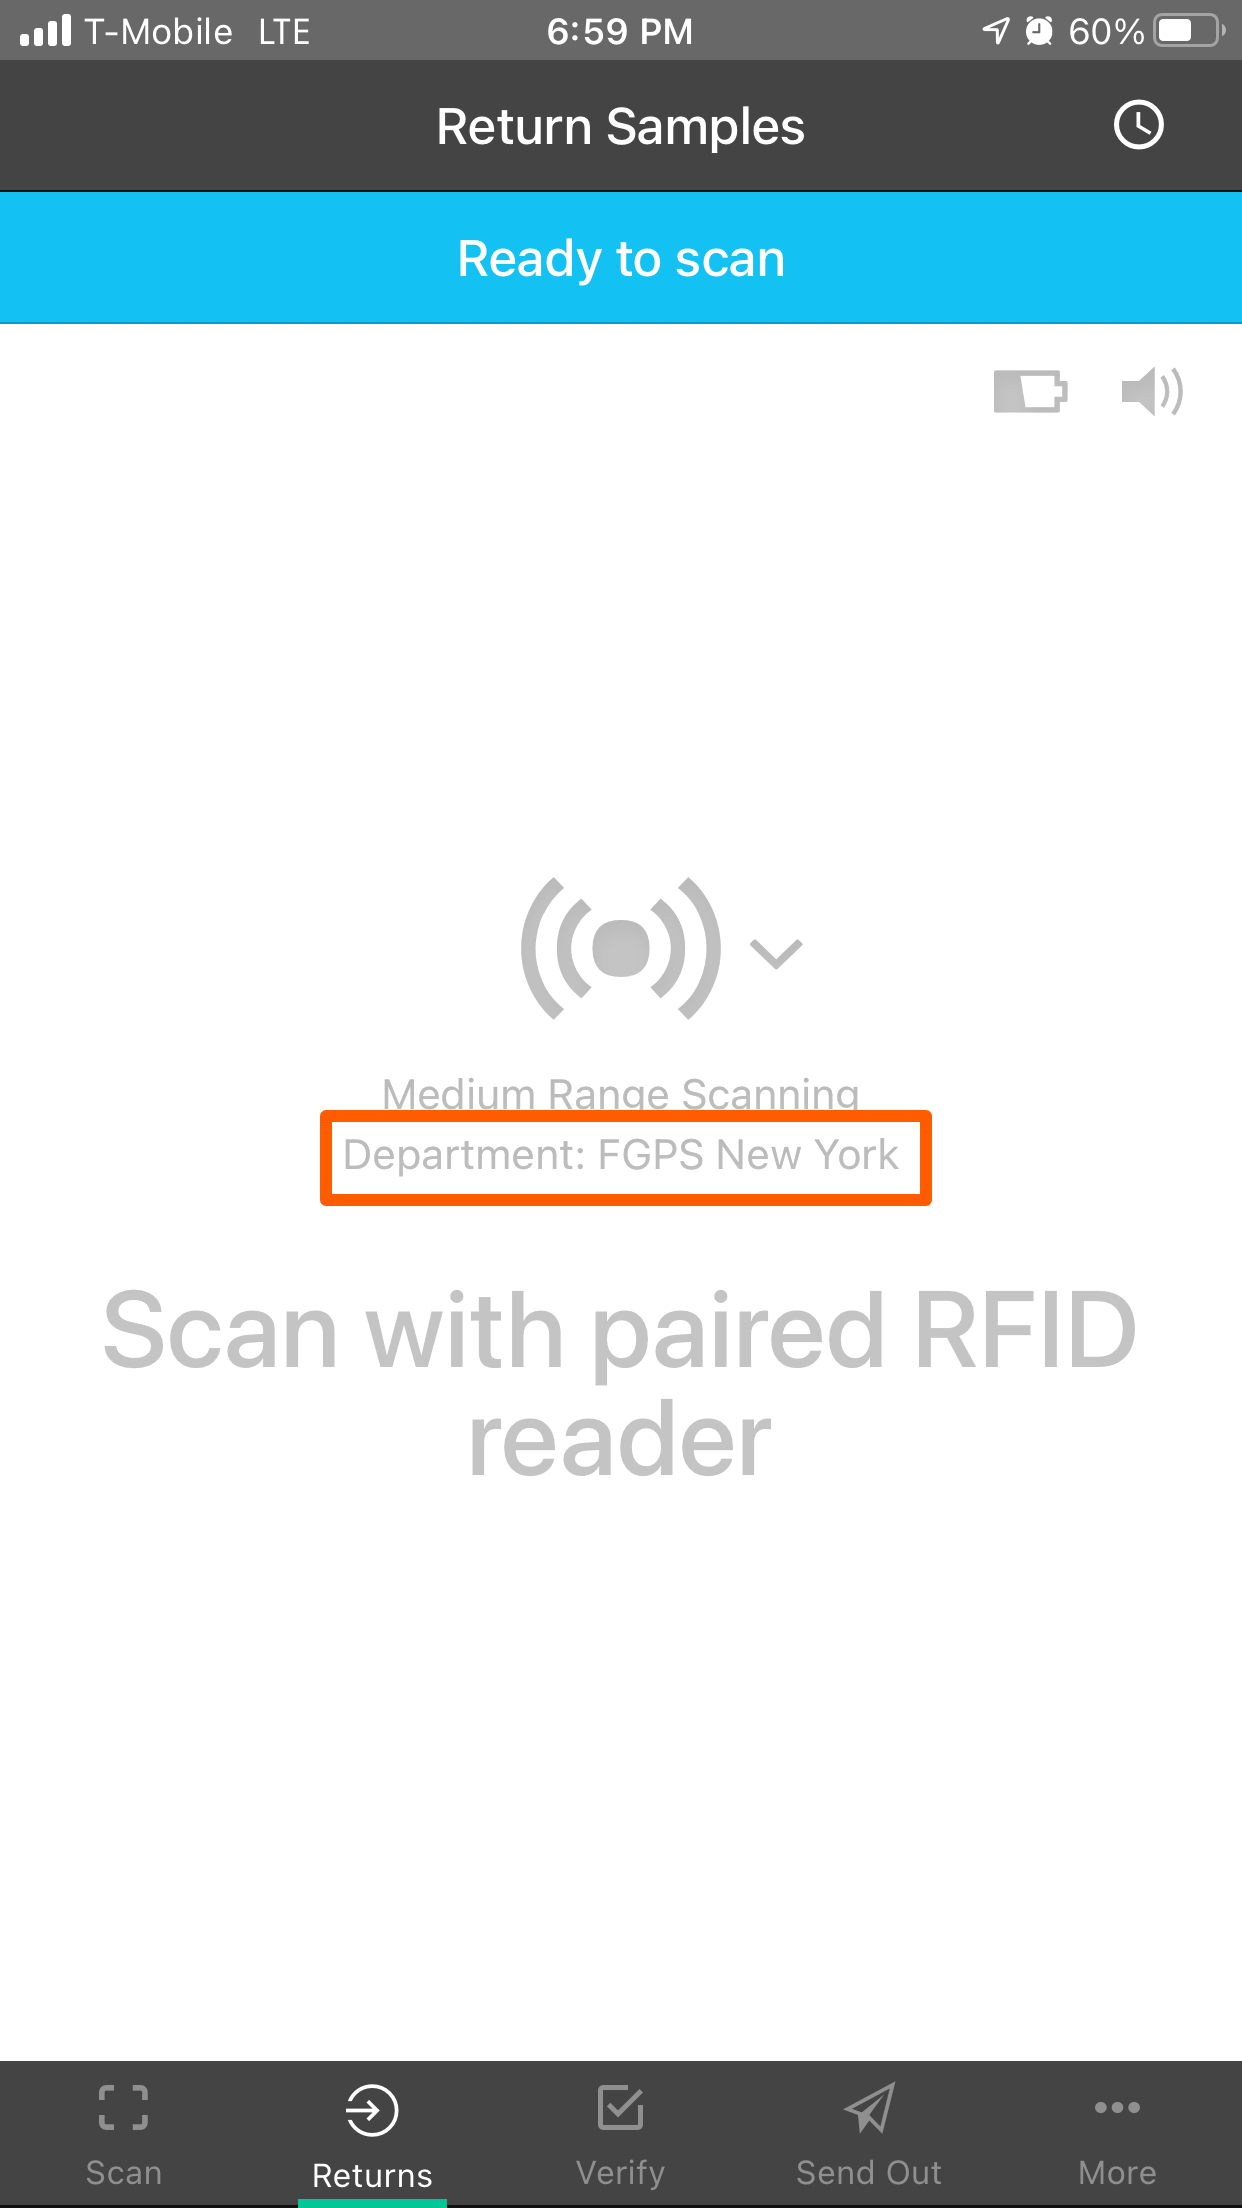
- Press and hold the RFD8500 trigger to begin scanning RFID tags
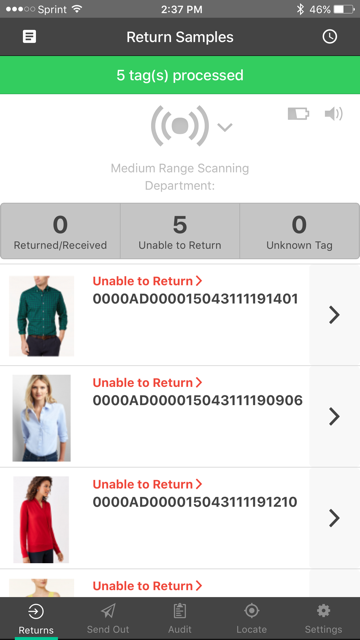
- After releasing the trigger, scanned RFID tags will be processed into 3 buckets
Returned/Received — Samples that have been successfully returned will appear in this tab.
Unable to return — These Samples were not found marked as 'On Loan'.
Unknown Tag — RFID tags that have been scanned and not found in the database will be marked as 'Unknown'.
- If returning samples (NOT receiving) returns can be undone by swiping left on the sample row > Undo
- Undoing a return can also be done from the Recently Returned screen. Tap on the clock icon in the top right hand corner of the page to view 'Recently Returned' samples.
- Tap the status at the top of each row for more details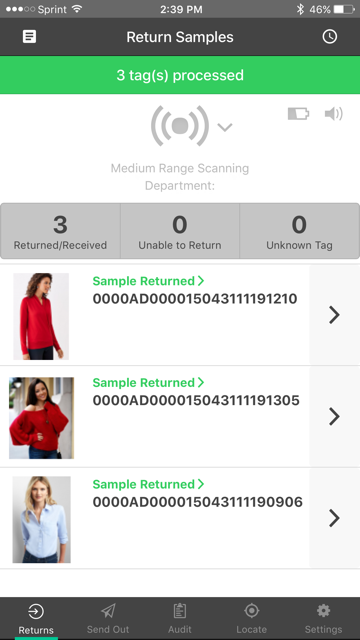
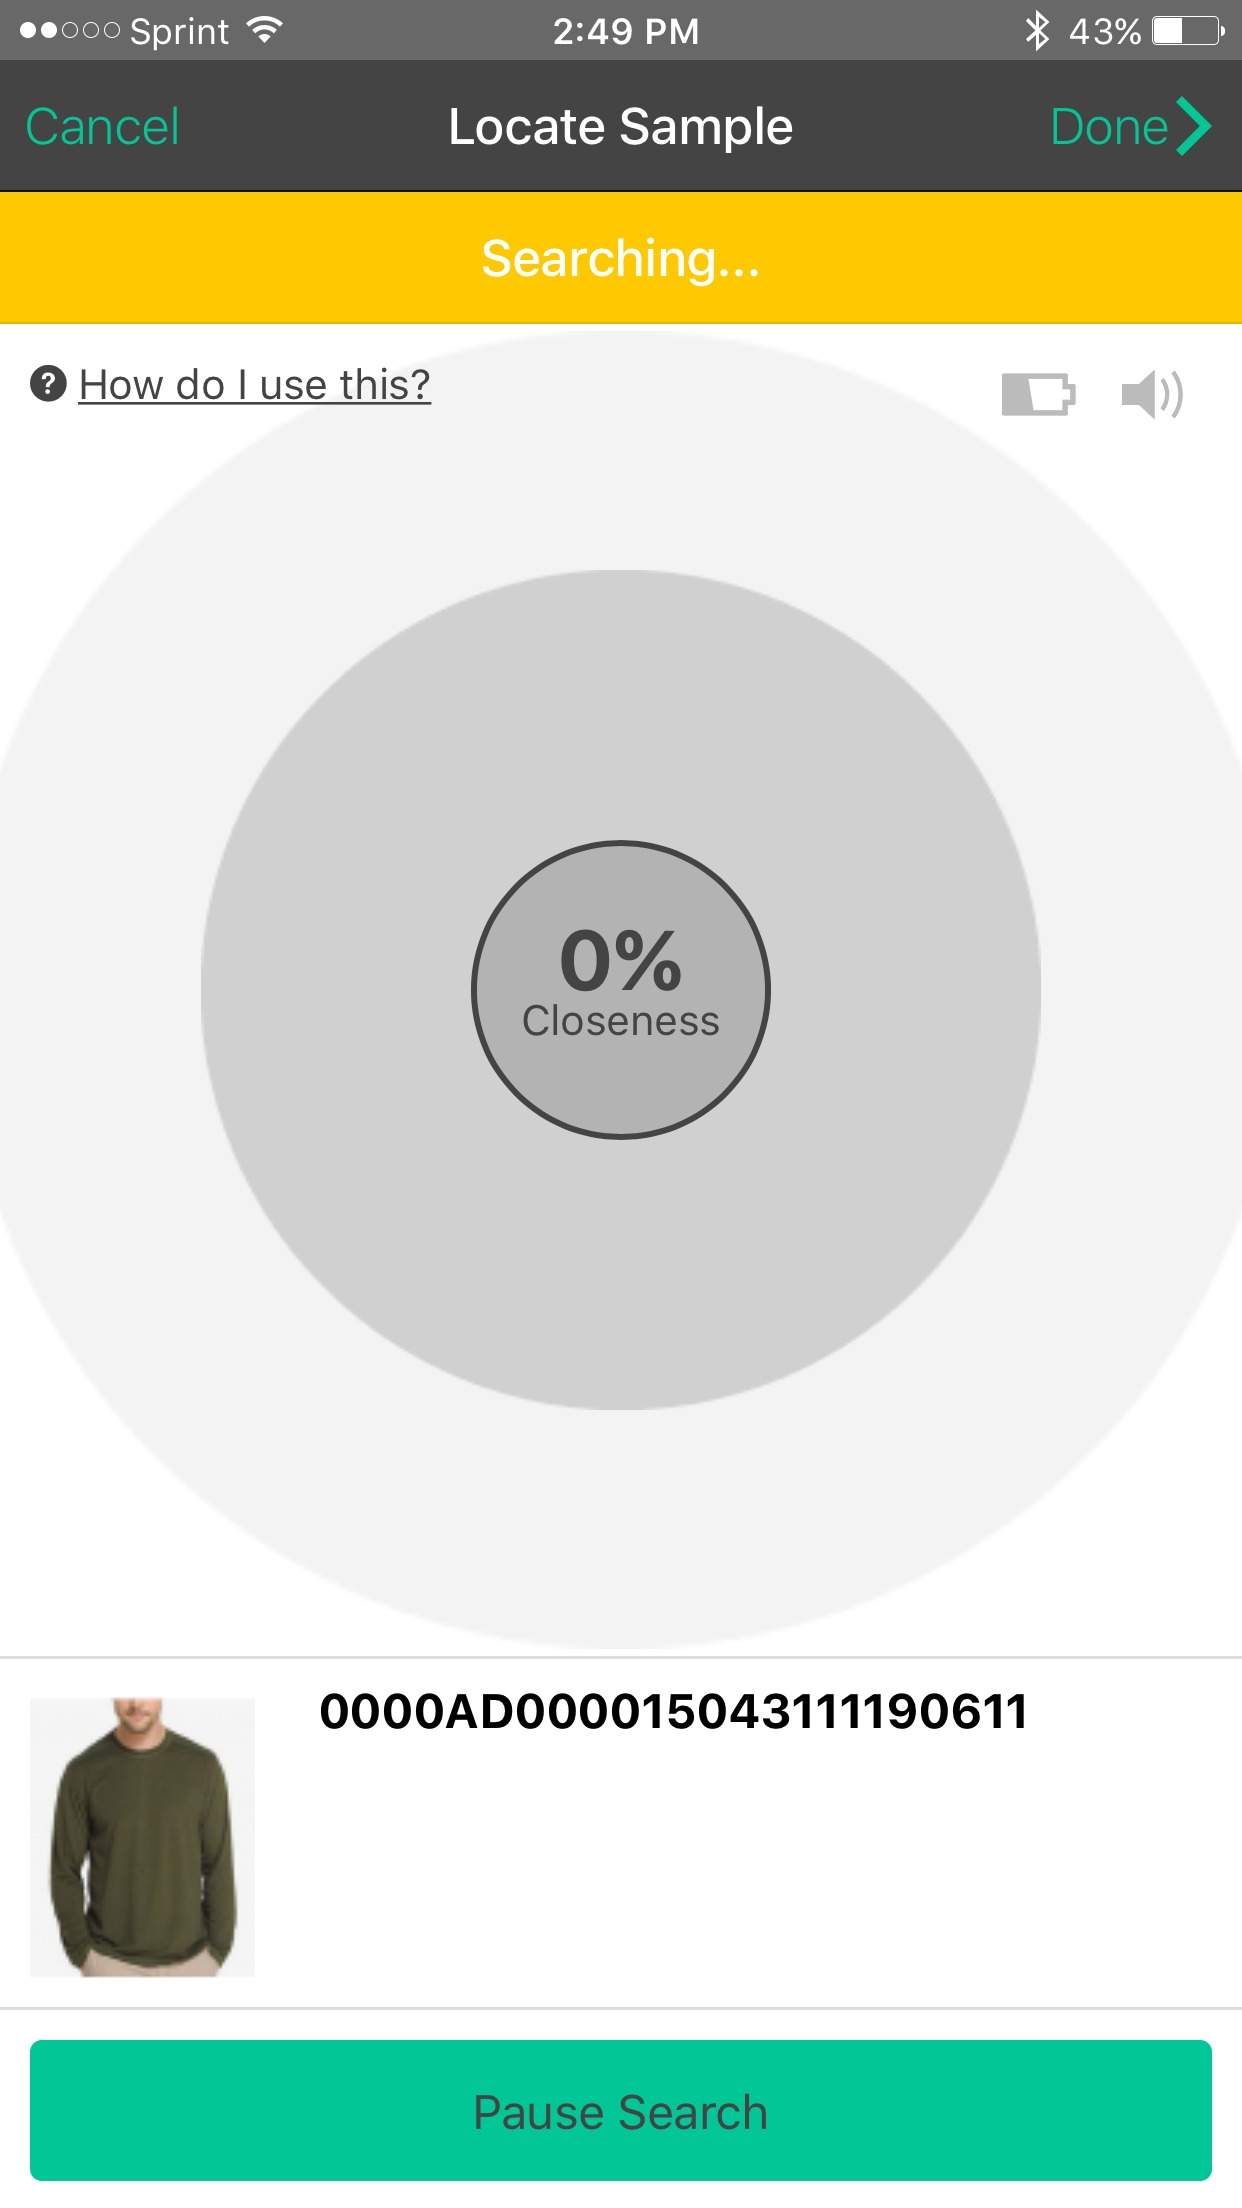
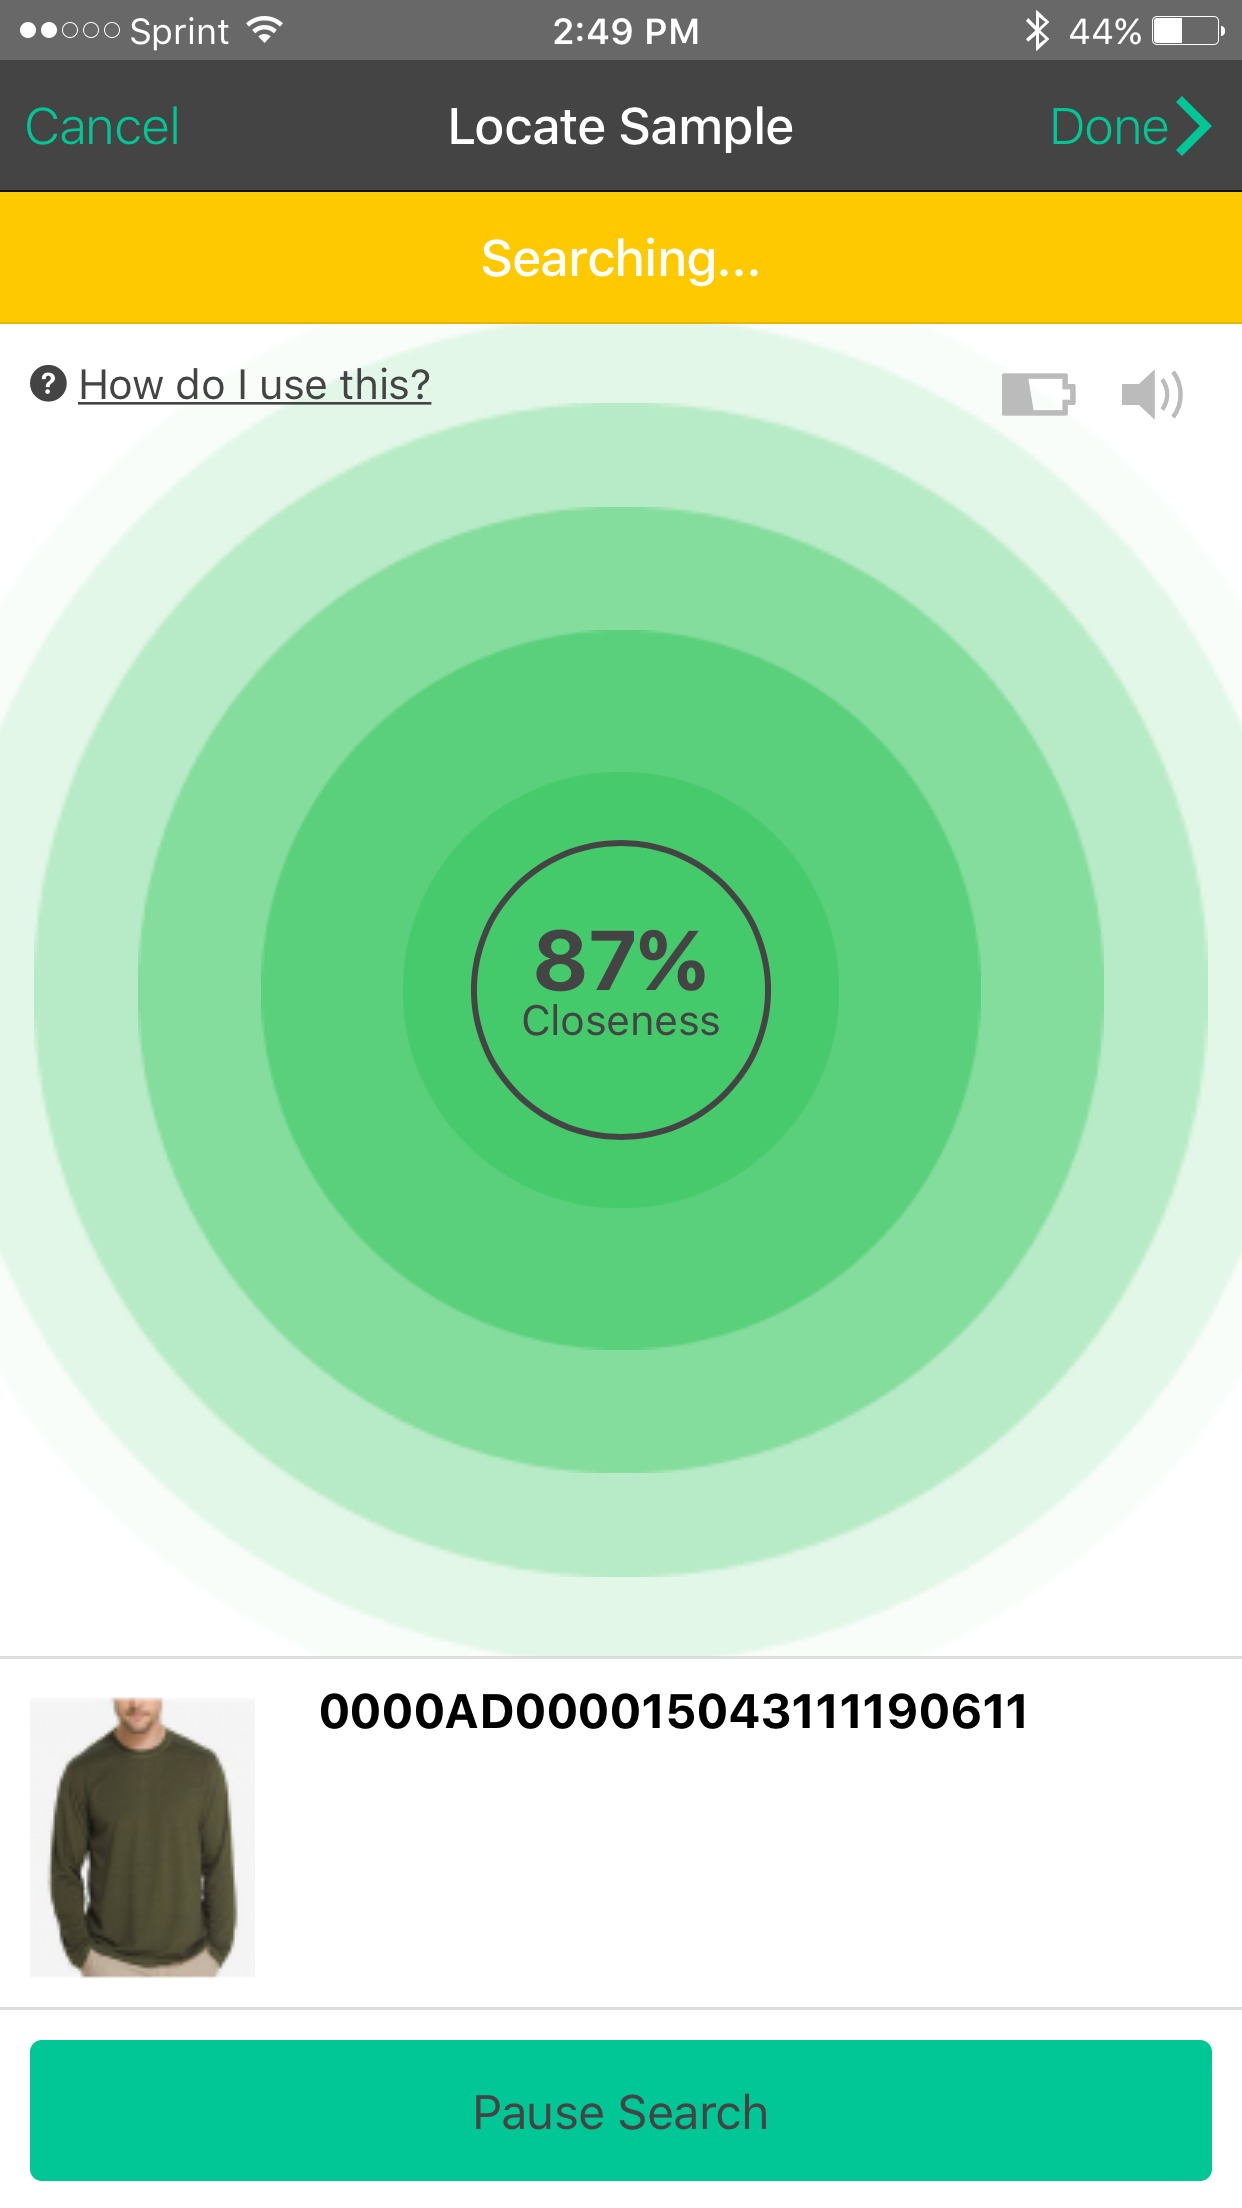
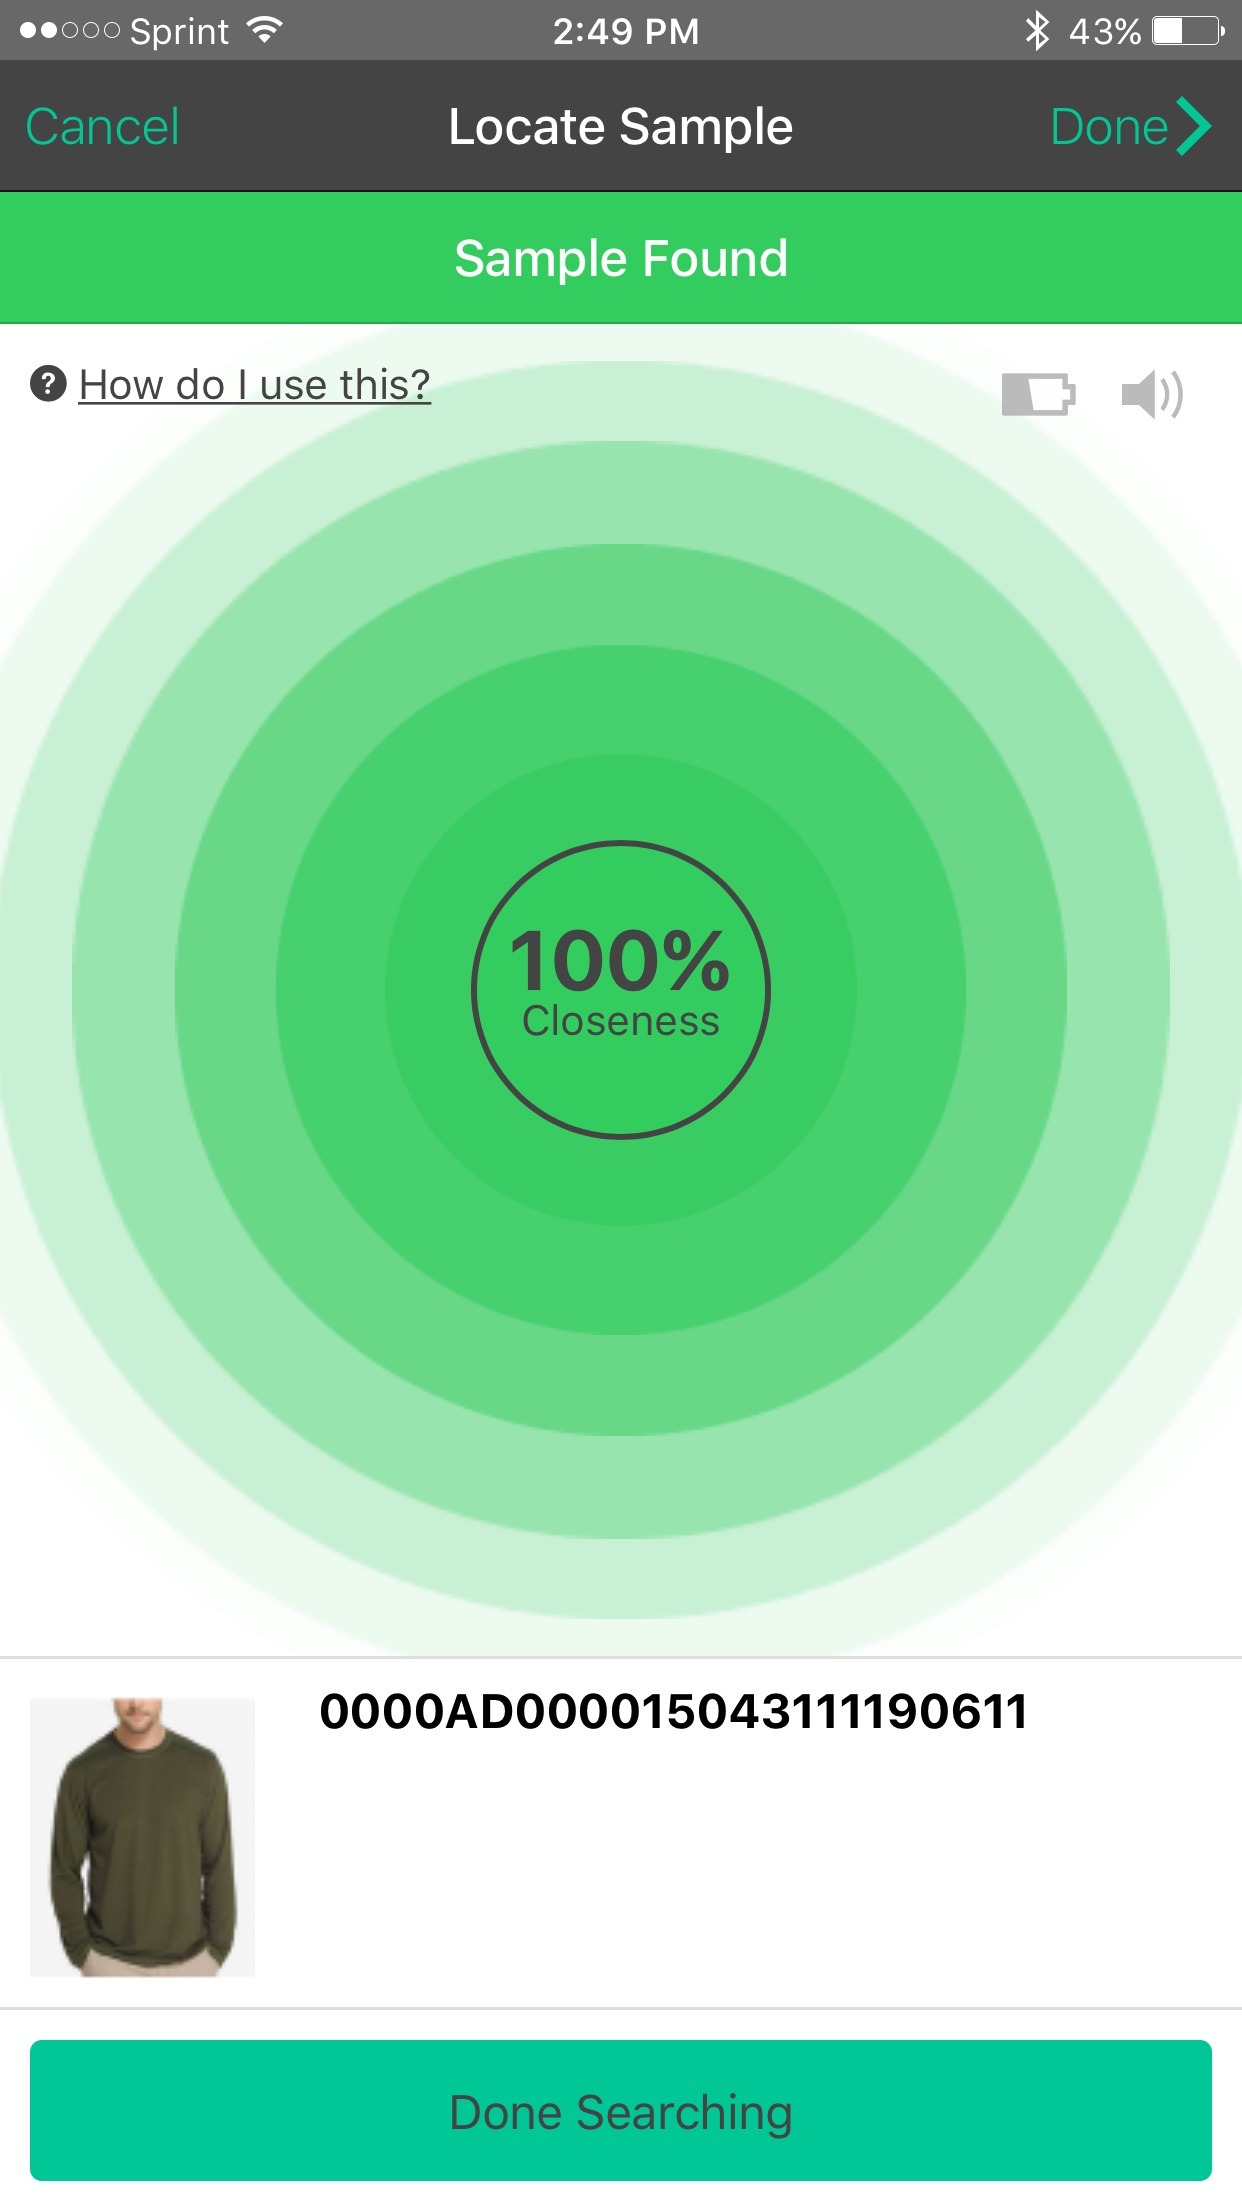
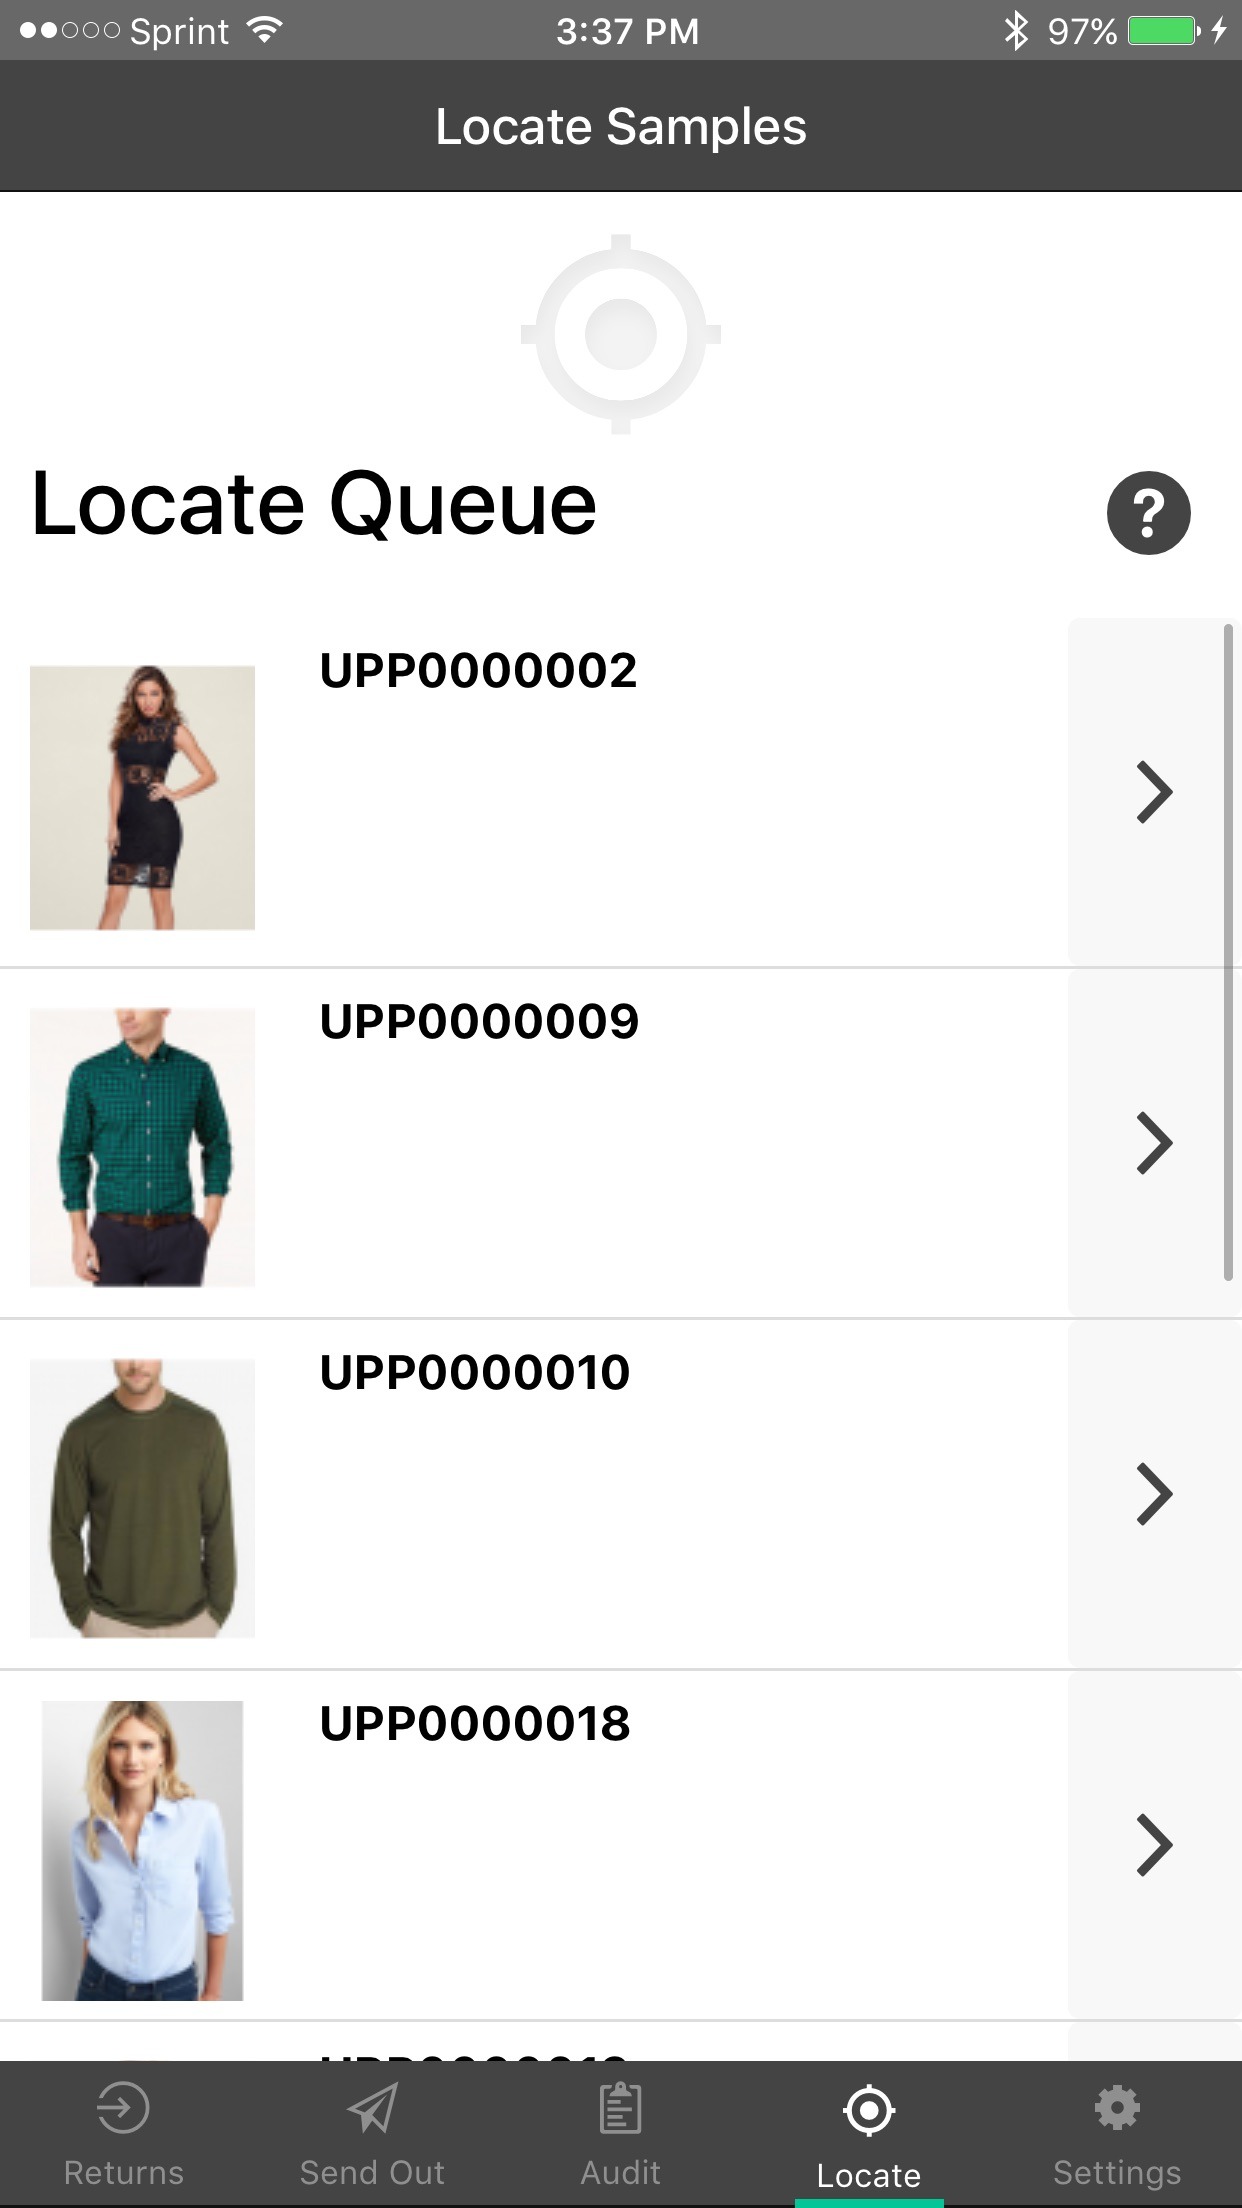
Locating Samples
Use this feature if you believe the sample is somewhere in the room or general vicinity. The scanner acts like a radar detector and can tell you if you are getting close to the target RFID tag.
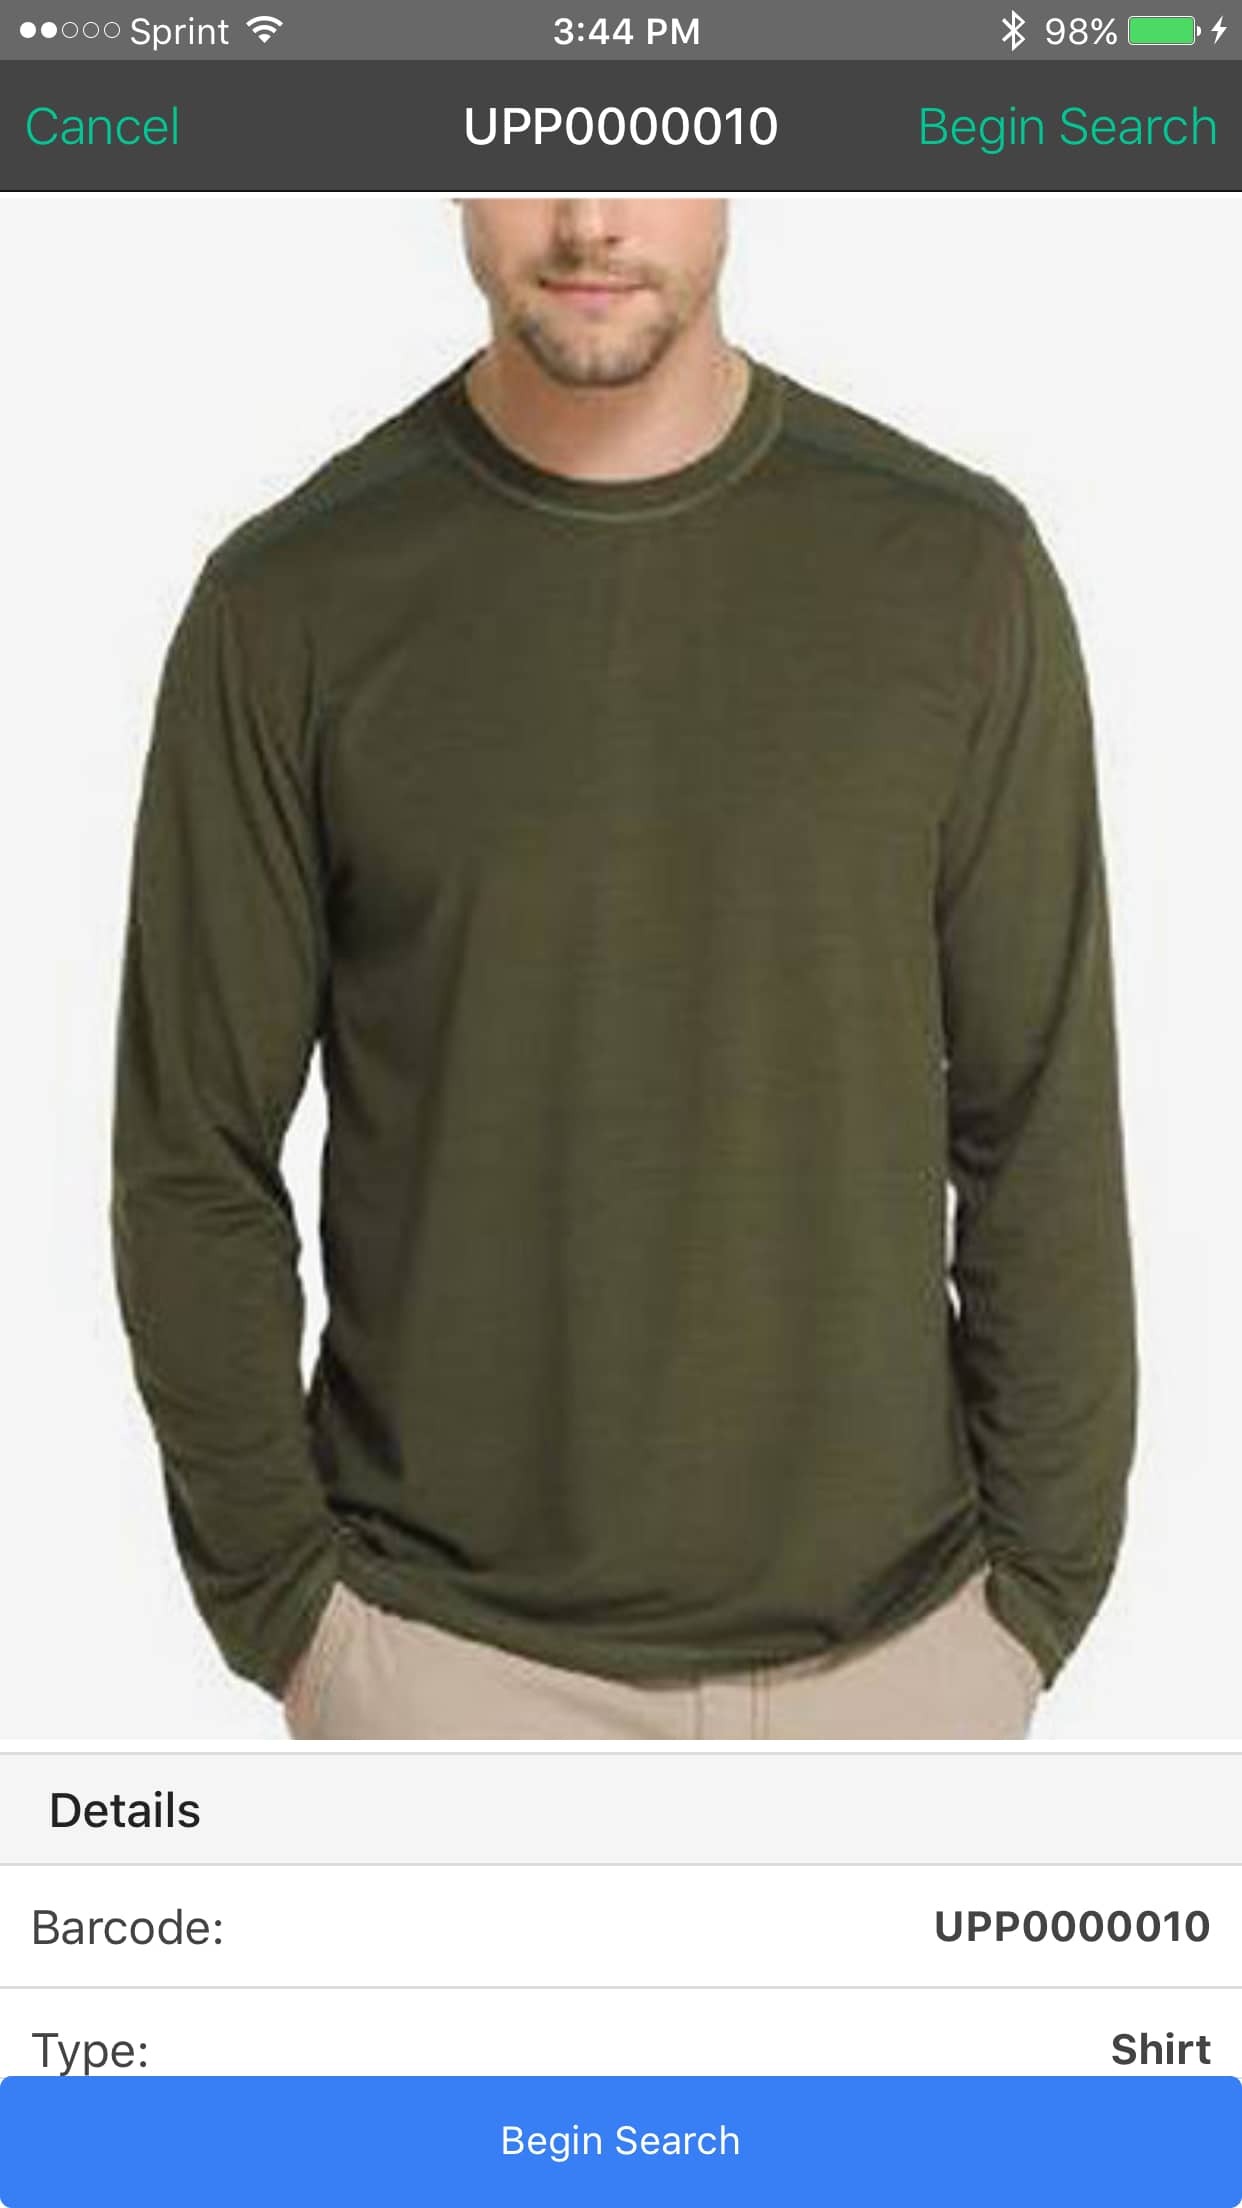
First you must indicate what samples you are trying to locate.
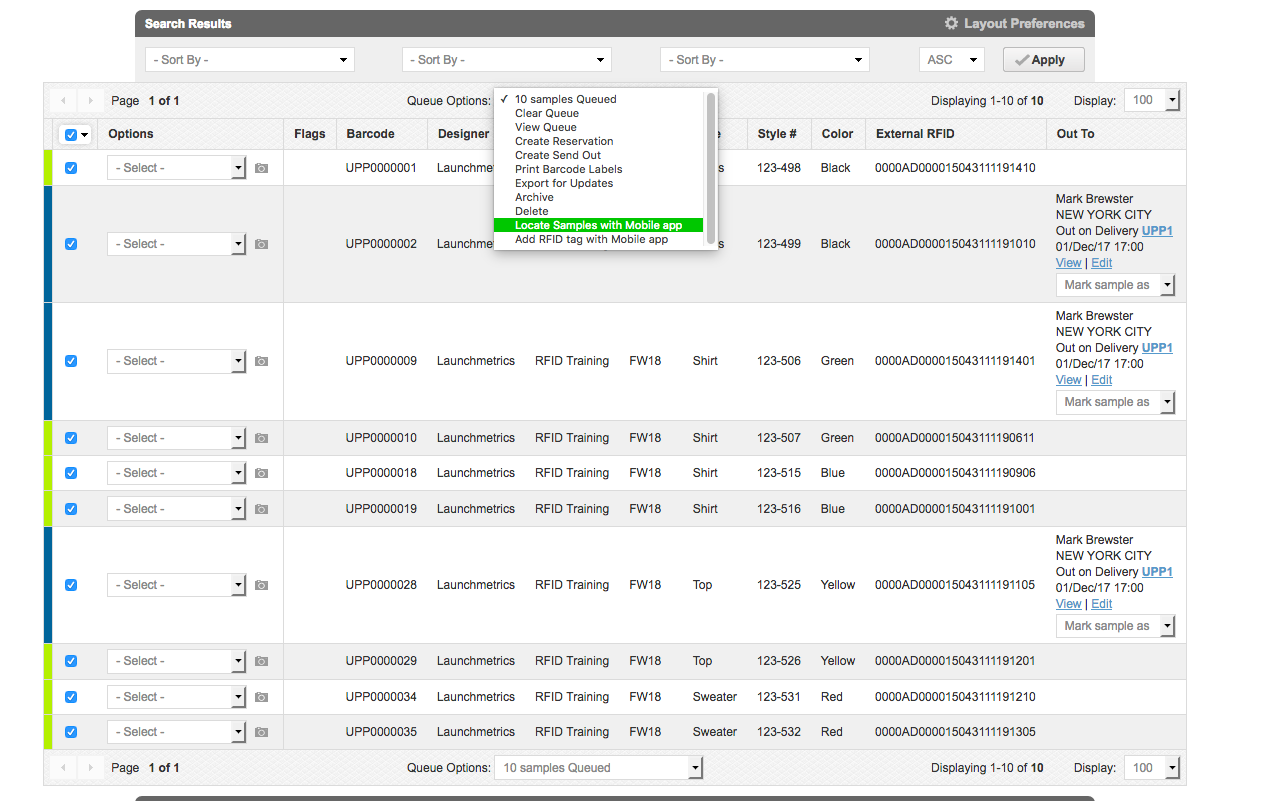
- Start from the desktop > Sample Manager
- Find the sample(s) you are looking for in the search
- Select the samples using the checkboxes on the left
- In the 'Queue Options' to select "Locate Samples with Samples Mobile".
- In the Samples mobile app > Bottom navigation tap "More" > Locatepull down to refresh the Locate Samples page.
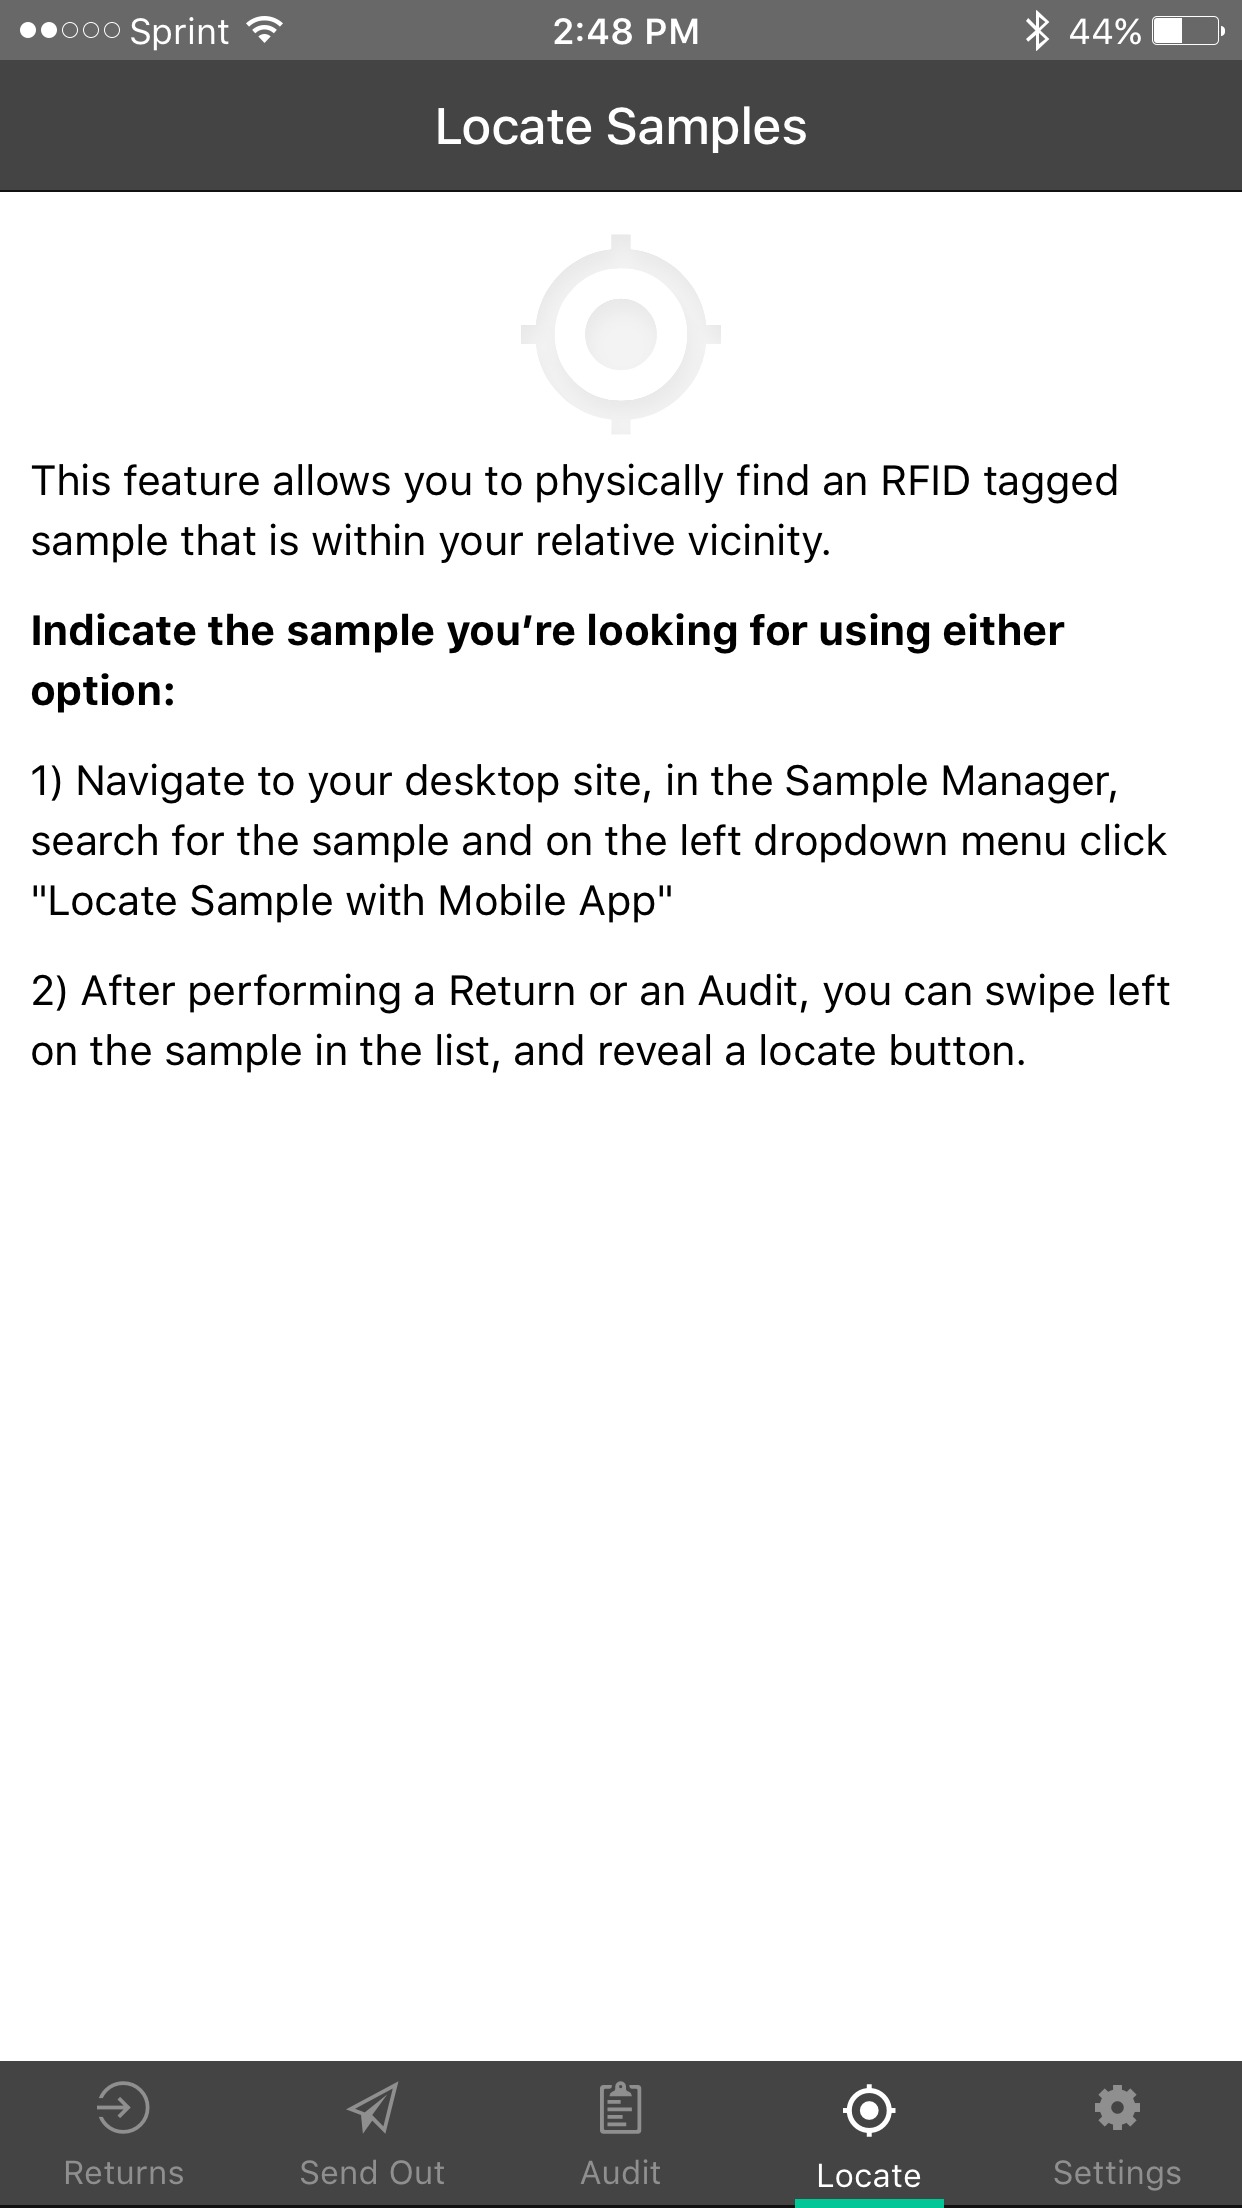
- Click on 'Locate' icon, to start locating the physical samples in the relative vicinity.
 |
 The above will be the success message after samples have been sent to mobile app. |
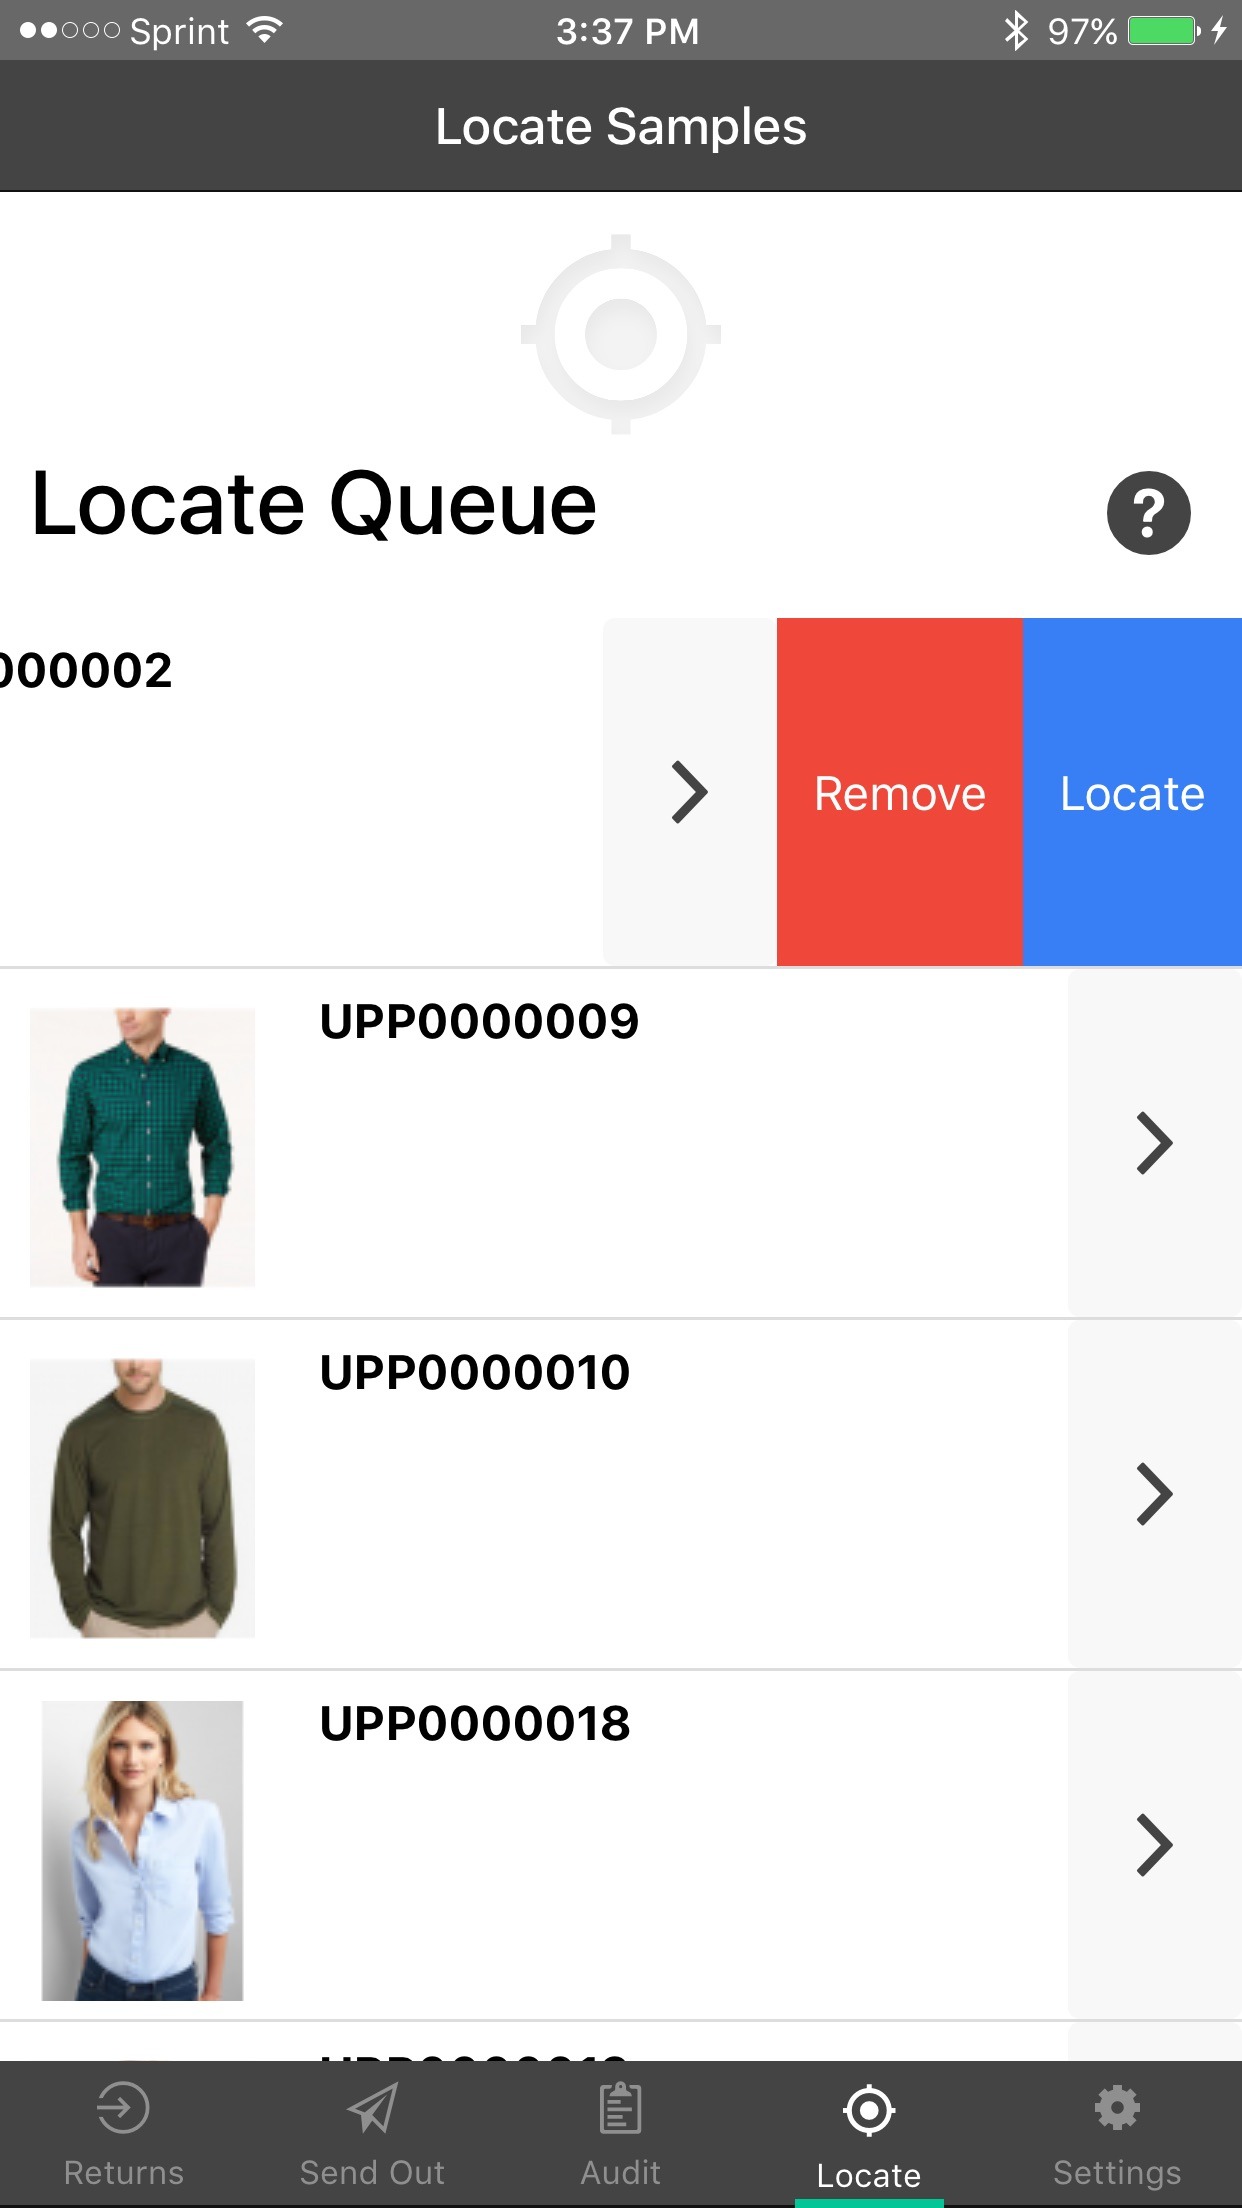
- Once the sample queue has been loaded to the mobile app, refresh the Locate Samples page to see the list of samples in the Locate Queue ready to found.
|
 |
|
|
|
|
 |
 |
|
|
|
|
 |
 |
|
|
|
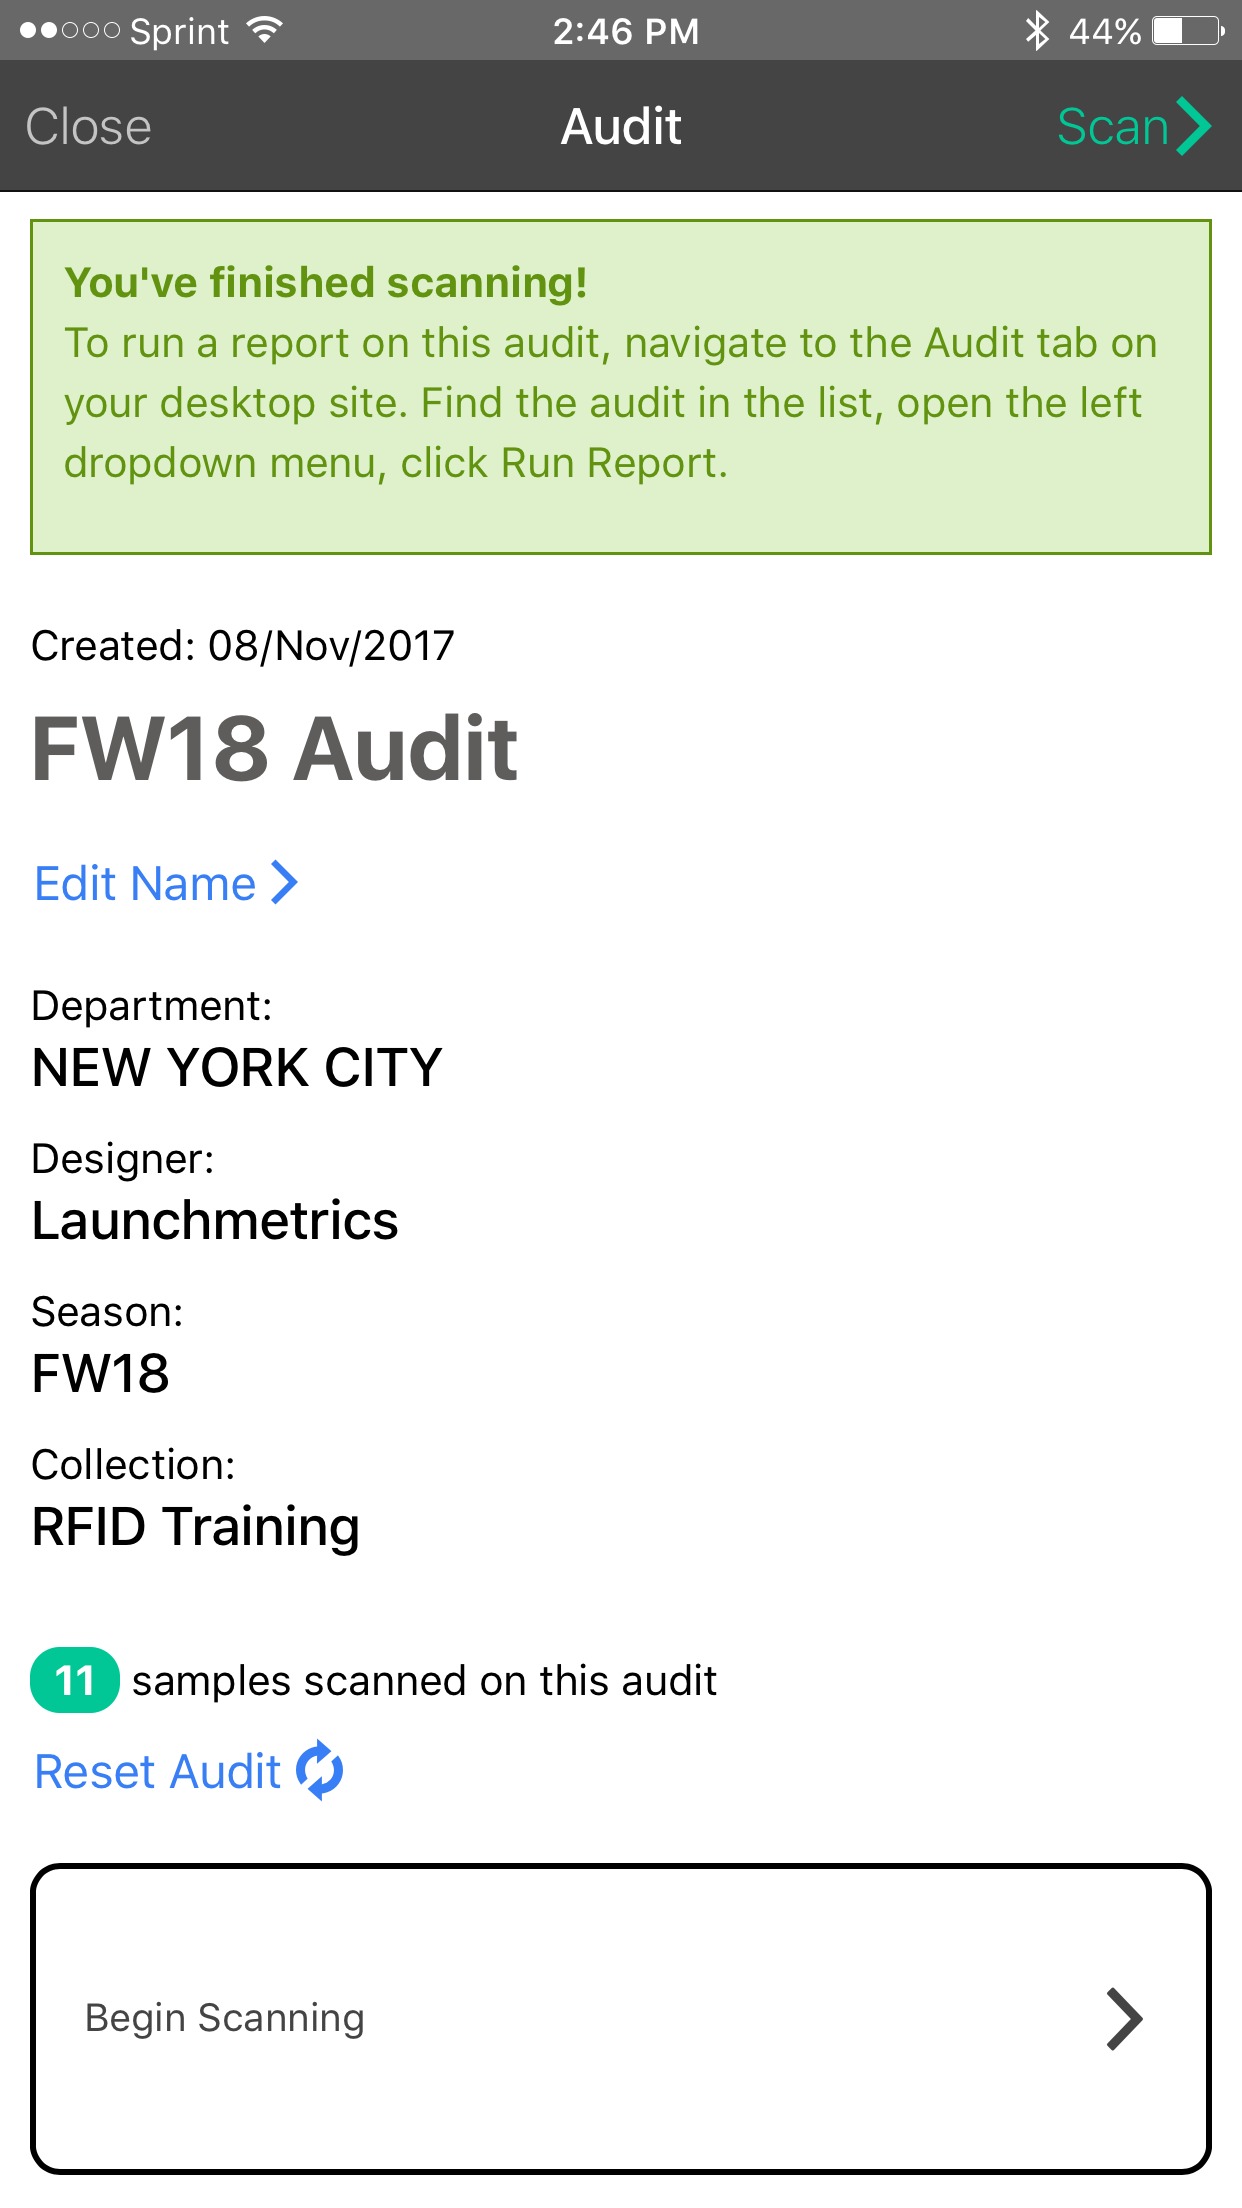
Creating New Inventory Audit
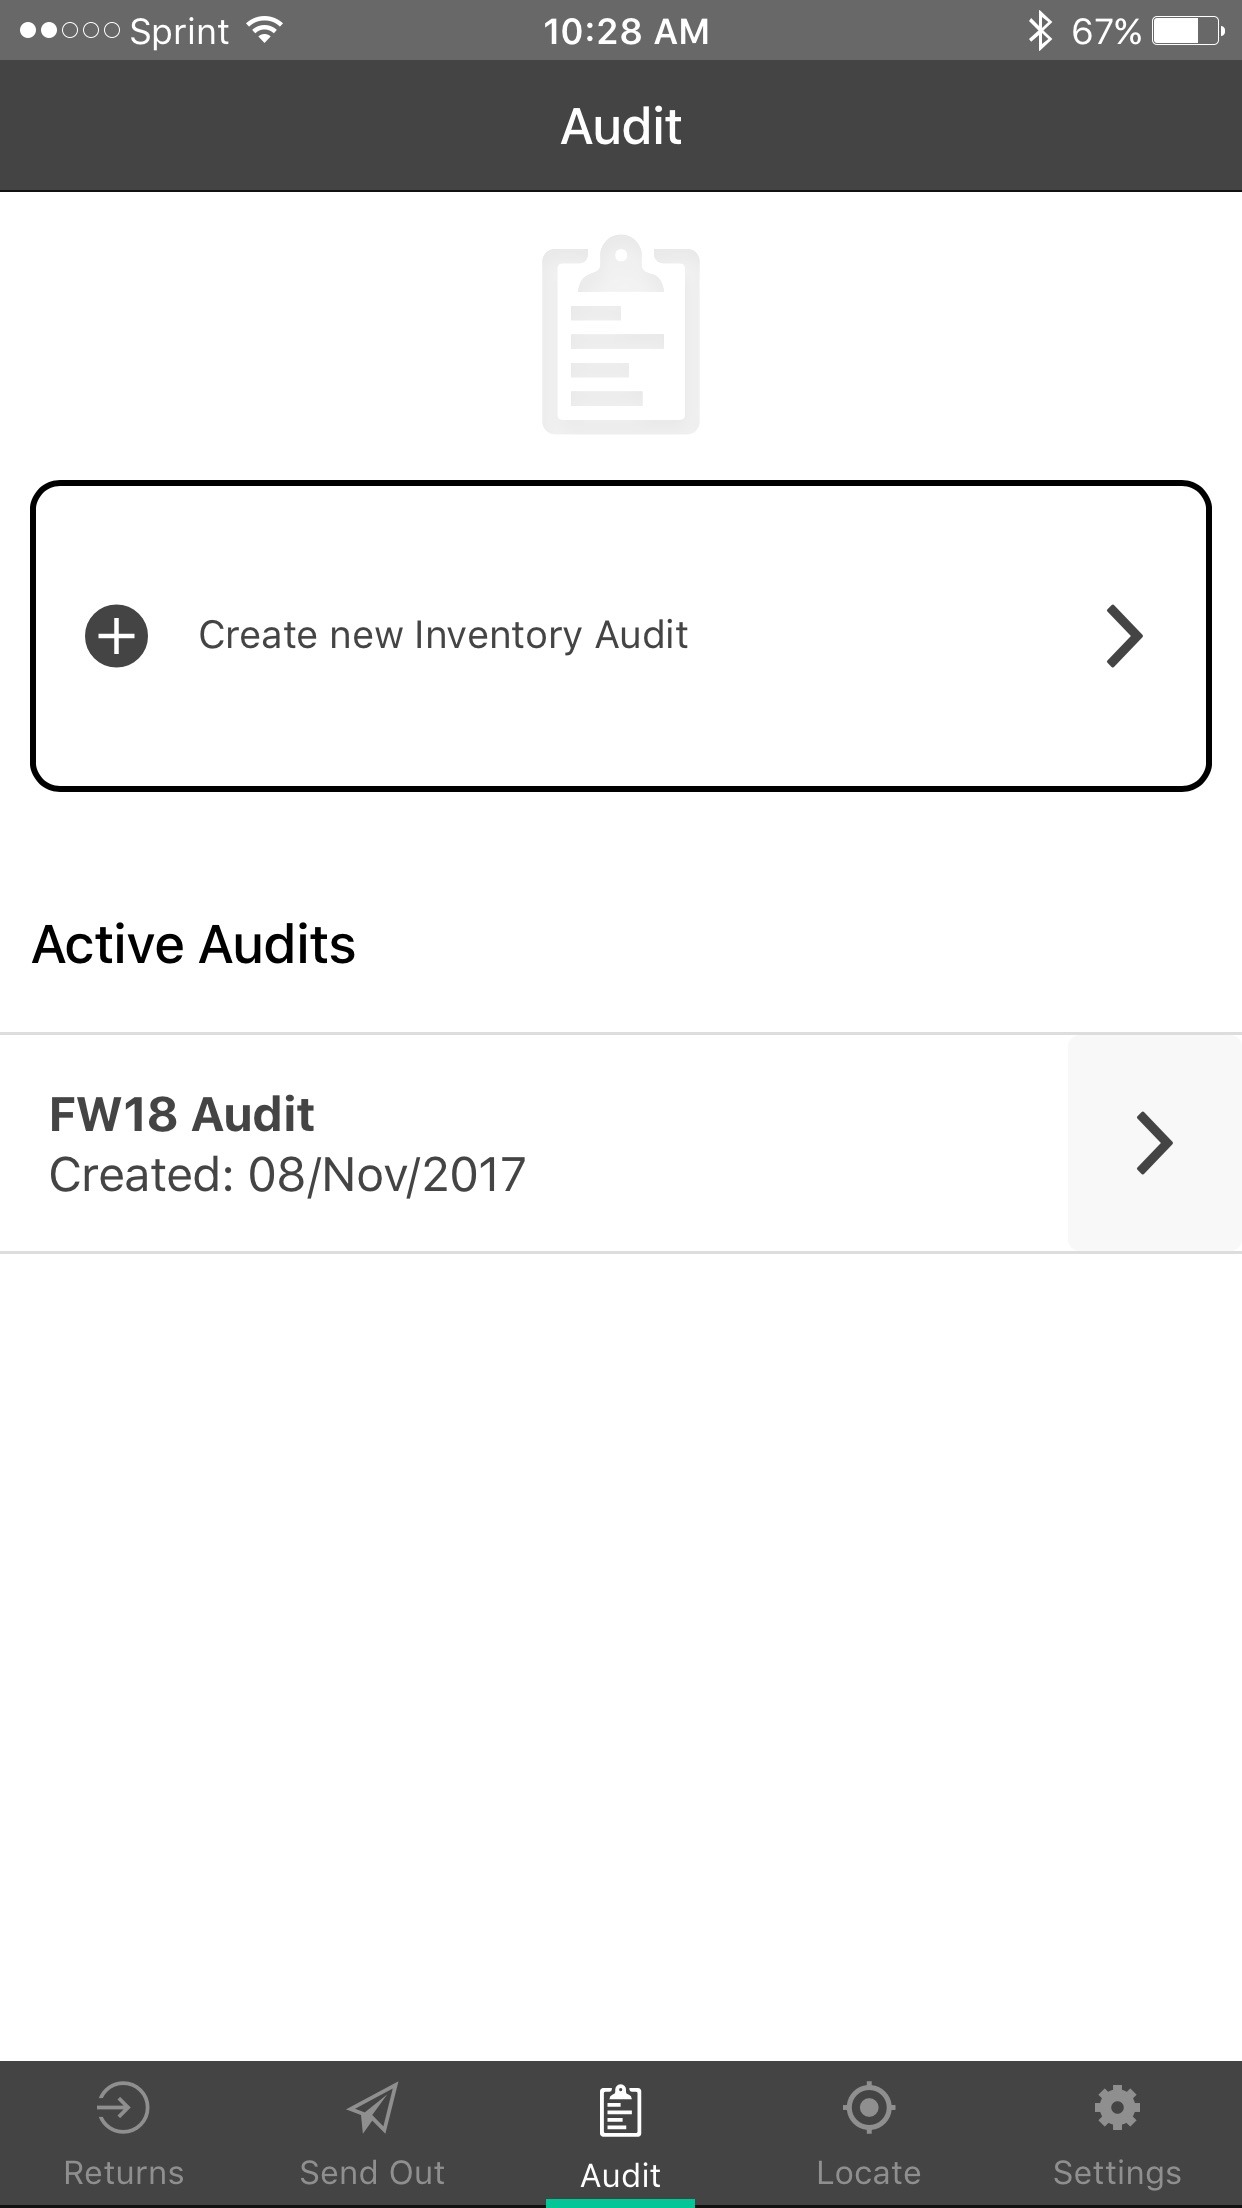
- Click on the 'Audit' icon to create a new 'Inventory Audit' and view other active audits.
- Click here to learn more about creating sample Inventory Audits.
- Click "Create new Inventory Audit" to get started.
|
 |
|
|
|
|
 |
 |
|
|
|
