
The Samples by Launchmetrics mobile app is available in on Apple iOS devices only. Some features available from the app:
- Scan a barcode to see its details
- Queue samples in Sample Manager
- Create Send Outs
- Return/Receive Samples
- Verify Import
- Match RFID Tags
- Locate a lost sample (that has an RFID tag attached)
- Print labels to Bluetooth printer
Downloading the app
The 'Samples by Launchmetrics' app can be found directly in the Apple Store by searching "Samples by Launchmetrics". Click here to be redirected to the Apple Store.
If downloading on iPad, make sure to change the App Store filters to "iPhone Only" in order to be able to search and find the app.
Logging into the app
- To begin, enter your Launchmetrics Site URL in the address bar. > Press Continue
Please note your site URL is usually your company name + .launchmetrics.com (e.g designer.launchmetrics.com).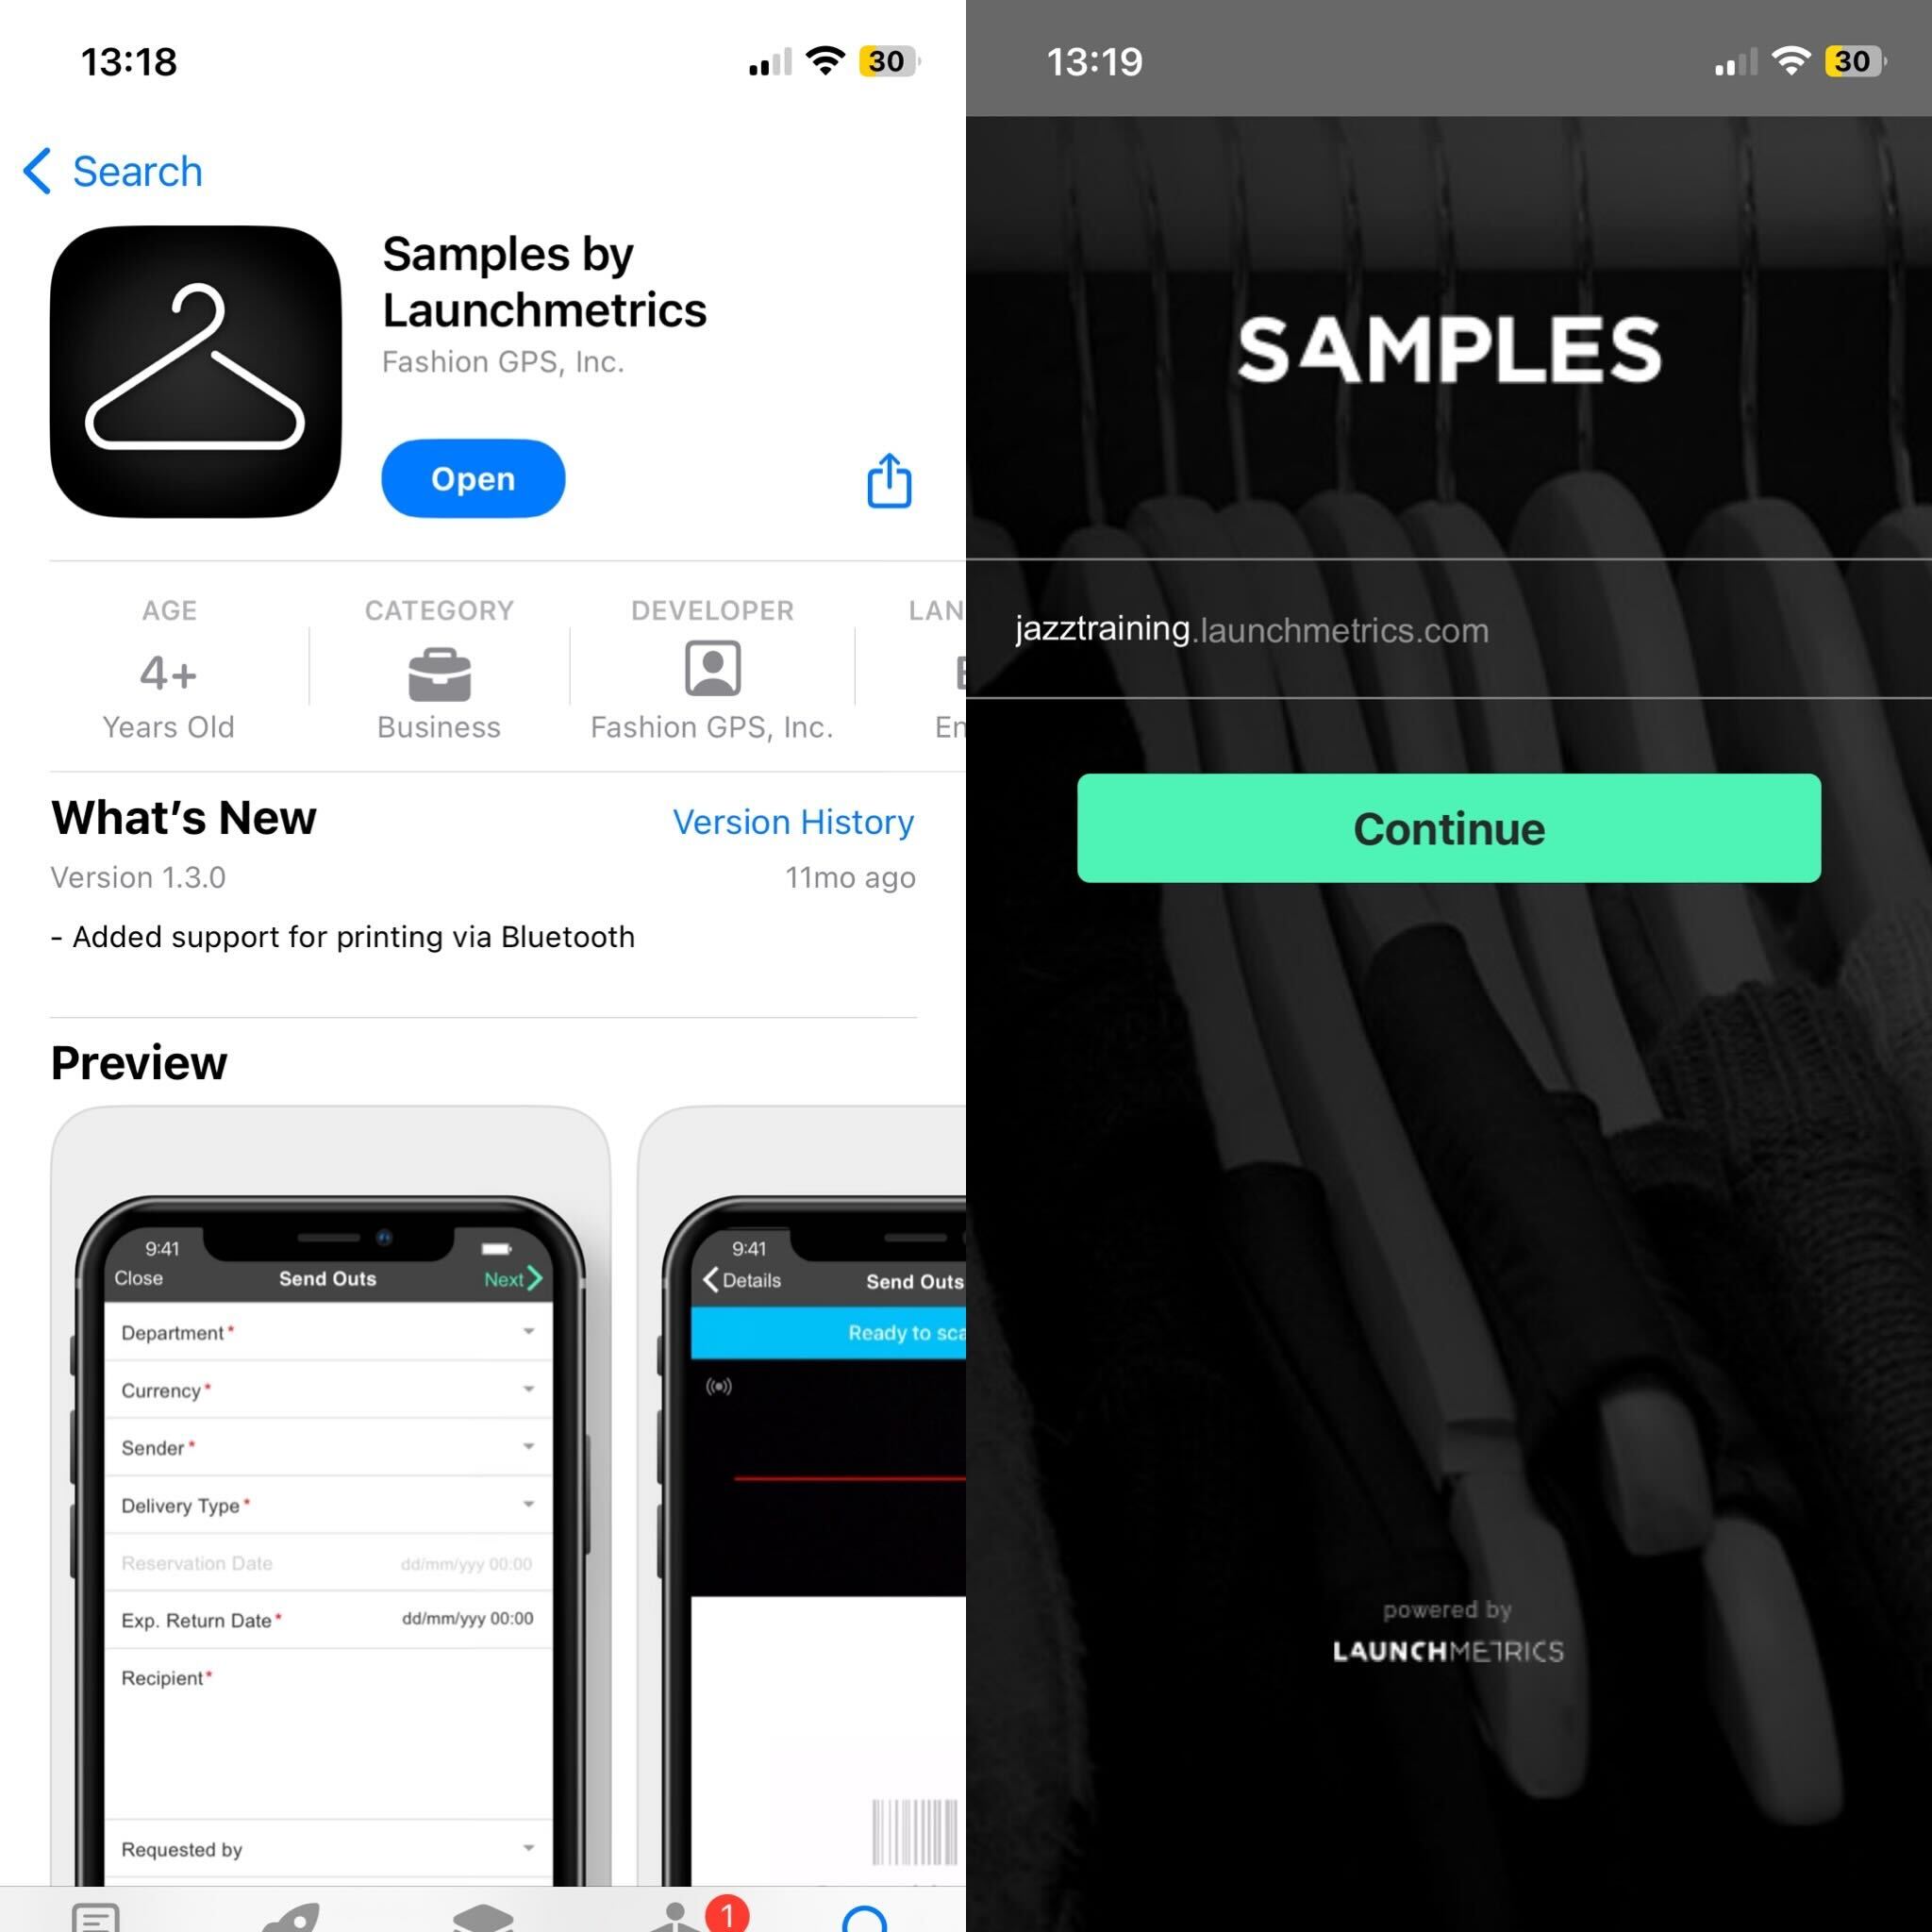
- Log in with your Username & password
- If your company has SSO enabled, use your company credentials.
- Users with Samples Mobile access can log into 1 computer session and 1 mobile session at a time. If a 2nd device tries to login, the app will prompt you to override.
Creating a Send out steps:
Creating a Send out
Navigate to the Send Out tab using the bottom navigation
2. Tap Create New Send Out
- As an alternative, you can complete step 1 of a 'Send Out' on your computer and continue via mobile device.
- Tap "Scan Samples To This Delivery" to get started scanning Samples.
- To type in your barcode you can swipe down on the camera screen. You'll see a "Barcode" field appear.
- To type in your barcode you can swipe down on the camera screen. You'll see a "Barcode" field appear.
- Tap "View Details" to edit the existing 'Send Out Details' that have been inputted on your computer previously.
- Tap "Cancel & Create New Send Out" to clear any 'Send Out' that is currently in the process of being created.

Your "Create Send Out" screen will look slightly different if you have started a send out from your desktop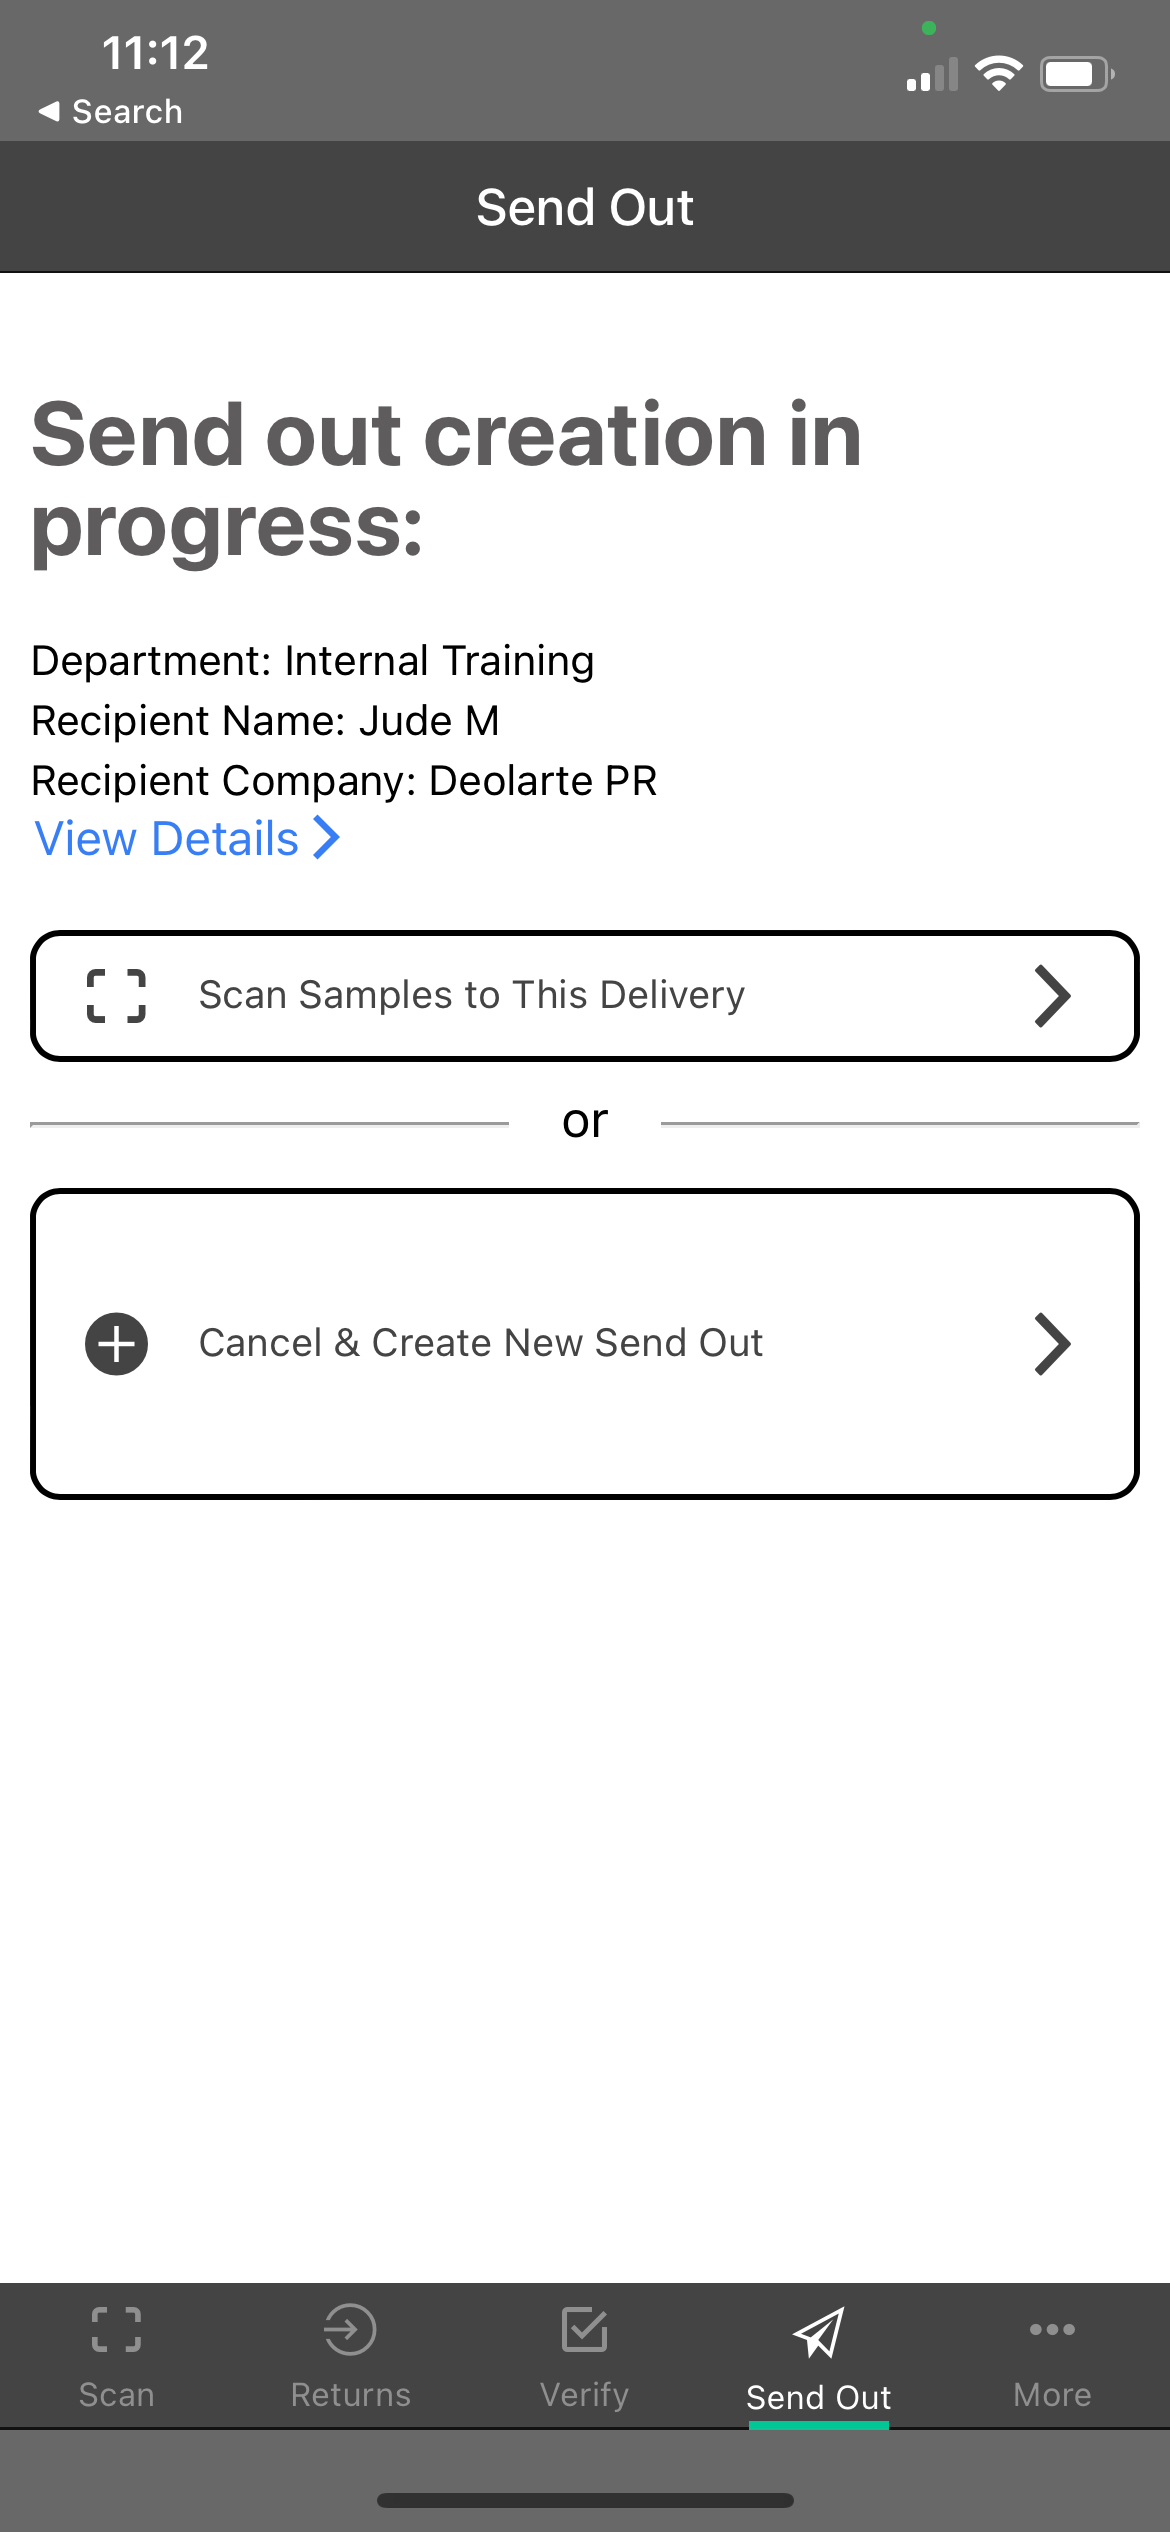
Filling out "Send out details"
Click 'Show more' to fill out all Send Out information that would otherwise be available to you using the desktop site.
Fields that are required will have a red *asterisk.
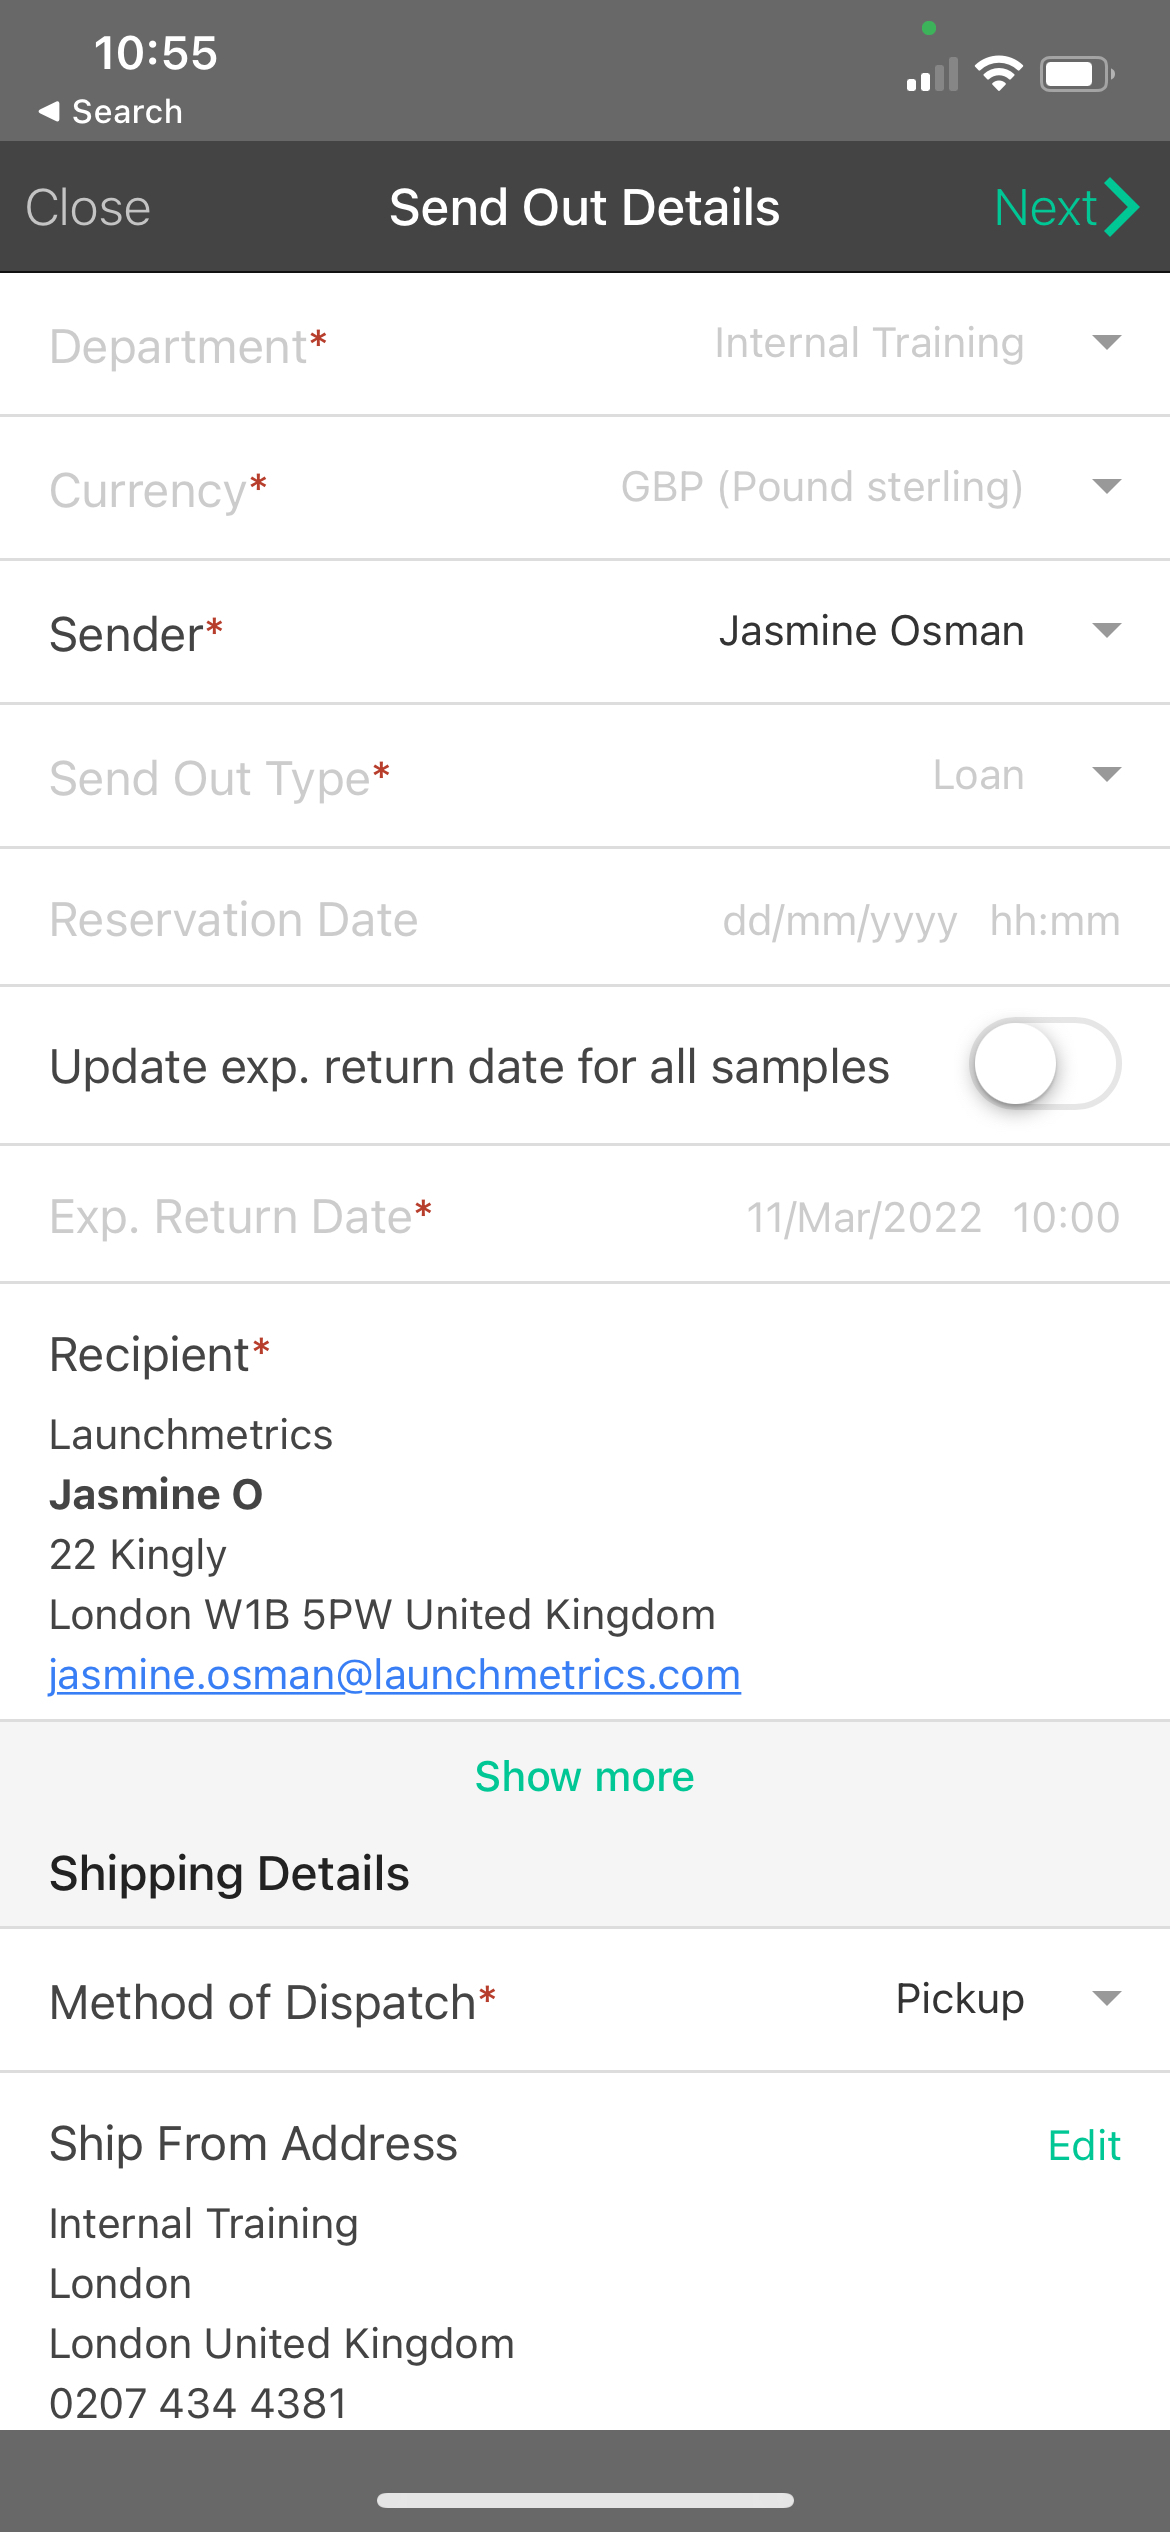
Once you have completed this step and clicked "Next", you're ready to scan your Samples!
Delete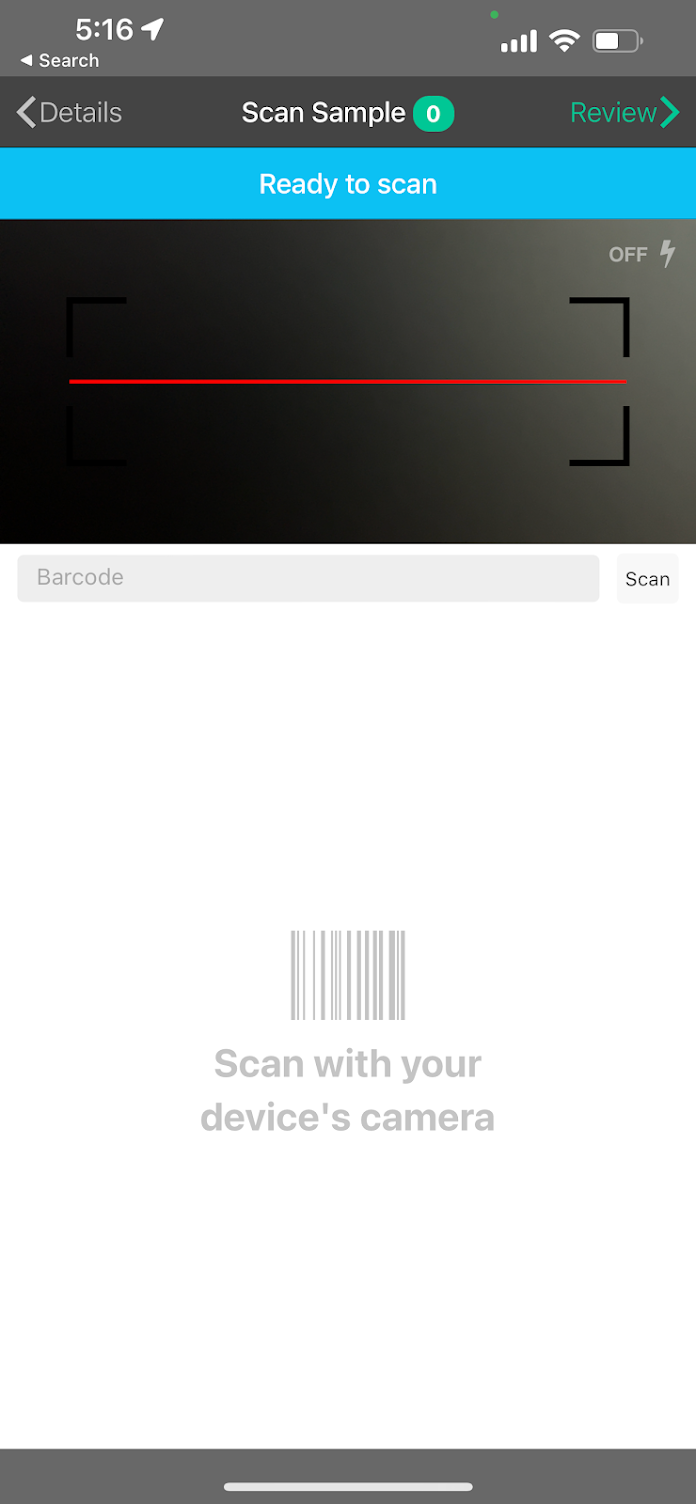
Scanning your Sample Barcodes
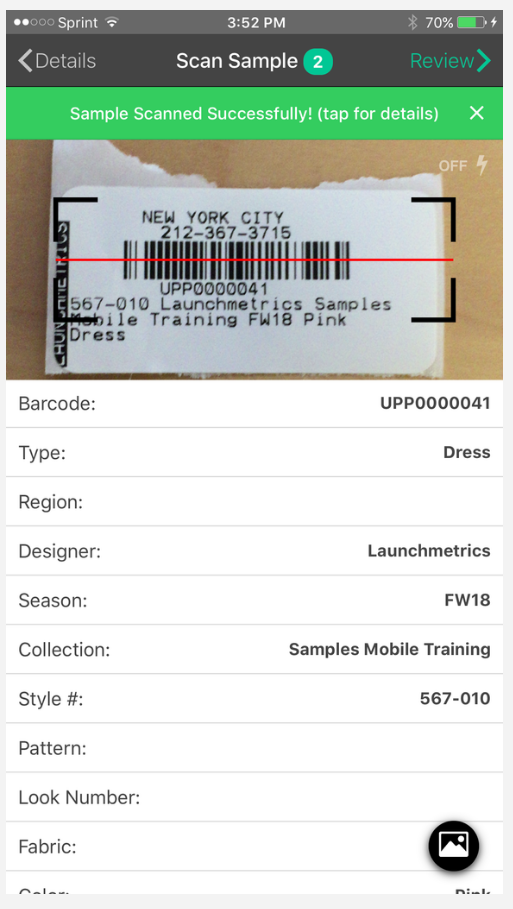
Hover over the barcode and align the red line over the barcode to scan.When a sample has been scanned successfully, a green banner will appear saying "Sample Scanned Successfully!". Tap that bar for more details on the sample.
Click on the "mountain" icon in the bottom right corner to view the Sample Image if one has been uploaded.
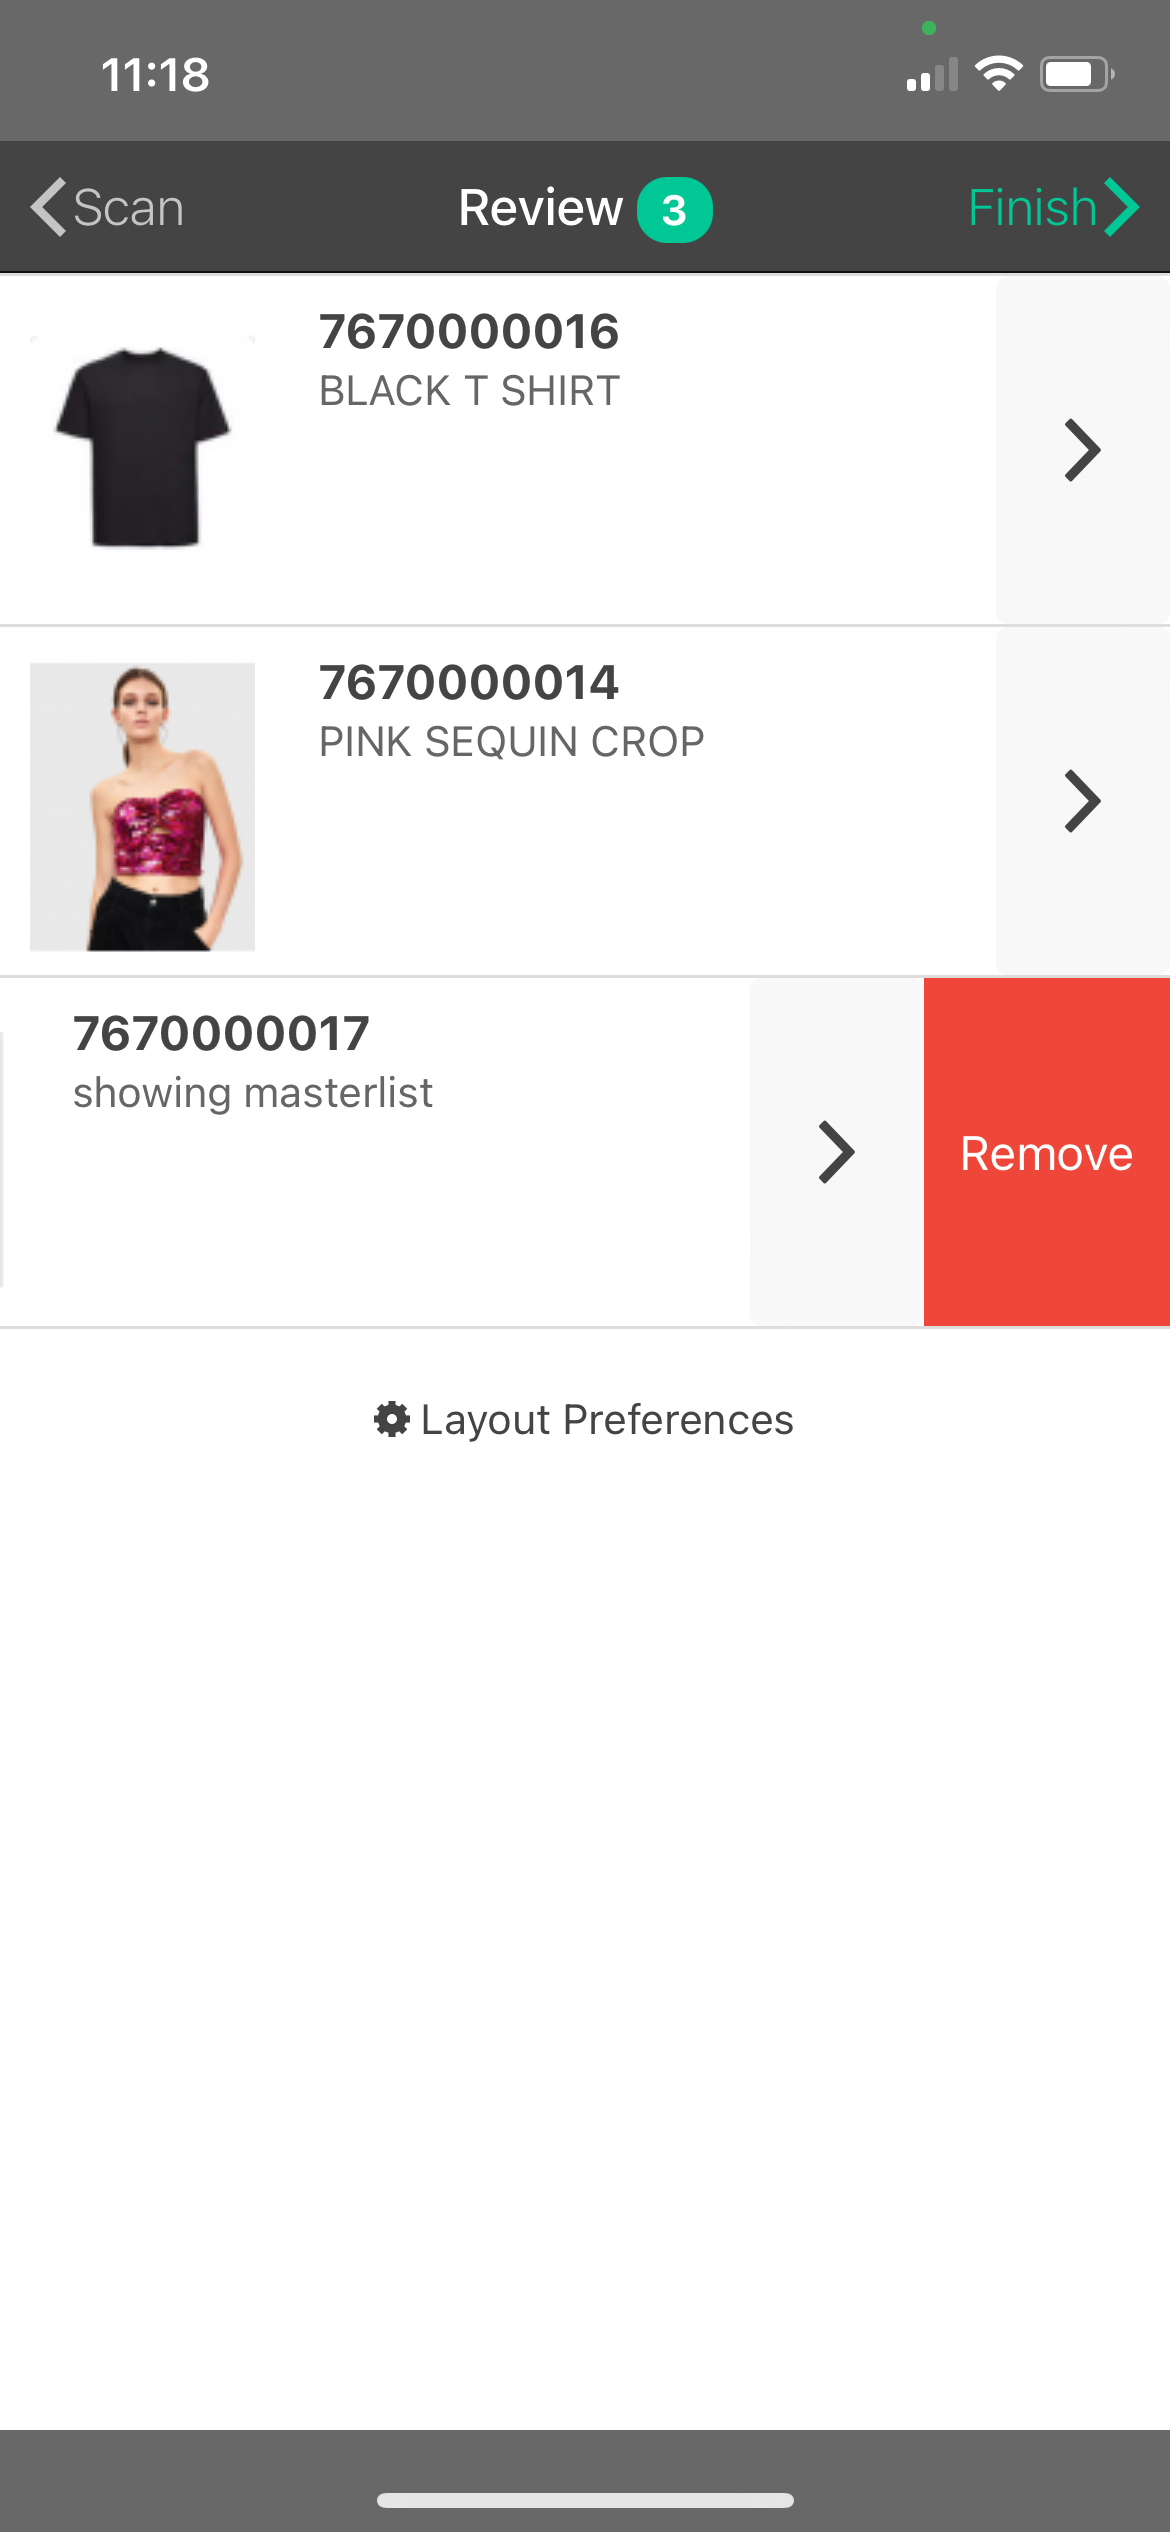
Review
Tap "Review" to see all the samples that have been added to the current delivery.
- Swipe left on the sample to have the option to "Remove" from the list or Add a photo using your native camera.
- Click the arrow point right to view more details on the individual sample.
- Click "Scan" to return to the camera scan to scan additional samples for this delivery.
- Click "Finish" when all samples have been scanned. The Send Out will then be successfully created.
Returning your Samples steps:
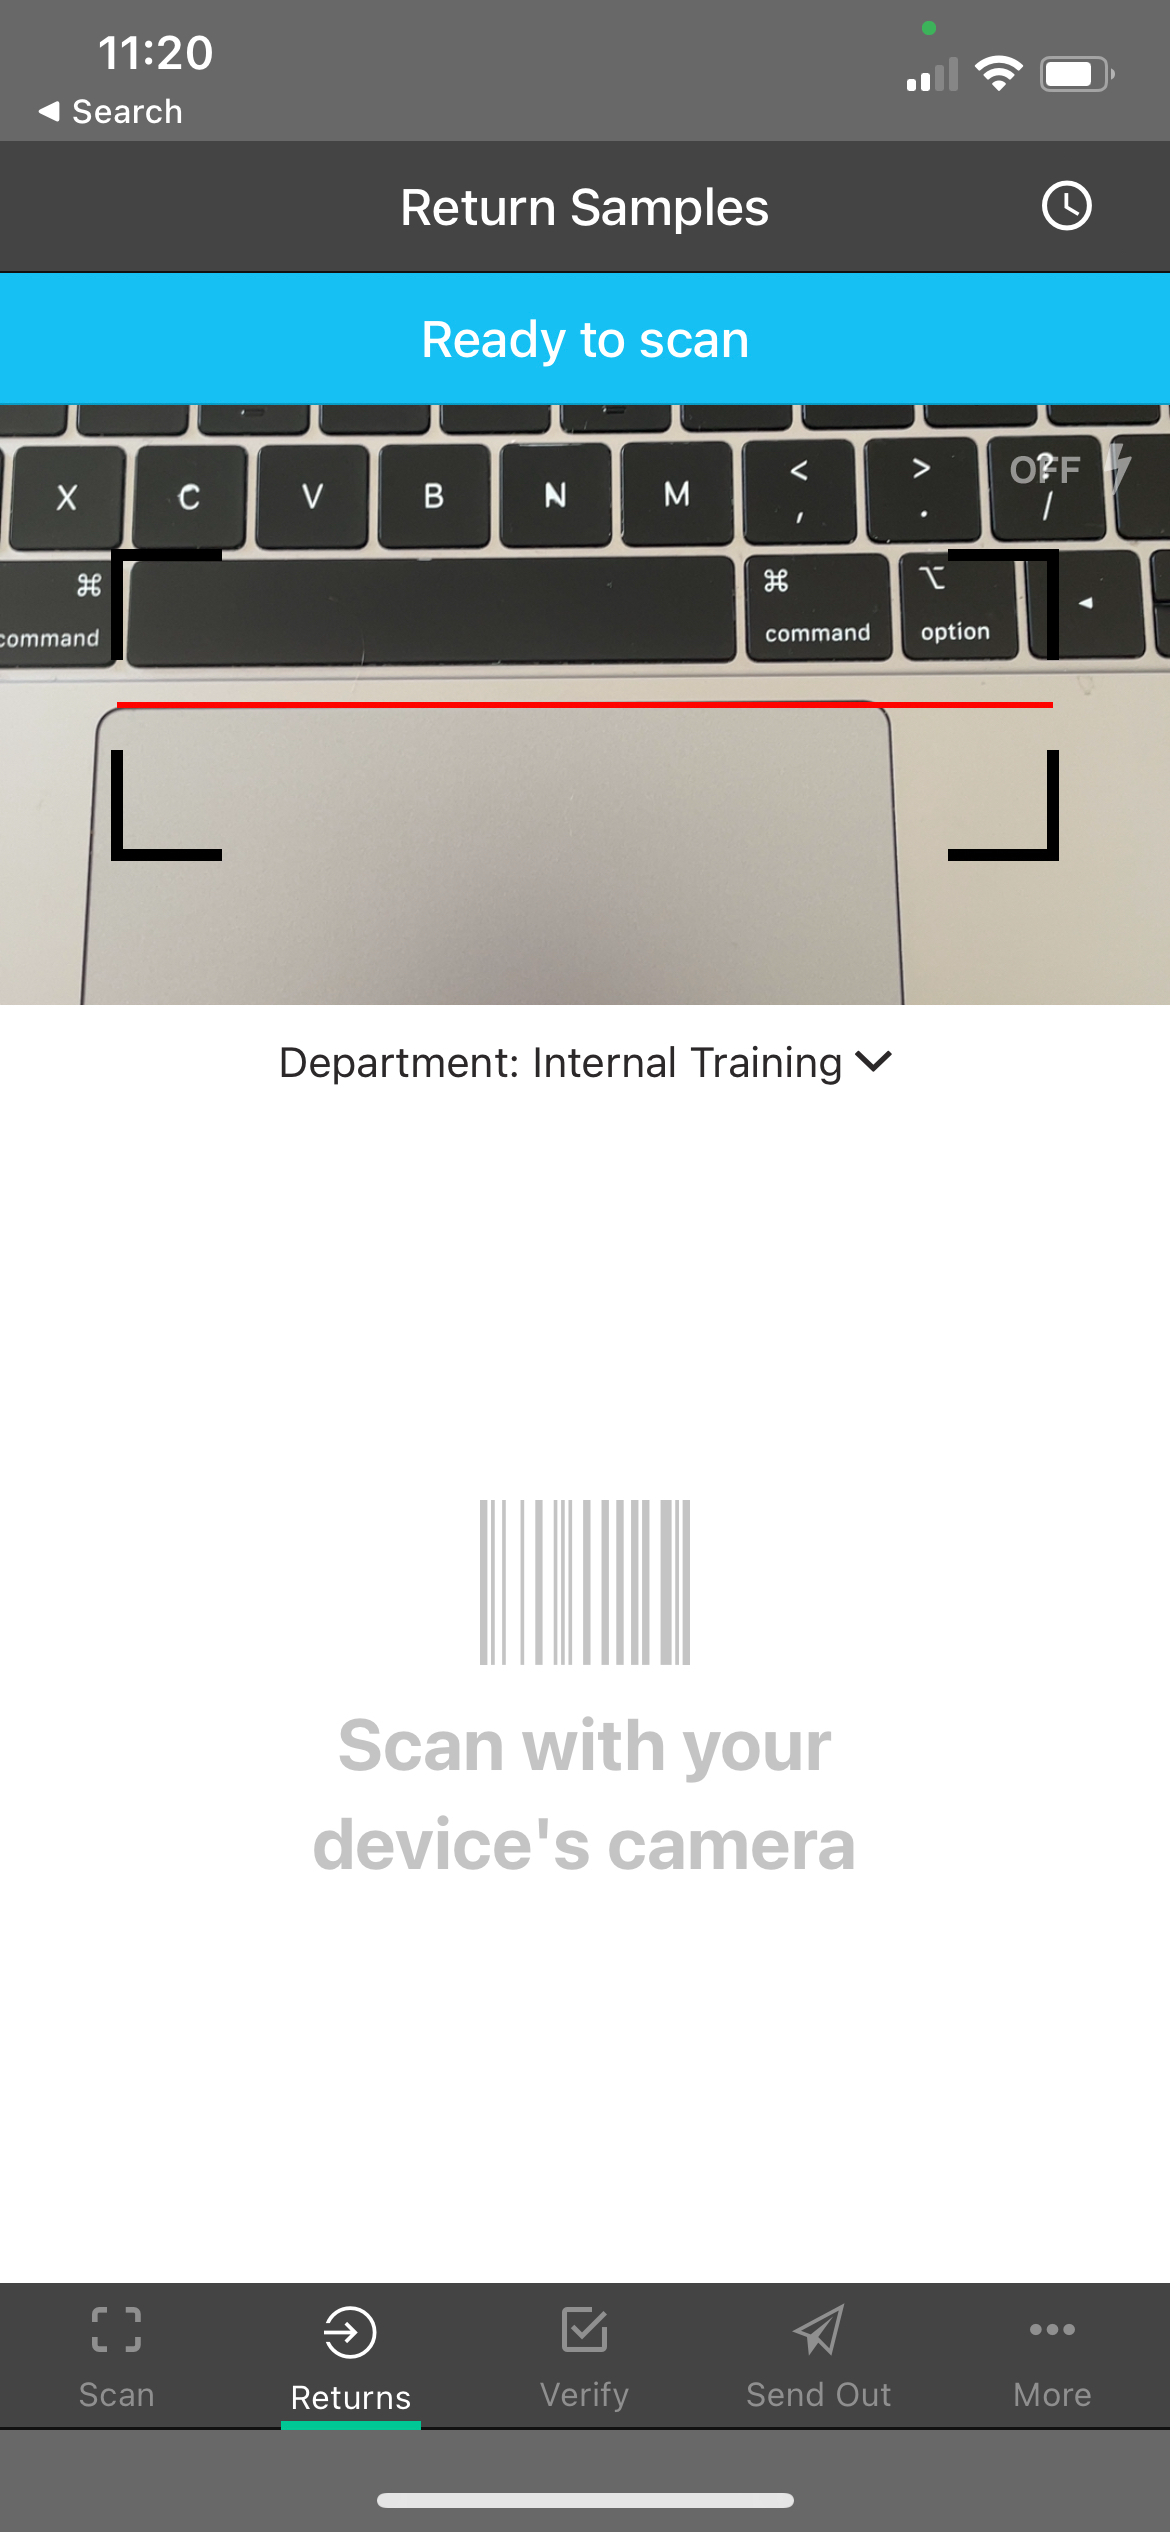
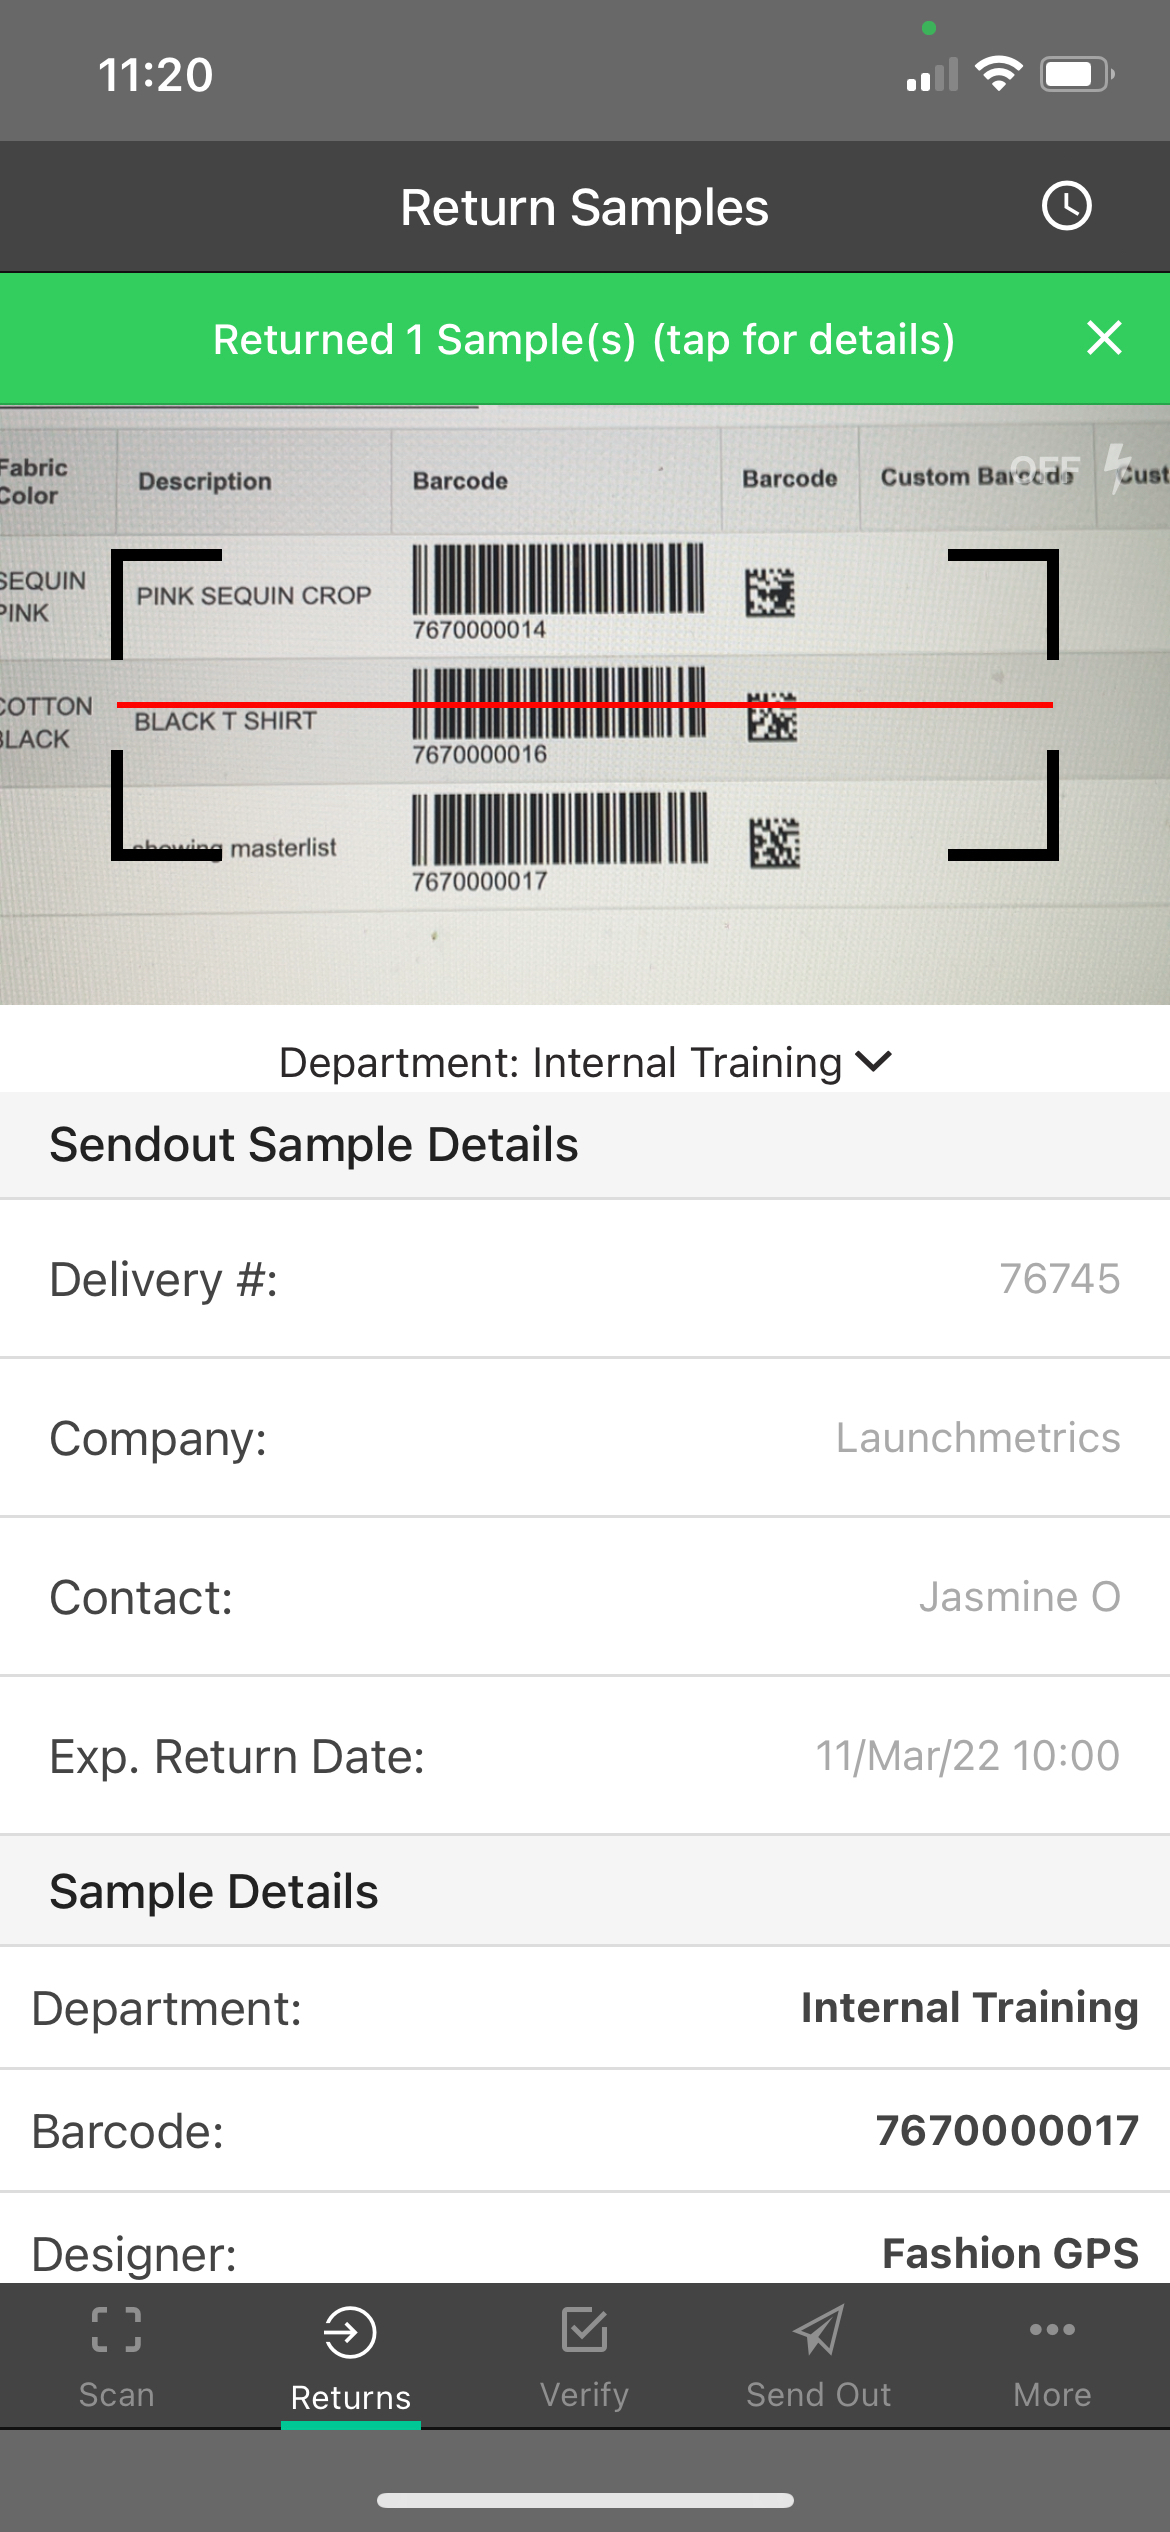
Return Samples
Tap the 'Returns' tab to begin to return samples currently on loan.
If you are using "Gateway" and transferring samples between departments internally or with another external Launchmetrics client, you are able to scan and "Receive" samples using Samples Mobile. When scanning a barcode, the entire Delivery will show and you will have the ability to "Receive" whichever sample you would like.
When a barcode is successfully scanned and marked as "Returned", you can tap the green banner to see exactly the Delivery number that the sample was returned from.
Click on the "clock" icon in the top right corner to view all recently returned samples. This page would allow you to "Undo" any return that was made.
Verifying an Import steps:
Verify
- Tap the 'Verify' tab to begin verifying your samples
- Tap the department name you're verifying your samples into.
- Scan your Samples
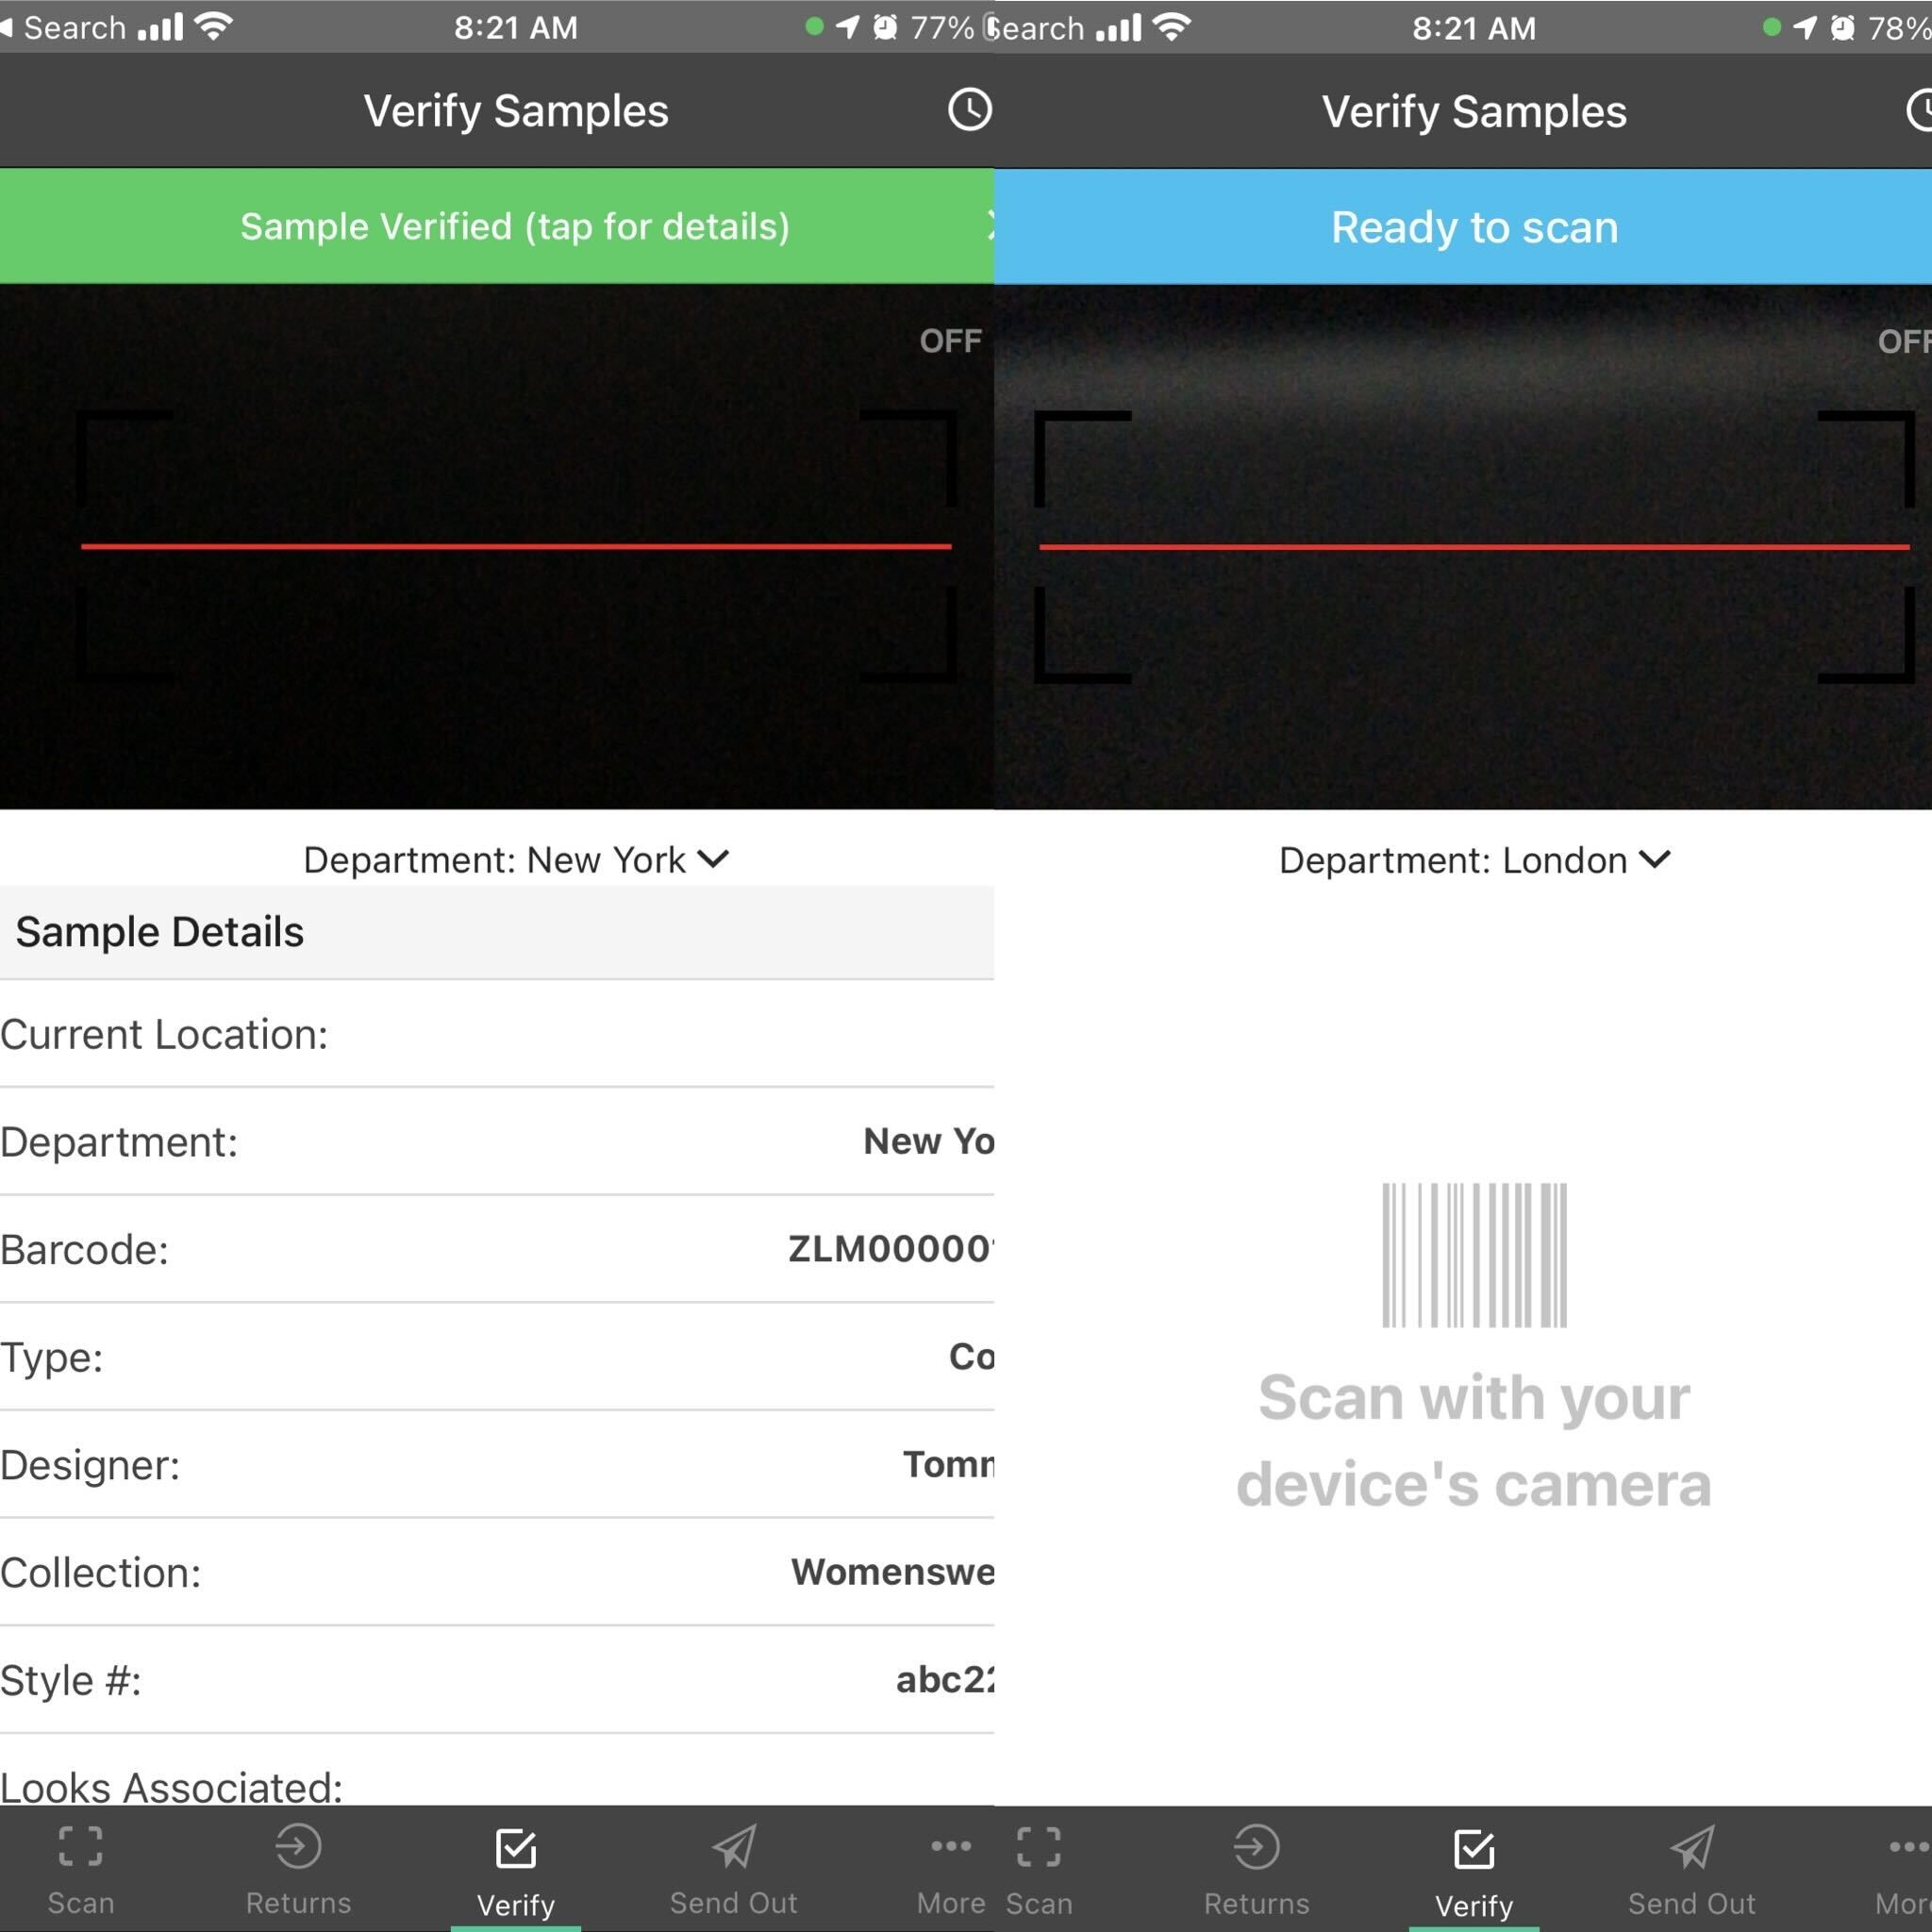
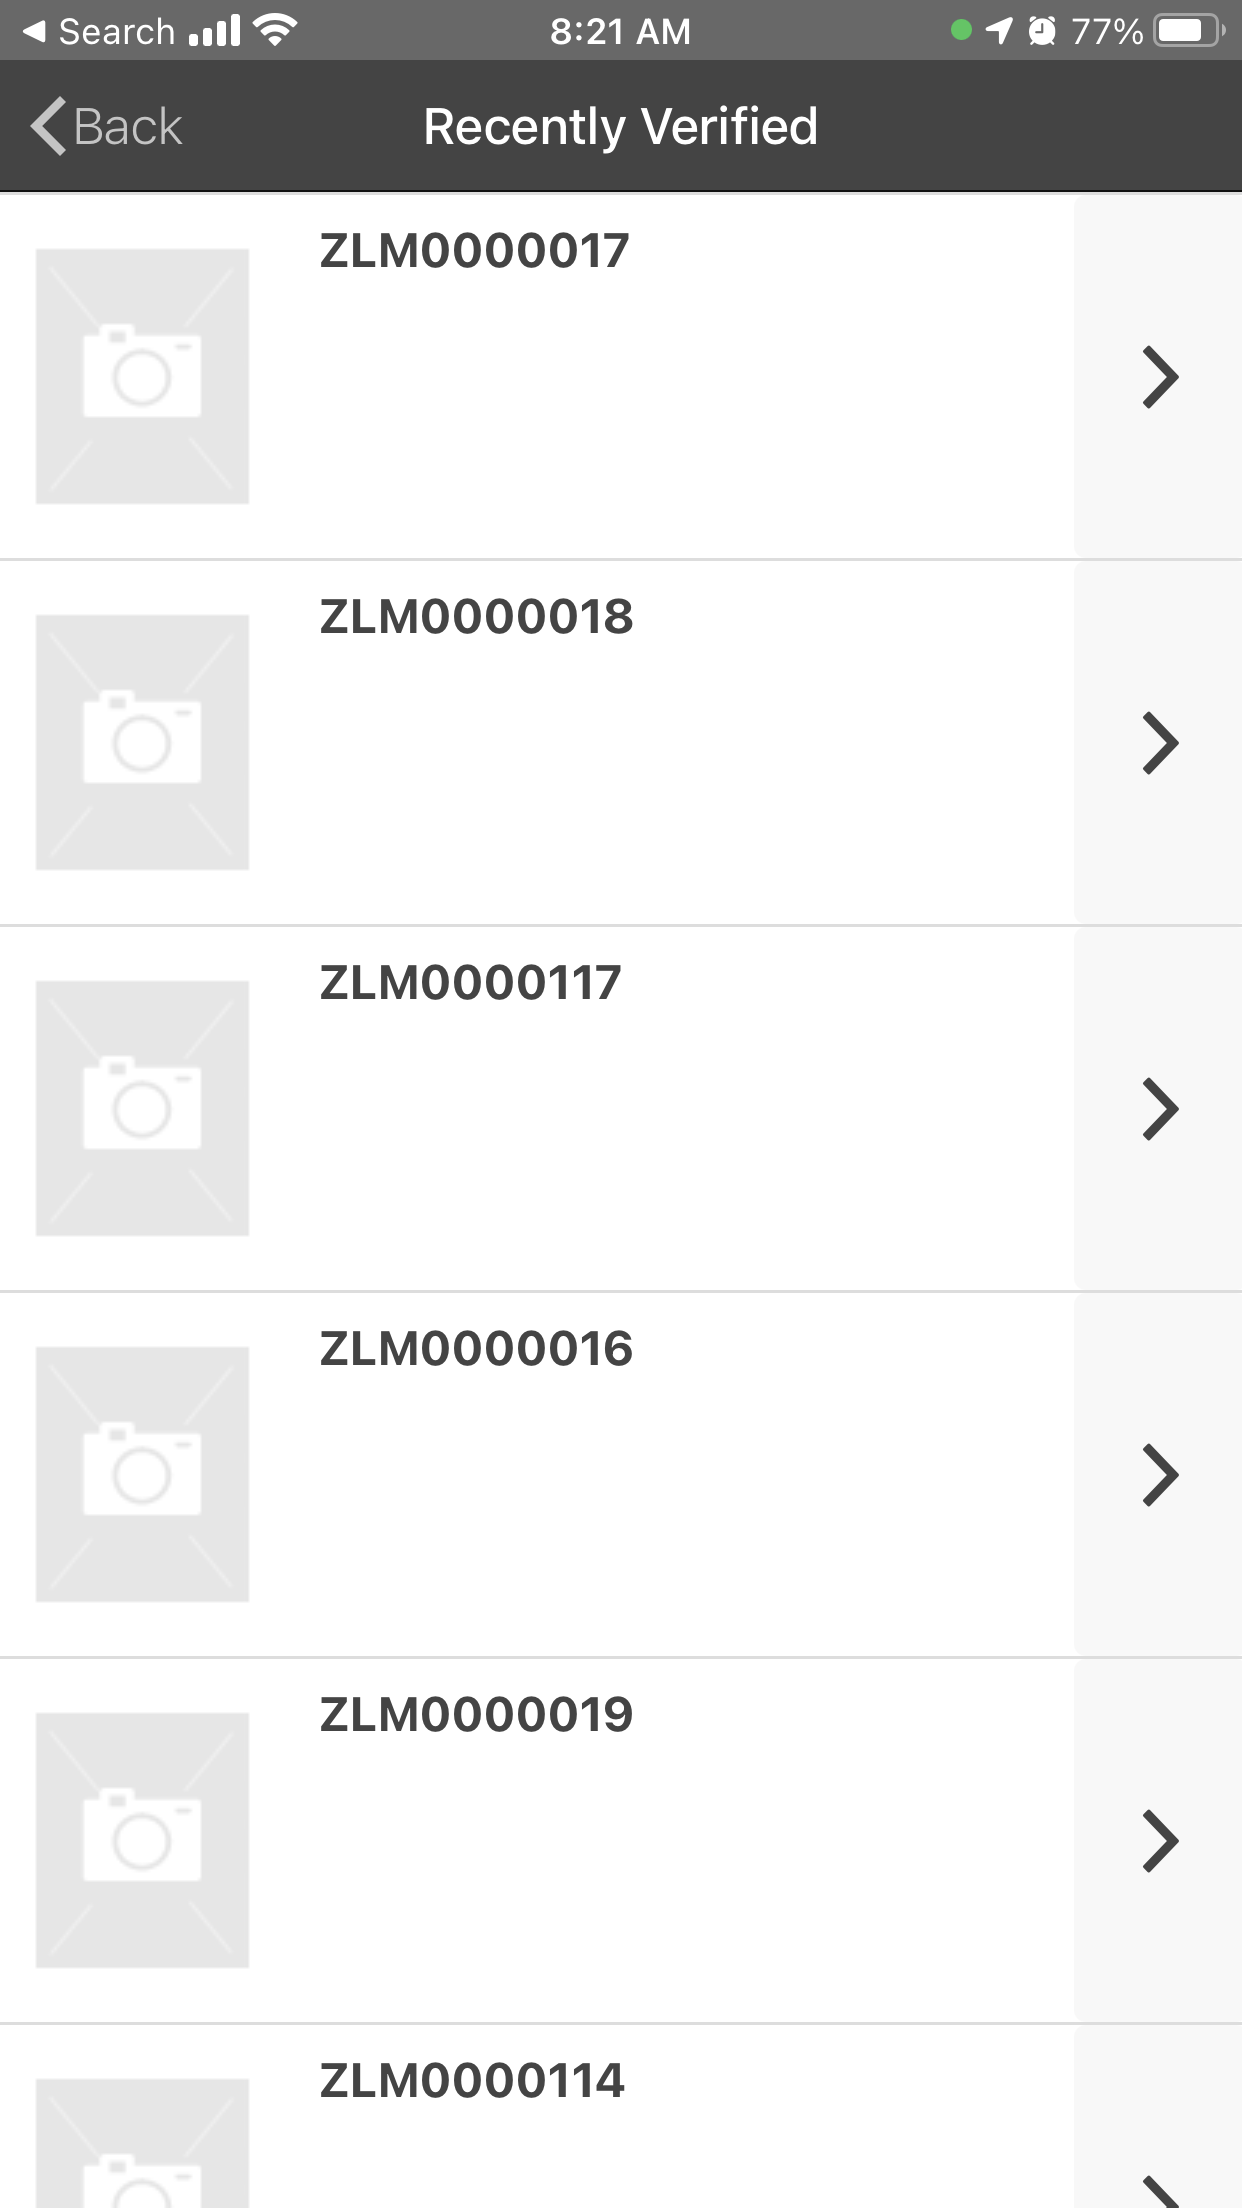
- View details and view your recently verified Samples
Creating a New Inventory Audit steps:
Audit
- Click the "More" Icon on the bottom right corner
- Select "Audit"
- 'Audits' can be created on the desktop site and available to continue auditing in the 'Active Audits' section.
-
Click here to learn more about creating sample Inventory Audits.
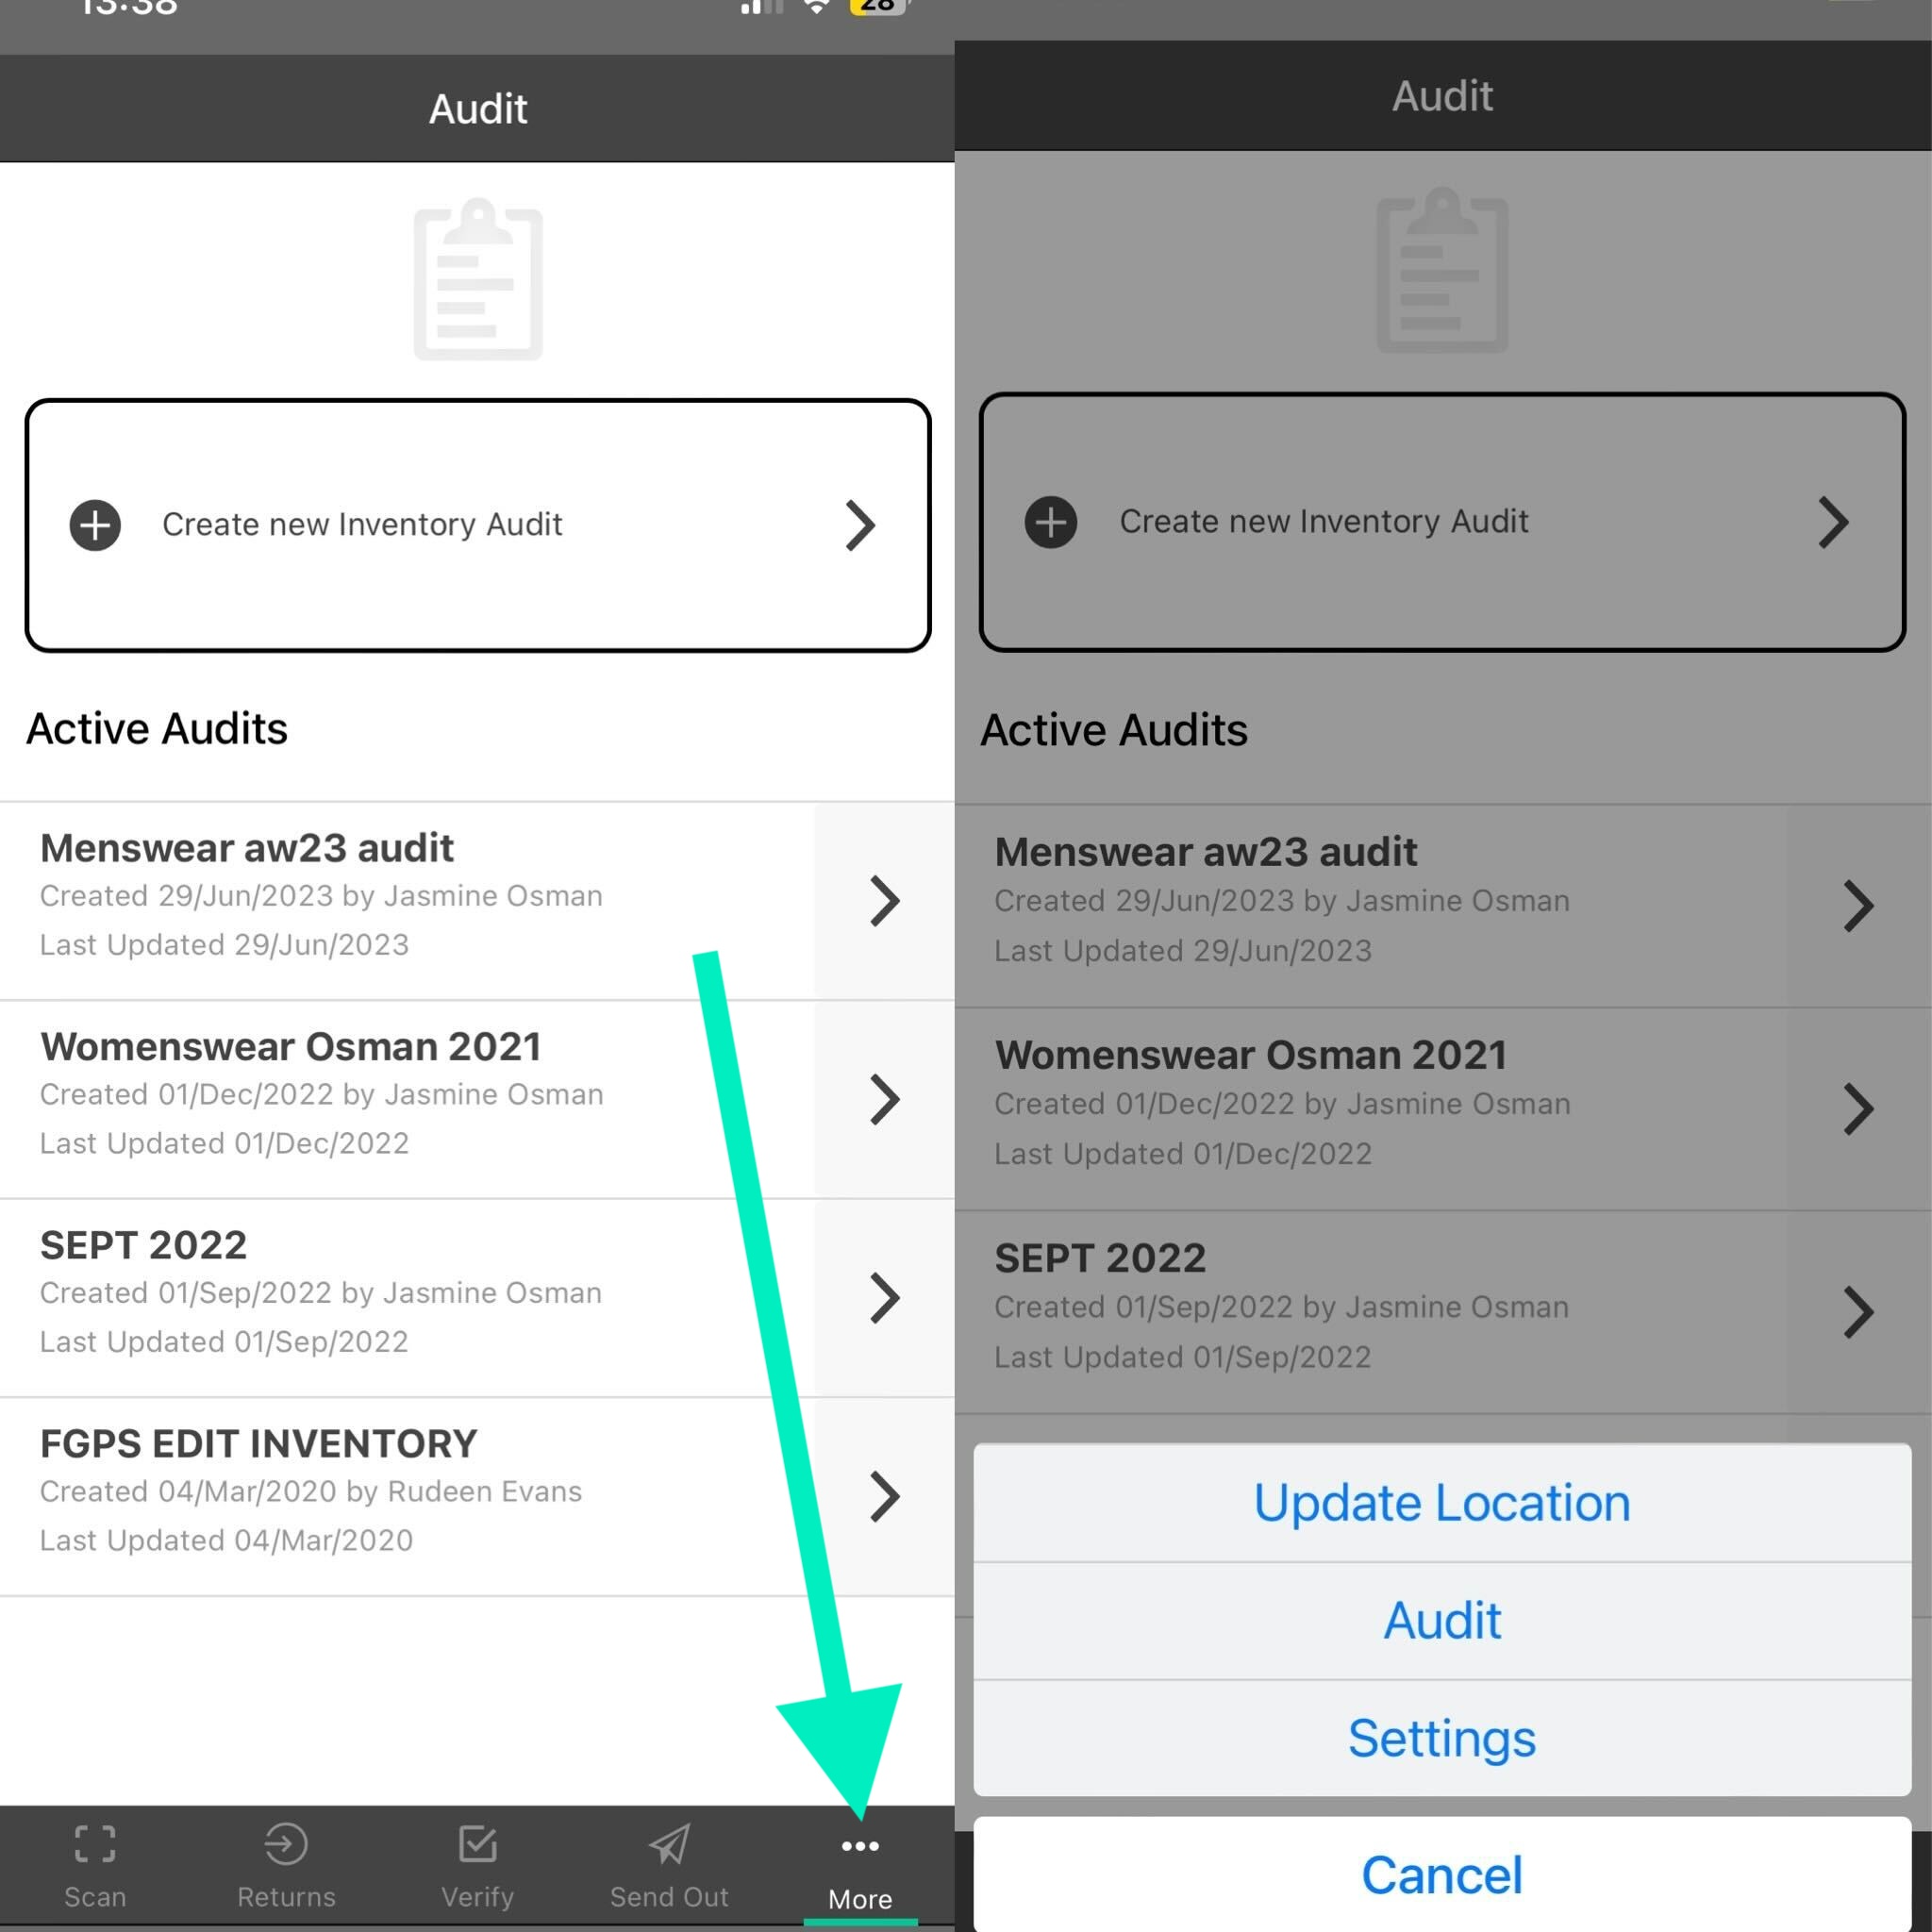
- Select "Create new Inventory Audit" to fill out the 'Audit Details' of the collection that is being audited.
- After clicking "Done" in the 'Audit Details', use your device's camera to scan barcode labels.
- Hove the red line over the barcode. If samples are in a darker location, use the flash icon to open the flashlight.
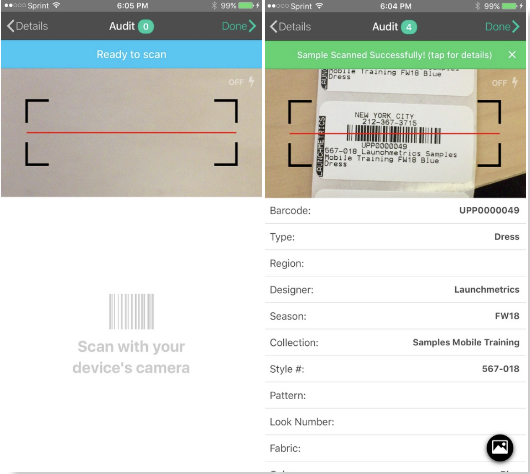
- Once a barcode has been scanned successfully, the details on the sample will appear.
- Click the "Mountain icon" to view samples images. *All Sample Images are available.
-
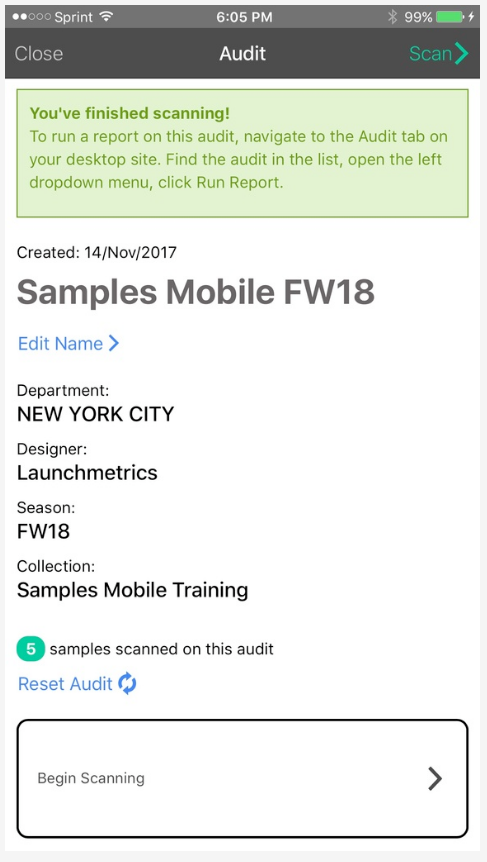
When finished scanning, click Done". You'll have the option to continue scanning samples again by clicking on "Scan", or "Close" to finish scanning.
You can also start over by clicking "Reset Audit".
You can now navigate back to your audits section on your Launchmetrics desktop site to run the audit report.
DeleteLocating your Samples steps:
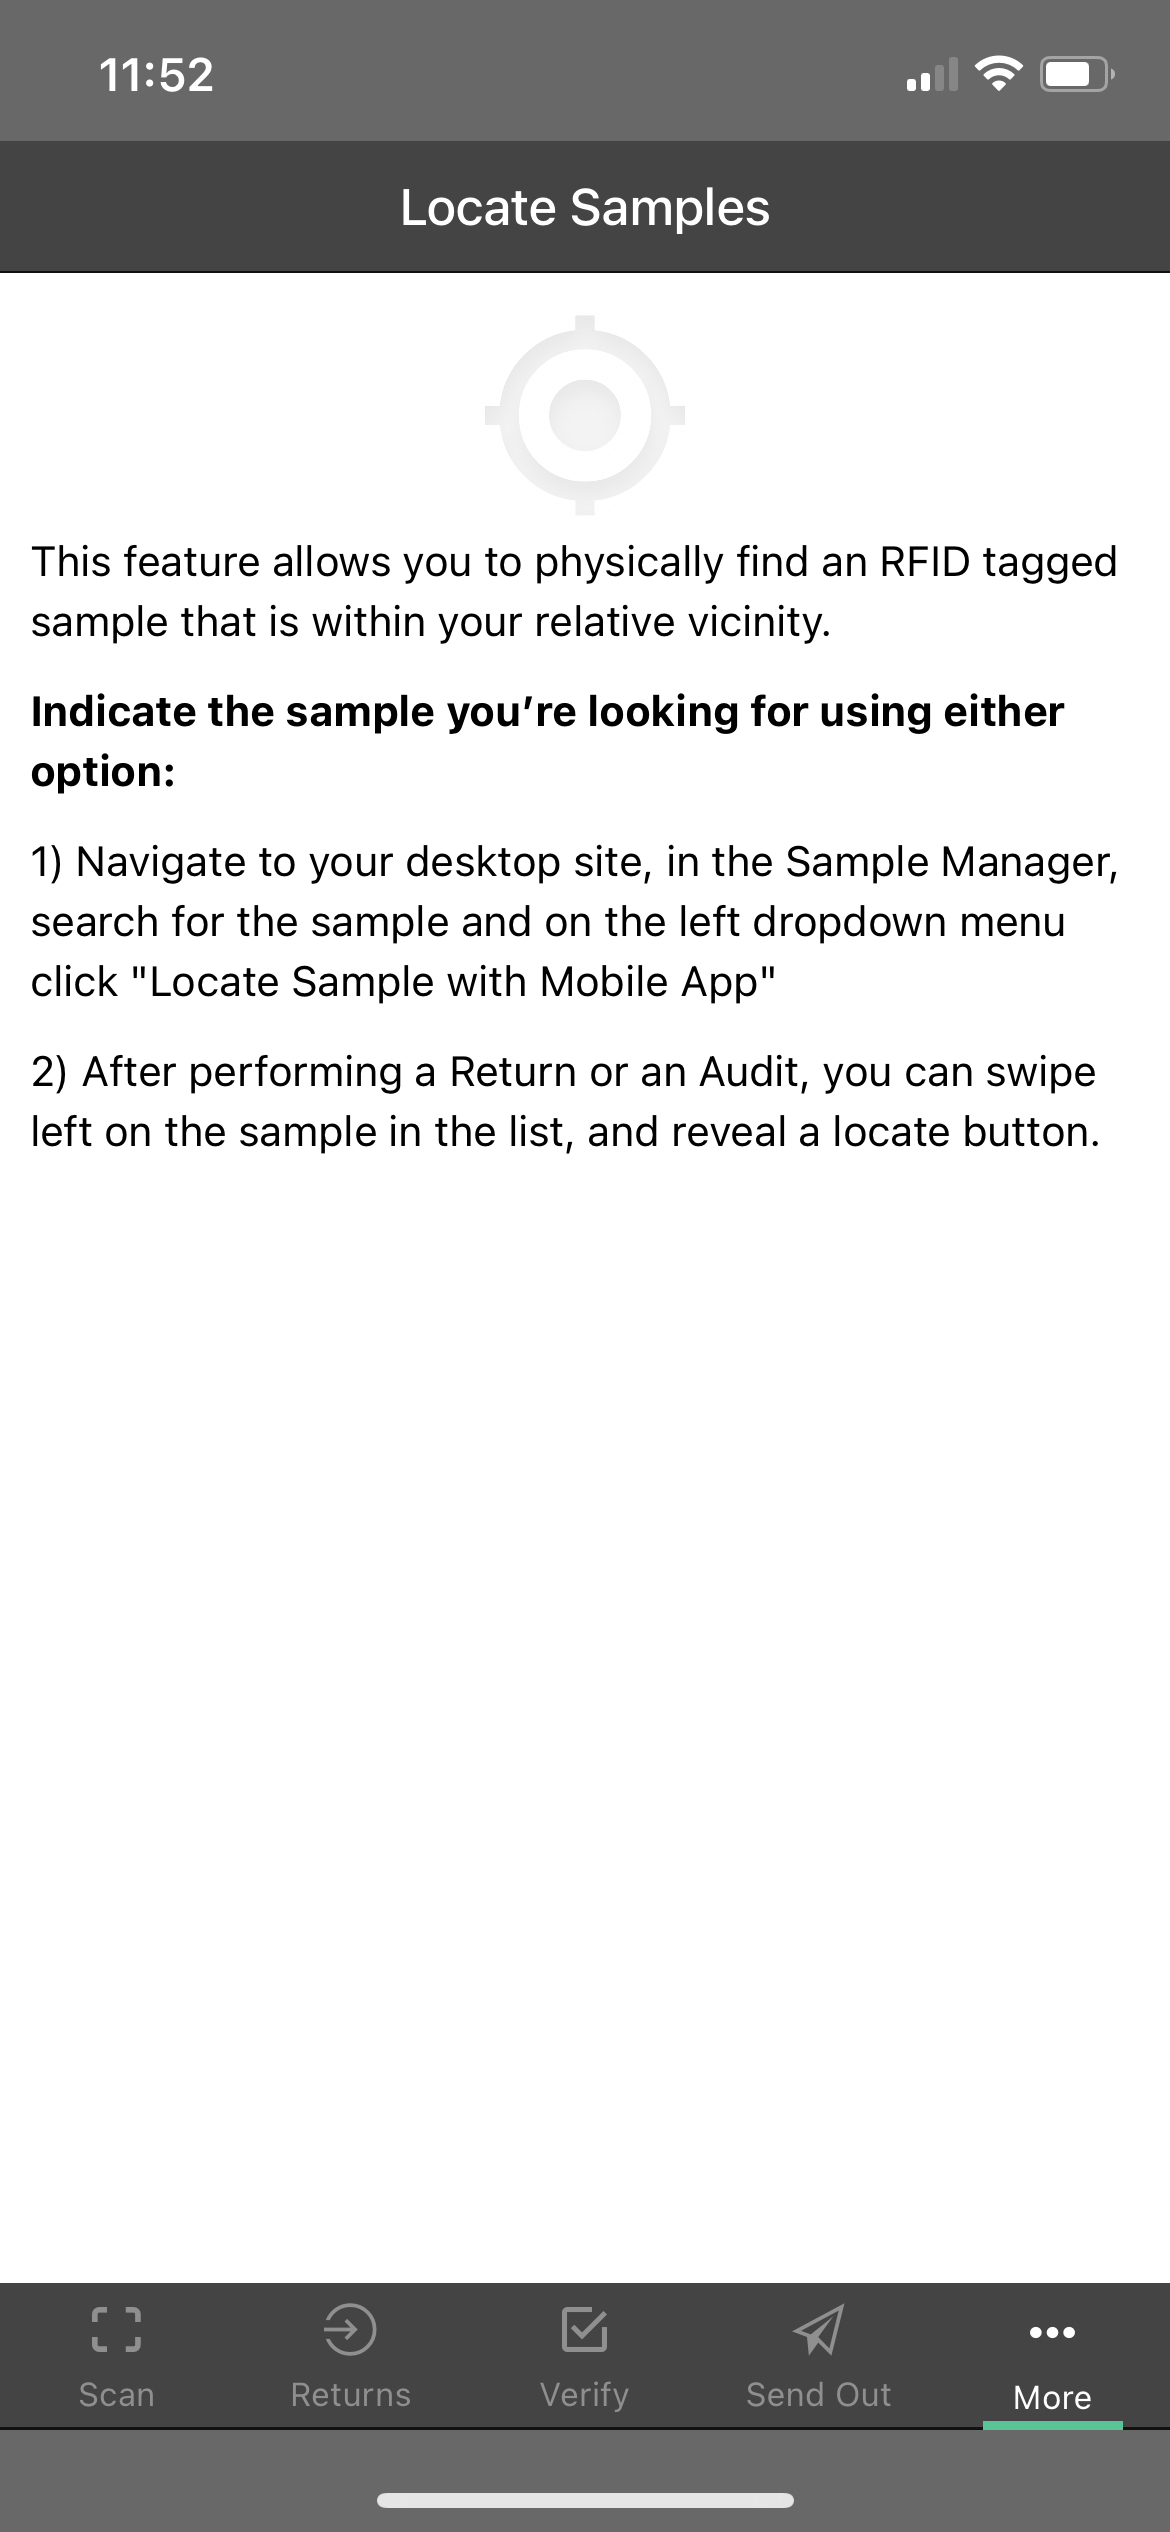 |
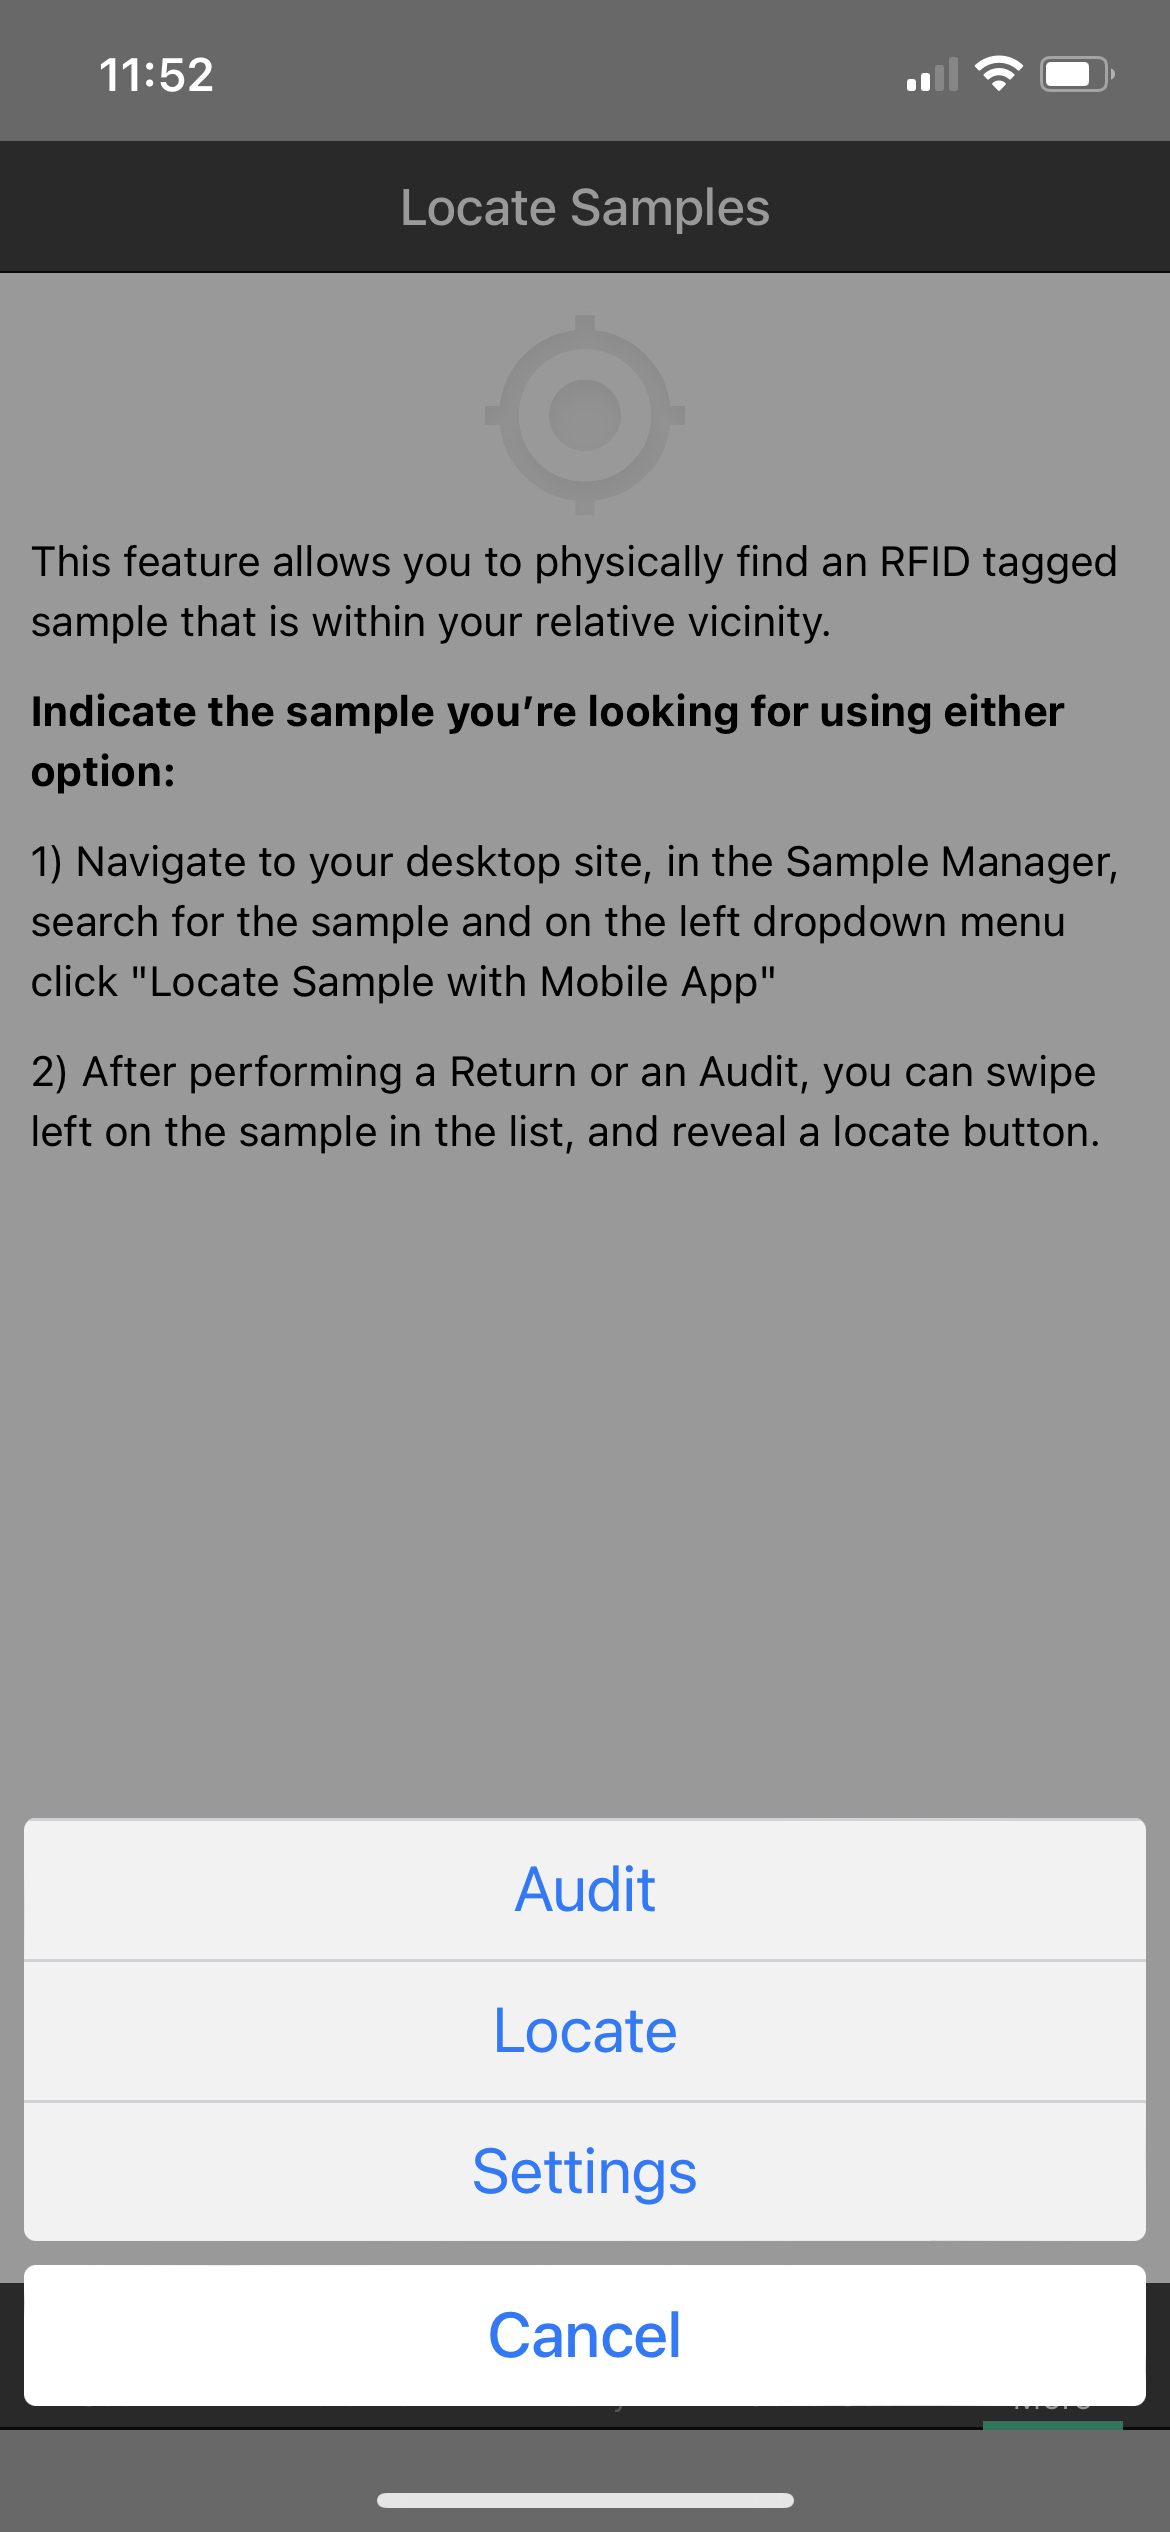 |
Settings
.png)
- Use the "Settings" tab to 'Log Out' of the app, email our Launchmetrics Support team, or change the app language to English, French, Japanese, or Romanian.
Print labels via your bluetooth printer
- See this documentation on how to pair a Bluetooth printer to your Apple phone
- Once the printer is connected, you can then print sample labels
- when scanning samples,
- when returning samples,
- when verifying samples.
.png)
.png)